If you’ve just started using Microsoft Office 365, you may have noticed that your default printer settings were changed. This happens automatically during install and you probably don’t even realize it until you print for the first time. Office 365 will try to “print” to OneNote. Since this isn’t what 99% of Office 365 users meant to do, we’ll show you how to quickly change the default printer settings in Office 365.
How to change the default print settings in Office 365
In order to change the default print settings in Office 365, open any document and click “File.”
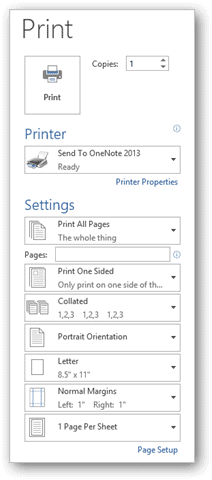
Then, click “Print.”
You’ll notice that the Printer is set to OneNote 2013. If you click on the “Down Arrow,” you’ll see no printers associated with your Office 365 suite.
Now, head to the Start screen and search for “Printers.”

Click on “Devices and Printers.”
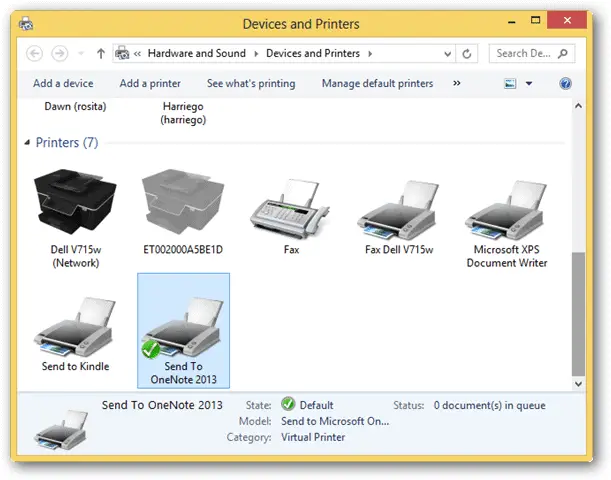
You’ll see that OneNote 2013 is your “default printer.”
Right-click on the printer you want to set as your default.
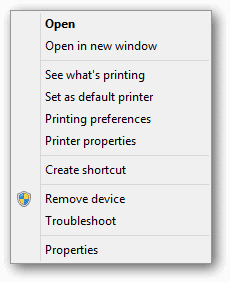
Click “Set as default printer.”
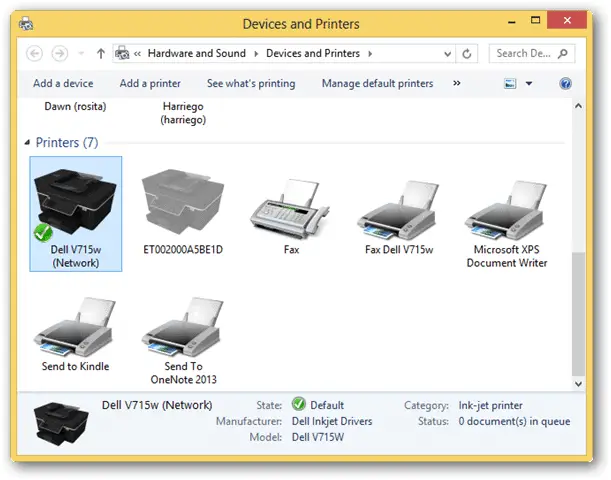
If you head back into your Office 365 and click on the “Drop Down” menu, you’ll see the rest of your Devices and Printers fill the list.
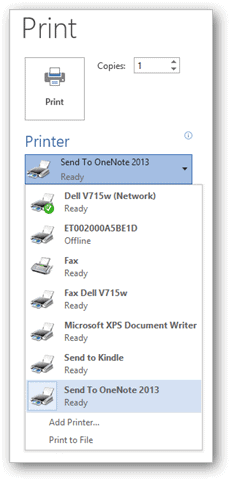
Now, click on your printer of choice to set it as the default in Office 365, too.
Why does Office 365 change your print settings to begin with?
Office 365 is an all-inclusive productivity suite. It wants you to take advantage of everything it has to offer, including sending items to “print” to OneNote. By changing the default printer yourself, you can pick how you print in Office 365. Try Microsoft Office 365 for free for a month and see if it’s right for you.


