Editing photos is without question one of the most popular graphic-based activities on a computer. The creative power to alter an image is like none other, and Photoshop by far is the most prevalent photo-editing software.
Photoshop, however, is also notorious for being one of the most complicated pieces of software to get the hang of. The reason being – there are literally hundreds of tools, effects and techniques that one could use to achieve different effects. Photoshop is loaded with so much stuff that it can turn many people away due to the complexity of it all.
There are still, however, several easy-to-do tricks for Photoshop that can really transform a photo. Whether you’re trying to make a photo a little prettier or just more interesting, we’ve compiled some amazing, but easy to use tricks for Photoshop newbies.
SEE ALSO: Top 12 Free Online Image Editing Alternatives to Photoshop
10 Beautifully Easy Photoshop Photo Editing Tricks
Spot Healing Brush to Remove Minor Imperfections
The Spot Healing Brush tool is one of the most satisfying tools you can use in Photoshop. This tool will erase any imperfections in a simple click, making it perfect for editing headshots. To use the Spot Healing Brush tool, all you have to do is right-click the “Bandaid icon” to activate it, and you can adjust the pixel size at the top of the screen.

When adjusting the pixel size, make sure it’s slightly bigger than the area you’re trying to fix, and most imperfections will be erased seamlessly. Click once, and Photoshop will automatically detect the surrounding colors and erase the darker area.


Use Style Match Tool for Better All-Over Photo Coloring
If you’re not a fan of the current color palette in your photo, you can enhance it by crossing it was another photo whose colors you like more. You can do this using the “Style Match” tool. To do this adjustment, you first want to open a photograph who’s color palette you like. Next, open up the photo you want to edit and click the “Guided” option to access the tool. Then click “Style Match” under the “Photomerge” category.

The photo you want to enhance will load, and an empty space next to it will appear. Simply drag the photo with the colors you like that area, and the photo you want to change will automatically do so.


Apply Gaussian Blur for Awesome Photo Lightening
To add a pop of life to a photo with a cool lighting filter, the “Gaussian Blur” filter gets the job done. To apply this effect, open the photo you want to edit, then duplicate the layer the photo is on by hitting “Command + J” in the layers window. On that new layer, set it’s “Blending” mode to “Screen.”
Duplicate that same layer, and then go to “Filter > Blur > Gaussian Blur” to finish the effect.


Create “Glitter” Color
If you like to add a little sparkle to your photos, an easy way to do this is to create a glitter color. To do this, choose a fill color, then duplicate that layer. Next, go to “Filter > Add Noise.” After that, select the layer again and choose “Linear Dodge” style and then change its opacity to 77%.

Add a Strong Vibrant Look with the Hard Light Tool
If you want to add more vibrant color saturation to your photo, you can do that using the “Hard Light” tool. To apply this effect, open the file you want to change than duplicate the layer that the photo is on. On that new layer, said the blending mode to “Hard Light.” Easy as that, the photo is instantly vibrant.


Hide Shiny Skin by Mattifying It
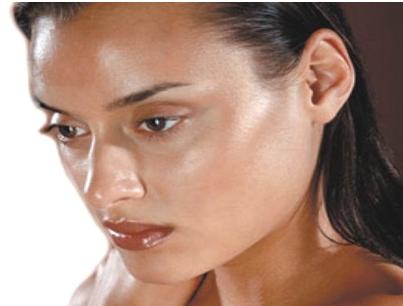
Another easy effect you can do in Photoshop is to adjust oily skin to a matte look. To do this, open your photo then use the “Eyedropper tool” to select a non-shiny area of the skin. After you do that, paint the shiny area was a brush set at “Normal” and “15% Opacity.”


Minimize Wrinkles with the Blur Tool
To easily erase small wrinkles, you can use the “Blur tool” found at the bottom of the tool menu. Simply open your photo then select the Blur tool to gently smooth out wrinkles around the eyes and mouth.


Combine Images with Text
If you want to create a beautiful image with a superimposed number, you can do this by combining images and text into one. To do this, you must overlay an image over the number.
After creating the number, put a new image layer over it, then hold down “Alt” as you click the line between the two layers in the layers panel, which will connect the image to the text.

Add an Ethereal Feel with the Diffuse Effect
If you like the idea of giving your photos a soft ethereal feel, you can do this using the “Diffuse Glow” filter combined with the “Desaturation” effect. To add this to your photo, after opening your photo hit “D” to reset the colors, and then go to “Filter > Distort > Diffuse Glow.”
Once it’s done, go to “Image > Adjustments > Hue/Saturation” and lower the saturation slightly to finalize the look.


Make your Photos Stand Out With Neon Glow Effect
If you really like to make your photos stand out, adding the “Neon Glow” effect will give you what you’re looking for. To add this, open a photo you want to edit and duplicate the layer. After that, go to “Filter > Artistic > Neon Glow” and pick a color that you think will work best with the photo.


Conclusion
You gotta love editing photos. The effects above are just a taste of what Photoshop offers. Many may take some time to learn fully, but it’s completely worth your time if creating beautiful photos is what you enjoy.
If you’d like to improve your general photography skills as well, read our post – 5 Essential Tricks for New Photographers


