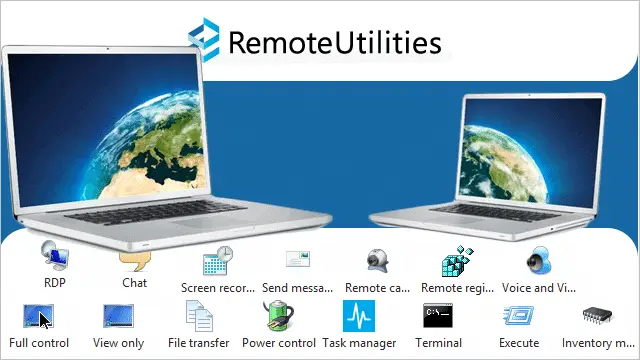
Remote access is extremely useful for troubleshooting or for accessing machines which aren’t in close proximity. While there are many similar programs that can do the required tasks effectively, Remote Utilities is by far the most feature-rich application I’ve used for the job. In addition, it’s absolutely free for personal use.
Whether you intend to help a friend or family member work out computer issues, or simply to remote into a PC of your own across a room or building, this program provides everything you would need. You can open a remote command prompt in seconds, transfer files to and from the two computers in the session, or gather essential hardware specs – which are easy to export for reference.
The program also allows a user to control the remote computer in a view-only mode to not disrupt the user or take full authority at any time to control the mouse and keystrokes. It lets you pull the audio and clipboard to your own computer as if you were using the remote PC at your own desk.
In this guide we take an in-depth look at how to use Remote Utilities, starting with getting it installed on both the admin computer and the remote (client) PC. We will highlight a few of the main features and then talk about how you can transport the connection settings to another computer so you can use more than one machine to control the same remote sessions.
Getting Started With Remote Utilities
Setting up Remote Utilities takes a bit of time, but once done, it can make your remote support/access job very easy. Read the guide carefully and prepare the first setup for repeated usage later.
Visit the download page here to get the “Viewer.” This is the program that is required to view the remote computers. You can optionally scroll down further and download the “Portable Viewer” for use on a USB drive.
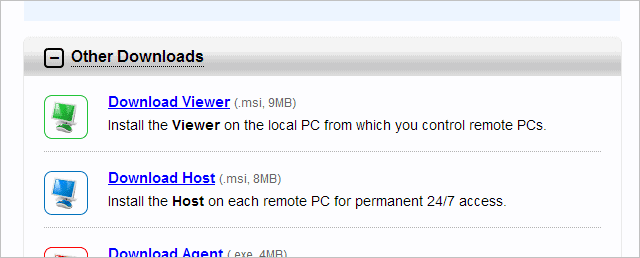
Install the “Viewer” while accepting all the default install options.
Navigate to “Help > License Key Storage > Get Free License” and enter your name and email address to obtain a free license to use the program.
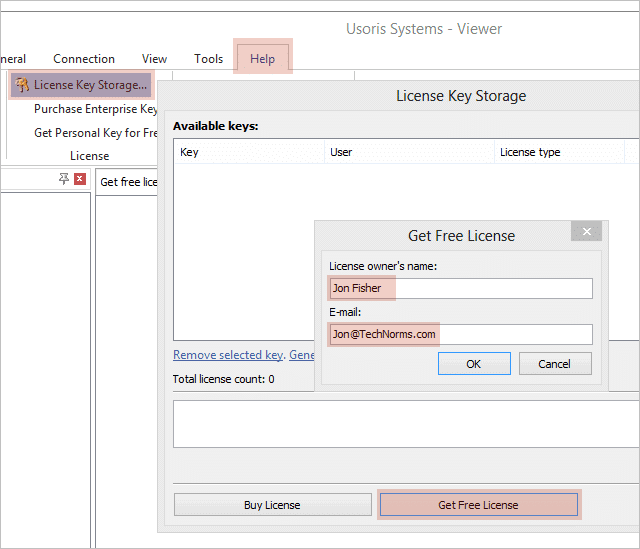
The free home license will show in this “License Key Storage” window, so you can exit at this point and move on.
Now download the “Host” file from the download page.
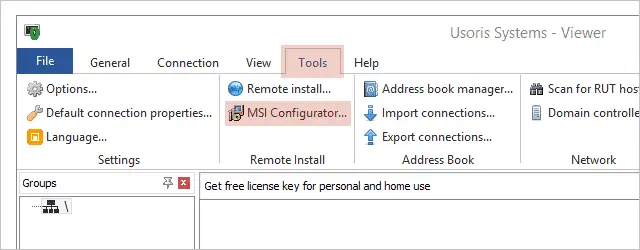
In the Viewer, go to the “Tools” menu and select “MSI Configurator.” We’re going to configure the Host program to fit our needs and then deploy it to the remote computers.
Browse for the Host file we downloaded above and click “Next.”
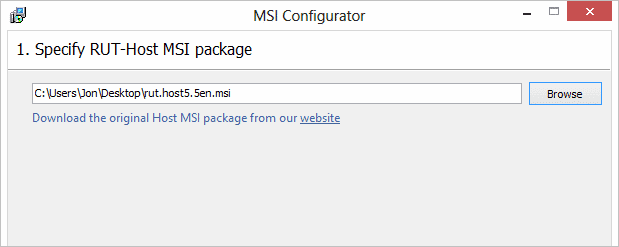
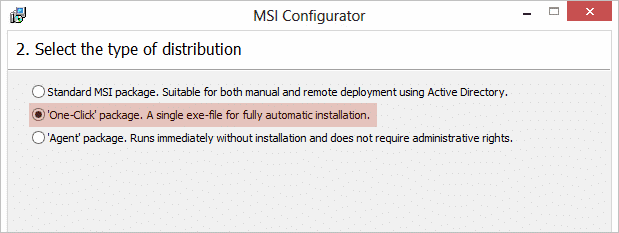
Choose the second option for a “One-Click” install. This will install everything we need with minimal input by the user.
Move on to step three and select the first option to create an “Internet-ID” at launch of the Host program. An ID is used by the Viewer to know how to communicate with the Host outside of the Viewer’s network.
Then enter your email address so the information can be sent to you. Also check the last option for identifying the user.
It’s important to know who the user is in the event you’re using this Host file on more than one computer. If this isn’t specified, the list of computers will be identified by the Viewer as unrecognizable strings of characters and not a readable name.
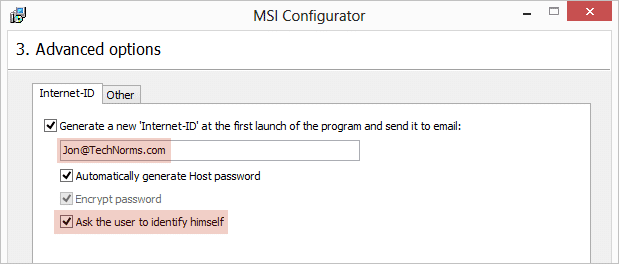
Note that sometimes this option for identification doesn’t work as intended. The “SYSTEM” user is sometimes the authenticator that launches the program. We’ll see this in a later step.
Choose the “Other” tab in this same window to check the first box for suppressing any install confirmations. This is a necessary step for aiding in requiring less work for the user during the install.
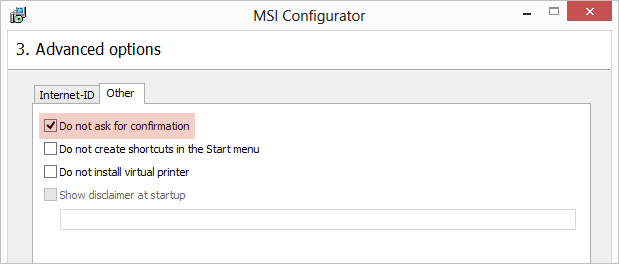
Keep the settings as they appear in step four and then click “Finish.”
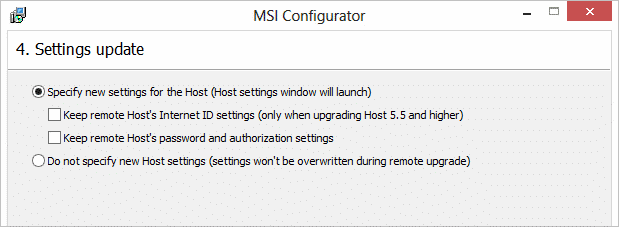
A new window will appear that contains the settings for the Host file. These are the settings the remote computer will be equipped with upon deployment. What you change here is going to be effective for the remote computer(s).
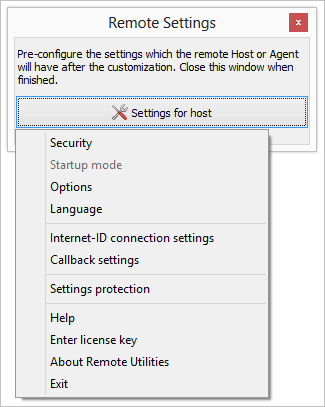
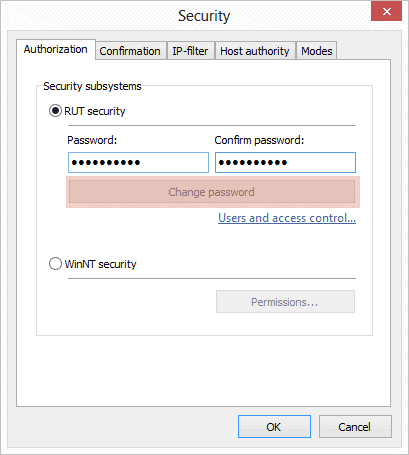
Choose “Security” from the dropdown and then click “Change password.” Fill out the two password fields and then click “OK.”
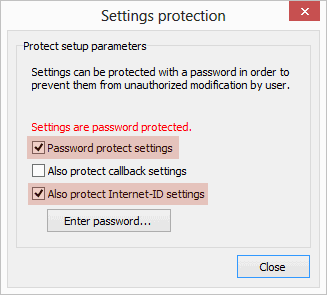
Back at the dropdown menu, choose “Settings protection” and check the first box to secure the settings with a password. Enter a password when the prompt opens and then choose the last option to protect the ID settings as well. Now the user will only be able to modify these important settings with the password you’ve just specified.
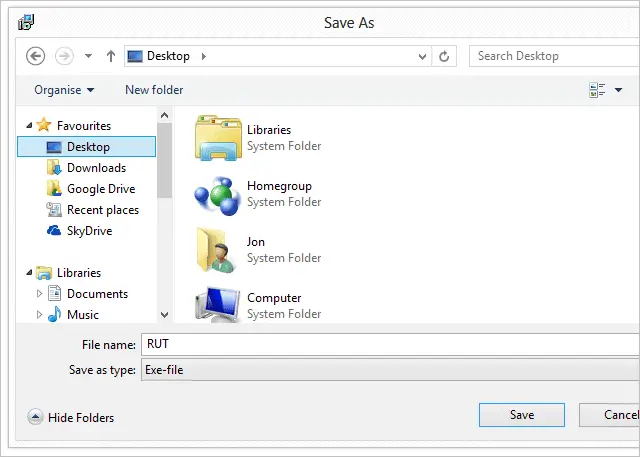
Now exit the “Remote Settings” window. You’ll then be prompted to save the Host file as another name. This is the modified file we’ve just been working on that will be used for deployment because the settings have been customized.
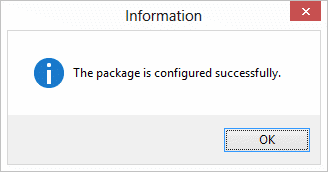
The steps have been completed correctly if you get the following message:
This RUT file will have the exact same settings no matter the computer it’s deployed to.
Controlling a Remote Computer With the Viewer
Now we have a Host file called “RUT” that is needed for the Viewer to communicate with a remote computer. My file is around 7 MB, so it can easily be sent using a file sharing service. I’m using PipeBytes for my transfer.
Email would be a nice medium but most providers block executables from being sent. You could also transfer the file with something like a USB device, CD, or network share if the user is on the same network as you.
Upon opening the Host file, the Remote Utilities website will launch, which can be exited immediately as there’s no purpose for this.
The following prompt will ask the user if they confirm sending information to the email that was specified when building the custom Host file:
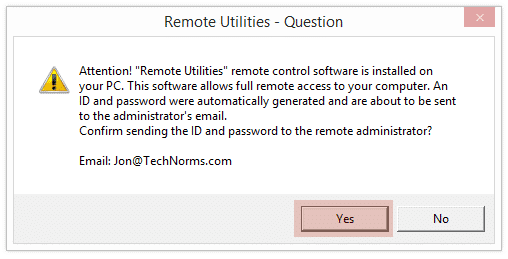
They must click “Yes” to send the information, else you won’t have the required data to remote in.
The following is an example of what this email will look like:
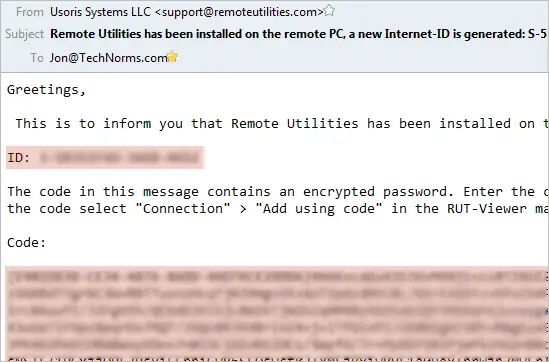
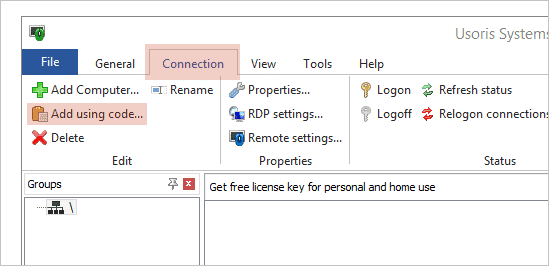
Return to the Viewer and navigate to “Connection > Add using code.”
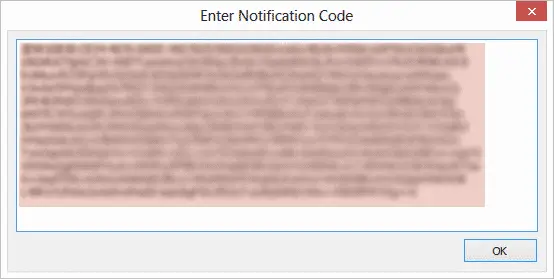
Now paste the code from the email into this window:
Note that if you try entering the code into a viewer that wasn’t used to create the RUT, you will be shown this message:
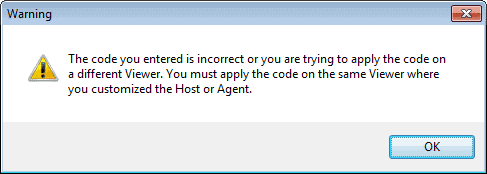
We’ll look at how to remedy this in a below step.
In the email, and after the code, is a “Username” and “Computer name.” This can help identify who the user is if the Host program didn’t ask them to self-identify. Use this information to rename the connection to something more recognizable.
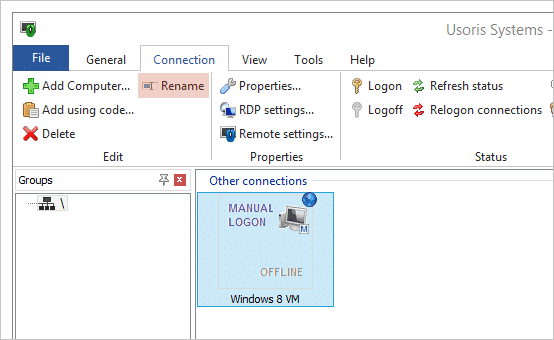
Now you can choose the computer and click “Full control” from the “General” menu tab to begin remote access with full mouse control. Select “View only” to simply see the screen but not control it. Your mouse is rendered useless in the latter mode.
You’ll be asked to confirm the license key, for which you can simply click “OK.”
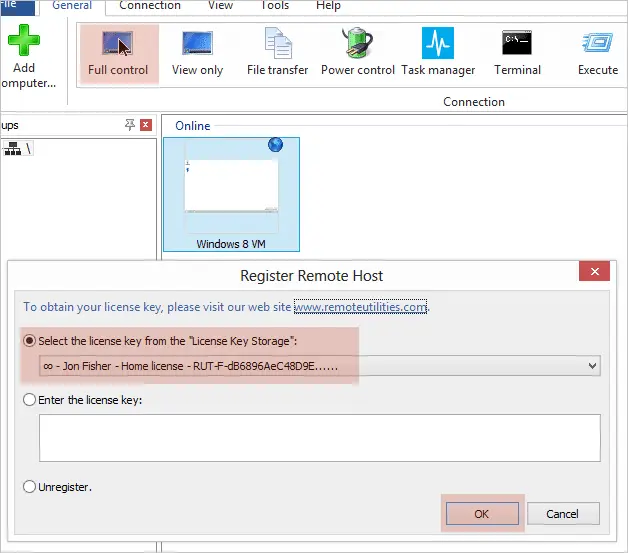
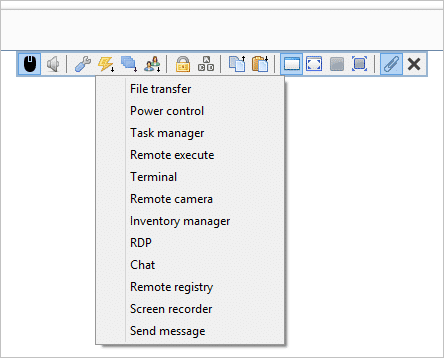
The remote window has its own set of menu items at the top. Hover over this bar to view all the available features.

It’s here you can listen to the remote audio. The sounds will be transmitted over the session as if they were coming right to the Viewer. It will not stop the sound of the remote computer.
You can also set the remote clipboard to whatever you have in your clipboard, or grab the contents of the remote clipboard for your own use.
Start a file transfer, the task manager, a remote command prompt (terminal), or chat window. You can even record the remote screen session or edit the registry at any time.
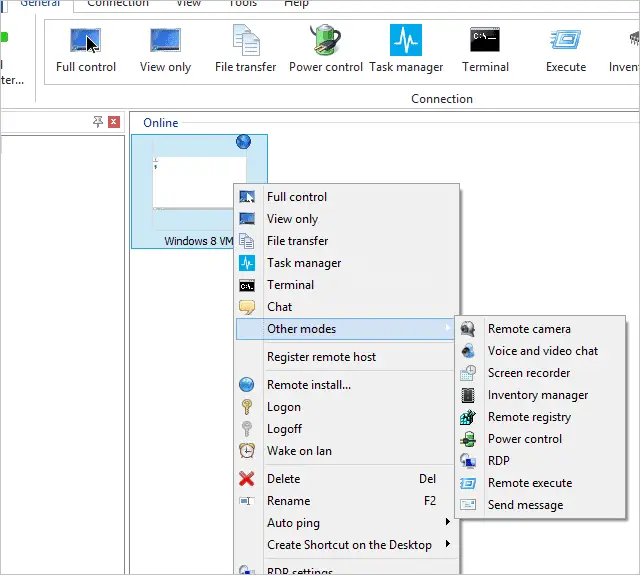
Start any of these functions without even opening the remote window by right-clicking the connection and choosing any of the context menu items.
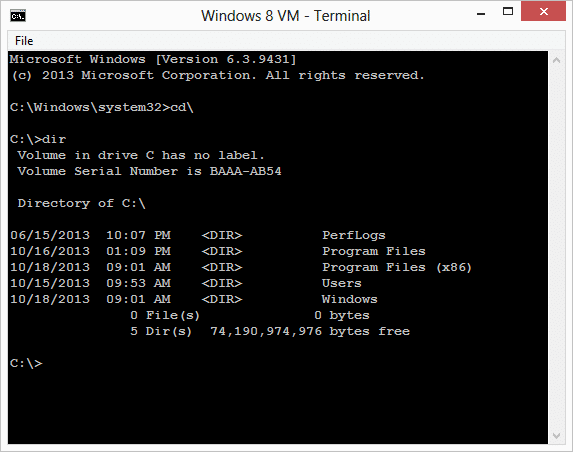
For example, you can open a remote command prompt very easily. Send any command as if you were in front of the remote computer yourself.
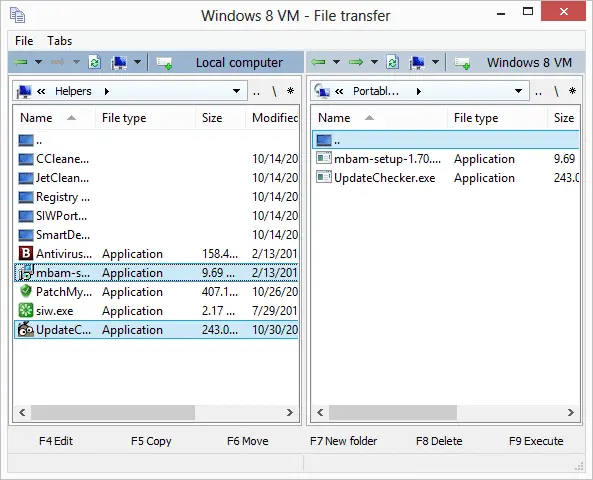
I particularly like the “File transfer” feature. You can send, retrieve, or remove files without the remote user having to do a thing. Everything is operating without prompts or notifications.
Just drag and drop files from the source window on the left (the Viewer’s machine) to the remote pane on the right. Do the opposite to retrieve files from the other computer. This is like if you had two different drives side by side, like when you transfer files to and from a USB device.
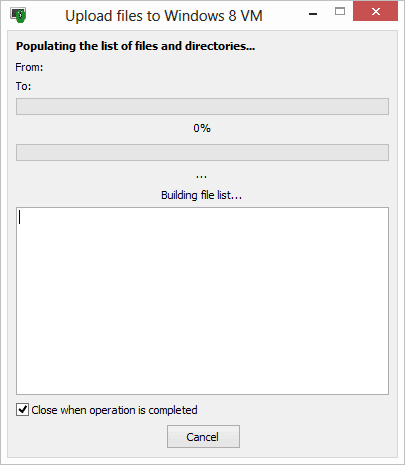
You can easily monitor the transfers in the resulting prompt.
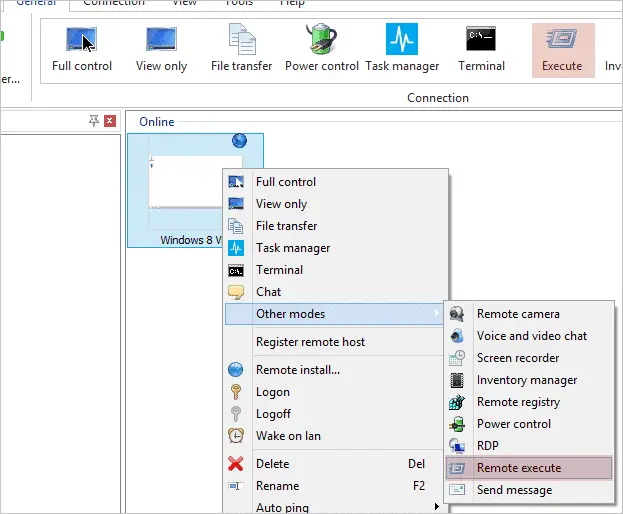
Another cool operation is the “Remote execute.” Maybe the user can’t find a particular program and needs your assistance. Right-click the computer and choose “Other modes > Remote execute.”
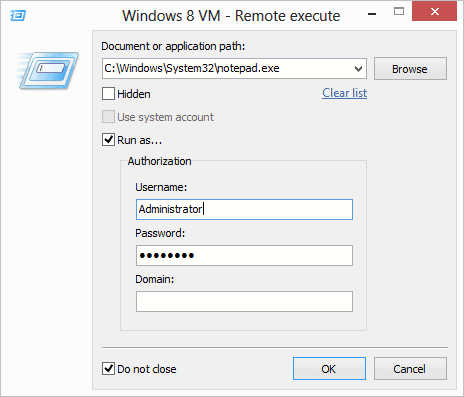
Then browse for the file or manually enter it as an application path. If the program requires admin rights, you can even enter alternative credentials at this screen.
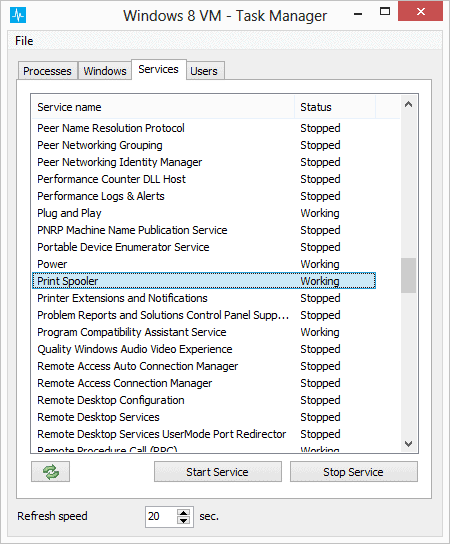
Open a remote Task Manager to monitor and manage running services and files. It looks very similar to a local Task Manager and it works wonderfully. I was able to stop and restart the print spooler service in less than 30 seconds.
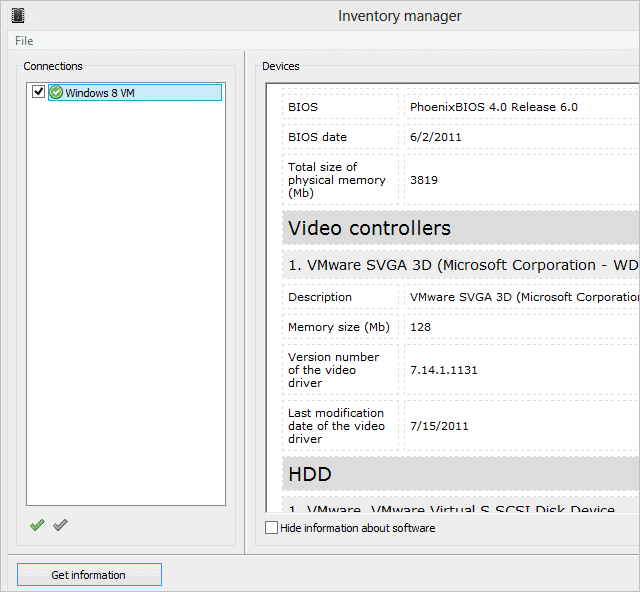
The ‘Inventory Manager” is a necessity for gathering the basic and advanced specs of the remote computer. Open it and choose “Get information” to pull over all the data it can find on the hardware and OS.
There are many other features like “Power Control” that can lock, hibernate, shut off the display, restart the computer, wake on LAN, etc. You can also activate the remote video camera to see the user at the computer.
How to Transfer Remote Utilities Connections to Another PC
I mentioned above that you can only use the code found in the email with the Viewer program that was used to create it. While this is true, you can export the connections and use them on another computer or portable install.
Export the Existing Connections
From the “Tools” menu, choose “Export connections” and choose a location to save the XML file.
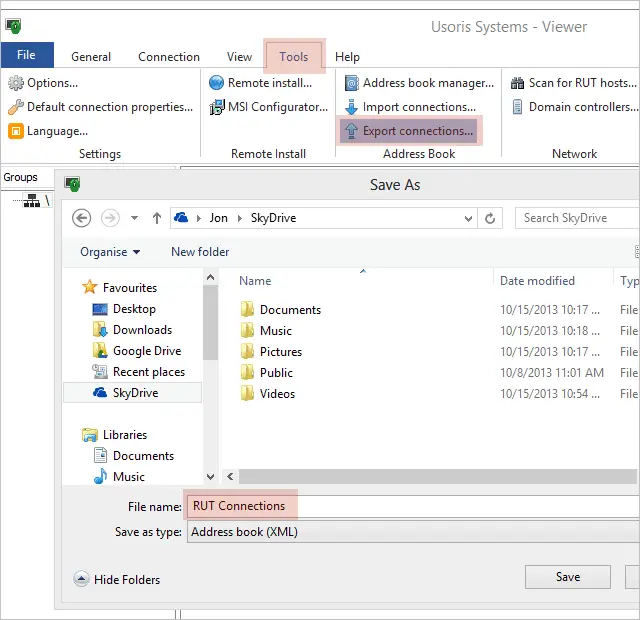
Select a safe location for this file. If someone gets ahold of it they could quite easily interact with the remote computer.
Import the New Connections
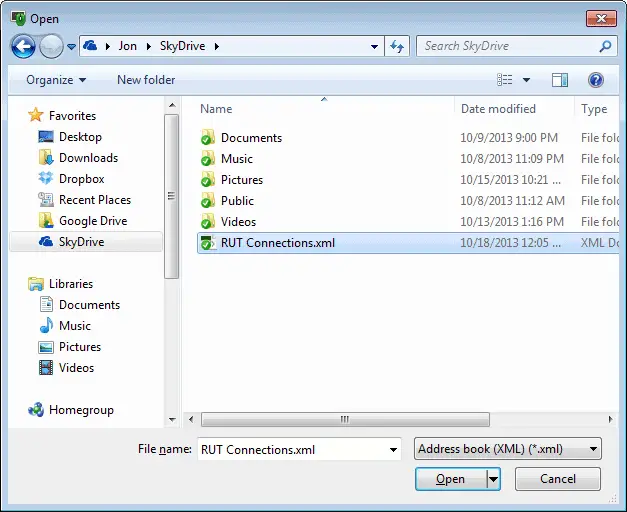
Now using another install of the Viewer, go to “Tools > Import connections.” Select “OK” at the prompt. Unless you want to replace all the existing connections, ensure the “Replace existing” option is not checked.
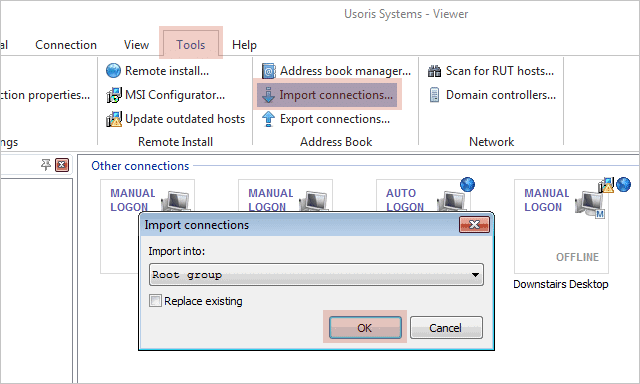
Now grab the file you exported from the other install:
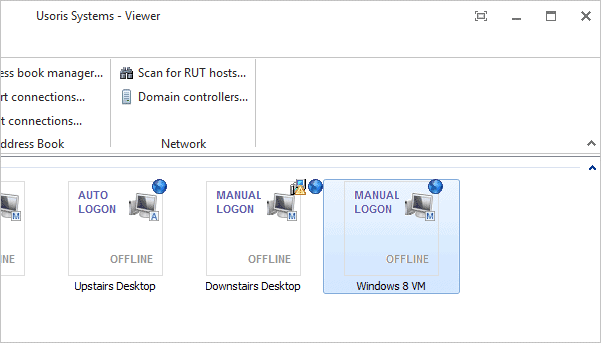
The new connection will show up alongside the other existing ones like so:
Conclusion
I honestly prefer using Remote Utilities over programs like TeamViewer and LogMeIn. I can easily transfer files to and from the remote computer and run other tasks without even looking at the screen, like the remote command prompt and task manager. I recommend you at least give this a shot even if you’ve never heard of it. It’s a wonderful program I find myself using a lot of the time.


