Sharing your photos with family, and friends can be a lot more exciting than just creating another Facebook photo album. That’s right, you have more, dare we say “creative” options, and one of the best that’s right under your nose is YouTube’s Photo slideshow feature.
Before this feature, uploading a photo straight to YouTube was impossible. Users first had to use a separate program like Windows Movie Maker to create their photo slideshow, then upload it as a video to YouTube. But now, you not only can upload pics directly, you can create a full-on slideshow with a whole host of interesting editing options.
Our guide will outline how to use the photo upload feature to create slideshows right in YouTube.
See Also: How to Preload and Buffer Entire YouTube Videos By Disabling DASH Playback
YouTube Photo Slideshow – Getting Started
Uploading the Photos
To use this cool new feature in YouTube, you first need to login to your YouTube account. Once you’re logged in, go to the “Upload” page and click “Photo slideshow” in the right sidebar under the section “Create Videos.”

After clicking “Photo slideshow,” a dialog box will open asking which of your photos you want to include in your slideshow. It will display both photo albums from your Facebook as a place to get pictures (if you have your two accounts connected) in addition to allowing you to upload photos directly.
For the purposes of this review, we will be uploading photos directly. In the dialog box, click “Upload photos” in the left side-bar.

After clicking, an upload window with today’s date for your slideshow photo album will appear. You can either drag-and-drop your photos or you can click the blue button that says, “Select photos from your computer.”
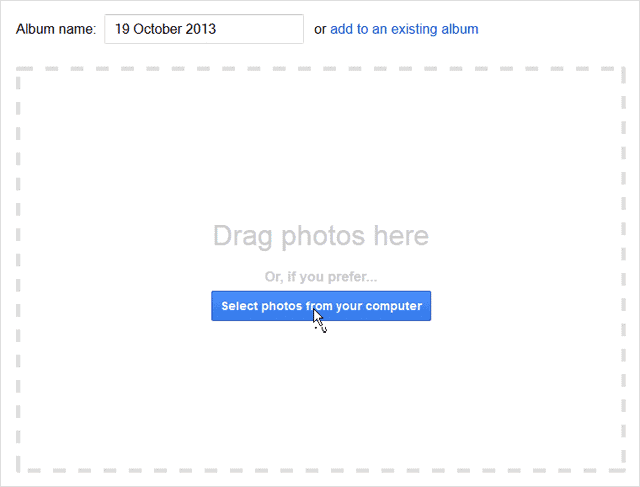
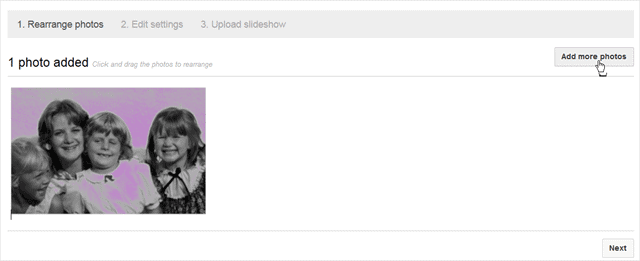
Start adding your photos. There is no limit to how many photos you can add. After you add a photo, each time you will be brought back to the “Rearrange Photos” page where you can click-and-drag the photos to put them in the order you would like for your slideshow.
Click “Add more photos” to keeping adding pictures until you’re satisfied.
Adding Effects and Audio
Once you’ve uploaded all the photos you’d like to add, click the “Next” button at the bottom of the page. The “Edit Settings” page will load, where you can customize your slideshow in multiple ways.
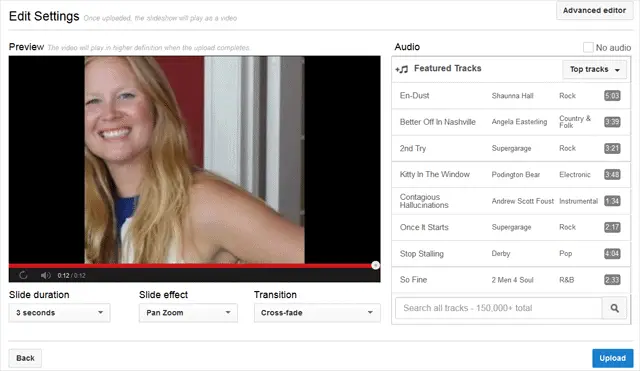
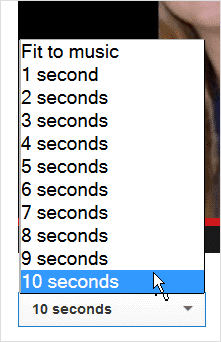
You can adjust how long each photo is shown by clicking “Slide duration” under the preview screen of your slideshow.
The “Fit to music” option is a great option if you plan on adding music.
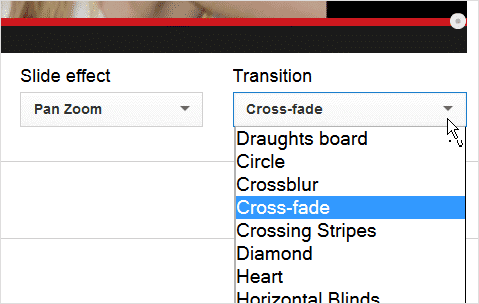
Also under the preview screen of your slideshow is the “Slide effect” menu where you can add “Pan Zoom” and the “Transition” menu, where you can add transitions between your photos with options like “Cross-fade,” “Diamond,” and “Radial swipe.”
Adding music to your slideshow is also integrated into YouTube’s slideshow creator. The “Audio” section for adding audio is located to the right of the slideshow preview on the “Edit Settings” page.
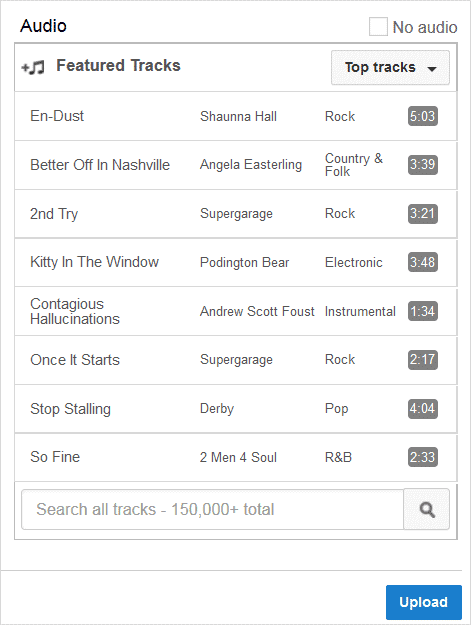
A variety of finding music options are provided, which definitely puts it ahead of other slideshow creators like Picasa or Windows Movie Maker.”Featured Tracks” are listed at the top, with the “Top tracks” of the day on YouTube displaying first.
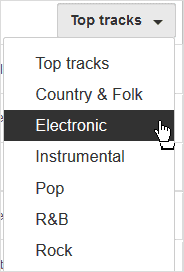
Otherwise, you can click where it says “Top tracks” and choose from “other genres.”
You can even search for a specific song at the bottom of the audio section. When you’re finished selecting your music – just like the song once to add it.

Adding Titles and Text
You can also add text to your slideshow. This is great for adding titles, dates, copyright and other information pertaining to the slideshow. To add text, you will have to go into “Advanced editor” by clicking the button on this area in the top right of the page. Once the page loads, click on the “a” icon at the end of the icon list.
When you do, you will see various options for how your text will be displayed: “Centered title,” “Banner,” “Centered fade,” “Slide” and “Zoom.”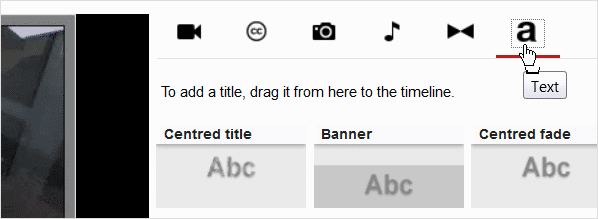
Click on a text effect you want, then just click and drag it below to the timeline of your video, and drop it on the section of video you’d like it to be displayed.
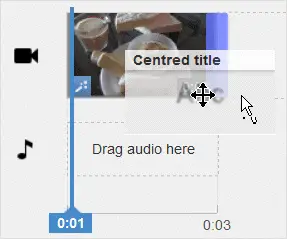
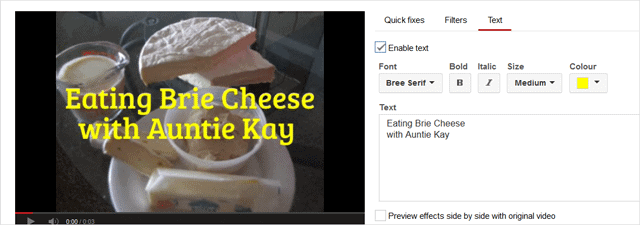
After you drop, a text editing area will where you can edit the text, font, color and text size will load.
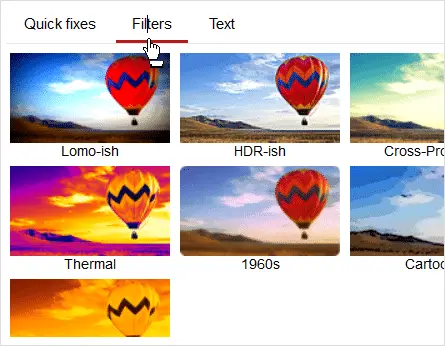
You will also find cool photo filters in the advanced editing area under “Filters.”
Publishing Options
When you’re ready to publish your video, just click the blue “Publish” button at the top of whatever page you’re on in the slideshow maker.

Once you click “Publish,” it will begin processing to go live. To keep the video private, just click “Video Manager.”
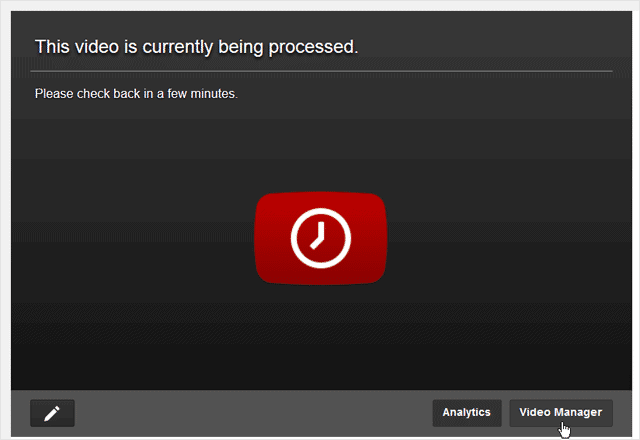
On the “Video Manager” page, click the small blue box to the right of the video which is for the viewing settings. “Public” should pop-up.

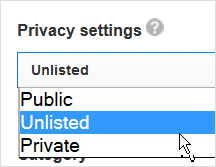
On the edit page, go to “Privacy settings” and click the drop-down menu to view your options – “Public,” “Unlisted” or “Private.”
Conclusion
Overall, YouTube has provided users with a solid slideshow option. While it doesn’t provide nearly the same about of editing options as a slideshow creation program like Windows Movie Maker or Picasa, it’s a slick little tool that lets you create nice looking slideshows with interesting effects in a snap.
To easily create a slideshow with your Facebook timeline photos, check out our post – Facebook Timeline Movie Maker Lets You Create a Movie from Your Timeline Updates


