
Email is still one of the most common ways for people to communicate with each other, but maintaining your privacy while emailing has become much harder. Your email address is in high-demand by marketers, hackers and many others who will try to get your email to send you marketing emails or access other sensitive information.
Web-based Outlook, however, offers one of the best options to maintain a cloak of privacy while sending emails. It’s possible using their very cool “Alias” feature. This feature allows you to create a mock email address for your real one so that your actual email address isn’t exposed.
In this article, we’ll show you how to use Outlook.com’s alias feature to keep your primary email address private.
Cool Tip: How To Switch From Gmail to Outlook.com in a Few Easy Steps
Login to Outlook.com
Creating an alias email address in Outlook is a piece of cake. To start, login to Outlook.com to access your inbox.
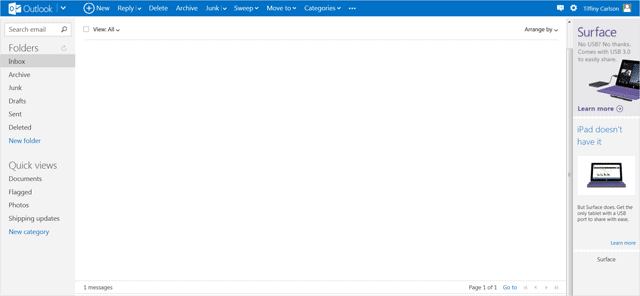
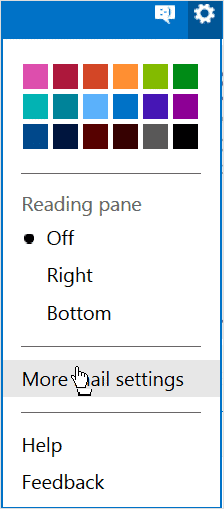
After logging in, go to the drop-down menu for “Options” by clicking on the gear icon in the top-right corner of the screen. After clicking the icon, a drop-down menu will appear with a handful of options.
Make sure to select “More mail settings.”
Related Reading: Microsoft Changes How Account Aliases Work in Windows 8 or 8.1
Creating an Alias in Outlook.com
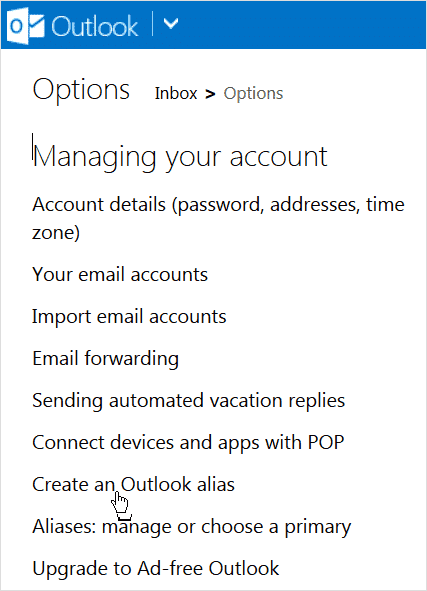
After selecting “More mail settings” from your inbox, a new page will load giving you dozens of available settings to tinker with. To find the alias feature, go to the first section titled “Managing your account” and find the sub-section, “Create an Outlook alias.”
Before Microsoft lets you create an alias in Outlook, they’ll ask you for your password one more time to ensure you are really you, which is never a bad idea. Then you’ll be brought to a page with an empty field awaiting you to enter your alias.
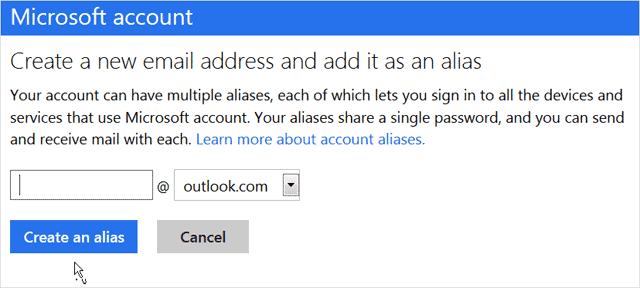
Simply enter the alias you want, then choose from “outlook.com,” “live.com” or “hotmail.com” to complete your new email address alias, and click “Create an alias.”
After clicking to create your new alias, Microsoft showed you a message to let you know they’re setting up your new alias. It also says they will send an email to your new alias when it’s ready to be used.
You’ll want to look for it in its new self-named folder that in your email account.

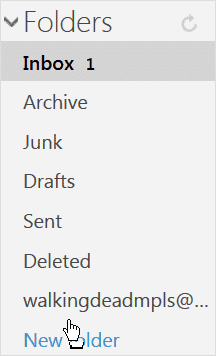
You’ll also receive an email in your primary account giving a thorough explanation of how to use your new email alias.

Note: You can login to your email account with your alias using your primary email account address.
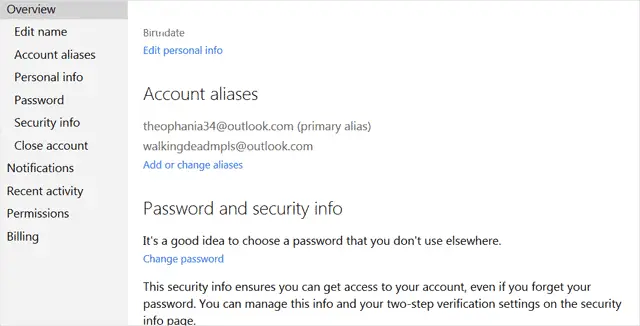
Also, if at anytime you’d like to manage your aliases (they allow users to create 10 a year), such as removing an alias you no longer use, go to “Account settings” and click “Account aliases.”
Conclusion
Having one to several email aliases can be infinitely handy, even if you haven’t realized it yet. From letting you register at websites without doling out your primary email address to the same on questionnaires and shopping in-person, Outlook.com’s alias feature easily lets you maintain your anonymity when sharing your email address.
Another way to ensure the security of your Outlook email account is to enable the 2-step verification. Read more about how to enable this feature on your account.
For more ways to maintain your privacy in your emailing activities, check out our post – 10 Tips To Keep Your Gmail Account Secure.


