We watch movies and videos on streaming platforms and browsers to keep ourselves entertained. However, if audio and video are out of sync in Windows 10, it can hamper our entertainment experience. Many times you might find the audio playing before video and vice versa.
It can be annoying to watch videos in such scenarios. Well, this can be because of outdated audio or video drivers, temporary issues with browsers or streaming platforms, and internet connectivity problems. Luckily, all these issues are fixable, and you can get your video and audio back in sync.
19 Ways To Fix Audio and Video Out of Sync in Windows 10
You can fix the audio and video issues on your Windows 10 PCs easily with some small fixes. You don’t even require the technical expertise to carry out the solutions given below. And if you are fortunate enough to experience the issue just because of a temporary glitch in streaming platforms, you can get it fixed as soon as streaming platform providers fix them.
1. Check your Internet Connection
The audio or video can be lagging if the internet speed is slower than required. And the lag might be causing the audio and video to be out of sync. You can check if your internet connection is up and working at a steady speed. The speedtest.net can help you find the issues with your internet connectivity.
There can be a glitch in the WiFi router connection as well; you can turn it off for some time and then turn it on again. This can help you fix the temporary issues with the internet connection.
2. Check Issues with Streaming Service
Sometimes, the particular streaming platform might be down. You can check it by playing a movie or video on some other streaming platform and see if the audio and video are in sync there.
People often tweet or complain about temporary issues on the internet. So, you can check on the web as well about the issue with specific streaming services. However, if the audio and video are out of sync in Windows 10 on every streaming platform and browser, the issue might be with something else.
3. Try Changing the Browser
Just like streaming platforms, there can be a temporary issue with web browsers. You can switch to some other browser and check if there are any video and audio lags there. If the video works properly on the other browser, there are issues with your browser which need to be fixed.
However, if the audio and video are the same on every browser, you need to dig deeper to fix the issue.
4. Update Windows 10 Operating System
If the audio and video are out of sync in Windows 10 because of OS issues, you need to update it with the recent version available. Windows provides updates to fix the issues in the previous version and also to introduce some new features.
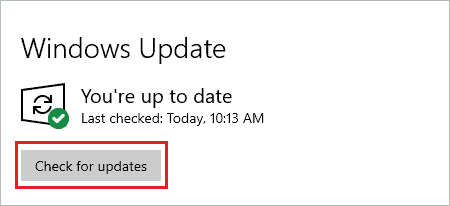
Press Windows key + I to launch the Settings app and go to Update & Security. Make sure you are in the Windows Update section, and there click on the Check for updates button.
Install the new updates and check if you can see videos normally on streaming platforms, browsers, and media players on your PC.
5. Delete Browser Cache
Sometimes, the browser history and cache can cause issues with audio and video sync. You can delete the browsing history along with cookies and cache to fix the video and audio sync issue.
The instructions shown below belong to the Google Chrome browser; the procedure may be similar in other browsers as well.
Open a new tab on your Chrome browser and press Ctrl + H to open browsing history. Now, click on Clear browsing data on the left of the history page.

When the new tab opens, make sure you are in the Advanced tab of Clear browsing data. Select the Time range as ‘All time’ and check the checkboxes next to Browsing history, Download history, Cookies and other site data, plus Cached images and files.
And then click on Clear data to delete the cache and cookies.
You can then sign out of your account and close the browser. Once done, relaunch the browser and sign in to your account again. Check if the audio-video issue is fixed or not after doing all this.
6. Update Audio Device Drivers
The outdated audio and video drivers can cause out of sync issues for many users. You can update device drivers manually or using some third-party software/tools.
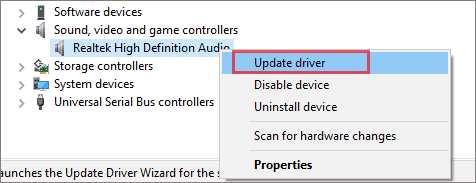
To do it manually, you need to open the Device Manager by searching for it in the Start menu. In the Device Manager, expand the Sound, video and game controllers section and then right-click on the audio drivers. Click on Update driver from the context menu.
You can download the recent driver software from the manufacturer’s website, before you begin with the manual update. You can then follow the wizard on your screen to complete the update. Once done, reboot your PC and check if audio and video out of sync in Windows 10 are fixed or not.
7. Run Windows 10 Playing Audio Troubleshooter
The Windows 10 troubleshooters can scan and fix many issues of your PC. There is an playing audio troubleshooter that can help you fix the issues with audio, if any.
Open the Settings app and go to Update & Security ➜ Troubleshoot. In the Troubleshoot window, click on the Additional troubleshooters link.

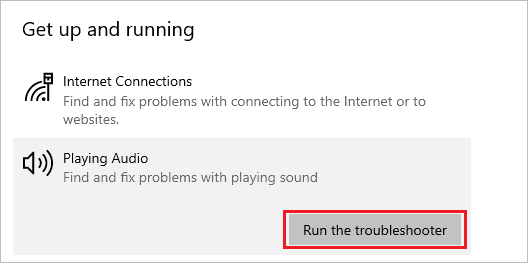
On the next window, click on Playing Audio and then on Run the troubleshooter window.
The Windows will find and fix the issue for you. Once the issue is resolved, you can try playing a video to check if the troubleshooter fixed the video sync issues.
8. Modify Processor Power Management in Power Options
Many users reported fixing audio and video out of sync in Windows 10 by changing the minimum processor state in Power Options.
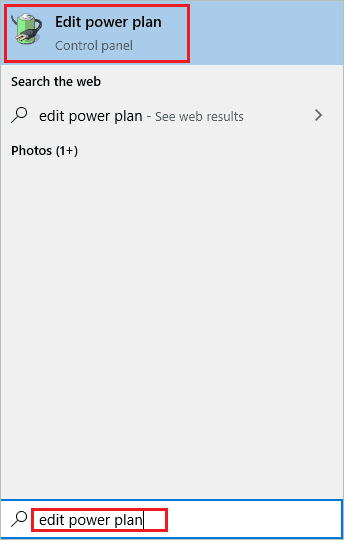
Search for the Edit power plan in the Start menu and click on it from the search results.
Next, click on the Change advanced power settings link.

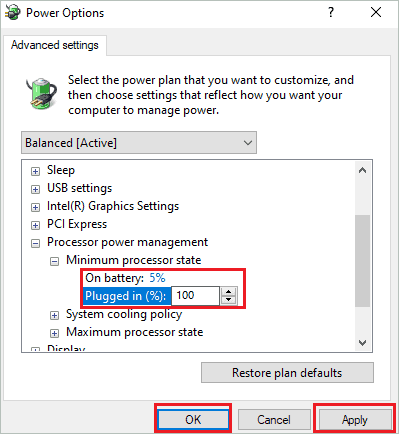
In the Power Options dialogue box, search for Processor power management and expand it. Next, expand the Minimum processor state and change Plugged in % from 5% to 100%.
Click on Apply and OK.
Now, you will probably enjoy videos on your PC without any issues.
9. Change the Power Plan Settings
You can make changes in the power plan settings to fix the audio and video out of sync in Windows 10. Sometimes, the balanced or power-saving mode can cause issues while playing a video, especially if you are on battery. You can change the power plan to high performance to avoid such issues.
Open Control Panel from the Start menu’s search box. In the control panel, search for Power Options and open the same from the search results.
Next, click on Change plan settings and then on Change advanced power settings. When the Power Options dialog box opens, click on the drop-down menu and select High performance.
Click on Apply and OK. If you don’t have an option of High performance in the drop-down menu, you can create it by following the below steps.
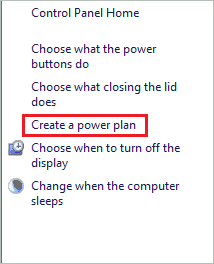
Open Power Options in the Control Panel, as explained above, and click on Create a power plan from the left frame.
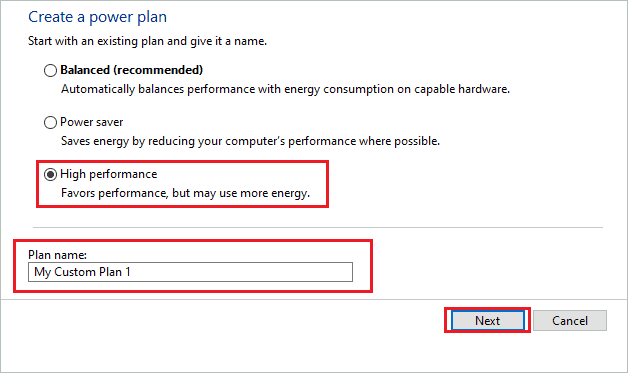
On the next window, select High performance, give the plan name of your choice, and click on Next.
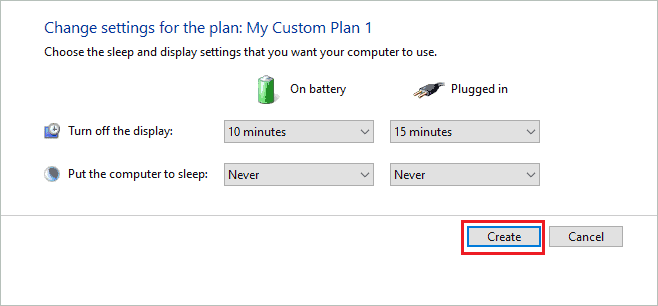
Next, click on the Create button.
Once you create a high performance plan, follow the above steps to select it under the drop-down menu of the Power Options dialogue box.
Post changing the power plan to high performance, reboot the PC, and check if you can see videos normally on your system.
10. Make Use of USB Audio Device
If you cannot listen to audio in sync with the video, there can be issues with the Realtek driver. You can use a USB audio device and plug in the headphones to it in such a case. The USB audio devices are cheap and have helped many Windows users fix out of sync issues on their system.
11. Disable Hardware Acceleration in the Browser
The audio and video are out of sync only on your browser; the issue might be because of hardware acceleration. You can disable it quickly and get rid of video issues on the browser.
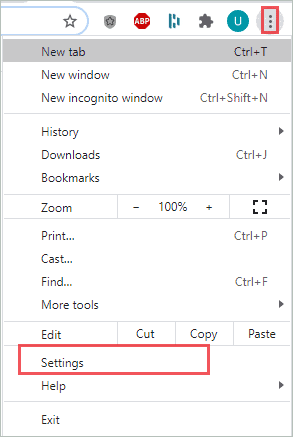
Click on the three dots in the upper right corner of your browser and then open Settings from the menu.
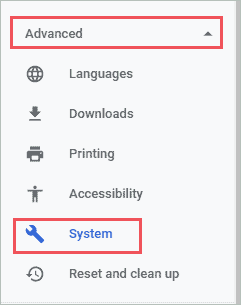
Next, click on the Advanced and then on the System.
Toggle the switch towards the left to disable ‘Use hardware acceleration when available’ and click on the Relaunch button.
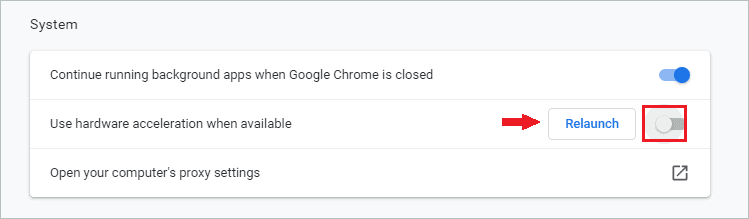
Once the browser is relaunched, you can play the videos again and check if this fix worked for you.
12. Restore the Playback Device Settings to Defaults
If the audio and video are out of sync on every browser and streaming app on Windows 10, you can try restoring the playback device settings to default.
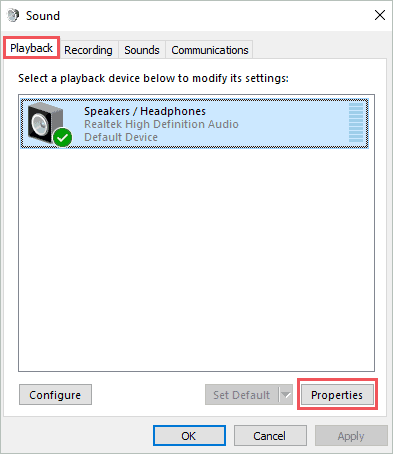
Right-click on the speaker icon on the taskbar and select Sounds. Now, navigate to the Playback tab. Click on the default playback device and then properties. Alternatively, you can double-click on the playback device to open its properties.
In the Properties dialog box, go to the Advanced tab and click on the Restore Defaults button.
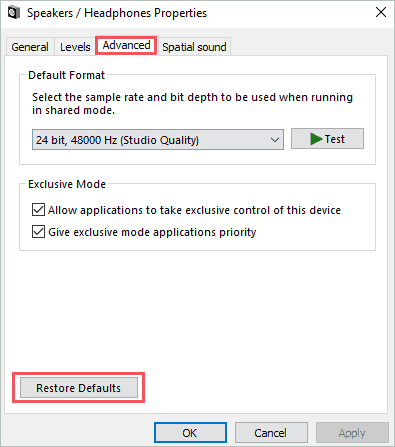
If asked for confirmation, click on Yes to restore the default settings. Post the restore, reboot your PC.
13. Disable Exclusive Mode for Playback Device
The exclusive mode can cause lags in audio for exclusive applications, causing audio and video out of sync in Windows 10. You can try disabling exclusive mode to fix it.
Right-click on the volume/audio icon on the taskbar and click on Sounds. Navigate to the Playback tab and open the default playback device’s properties.
Go to the Advanced tab and uncheck the checkbox next to ‘Allow application to take exclusive control of this device’ and ‘Give exclusive mode applications priority’ under Exclusive mode.
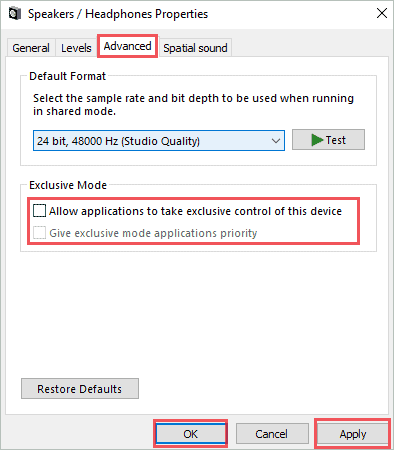
Click on Apply and OK. Restart the PC and check if this worked for you.
14. Change Default Audio Format and Disable All Enhancements
Sometimes, tweaking around the sound settings helps users to fix the audio and video out of sync in Windows 10. You can disable all enhancements and also try changing the default audio format.
Open the playback device’s properties as shown in the above solutions and go to the Advanced tab.
Click on the drop-down menu in the Default Format section and change the format to CD Quality or DVD Quality.
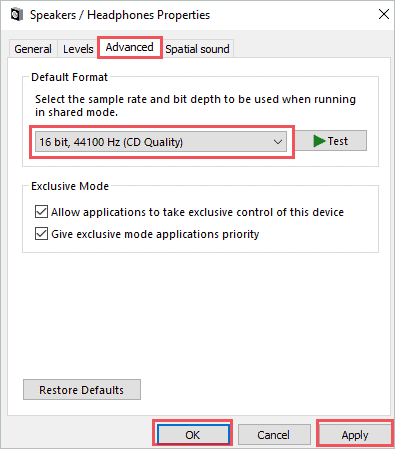
Click on Apply.
Now, go to the Enhancement tab, if it exists, as enhancement is only present for some playback devices. And check the checkbox next to Disable all enhancements. Click on Apply and then OK to close the dialog box.
You need to reboot the system for the change to take effect.
15. Install Flash Player
The Flash player was required to play videos in browsers. However, now with technological advancement, you don’t need it in most browsers. If you are using an older version of the browser, you may have to download and install flash player.
16. Reinstall Realtek Audio Drivers
If there is a glitch in audio drivers, you can experience audio and video out of sync in Windows 10. You can reinstall the audio drivers to fix this.
Open Device Manager by searching for it in the Start menu and expand Sound, video and game controllers.
Right-click on the Realtek High Definition Audio and select Uninstall device.
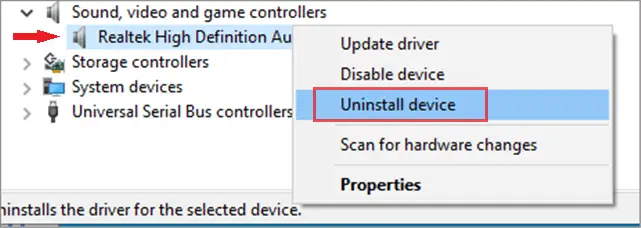
You can now restart the PC so that Windows can reinstall the audio drivers for you. Alternatively, you can click on Action in the Device Manager’s menu bar and then on Scan for hardware changes.
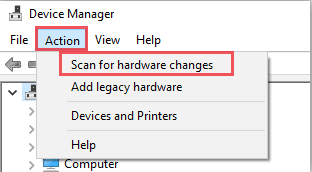
The audio driver will be reinstalled, and you will watch the video without any issues.
17. Use Generic Windows Drivers
If reinstall didn’t work, you could replace the Realtek audio drivers with the Windows generic one. You need to log in using the administrator account to follow the steps given below.
Step 1: Open Device Manager and right-click on the Realtek High Definition Audio. Choose Update driver.
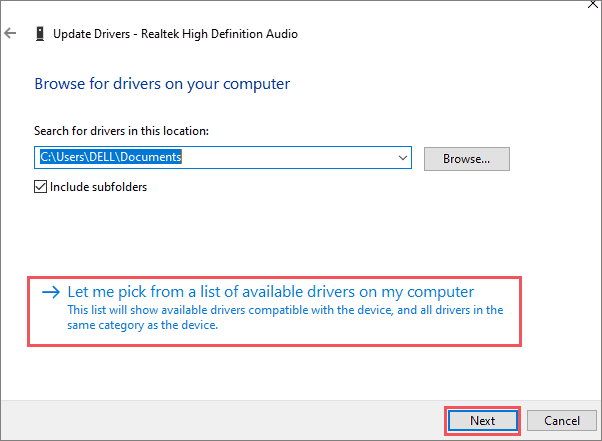
Step 2: Click on Browse my computer for drivers.

Step 3: On the next window, click on ‘Let me pick from a list of available drivers on my computer.’
Step 4: Select the High Definition Audio Device and click on Next. The names of generic drivers on your PC can be different.
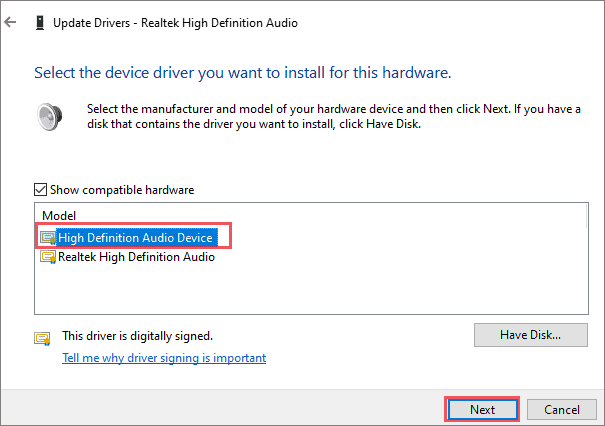
Now, follow the instructions on your screen to complete the process. The audio and video will be in sync once you start using the generic audio driver.
18. Disable Hardware Acceleration of Default Playback Device
You can disable the hardware acceleration for the default playback device to fix the audio and video out of sync in Windows 10.
Open default playback device properties, as shown in the above solutions (Solution No.13). Now, go to the Advanced tab and uncheck the checkbox next to ‘Allow hardware acceleration of audio with this device.’
Click on Apply and OK.
Note: Many manufacturers don’t provide hardware acceleration for playback devices. So, if you don’t find this setting, you can skip this solution.
Reboot the PC and check if you got rid of audio and video issues.
19. Disable HPET and ErP Ready in BIOS
HPET (High Precision Event Timer) generates periodic interrupts and can be used to synchronize multimedia streams. Many users fixed audio and video out of sync in Windows 10 by disabling the HPET in BIOS. You can also try disabling ErP Ready as well.
You can enter BIOS by following the PC manual provided by the manufacturer, as each system has a different way of entering BIOS. Once you enter BIOS, disable HPET and ErP Ready, and save the settings before exiting BIOS.
Login to your PC normally and try playing the video on a streaming service, media player, and browser to check if it normally plays without any audio lags.
Conclusion
Audio and video lags are common issues when the internet connection is not stable. However, if you are experiencing audio and video out of sync on an offline music player and streaming platforms as well, something seems to be wrong with your Windows 10 PC. You can fix this issue conveniently by tweaking the system settings and updating drivers.
The above guide explains how to fix audio and video out of sync in Windows 10 in a straightforward way. You may find the list of solutions long because there is not one reason you will end up in this issue and, therefore, not one working solution to get rid of it.


