Key Takeaways:
- Start menu is the most used component of Windows 11.
- If the Start menu stops functioning, it becomes difficult to access apps and files.
- Users complain about the frozen Start menu after upgrading to Windows 11.
- If you have modified the Start menu using any third-party apps, simply uninstalling it can help.
After upgrading to Windows 11, the first thing that pops up on your screen is the Start menu in the center of your screen. Microsoft tried making the Start menu more helpful and attractive compared to previous versions of Windows. However, many users complain that their Windows 11 Start menu is not working despite repetitively launching it.
One of the important Windows 11 features includes a new and improved Start menu. So, if it is not working as expected, it can hamper your productivity. However, some tweaks in your Windows 11 PC can help you resolve the issue.
15 Solutions For Windows 11 Start Menu Not Working Issue
You can try out the below fixes to get the Start menu working again. The solutions will help you resolve the Start menu frozen or stuck issues. You can follow the below fixes in chronological order to avoid putting in significant efforts.
1. Restart your Computer
A quick restart can help you fix minor issues on your Windows PCs. You can reboot once and check if it helps with the Start menu or not. As the Windows 11 Start menu is not working, you need to use the shortcut keys to restart your PC.
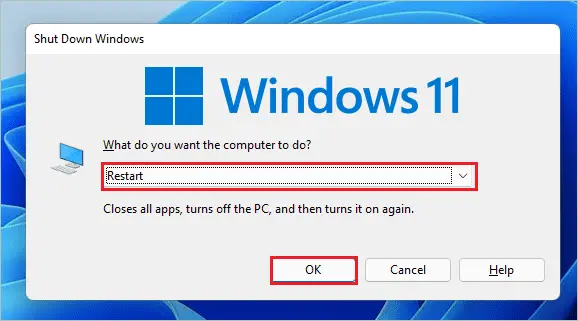
Press “Alt + F4” to open the Shut Down Windows dialog box. Next, select “Restart” from the drop-down menu and click on “OK” to reboot the PC.
After the PC restarts, you can press the Start button and check if the Start menu launches or not.
2. Restart Windows Explorer
You can restart Windows Explorer via Task Manager to fix the Start menu not working. If there is a minor bug in the process, restarting it can help you.
Press the “Ctrl + Shift + Esc” keys to open “Task Manager” on your computer. You can also press the “Ctrl + Alt + Del” keys and then click on Task Manager to open it.
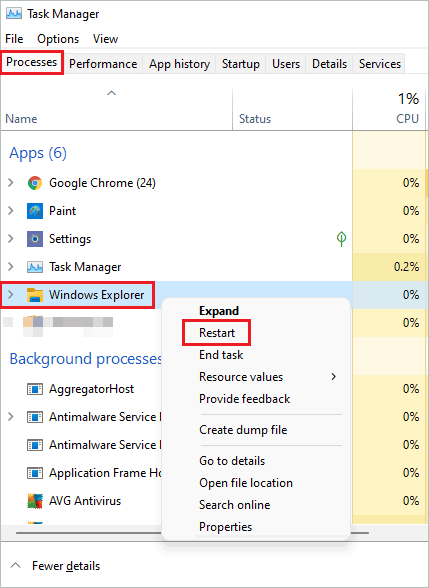
In the Task Manager window, go to “Processes” and search for Windows Explorer. You won’t find Windows Explorer if File Explorer is not opened on your computer. You can either launch it from the Windows 11 taskbar or press Windows key + E.
You can then right-click on “Windows Explorer” and select “Restart” from the context menu.
Once the Windows Explorer is restarted, check if the Windows 11 Start menu not working issue is resolved or not.
3. Uninstall Third-party Applications that Alter Start Menu
We all want to customize the Start menu as per your choice, and many third-party apps can help you achieve it. However, sometimes these apps can cause issues with the Start menu.
You can uninstall the third-party app that alters the Start menu and check if this helps in resolving the problem or not.
Step 1: Press Windows key + I to open the “Settings” app and go to “Apps.”
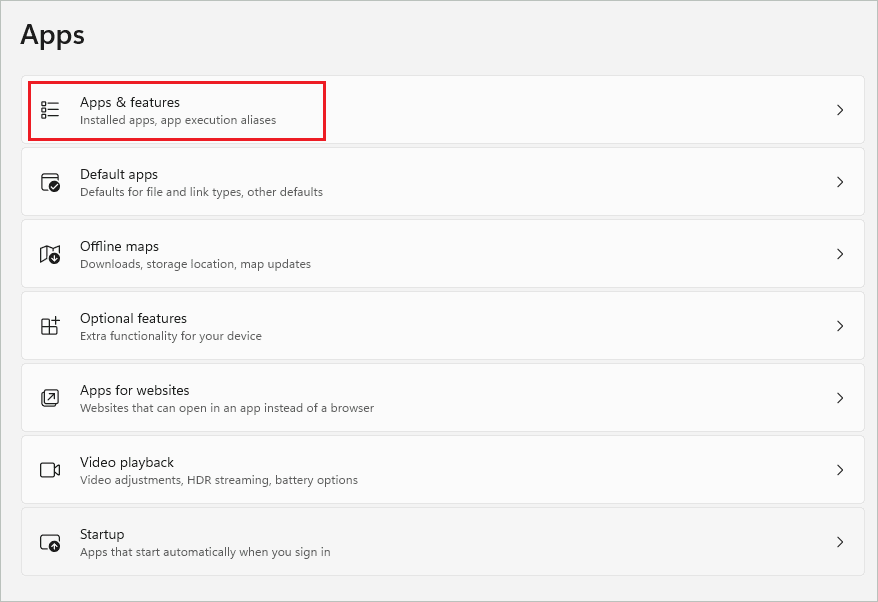
Step 2: Click on “Apps & features” in the Apps settings.
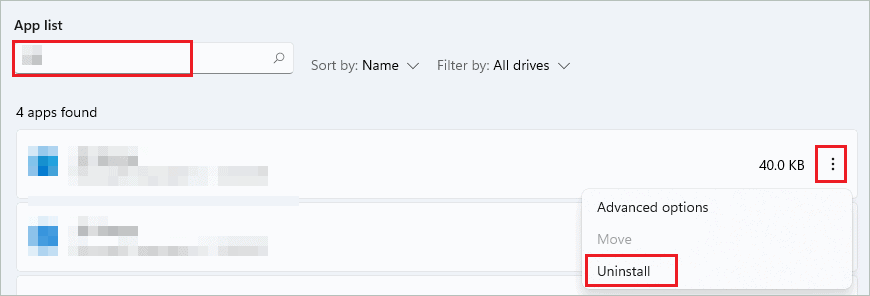
Step 3: Search for the app you want to remove in the search bar, and when the app shows up in the search results, click on the “3 dots” next to the app.
Step 4: Click on the “Uninstall” option.
Once the app is uninstalled, restart your PC and check if the Start menu works without any issue.
4. Uninstall Recent Windows Update
If you started experiencing Start menu problems after a recent Windows update, you could uninstall it. However, some buggy updates can cause issues and need to be removed. For example, users who updated to KB5004300 experienced problems with the Start menu.
In such cases, uninstalling the Start menu is the only way to resolve the problem. You can later install the update again.
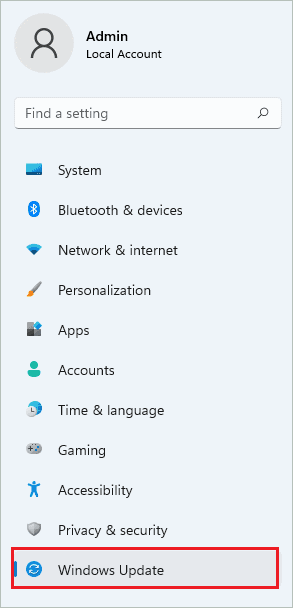
Step 1: Launch the “Settings” app and go to “Windows Update” from the left panel.
Step 2: Click on “Update history.”
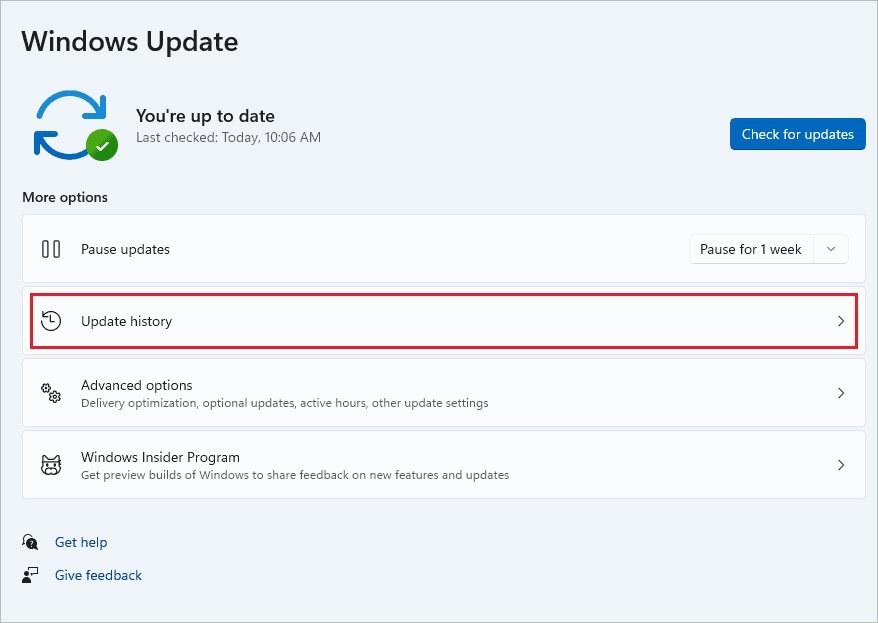
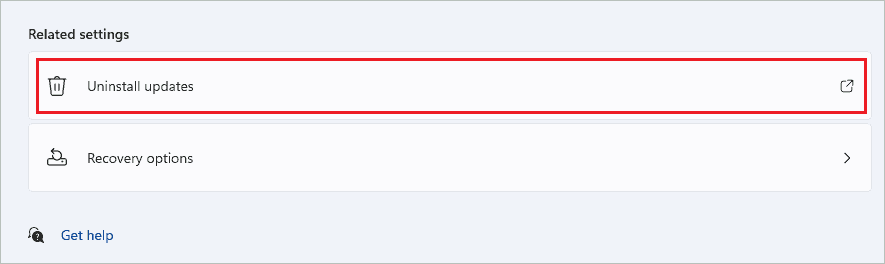
Step 3: On the next screen, scroll down and click on “Uninstall updates.”
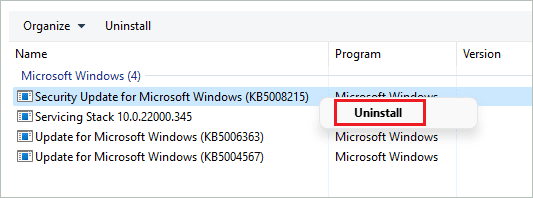
Step 4: When the Control Panel window opens, right-click on the recent update and click on “Uninstall” to remove the update.
If you are unsure which was the recent update, you can check the date in the “Installed On” column.
After uninstalling the update, reboot your computer and check if the Start menu launches without any issues or not.
5. Revert the Recent Registry Change
Many registry hacks can change the look and feel of the Start menu in Windows 11. However, this hack can also freeze or slow down the Start menu on your computer. You can revert those changes.
If any new key or DWORD value was created in the Windows Registry Editor, you could delete them to get the Start menu working again. If you didn’t make any changes in the Registry Editor, you could look for an alternative solution from below.
6. Run SFC and DISM Scans
The corrupt Windows system files can cause many unwanted issues on your computer. You can use DISM (Deployment Image Servicing and Management) and SFC (System File Checker) utilities to scan and repair corrupted files on your Windows 11 computer. Both these utilities can be used via the elevated Command Prompt.
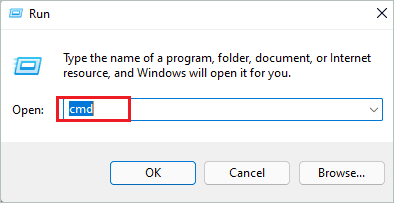
Step 1: Press Windows key + R to open the “Run” window and type “cmd” there. Now, press Ctrl + Shift + Enter keys simultaneously to open Command Prompt with administrator privileges.
Step 2: Once the Command Prompt opens, type the sfc /scannow command and press “Enter” to execute it.
sfc /scannow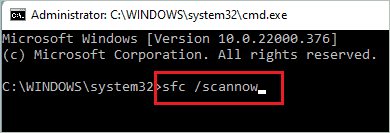
Step 3: Wait till the sfc command is executed, and then you can perform a DISM scan.
Dism /Online /Cleanup-Image /RestoreHealth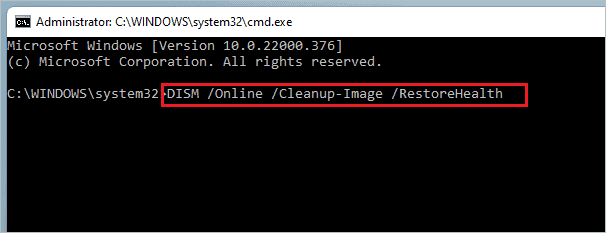
Once both the commands are executed, close the Command Prompt window and restart your computer.
7. Scan for Viruses and Malware
Viruses and malware can cause unwanted problems on your computer. You can scan for viruses using Windows inbuilt security or third-party malware removal tools. The below steps show the process to perform the scan using Windows Security.
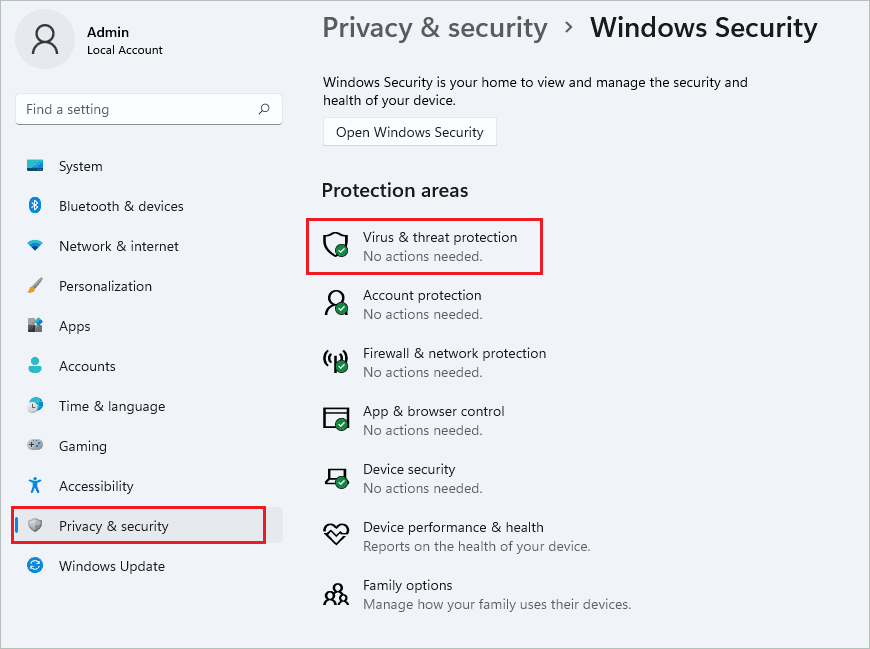
Step 1: Open the “Settings” app and go to “Privacy & Security” from the left panel.
Step 2: Click on “Virus & threat protection.”
Step 3: Click on the “Scan options” link.
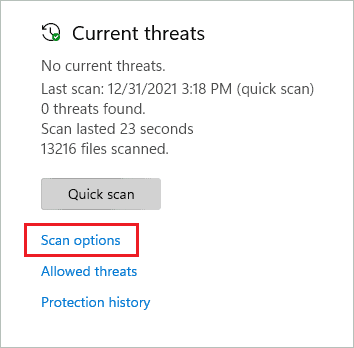
Step 4: Select the “Full scan” options and click on the “Scan now” button.
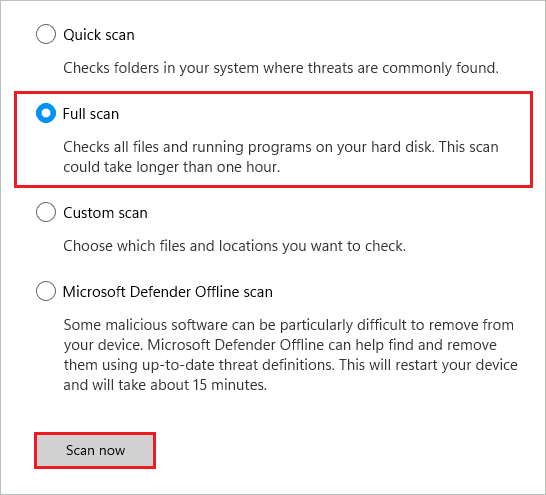
The scan will take some time, but you will get rid of the viruses and malware from your system.
8. Rebuild Search Index
Sometimes Windows search can mess up with the Start menu, thus creating unwanted issues. You can rebuild the search index by following the steps below to resolve the Windows 11 Start menu not working issue.
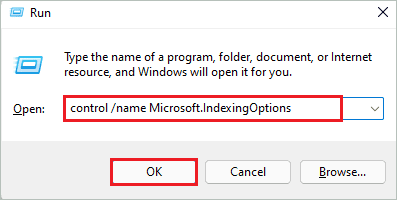
Step 1: Open the Run dialog box and type “control /name Microsoft.IndexingOptions” there. Press “Enter” or click “OK” to open the Indexing Options window.
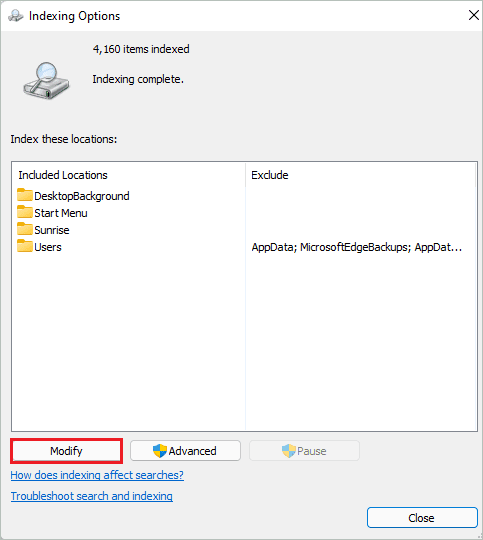
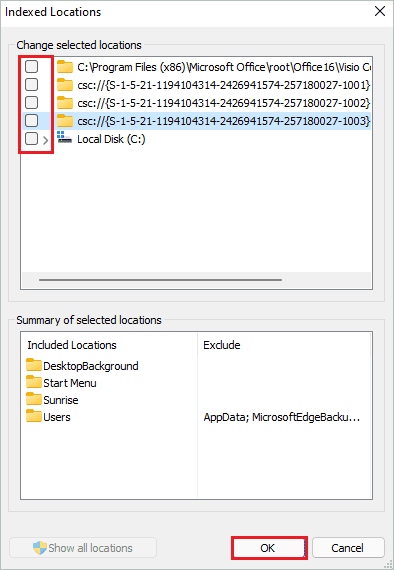
Step 2: In the Indexing Options, click on the “Modify” button to open the Indexed Locations window.
Step 3: In the Indexed Locations window, click on “Show all locations”

Step 4: Uncheck all the checkboxes in Change selected locations and click on the “OK” button.
Step 5: In the Indexing Options, click on the “Advanced” button.
Step 6: In the Advanced Options dialog box, click on the “Rebuild” button in the Troubleshooting section.
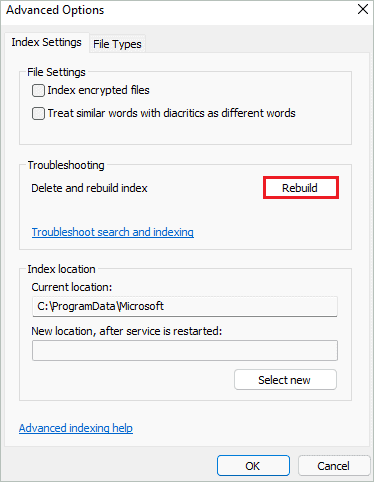
Windows will rebuild the search index for you now. However, it may take some time to rebuild the index on your computer. Once the search index is rebuilt, you can restart your computer and check if the issue is resolved or not.
9. Update Windows Operating System
You can check if your computer has any new updates or not. The latest update can fix the bugs in the previous, making the Start menu normal again.
Open the Windows Settings app and go to the “Windows Update” section from the left panel. Next, click on the “Check for updates” button.
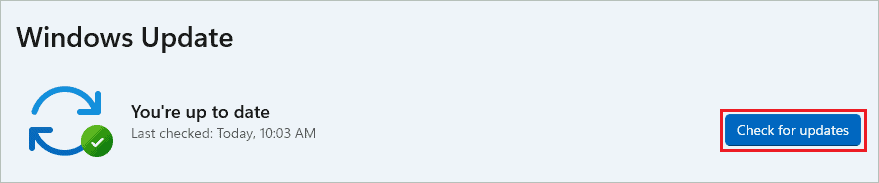
If there are any updates, the download and install process will start on its own. All you need to do is restart after the update is downloaded.
10. Update Graphics Drivers
Many Windows 11 resolved this issue by updating their graphics drivers. You can update the device driver manually via Device Manager or use a third-party driver updater like Driver Booster.
If you are doing it manually, make sure you download stable and compatible driver software from a reliable source. Once you have the driver software, press Windows key + X to open the quick link menu and click on “Device Manager” to open it.
Now, expand “Display adapters” and right-click on the display driver below. Next, select “Update driver” from the context menu.
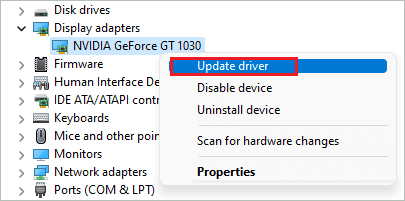
You can then follow on-screen instructions to complete the update process.
11. Restart Start Menu Service
You can restart the Start menu background services via Task Manager. The bugs and temporary issues can be resolved by restarting the service once.
Step 1: Press Ctrl + Shift + Esc keys simultaneously to open Task Manager.
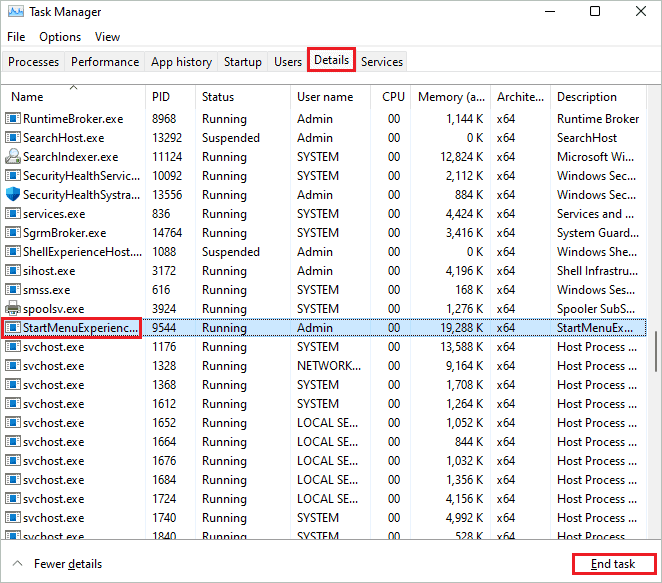
Step 2: In the Task Manager window, go to the “Details” tab and search for the “StartMenuExperienceHost.exe” service.
Step 3: Select the service when found and then click on the “End task” button to end the service.
Once the service is killed, reboot the PC and then try to relaunch the Start menu.
12. Restart Iris Service
The Microsoft insiders who have updated to build number 22449 were experiencing issues with the Start menu. If you are one of them, you need to force restart the Iris service on your computer.
The Iris service can be forced shutdown via Command Prompt. Make sure you close all the apps and save all unsaved documents before executing this command.
Now, open Command Prompt with administrative privileges and execute the command mentioned below.
reg delete HKCU\SOFTWARE\Microsoft\Windows\CurrentVersion\IrisService /f && shutdown -r -t 0The command will reboot the PC, and this service will be forced to start during the restart. In addition, it will resolve the Windows 11 Start menu not working issue on your PC.
13. Disable Automatically Hide Taskbar Feature
You can disable automatically hiding the taskbar to fix Windows 11 Start menu not working. This may sound weird, but it helped many Windows 11 users resolve the issue.
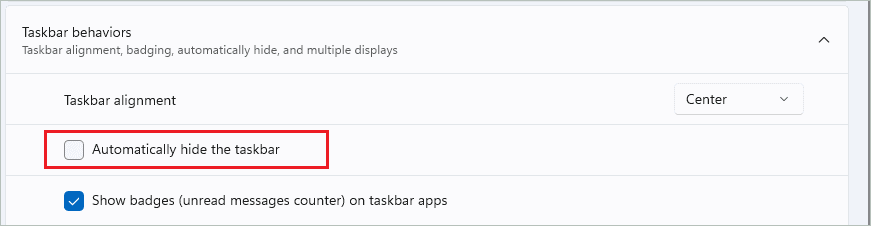
Open the Settings app and go to the “Personalization” section. Next, click on “Taskbar” and expand “Taskbar behaviors.”
Uncheck the checkbox next to “Automatically hide the taskbar” to disable the auto-hide feature.
Close the Settings app and try clicking on the Start button on the taskbar to check if the Start menu is working properly or not.
14. Reinstall the Package That Contains Start Menu using PowerShell
Microsoft gives you the freedom to reinstall the basic apps using PowerShell. This makes it easy to fix the issue on the computer. For example, if Windows 11 Start menu is not working, you can reinstall it using the below instructions.
Open the Run window and type “powershell” there. Next, press Ctrl + Shift + Enter keys to open PowerShell with administrator rights.
In the PowerShell window, type the below command and press “Enter” to execute the command that will reinstall the package.
Get-appxpackage -all *shellexperience* -packagetype bundle |% {add-appxpackage -register -disabledevelopmentmode ($_.installlocation + “\appxmetadata\appxbundlemanifest.xml”)}
Once the command is executed, you need to rebuild the search index. You can do so by following solution no. 8 of this guide. After rebuilding the search index, you can restart your computer and check if this helped resolve the issue.
15. Use Another Account or Local Admin Account
Sometimes, the account can get corrupted, creating unnecessary issues only within that account. You can check if the Start menu is working in other accounts/the local admin account or not.
If it works well, you can switch the account, move your data, and work to another account. It is the last resort to resolve the Windows 11 Start menu not working issue.
Final Thoughts On Windows 11 Start Menu Not Working Issue
Many Windows 11 users complained about the Start menu not working or freezing. Windows 11 is a new operating system and is prone to some minor issues here and there. However, you can expect an update that fixes the bug soon after the problem is experienced.
If you just experience the issue, some solutions can help you get rid of it. The guide can help you to fix Windows 11 Start menu not working issue. You can try all the fixes until you find the one that helps the Start menu work again.
If the issue is not severe, restarting the PC, services, and process can resolve the problem. However, if the corrupt account is causing the issue, you may need to switch to another account.
FAQs
What button opens the Start Menu?
The first button from the left on the taskbar, known as the Start button, opens the Start menu for you. You can also press the “Windows” key on the keyboard to open the Start menu on Windows 11 PC.
How do I get into Windows Settings without the Start menu?
You can press Windows key + I to open the Settings app without the Start menu.
Why is my Start menu not opening?
There can be a bug in the process or service that can cause the Start menu not to open. In addition, outdated drivers, corrupt system files, third-party apps, and corrupt account files can cause the Start menu not to open.


