‘How to disable touchpad in Windows 10?’ is a frequently asked question by users who prefer using a mouse instead of a trackpad. Moreover, when we are typing on our laptop, our hands tend to touch the cursor frequently, causing the cursor to move frequently. This creates an inconvenience that tends to irritate users a lot.
When the touch screen is not working, a mouse offers better convenience and accuracy in terms of navigation. It is also the go-to device for beginners as getting used to a touchpad takes time. A mouse can also come handy, unlike a touchpad in gaming and while using a designing software, thereby showcasing its multifunctionality.
8 Best Solutions For How To Disable Touchpad In Windows 10
The small size of a touchpad also tends to affect the pointing accuracy. Added to that, using a touchpad with moist fingers might also result in signal disruption. If you wish to avoid such a problem or if you love using a mouse, here are eight great ways to disable touchpad in Windows 10 on your laptop.
1. Disable The Touchpad By Using The Keyboard Shortcut
Every laptop has special shortcuts to turn off the touchpad but they differ as per laptops of different companies. For example, Dell laptops have a shortcut of FN + F5 for disabling the trackpad without hassle.
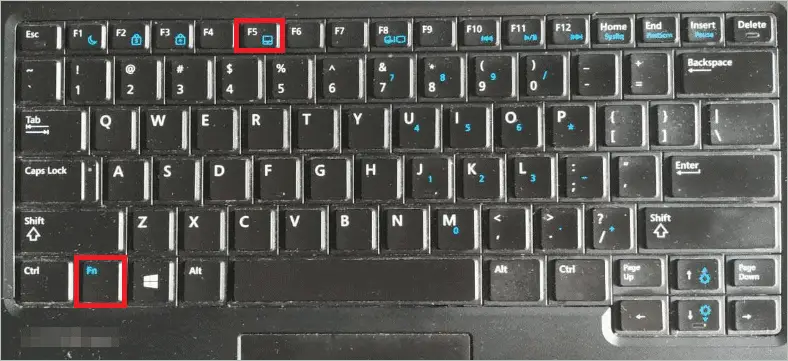
Check the instruction manual of your laptop to know how to disable touchpad in Windows 10 using a keyboard shortcut.
2. Using Mouse Properties To Disable Touchpad
Disabling a trackpad is also possible by using the Settings tab in Windows 10. Also, it is comparatively easier to do so instead of using the Control Panel.
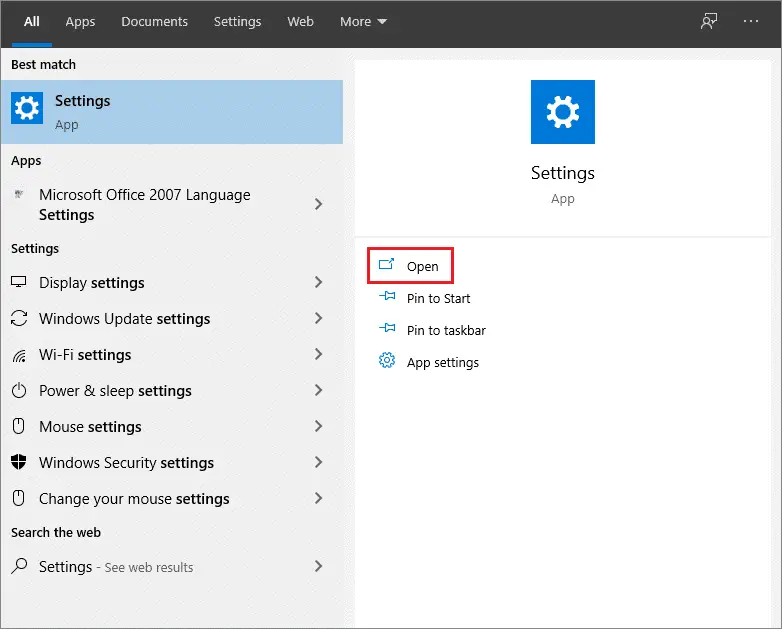
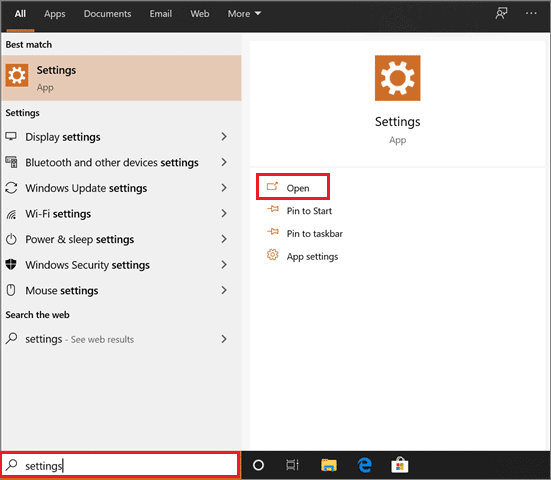
First, go to the Settings app by typing ‘Settings’ in the Cortana search bar and clicking on Open in the right window pane.
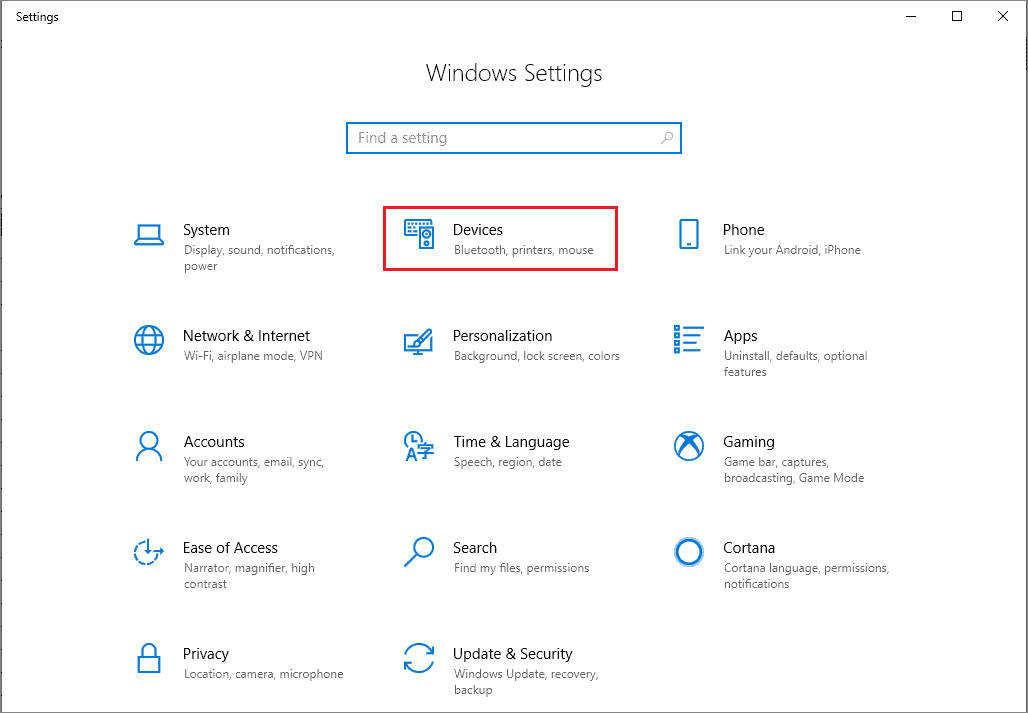
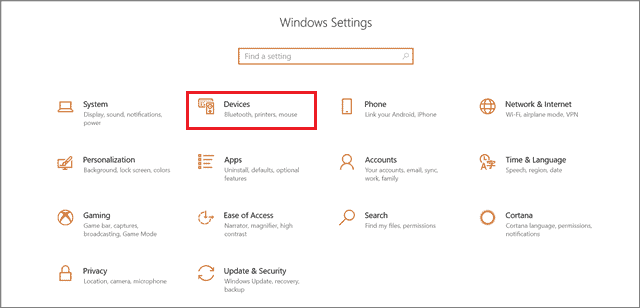
Then, Click on the Devices tab.
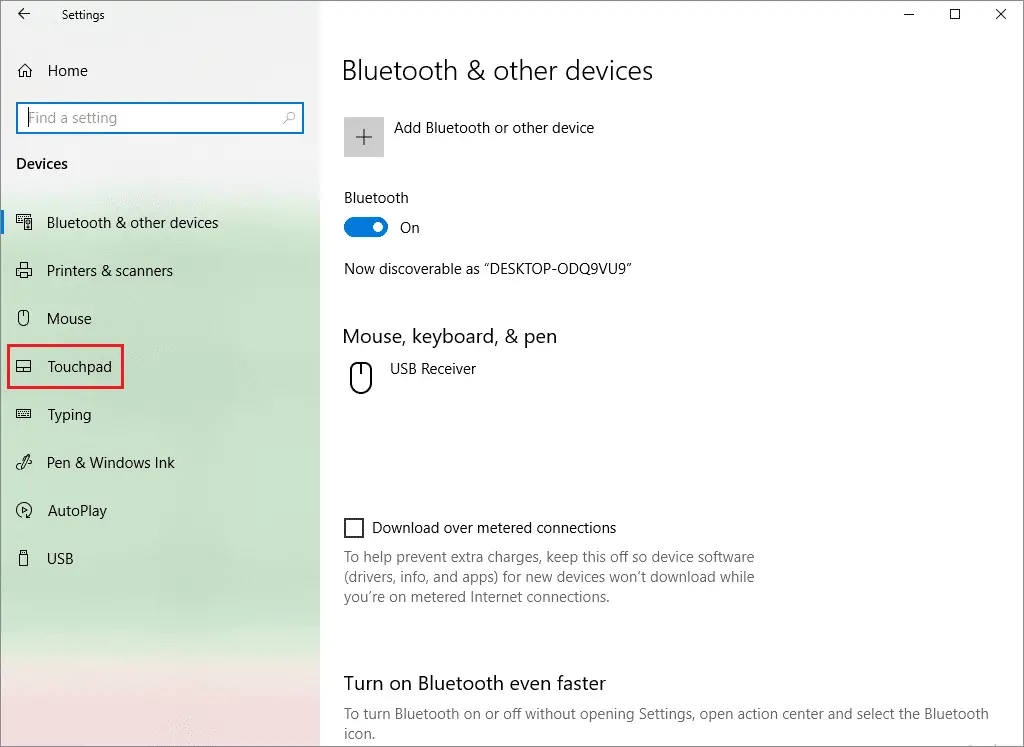
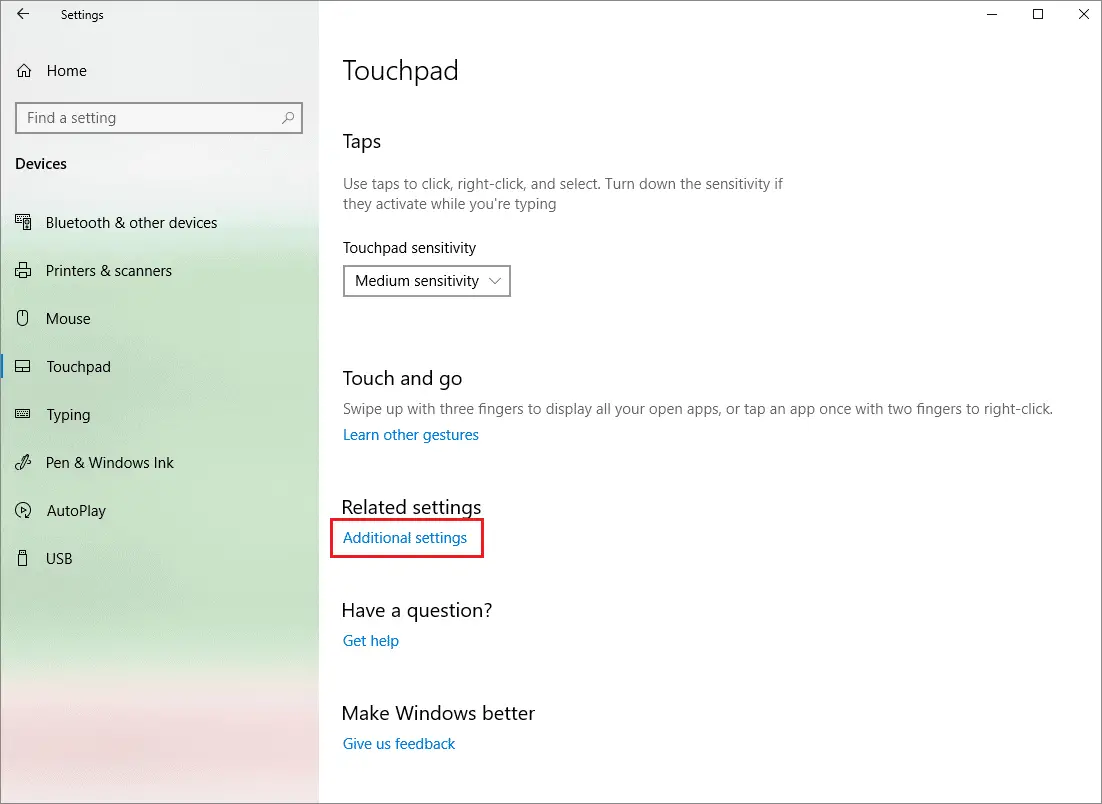
Now, Click on the Touchpad tab.
Go to Additional Settings under the Related Settings section.
After doing so, click the ThinkPad tab in the Mouse Properties. In the Pointing Options, select Use Trackpoint Only. Then, click on Apply and Ok.
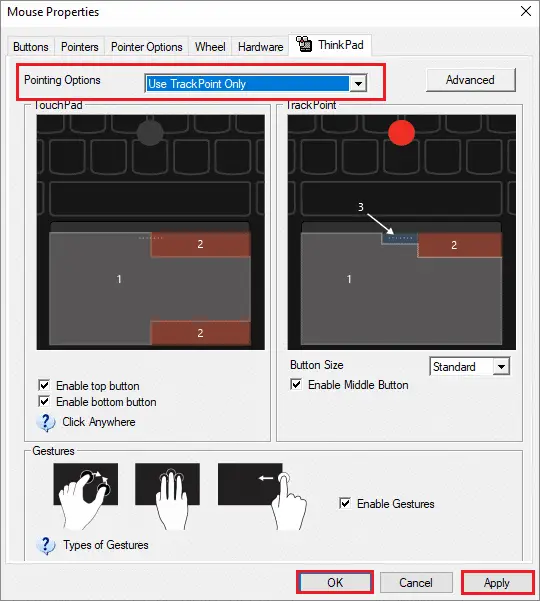
This option allows a user to stop the functions of a touchpad albeit he can still scroll with it. The Mouse Properties method is by far the easiest one on this list as it doesn’t require users to navigate into a rabbit hole or install any software to disable a laptop trackpad.
3. Touchpad Can Also Be Disabled From The Settings App
Earlier, we saw how long it takes to disable the touchpad functioning through the Settings app. However, that was an alternative to this method, which can be used if you don’t have certain options available.
First, go to the Settings app from the taskbar.
Then, click on the Devices option.
Once the Devices option opens up, click on the Touchpad tab and uncheck the Leave touchpad when a mouse is connected.
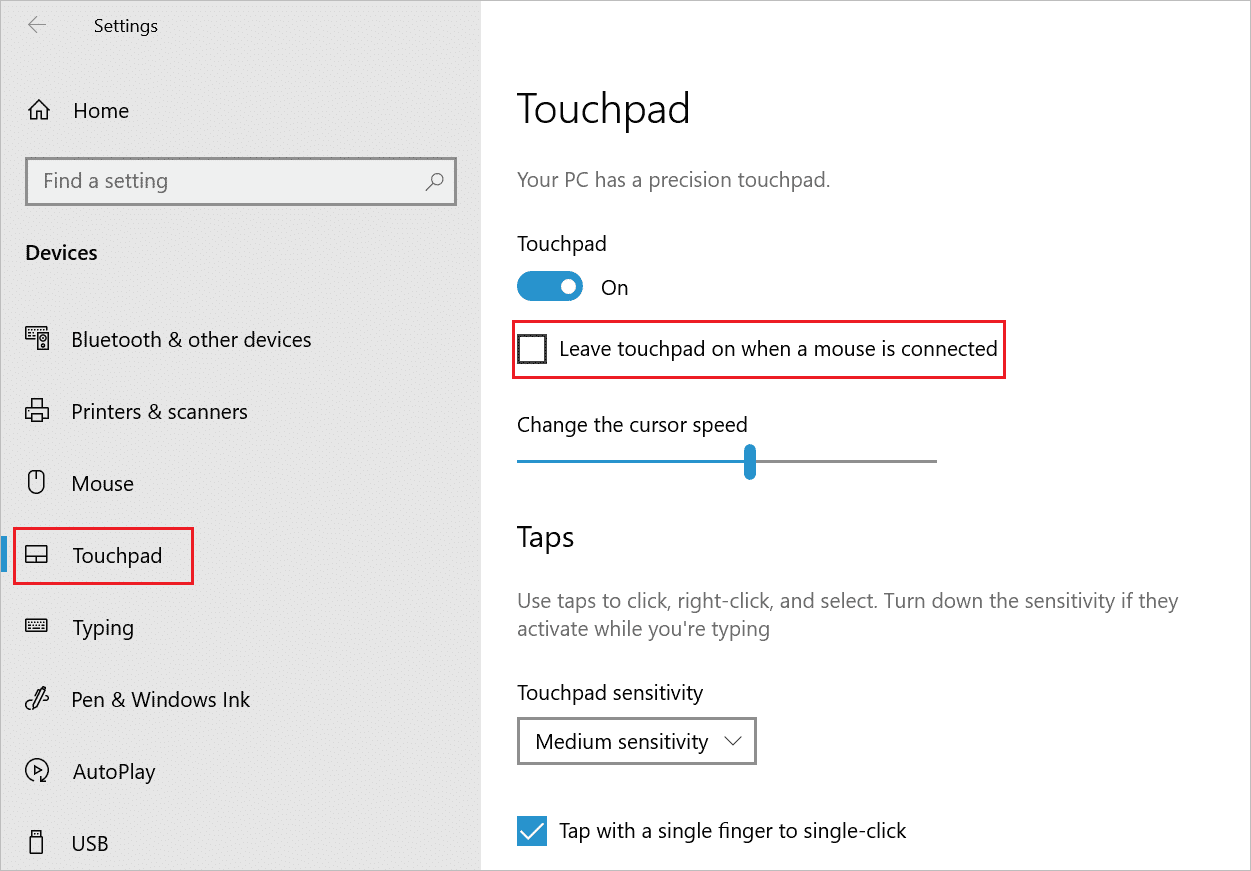
If you are a beginner looking for how to disable touchpad in Windows 10, using the Settings app method is the best choice as it gets the work done without creating much hassle.
Note: If you don’t find this touchpad setting on your laptop, it means your laptop doesn’t have a precision touchpad. In such a case, you can move on to another way to disable the touchpad.
4. Use Touchfreeze To Disable The Touchpad

Touchfreeze is a freeware tool you can use to disable the touchpad with a few clicks. It is an extremely handy software if you wish to avoid the accidental changing of the mouse cursor that arises when you are typing.
Touchfreeze comes with a scarcity of features but does its job extremely well. It locks the touchpad for a set time. After you are done with the typing work, you can unlock your touchpad.
In case you wish to use both touchpad and the mouse but want to block the former for selective purposes, using Touchfreeze is a good option to go with. Also, in times when your mouse is creating problems by freezing up frequently, you can use Touchfreeze to enable the trackpad and continue with the navigation.
5. TouchPad Blocker
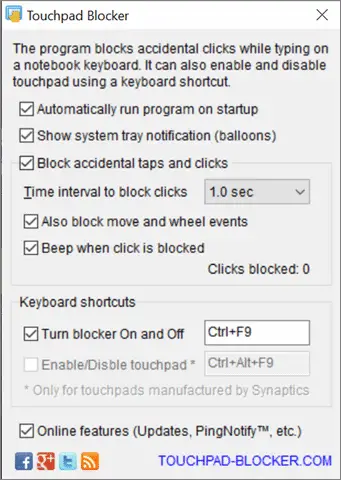
Similar to Touchfreeze, Touchpad Blocker also blocks the trackpad from becoming a hindrance while typing. Basically, it blocks clicks so that the cursor doesn’t change its position involuntarily due to accidental clicks.
Also, TouchPad Blocker can block clicks by a regular mouse while typing. Unlike Touchfreeze, it offers certain customizations to the users. You can select the time-intervals to block the clicks and also know the number of blocked clicks by using this application. TouchPad blocker can also be turned on and off using a hotkey.
6. Disabling Touchpad Using Device Manager
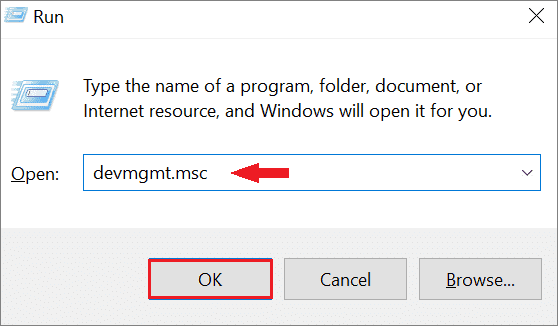
It is also possible to disable touchpad using the native Device Manager. To start with, you have to open the Device Manager.
Press Win Key + R to open the Run command. Type devmgmt.msc and click on OK.
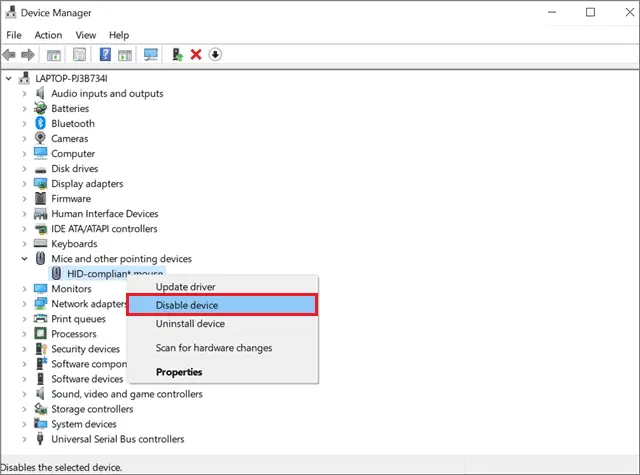
After the Device Manager opens, expand Test (if it’s not already), and then expand Mice and other pointing devices to see HID-compliant mouse entries.
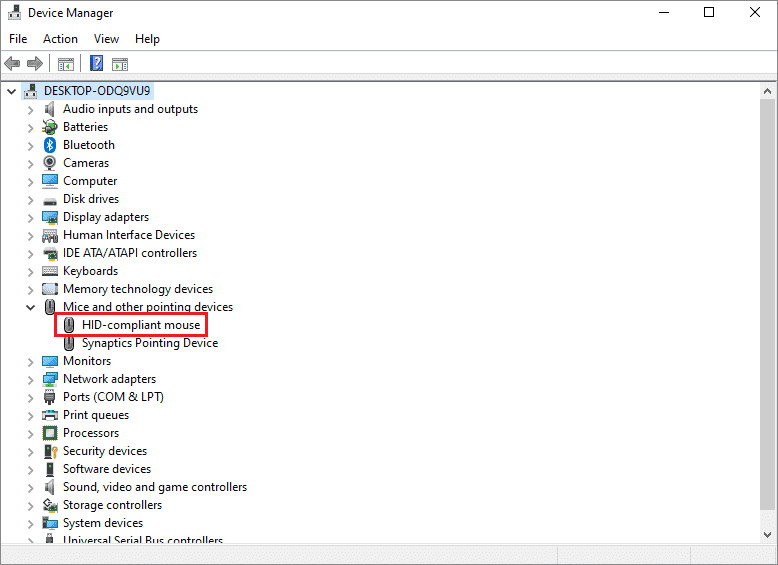
Now, right-click on the first HID-compliant mouse and select Disable.
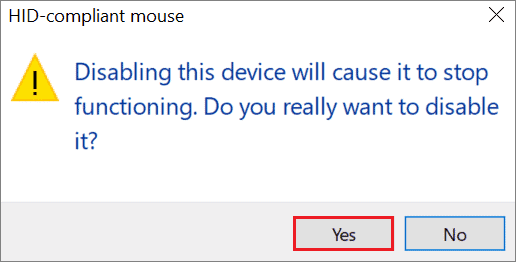
Click Yes in the dialog box that shows up. This will do the trick and disable the touchpad.
However, if the touchpad is running even after you have disabled the first option, try the one below it. It’s just a trial and error case.
7. Disable the touchpad with registry editor for Synaptics
Synaptics is a California-based company that is known for making pointing devices such as touchpads and touchscreens. Disabling the Synaptics driver can stop your touchpad from working. You can disable Synaptics touchpad via the Registry editor. We recommend backing up the Registry editor before making any changes, as it stores crucial Windows 10 settings and data.
This is another method that will help you to disable the touchpad when you connect a mouse.
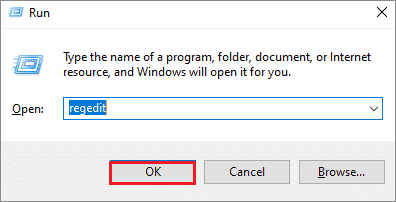
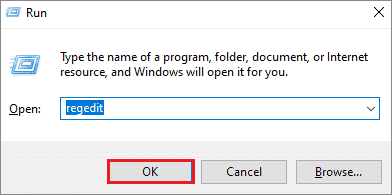
To start with, press Windows Key + R to open the Run function. Then, type regedit and hit OK.
After the registry opens, navigate to this path:
HKEY_LOCAL_MACHINESOFTWARESynapticsSynTPEnh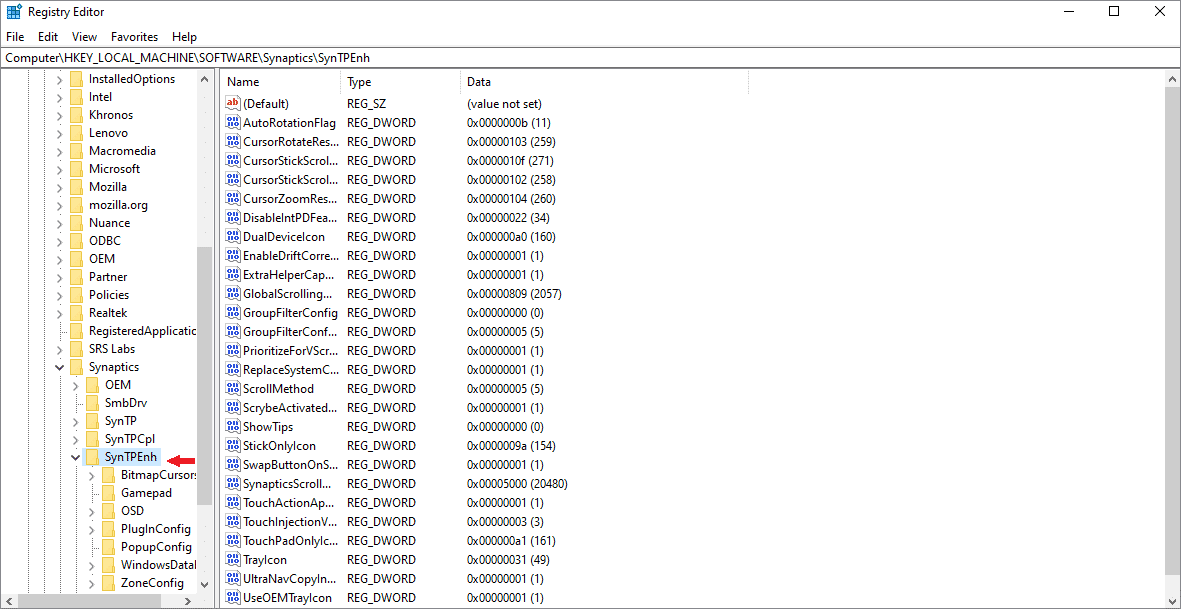
Now, locate the DisableIntPDFeature file. Once found, right-click on it and press the Modify option.
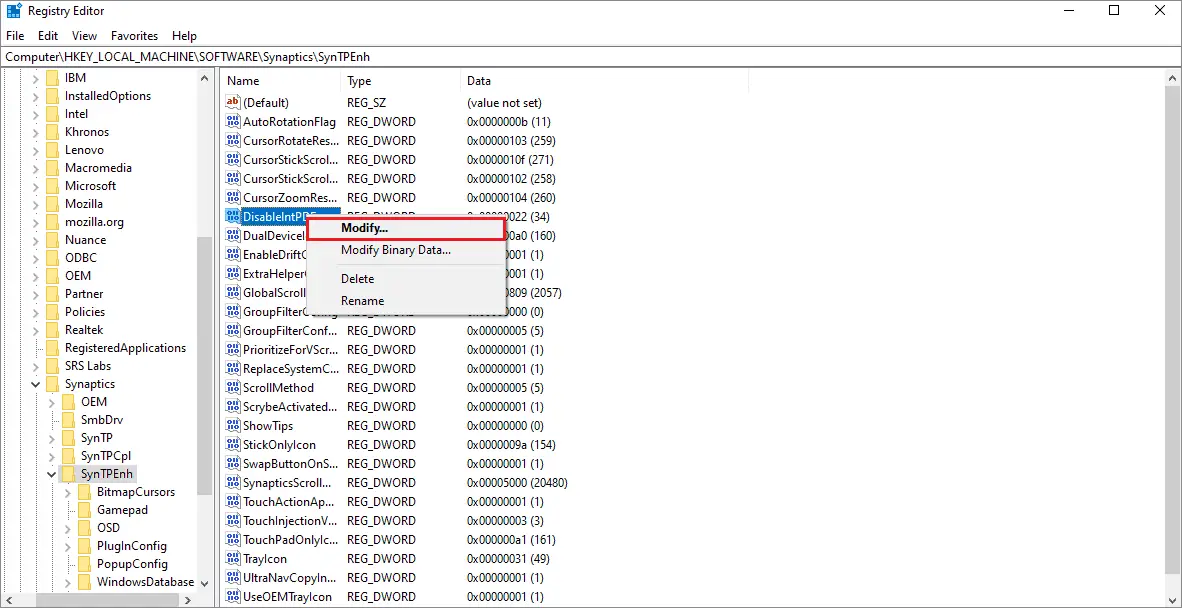
Now, set the value to 33 and select Hexadecimal as the base. After clicking OK, reboot the computer and see the effect.

If executed correctly, this method will enable the users to disable the trackpad and continue their navigation with the help of a mouse. Even though it has a lengthy process, the registry editor method does work well if executed correctly.
8. Disable the touchpad using registry editor for Elantech
Elantech is a software company that provides drivers for machines that require human interfaces such as touchpads, mice, and keyboards. Some users are unable to find options to disable touchpad in Windows 10 on their respective laptops. In such cases, one can always disable it via the registry by using it for Elantech.
Note: You need to have an Elantech touchpad to disable the touchpad using this way.
First, open the registry editor. To do so, open the Run command from the Cortana search bar. Type regedit and press enter.
Now, go to
HKEY_CURRENT_USERSoftwareElantechOthersettingDisableWhenDetectUSBMouseKey in the left pane.
After you have arrived at this location, click on DisableWhenType_Enable. Change the value from 0 to 1 and close the registry editor. Click OK and reboot the computer to see the effect.
Conclusion
The touchpad can be an unnecessary hindrance while typing. However, the solutions presented above can help a user in disabling it for a set period of time and then enable it manually. The choice of solution to go with totally depends upon the user. If you do not wish to waste time to disable a touchpad, you can go for Touchfreeze or TouchPad Blocker. However, these applications do not necessarily run on every laptop.
On the other hand, using the registry editor method to resolve the issue is bound to give guaranteed results. However, it is a bit complicated and can consume time. Irrespective of the recommendations, users can choose to disable touchpad in Windows 10 as and when they find it convenient. Make sure your touchpad doesn’t stop working permanently while making changes in the settings.
(Updated on 2nd February 2021)


