You hear people raving about it all the time, “The cloud, the cloud,” and for good reason. The cloud is like magic, letting you access your files anywhere, from any device.
Now it’s possible to access your Windows Desktop, everything from your program shortcuts, Word files, web links and whatever else you store there, from the cloud, and you can put it in the cloud using Microsoft’s free program, OneDrive.
Our guide will outline how to make your Windows Desktop available anywhere by syncing it with OneDrive.
See Also: How to Sync Windows Sticky Notes Across PCs With Google Drive, Dropbox or SkyDrive
Get OneDrive
If you haven’t yet, as it’s not standard software with Windows, you’ll need to install OneDrive before syncing your Desktop. To get the software, go to the OneDrive download page and grab the software for your version of Windows.
Note: OneDrive is not available for Windows XP.

While installing, OneDrive will prompt you to create a new account if you don’t already have one. Go ahead and create an account using your email address from any provider – Yahoo, Gmail or Outlook.com – as your OneDrive username.

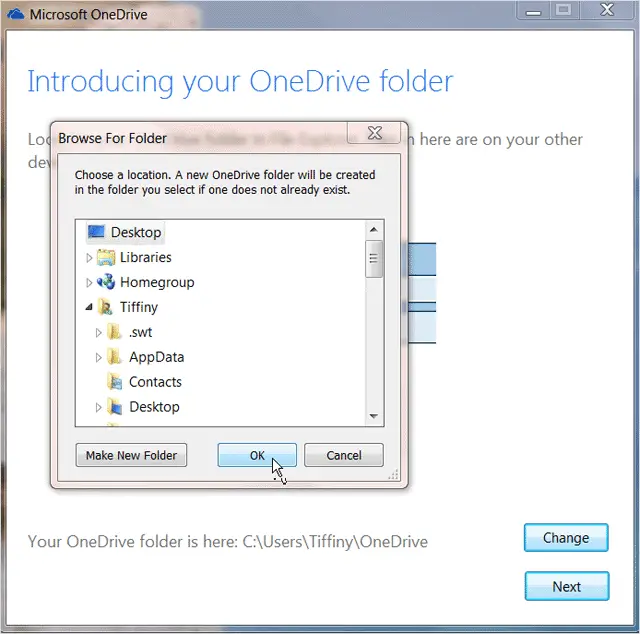
After creating an account, OneDrive will finish installing and will add an “OneDrive folder” to your computer in the “File Explorer” area by default. You can however change the folder location for easier access.

Sync Your Desktop to the Cloud
Now with OneDrive installed and ready to go, you’re ready to sync your Desktop to the cloud with your OneDrive folder.
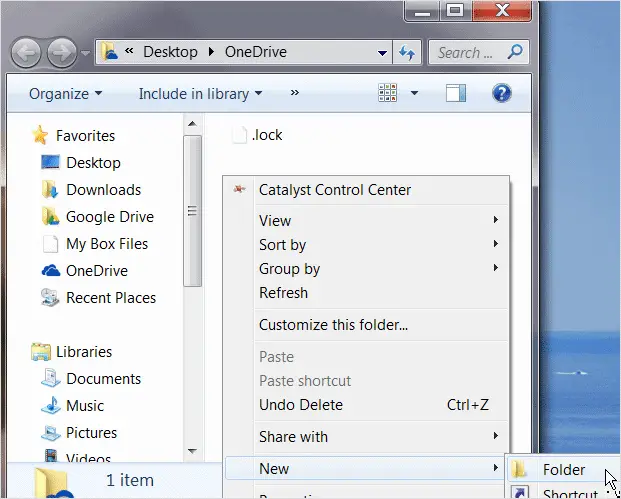
The first step in syncing your Desktop is “Opening your OneDrive folder” from wherever you’ve decided to store it. After opening it, right-click in the white space in the center of the folder, select “New,” then click to add “New folder.”
See Also 5 Simple Tips For a Better Looking and Organized Desktop
After adding a new folder to your OneDrive account, rename it to something àpropos, such as “Desktop.”
After renaming your new folder, if you have Windows 7 go to “Computer > Users > [your username] > Desktop” to use “File Explorer” to access your Desktop folder.
Once you find it, “right-click the Desktop icon” and select “Properties.”
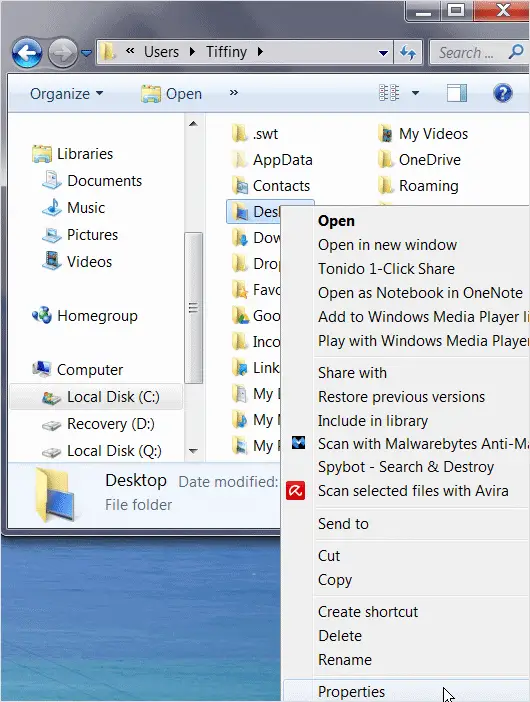
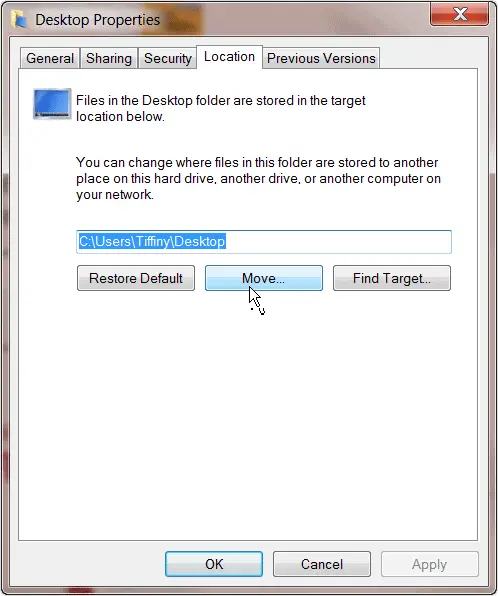
Next, the “Desktop Properties” dialog window will load. Click the “Location” tab, and at the bottom click “Move.”
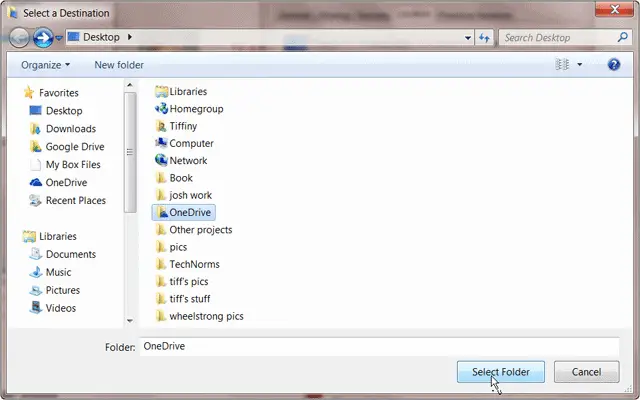
Next, another dialog window will load. Select the “OneDrive folder” on your Desktop, then click the “Select Folder” button.
To finalize sending your Desktop data to the cloud, click “Apply” then “Ok” in the last window.
Once done, login to your OneDrive account from another device, such as your phone or tablet, to check if the data from the desktop is synched across the devices.

Conclusion
Formally known as SkyDrive, the Desktop syncing with OneDrive is seamless and easy. You can set it up in minutes, and it offers a great way to get access to your main work area so-to-speak. Don’t forget – synching to your Desktop is also available with other programs such as Google Drive and Dropbox. For anyone frequently on the go and uses multiple devices, Desktop data syncing is a good idea.
Check out: OneDrive
For more information on OneDrive, check out our post – Windows 8.1 Introduces True SkyDrive Integration – Here’s Everything You Need To Know.


