You can use the Windows Snap layout option to choose from predefined layouts to arrange your apps on the screen. You will find the same in Windows 10, but in Windows 11, features like Snap layouts are more sophisticated and innovative. But if you encounter the Snap layouts not working in Windows 11 issue, you may get it working so you can multitask effectively.
If the layouts don’t work on Windows 11, ensure that Snap layouts are enabled on your Windows 11 PC. It must usually appear when you hover over the Maximize icon of an app. If it does not, make sure you have met the minimum requirements to install Windows 11 in the first place. Since Windows 11 is still in its initial stages, users even report Snap layouts missing on touchscreens, which may hopefully be taken care of in the future.
How To Fix Snap Layouts Not Working In Windows 11
There are many ways to fix Snap layouts not working in Windows 11, as detailed below. But sometimes, you may need to clean install the Windows operating system to get the latest build. But before that, try these solutions and see if you can reveal the Snap layout options.
1. Re-Enable Snap Layouts
Re-enabling a non-working feature can sometimes breathe life into it, like restarting your computer. If you have the Snap layouts not working in Windows 11 problem, try re-enabling it to make it work.
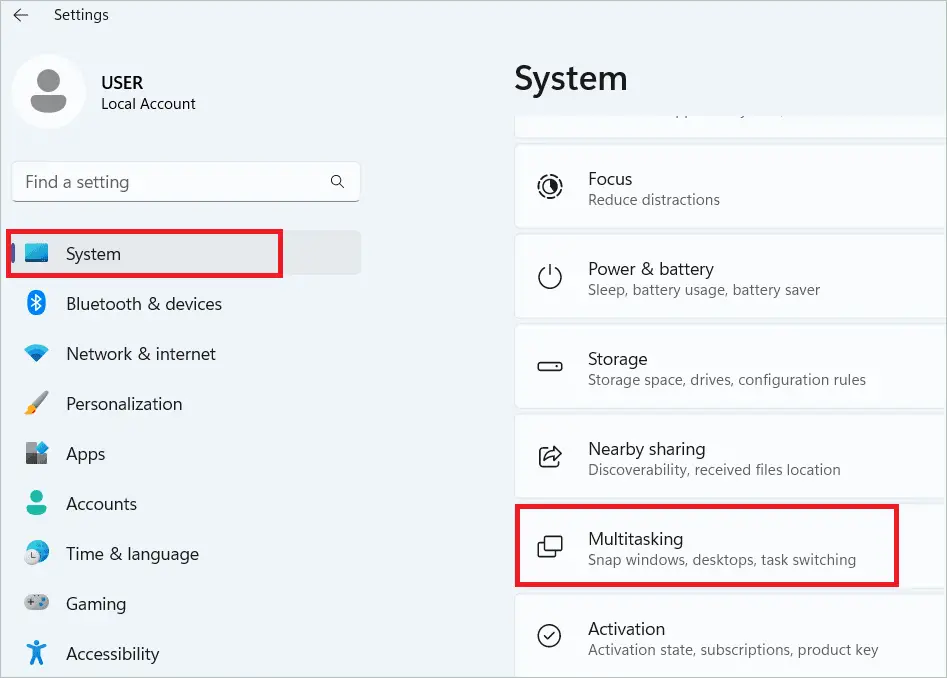
Press the Windows key + I to open Windows Settings and select System > Multitasking.
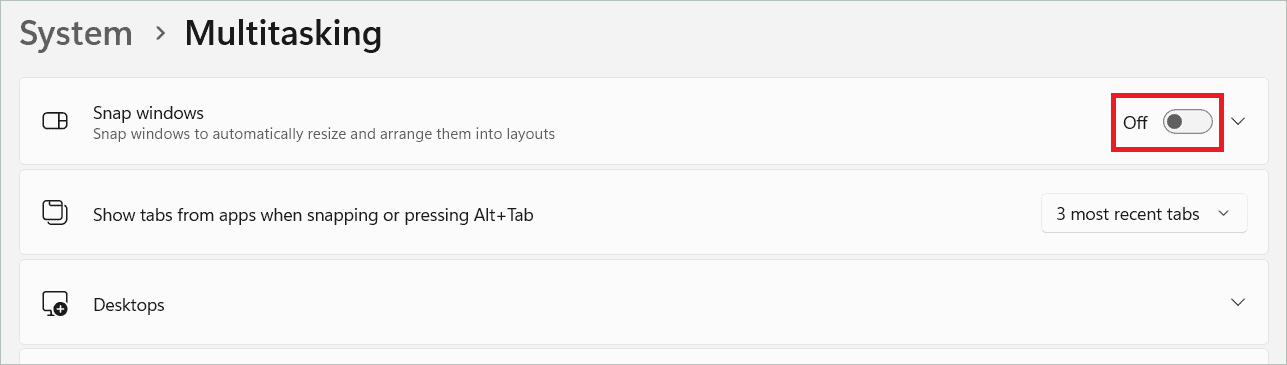
Toggle off “Snap windows” to disable the Snap layouts feature.
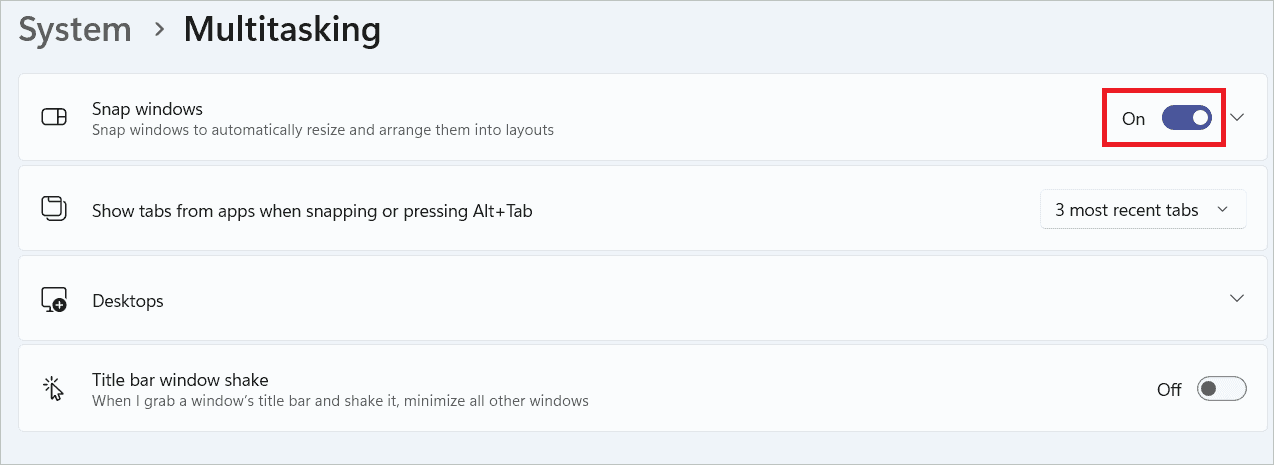
Next, toggle on “Snap windows” to enable the Snap feature again.
You should now be able to use the layouts on your PC.
2. Enable Snap Layouts Via Registry
Windows Registry is an integral part of the Windows OS, which helps change some system settings. You can solve the Snap layouts not working in Windows 11 by instantly enabling Snaps layouts on Windows using the Registry Editor.
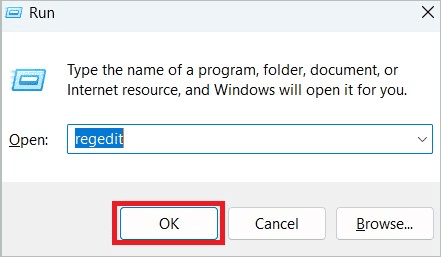
Press the Windows key + R to open Run. Type “regedit” and click “OK”.
Paste the following path into the address bar and press Enter.
Computer\HKEY_CURRENT_USER\Software\Microsoft\Windows\CurrentVersion\Explorer\Advanced
Right-click on an empty space on the right side, select New > DWORD (32-bit) Value, and name it EnableSnapAssistFlyout.
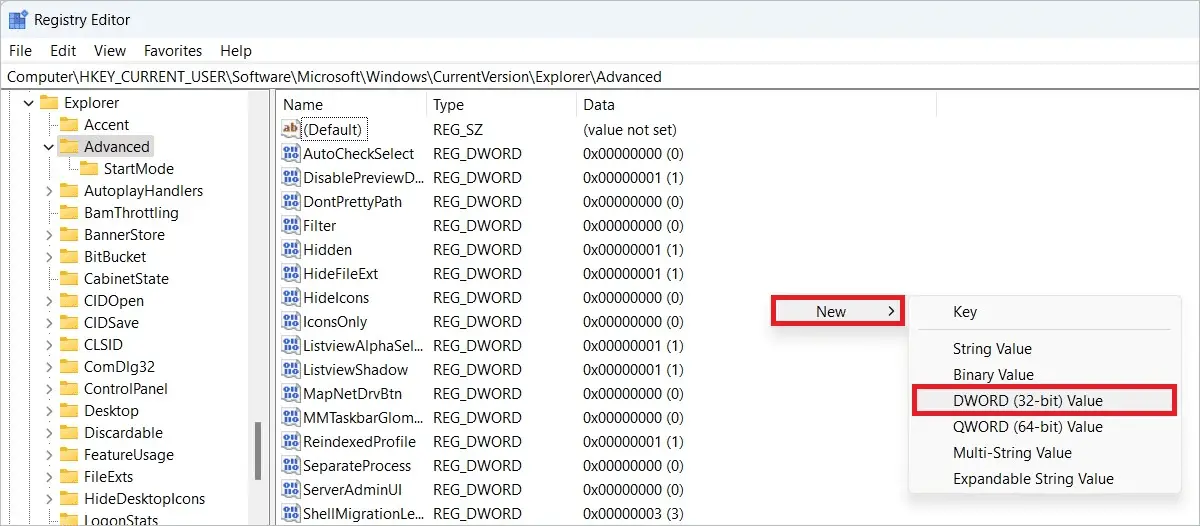
Double-click on EnableSnapAssistFlyout, enter 1 in the Value data field, and click “OK”. Then, close the Registry Editor and restart your computer to see if you get the default Snap layouts experience.
3. Change Screen Resolution
If you can see only four Snap layouts, you are one of those users who have selected lower screen resolutions. This can be one of the reasons you are facing the Snap layouts not working in Windows 11. You can increase the screen resolution by following the below steps.
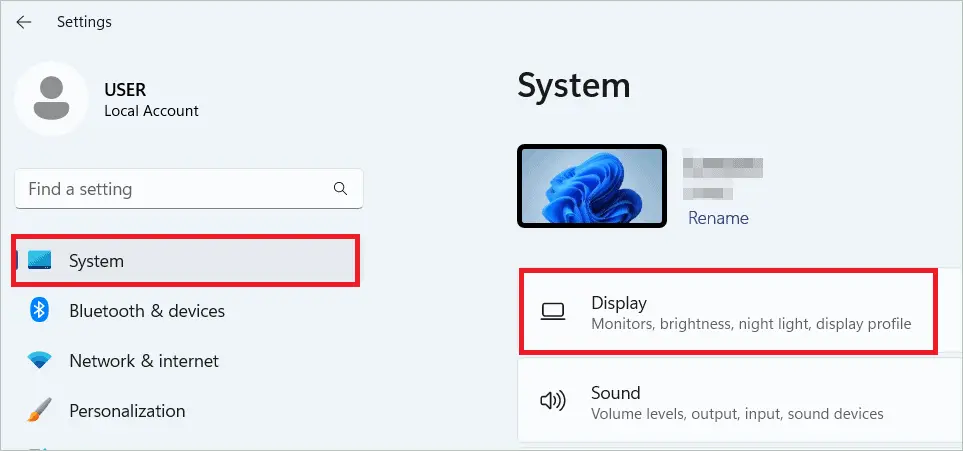
Press the Windows key + I to open Settings and select System > Display.
Locate Display resolution under Scale & layout and select the highest screen resolution in the drop-down box near it.
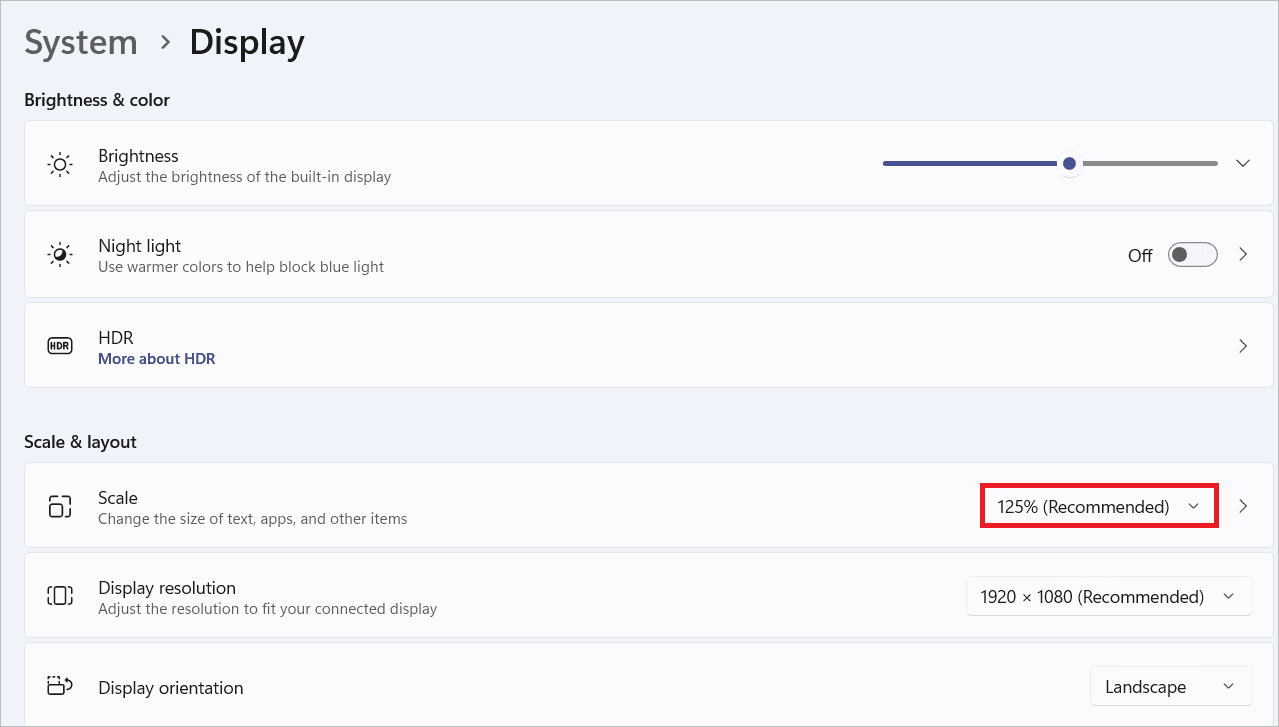
Now, the feature should work fine.
4. Use Keyboard Shortcuts
Some users reported that they could not access the Snap layouts by hovering the mouse over the Maximize button of an app. This could be due to some issue with the GUI. Instead, you can view the layouts using the Windows key + Z shortcut. Below are the keyboard shortcuts you can use to snap apps into position.
Windows Key + Left Arrow key: The app positions on the screen’s left side
Windows Key + Right Arrow key: The app positions on the screen’s right side
Windows Key + Up Arrow key: The app positions on the top of the screen
5. Ensure That The App Is Compatible With Snap Layouts
Unfortunately, not all apps are compatible with Snap layouts. While the apps from Microsoft can use the feature without any issue, some third-party apps installed on Windows aren’t compatible with Snap layouts. If you face Snap layouts not working in Windows 11, it could be because these apps are incompatible with Snap layouts.
Some apps like Spotify have their own rules regarding resizing. As a result, they don’t snap into positions you decide so they can continue having optimum performance. Keep an eye out for apps that don’t go with Snap layouts.
6. Update Windows 11
Microsoft brings many updates to Windows 11 and its features frequently. If the Windows 11 Snap layouts not working issue persists, it could be due to some pending updates. Once you install the updates, the feature might kick-start again.
Press the Windows key + I to open Settings and select “Windows Update” in the left pane. On the right, click the “Check for updates” button.
The pending updates will be listed now, which you can install by clicking the “Download & install” button.
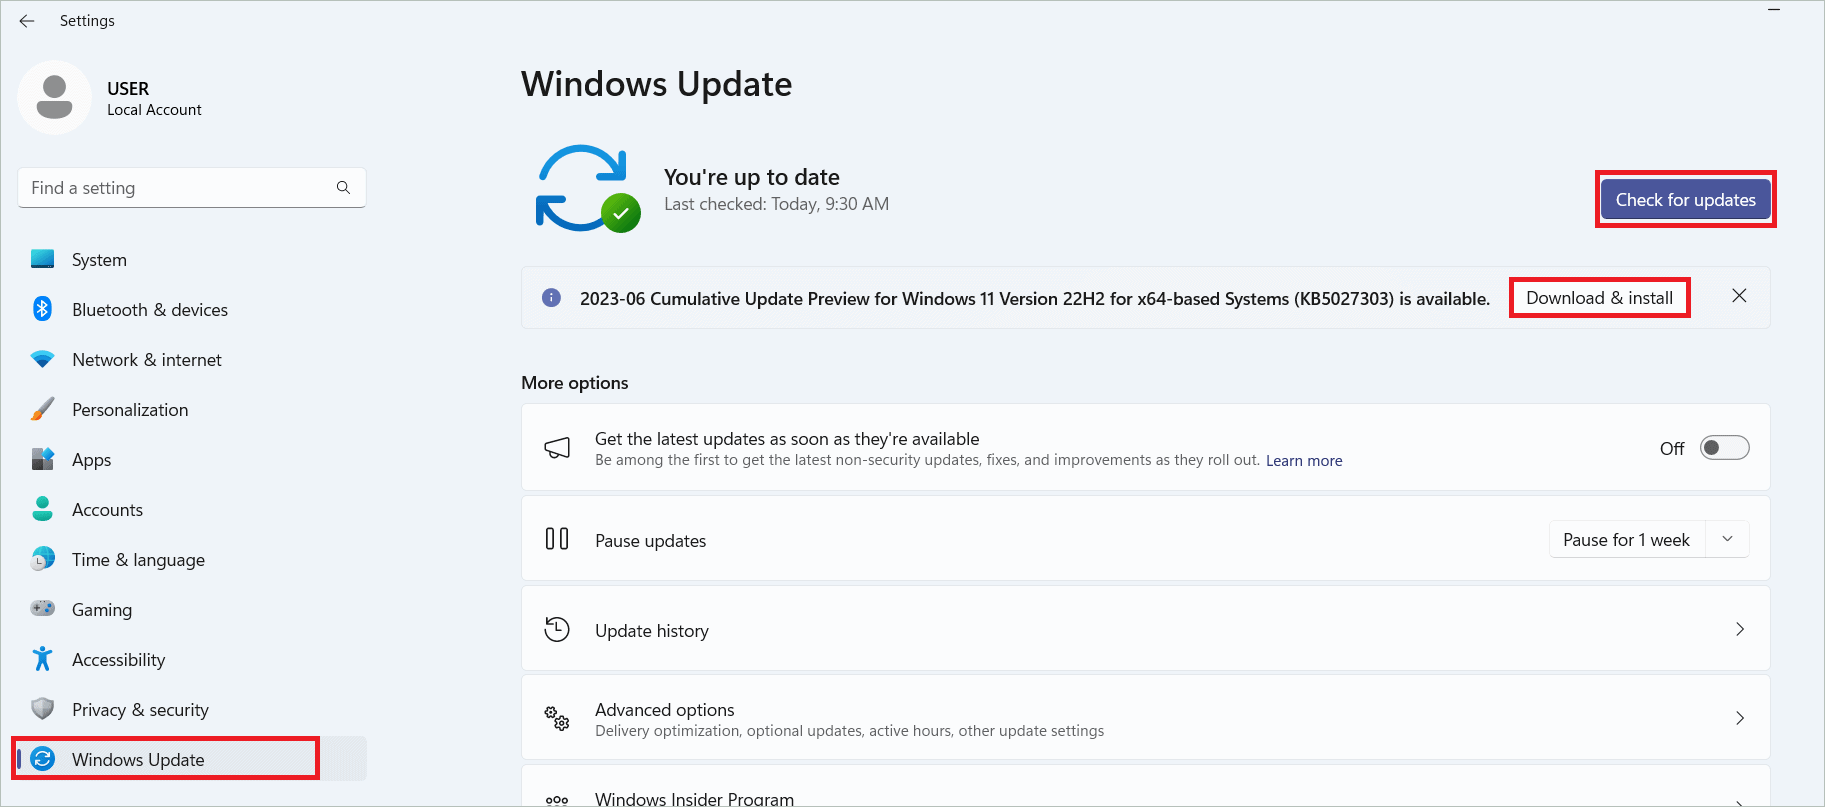
Check if the issues with Snap layouts still persist.
7. Run Troubleshooter
If updating Windows 11 did not help solve the Snap layouts not working in Windows 11, you can use the troubleshooter to identify the issue. The update troubleshooter helps rectify issues with updating.
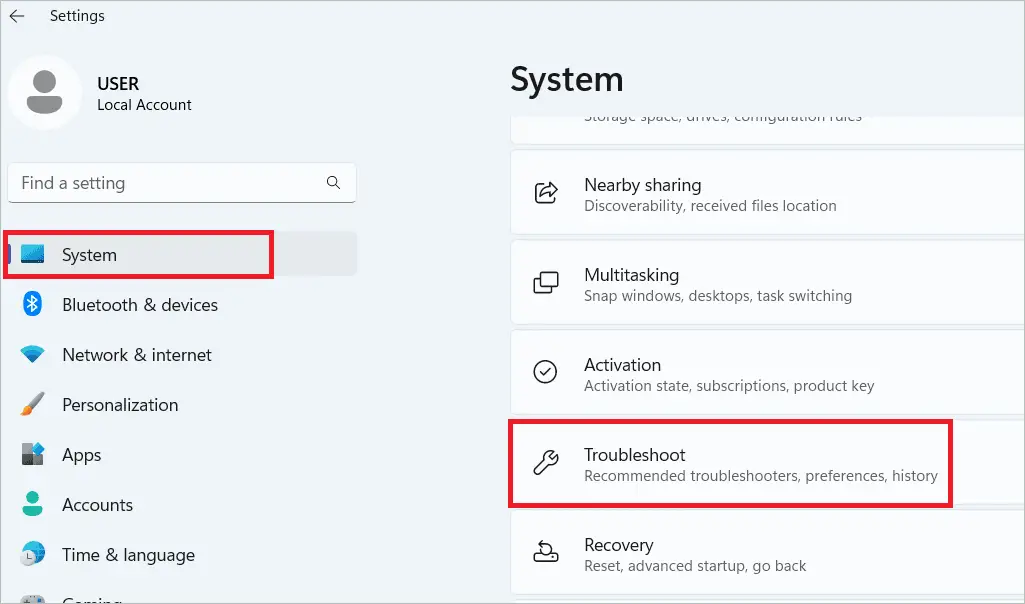
Press the Windows key + I to open Settings and select System > Troubleshoot.
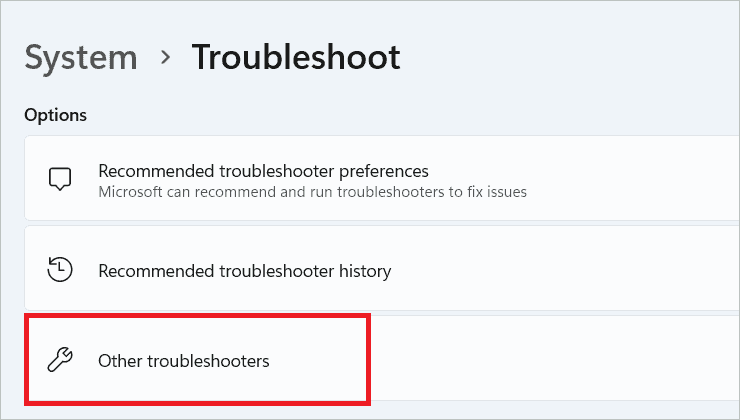
Next, select “Other troubleshooters”.
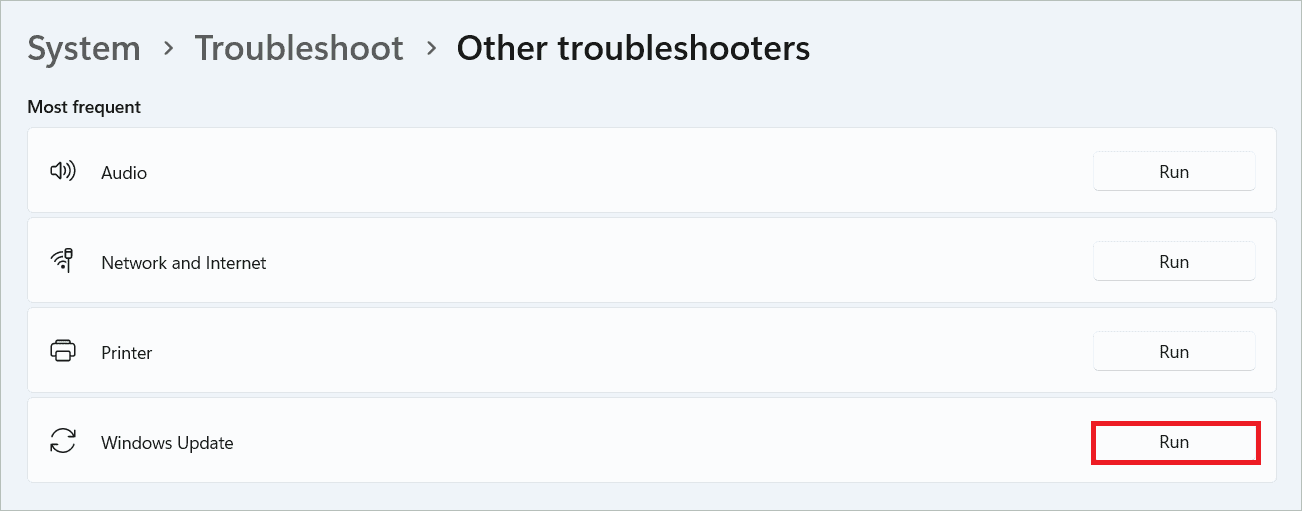
Click the “Run” button near Windows Update.
Apply the fixes recommended by the troubleshooter, and the Snap layout on your PC will work again.
8. Remove Similar Apps
Many similar apps like FancyZones and PowerToys let you choose layouts and use them. The apps that offer similar functionality may conflict with the built-in Snap layout feature and create issues. You may remove them and see if the Snap layouts on Windows work well.
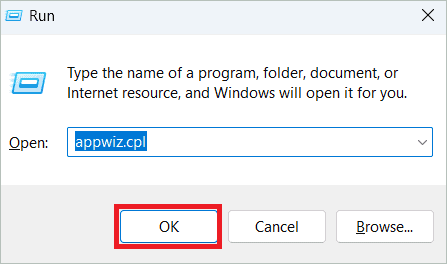
Press the Windows key + R to open Run. Type “appwiz.cpl” and click “OK”.
Locate the app you want to remove, right-click on it and select “Uninstall”.
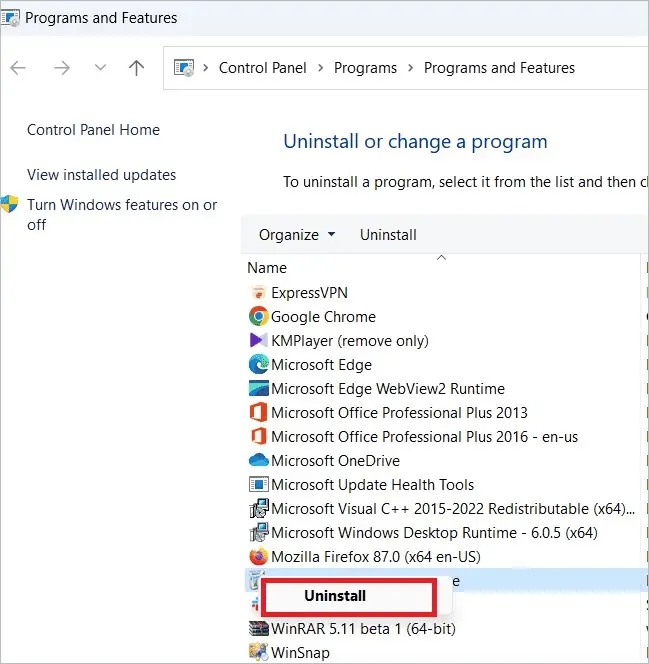
Once the app is removed, check if the Snap layout is working.
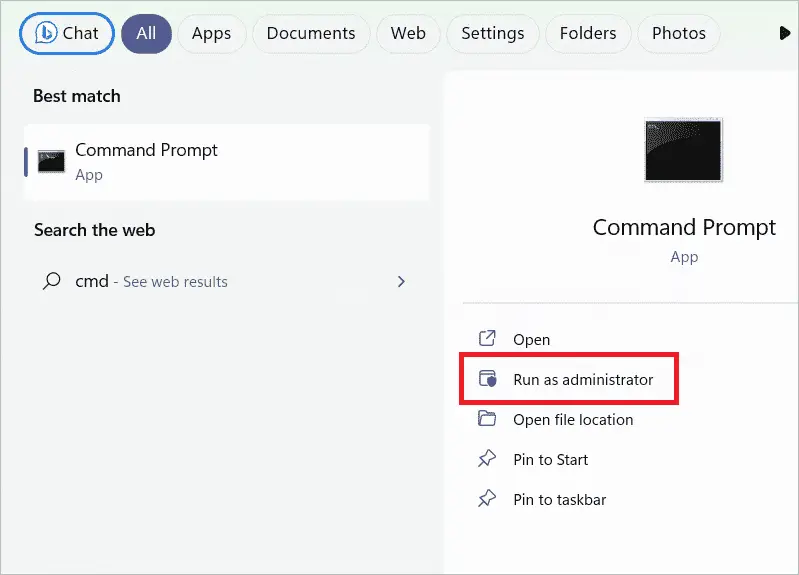
9. Run SFC And DISM Scan
If corrupted system files are behind the Snap layouts not working in Windows 11 issue, running SFC and DISM scans can help. The scans mend the system files and eliminate all issues related to them.
Type “cmd” in the search bar and select “Run as administrator” to open the Command Prompt with administrative privileges.
Paste the following command in the Command Prompt windows and press Enter.
DISM.exe /Online /Cleanup-image /Restorehealth
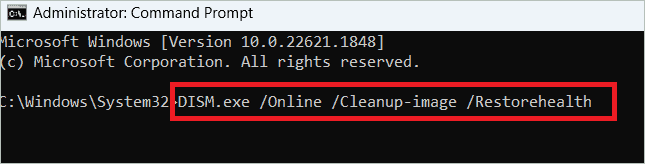
Now, paste the following command and press Enter.
SFC /scannow
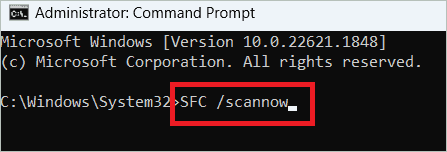
Once the commands are executed, try using Snap layouts.
10. Fix For Firefox Incompatibility
For many Firefox users, the Snap feature does not show when using the browser. But you can do some customizations in the browser settings and make Snap layouts work.
Open Firefox, right-click on the toolbar, and select “Customize Toolbar”.
Check the “Title Bar” box, and you will now find Snap layouts when you try to open them.
11. Reset PC
Resetting your PC will return it to the default settings. In many cases, this has resolved the Snap layouts not working in Windows 11 problem. This is also found to improve system performance. So, here are the steps to reset your PC.
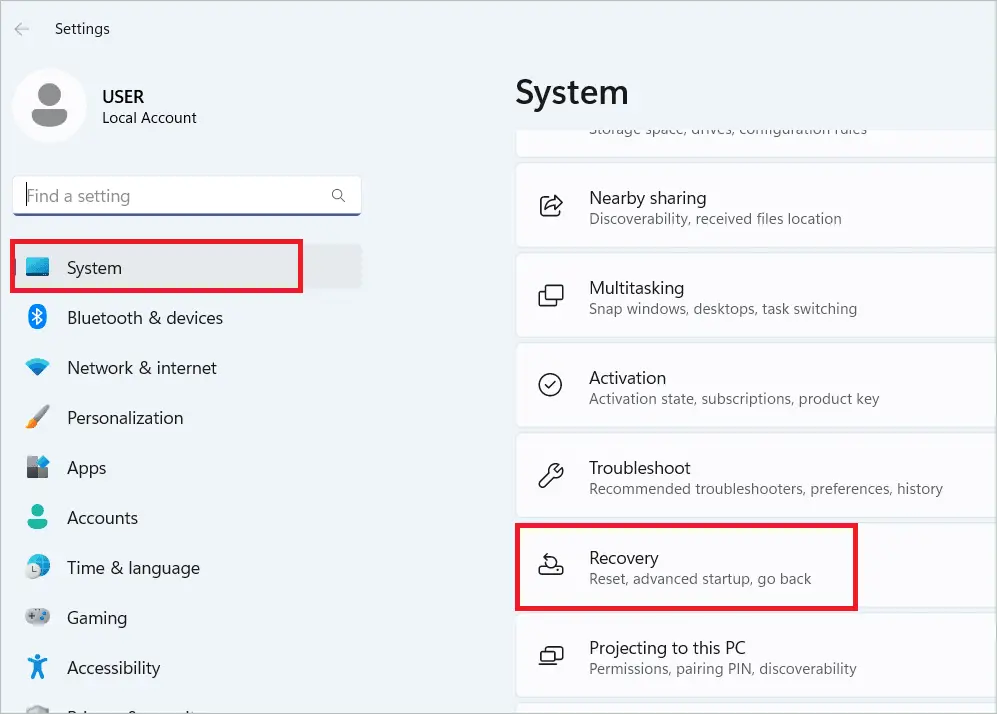
Press the Windows key + I to open Settings and select System > Recovery.
Click the “Reset PC” button near Reset this PC under Recovery options.
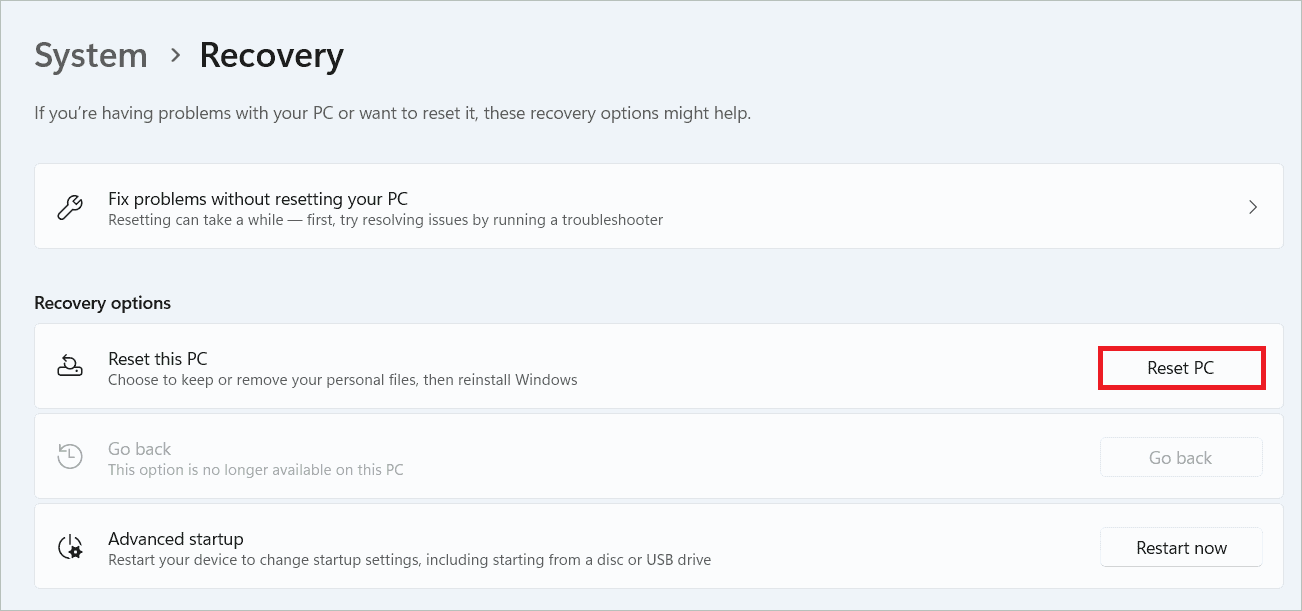
You may then follow the on-screen instructions to reset the PC and view the layout options on your desktop.
Final Thoughts
If you have been using Windows 11 for some time now, you may know that when you turn on Snap layouts, you can hover over the Maximize button and view the available Snap layouts. But for various reasons, you may face the Snap layouts not working in Windows 11 issue.
The article gives various fixes to get the Snaps layouts function working for Windows 11 users. Whether you’re only getting four layouts or can’t access the Snap layouts, the solutions act as a guiding light to troubleshoot the issue. Once the feature works fine, don’t forget to customize Snap layouts from your Settings app.


