The Local Security Authority protection is part of your Windows security and offers protection to the user credentials. But many users face the Local Security Authority protection is off on Windows 11, your device may be vulnerable error. And this is the case even when the LSA protection feature is enabled on your device.
Microsoft places a lot of importance on the security of Windows 11 users and has many security features for additional protection. The local security protection feature is enabled by default in Windows 11, including Windows 11 Home. But the bug first emerged with the latest Windows update in March 2023. It is essential to fix the issue as soon as possible to ensure your private data remains safe. If you know how to factory reset Windows 11, trying it is also a good option to fix the LSA issue.
How To Fix Local Security Authority Protection Is Off On Windows 11
If Local Security Authority protection is off on Windows 11, the first thing you must do is to ensure that the LSA protection is enabled. There are many ways to turn on the LSA process. You will find all those methods here, so let’s get started.
Turn On LSA In The Windows Security Application
If Local Security Authority protection is off on Windows 11, the first thing that you must try is to enable the feature in the Windows Security app. The application has tools that keep your device and data safe. So, here is how you can toggle on the feature manually.
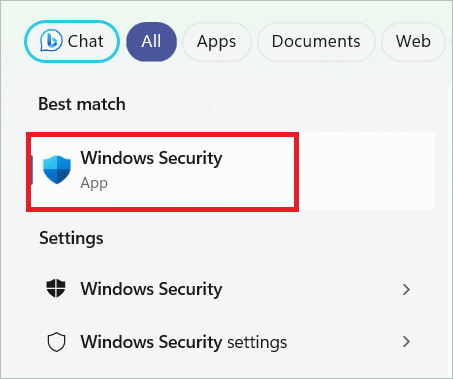
Type “windows security” in the search bar and open the app when it appears in the search results.
Select “Device security” on the left pane. On the right, select “Core isolation details” under Core isolation.
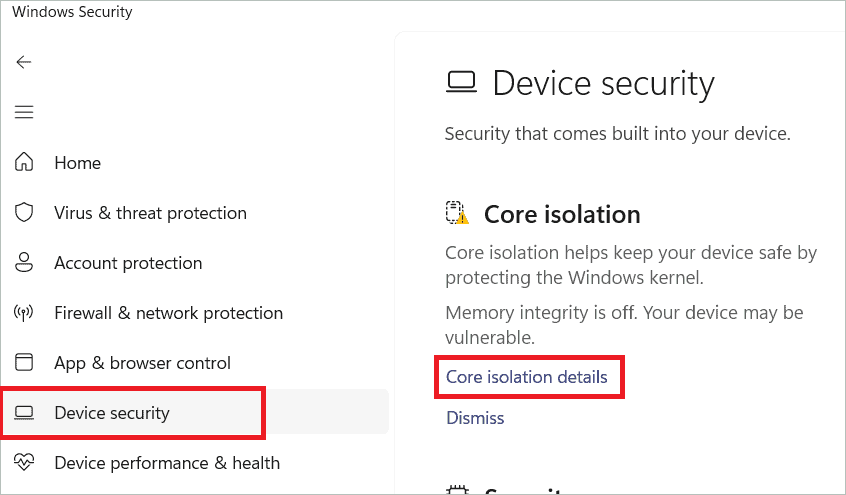
Under Local Security Authority Protection, toggle the switch on to enable the feature if it is disabled.
Turn On LSA Via Windows Registry Editor
Changing Registry entries to enable LSA can also be an excellent fix for Local Security Authority protection is off on Windows 11. Remember to take a backup of the Registry or create a Restore Point to be safe.
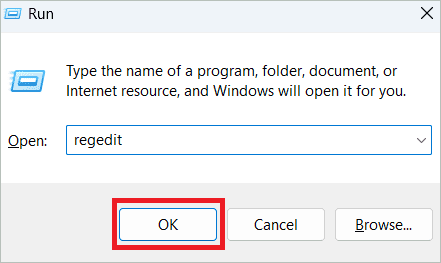
Press the Windows key + R to open Run. Type “regedit” and click “OK”.
Paste the following path in the address bar and press Enter.
Computer\HKEY_LOCAL_MACHINE\SYSTEM\CurrentControlSet\Control\Lsa
Double-click on “RunAsPPL”, enter 1 or 2 in the Value data field, and click “OK”. If the entry doesn’t exist, right-click on an empty space, select New > DWORD (32-bit) Value, and name it RunAsPPL. You may then edit its value as explained above.
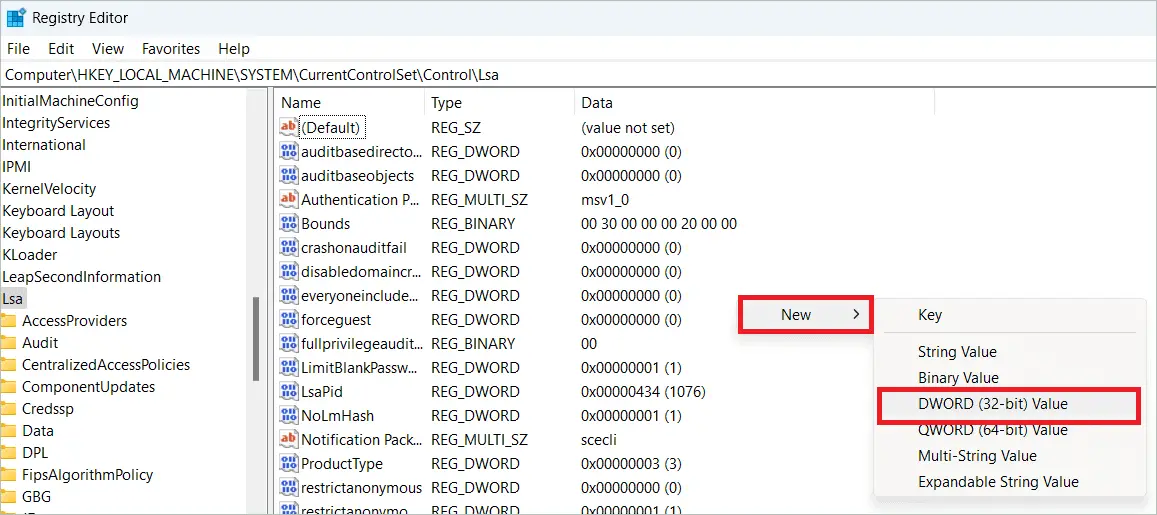
Next, click on an empty area, select New > DWORD (32-bit) Value, and name it RunAsPPLBoot. Double-click on the newly created entry, enter 1 or 2 and click “OK”.
Finally, restart your computer for the changes to apply.
Turn On LSA In Local Group Policy Editor
Local Group Policy Editor is yet another place you can go to fix Local Security Authority protection is off on Windows 11. Some changes in the settings here should make the feature work fine. Let us see how.
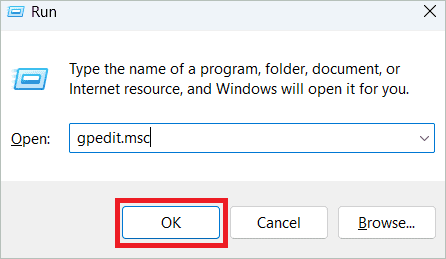
Press the Windows key + R to open Run. Type “gpedit.msc” and click “OK”.
Paste the following path in the address bar and press Enter.
Computer Configuration\Administrative Templates\System\Local Security Authority
On the right pane, double-click on “Configures LSASS to run as a protected process”, and select the “Enabled” radio button.
Under Options, select “Enabled with UEFI Lock”. Click “Apply” and “OK”, and restart your PC.
Turn On LSA Using PowerShell
If you want to fix Local Security Authority protection is off on Windows 11 in a couple of commands, you can use the PowerShell utility. These commands enable LSA for you.
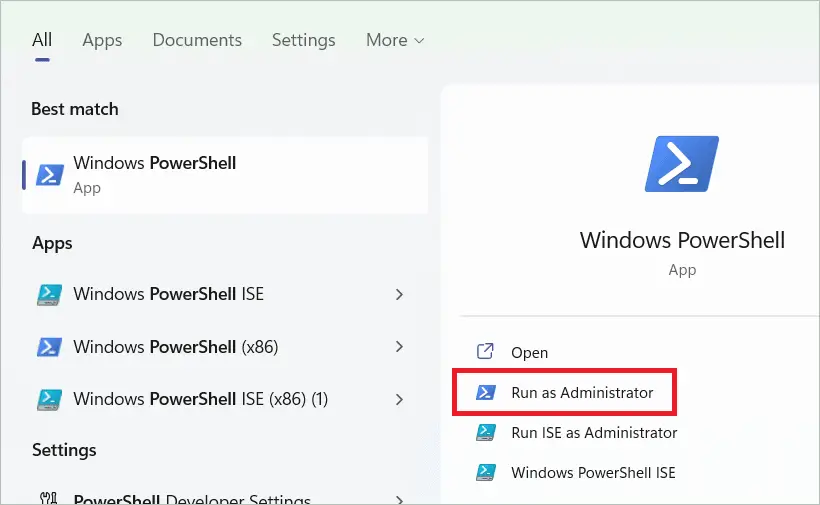
Type “powershell” in the search bar and open PowerShell by selecting “Run as administrator”.
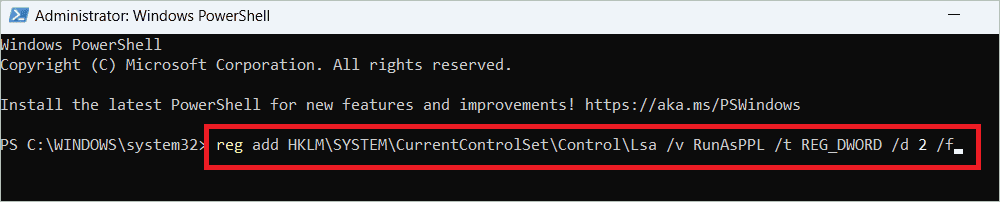
Copy the following command into the PowerShell window and press Enter.
reg add HKLMSYSTEM\CurrentControlSet\Control\Lsa /v RunAsPPL /t REG_DWORD /d 2 /f
Now, execute the following command.
reg add HKLM\SYSTEM\CurrentControlSet\ControlLsa /v RunAsPPLBoot /t REG_DWORD /d 2 /f
A system restart is required after running the commands.
Run SFC And DISM Scans
Even though LSA is enabled, you may find Local Security Authority protection is off on Windows 11. Some users have found a solution by running SFC and DISM scans. Here is how to do it.
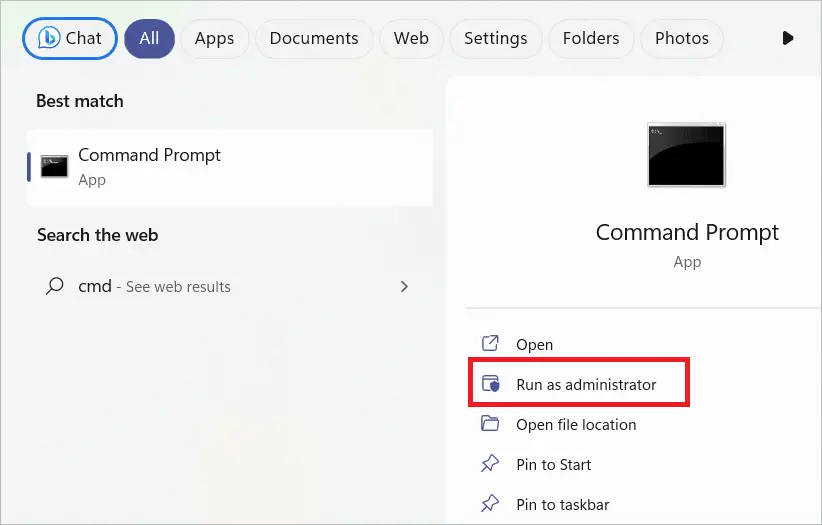
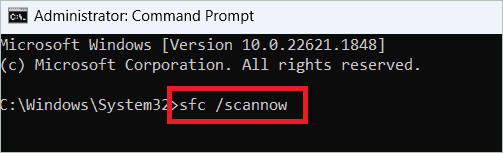
Type “cmd” in the search bar and open Command Prompt by selecting “Run as administrator”.
Paste the following command in the Command Prompt window and press Enter.
sfc /scannow
Execute the following commands to run the DISM scan.
DISM /Online /Cleanup-Image /CheckHealth
DISM /Online /Cleanup-Image /ScanHealth
DISM /Online /Cleanup-Image /RestoreHealth
Final Thoughts
Local Security Authority protection is an important Windows process that keeps hackers, attackers and other cyber criminals at bay. But you may often see a yellow triangle over the Windows Security icon with a notification saying that Local Security Authority protection is off on Windows 11.
The issue popped after latest updates to the OS and is persistently creating issues for users, by compromising user’s identity and personal data like passwords. But you can keep your Windows 11 PC safe by enabling Local Security Authority protection in Windows 11. The article gives you several workarounds to save the situation.


