Network-related issues are common in Windows 10, and there are many ways you can fix them. You can use Windows 10 built-in network troubleshooter, and if that doesn’t work, you can reset network settings. People opt for network reset as the final resort to get rid of network connection issues and errors like can’t connect to this network.
Network reset was introduced by Microsoft in Windows 10 version 1607, which was the Anniversary Update of Windows 10. This feature helped people resolve network issues with one click, but it does have consequences. You can refer to the next section to know what network reset does.
What Happens When You Reset Network Settings?
When the network reset is performed on Windows 10 computer all the network-related settings are restored to default. The network components like TCP/IP and Winsock are reverted to the default settings, so if you have made any changes to these components we recommend taking a note of it before proceeding.
Network reset also reinstalls the network adapter drivers and removes all the Wi-Fi and Ethernet connections along with VPN connections. It will also uninstall all the networking software related to VPN and virtual switches. Therefore, you must be careful while performing a network reset in Windows 10.
How To Reset Network Settings in Windows 10 PC
It is pretty straightforward and simple to reset your network settings in Windows 10. We recommend noting down the important software and connection names before proceeding with the reset.
Let’s see the quick steps for how to reset network settings.
4 Steps To Reset Network Settings in Windows 10
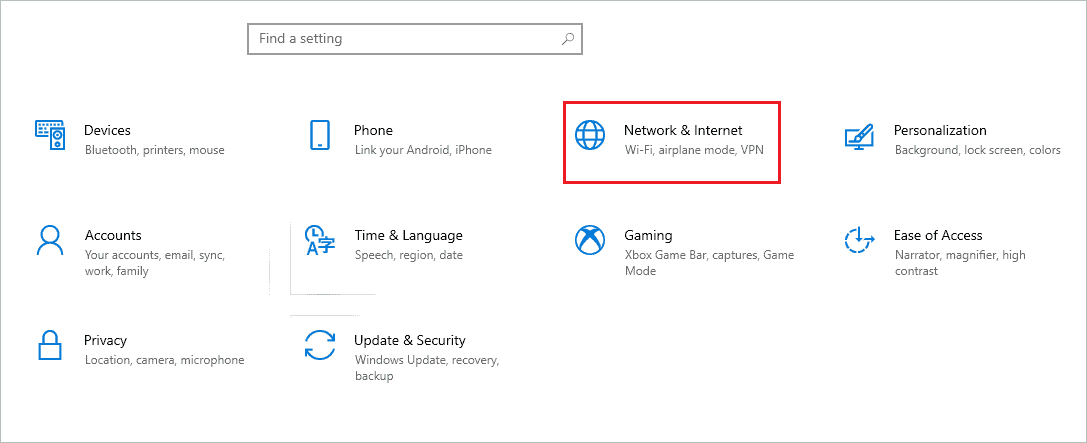
1. Open the Settings app and go to Network & Internet.
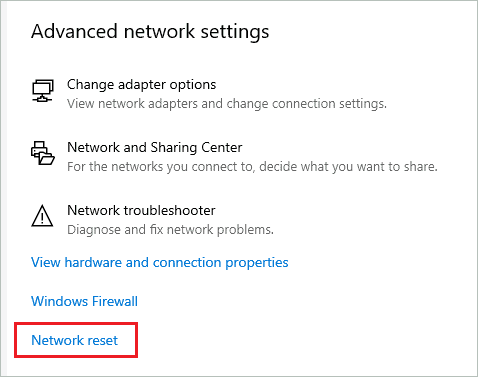
2. Scroll down and click on Network reset.
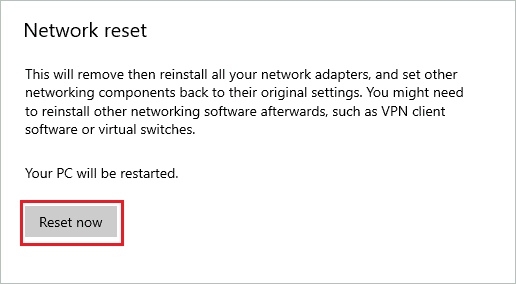
3. Click on the Reset now button.
4. When asked for confirmation, click on Yes to reset network settings.
You can go through the detailed steps below, along with the screenshot, to understand the process of resetting network settings thoroughly.
Detailed Steps for How to Reset Network Settings in Windows 10
Step 1: Press Windows key + I to open Windows Settings app and then click on Network & Internet.
Step 2: Click the Network reset link.
Step 3: Now, click on the Reset now button.
Step 4: When asked for confirmation, click on Yes to start the reset process.

Now, your computer will reboot to apply the changes. After the restarts, you will have to connect to Wi-Fi network and Ethernet connection again to access the Internet, as everything is restored to its original settings.
Use Commands to Reset TCP/IP and Winsock
You can use Command Prompt terminal to reset networking components like TCP/IP stack and Winsock. The commands are also applicable to Windows 7 and 8.
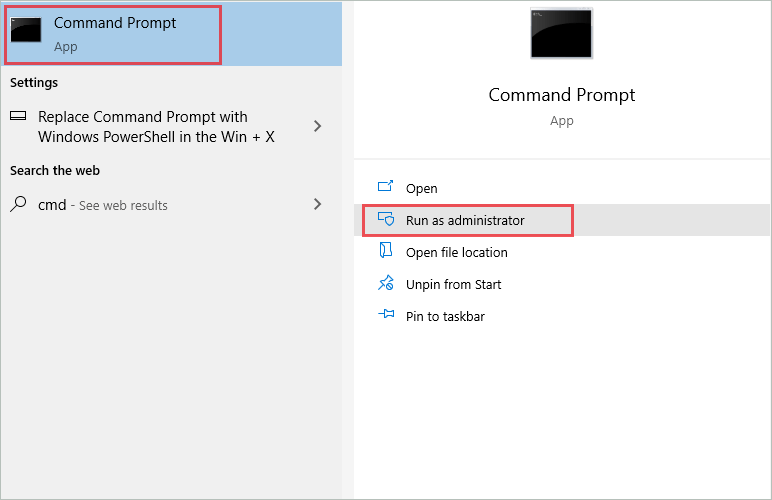
Type cmd in the Start menu and click on Run as administrator for Command Prompt.
In the Command Prompt terminal, type the following commands and press Enter key after each command to execute it.
netsh winsock resetnetsh int ip resetipconfig /releaseipconfig /renewipconfig /flushdnsAfter the commands are executed, restart your computer and check if this fixed the networking issue.
Conclusion
The network reset utility was introduced by Windows in its Anniversary Update, and it made fixing the serious network issues easy. You don’t require any technical expertise to reset network settings. However, you will have to configure entire network settings, software, and VPN connections again after the reset.
Therefore, it is recommended to perform the network reset if the other way of troubleshooting the network didn’t help fix the issue. The instructions mentioned above can help you reset network settings on your Windows 10 PC in a simple and straightforward way.


