Multiple processes are running on a Windows 10 PC at any given time. The CPU core processor’s job is to allocate adequate system resources to these processes to run smoothly. As the processes are different, some may require more power and priority than others to run smoothly. Hence, users need to know how to change priority in task manager in Windows 10.
There are six process priorities available in Windows XP and Windows 10, and most of the tasks are set to normal priority by default. However, you can change this priority setting if you want a particular running process to run more efficiently using more CPU power. To balance it out, you can set a low CPU priority to tasks that you feel are very basic and not important enough at that moment.
How To Change Priority In Task Manager In Windows 10
One thing to remember is that you can set the desired priority only temporarily. Once you restart the PC, the priority of a process will return to its default base priority even if you changed it in the previous session. Let’s see how we can change the Windows Task Manager priority.
1. Use The Details Tab
The first and the easiest way to change the task priority and ensure good CPU usage is by using the Details tab in the Task Manager.
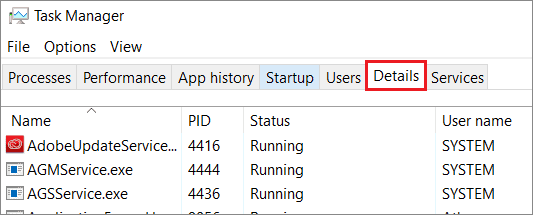
Step 1: Open the Task Manager window using the Ctrl + Shift + Esc keyboard shortcut. Then click on the Details tab.
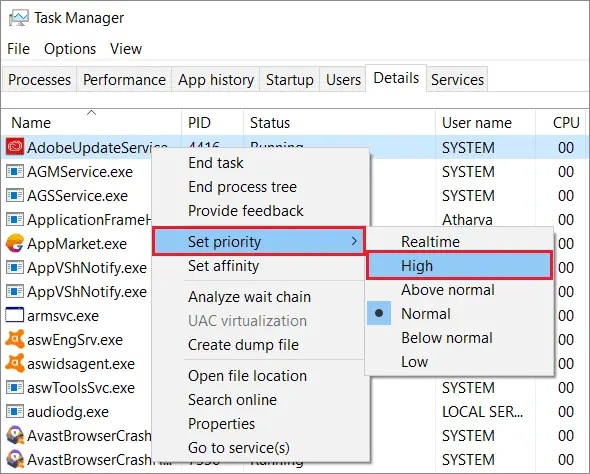
Step 2: In the Details tab, right-click on any task and select Set priority from the context menu.
You can choose any one of the six options to set the priority for a task. The six options are Realtime, High, Above normal, Normal, Below normal, and Low.
Step 3: You will see a confirmation dialog box after changing process priority. Click on the Change priority button to confirm the changes.

The priority of the process will remain the same until you change it or turn off your PC.
2. Change Priority Using The Command Prompt
If you wonder how to change priority in Task Manager in Windows 10 apart from using the Details tab, you can opt for the Command Prompt method.
To begin with, press the Windows key + S keyboard shortcut to access the Start menu search box.
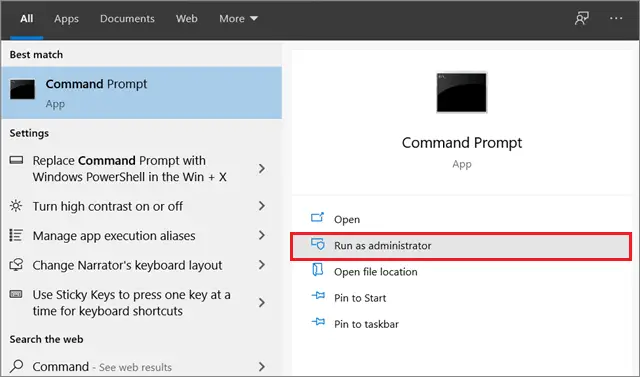
Step 1: Enter Command Prompt in the Start menu search box and select Run as administrator to open it with administrative privileges.
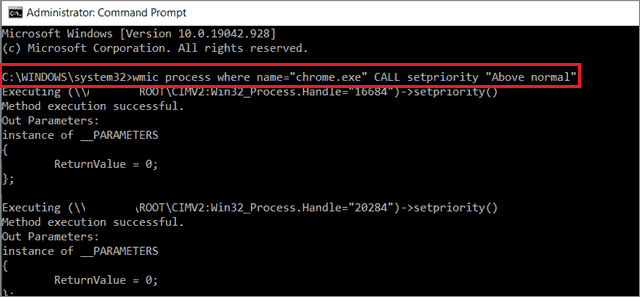
Step 2: Enter the command given below.
wmic process where name="chrome.exe" CALL setpriority "Above normal"You can also enter the command using a numerical value, as shown below.
wmic process where name="firefox.exe" CALL setpriority 1638416384 is the numerical code for the Below normal priority. The numerical values for these process priorities as given below.
Realtime: 256
High: 128
Above normal: 32768
Normal: 32
Below normal: 16384
Low: 64
Step 3: Once you enter the command, press the Enter key to run it and change the priority of the selected task.
3. Use Powershell
Powershell is an excellent alternative to Command Prompt for those who want to know how to change priority in task manager in Windows 10.
Step 1: Press the Win key + X keyboard combination to open the Quick Link menu.
Step 2: Select Powershell(Admin) from the list of options.
You can also open it using the Start menu in the administrator mode.

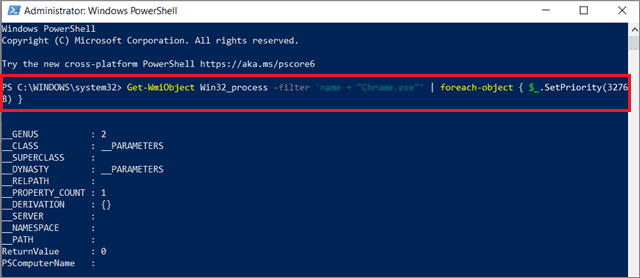
Step 3: Enter the command given below and press the Enter key.
Get-WmiObject Win32_process -filter 'name = "Chrome.exe"' | foreach-object { $_.SetPriority(32768) }32768 is the code for the ‘Above normal.’ The codes for the rest of the priorities are the same as given for the Command Prompt method.
You can replace the code according to the priority you want to set for a particular process.
4. Start An App With A Specific Process
If you use a particular application or background process more frequently than others, you can start that specific process with a pre-defined priority class.
Step 1: Open the Command Prompt with administrative privileges.
Step 2: Run the command given below to set the priority.
start "" /AboveNormal " C:Program FilesGoogle Chromechrome.exe"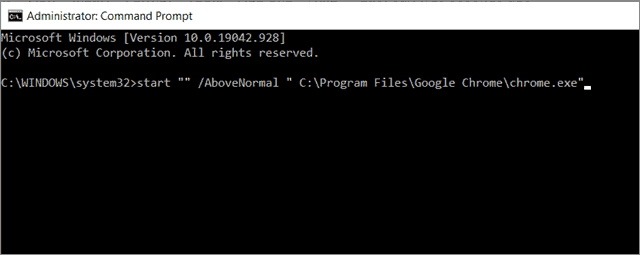
The Command Prompt and Powershell methods are suitable for advanced users. However, if you are a beginner, you can go ahead with the Details tab if you want to know how to change priority in Task Manager in Windows 10.
Final Thoughts
Process priority is a critical aspect of the Task Manager that determines which processes get a high priority to use the maximum and minimum CPU cycles. Users can set process priority levels temporarily only; once the PC restarts, the process will be set to its default priority. Now that you know how to change priority in Task Manager in Windows 10, there are specific cautions you need to consider before changing it.
Ensure you stay clear of the Realtime priority level as it is not designed to be set by the users. If you set this priority, your system might become unstable and intercept the functioning of your keyboard and mouse, thus affecting the user interface of your PC. Also, it is a favorable condition to have a higher priority for essential processes and a lower priority for foreground apps.


