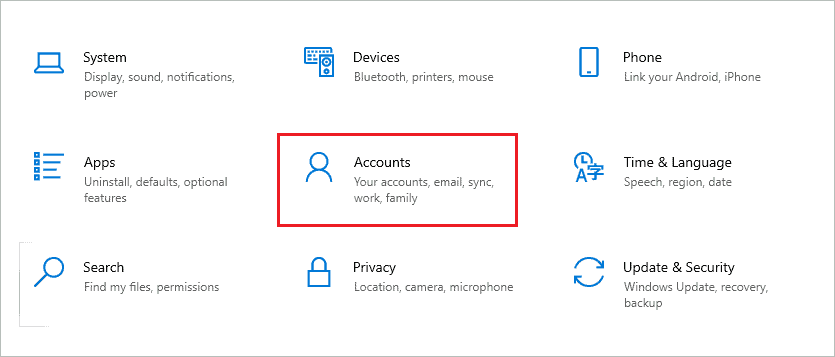
Windows 10 comes with two types of user accounts, one is standard, and another is an administrator. The standard user comes with limited access rights and privileges, while the administrator has control over the entire system without any limitations. So, how to change administrator on Windows 10?
You can change any standard user’s account to the local administrator so that the user can have complete control over settings, app, group policies, and a lot more. Once you change a standard user to an administrator user, you can also delete the old administrator account. Overall it is easy to manage users in Windows 10.
How to Change Administrator on Windows 10
If you want to know how to change administrator on Windows 10, there are six ways to do it. However, all the ways require you to have administrator credentials and accounts. So, make sure you have access to the administrator account before proceeding.
1. Use Windows Settings App
The Settings app can help you change the local user account to an administrative user account. It is the easiest and fastest method to change administrator on Windows 10.
Step 1: Press Windows key + I to open the Settings app and go to the Accounts section.
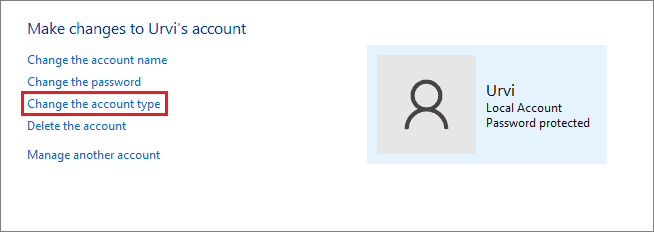
Step 2: In the Accounts settings window, go to Family & other users from the left-hand pane.
Step 3: Click on the account you wish to change to administrator and click on the Change account type button.
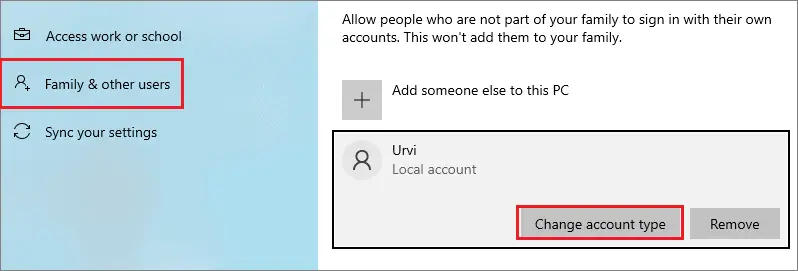
Step 4: In the Account type dropdown menu, choose the Administrator option and click OK.

This will change the account type of the standard user to the local administrator. You will need to log out and log in again for changes to take effect.
2. Use Control Panel
Although the settings are getting shifted to the Settings app in Windows 10, many Windows users still rely on the Control Panel to change their computer’s settings. If you want to know how to change administrator on Windows 10 via Control Panel, you can carefully go through the instructions below.
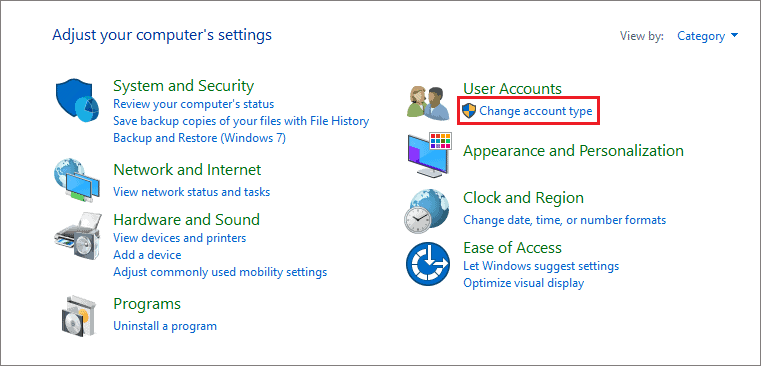
Press Windows key + S and type Control Panel in the search bar of the Start menu. Then, open the same from the search results.
Click on Change account type in User Accounts.
Select the account whose account type you want to change.
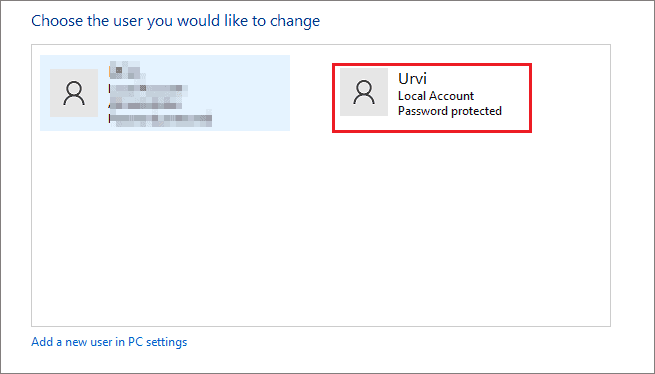
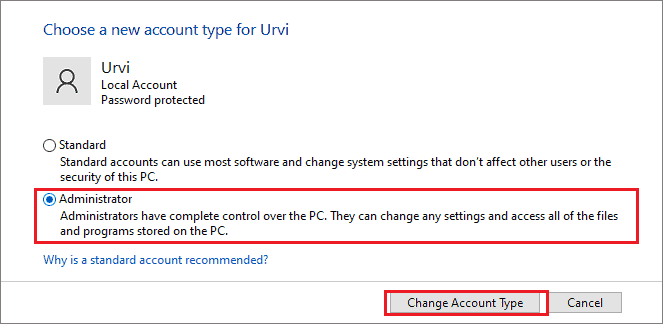
On the next window, click on Change the account type.
Select Administrator using the radio button and then click on Change Account Type.
You will see the account type of the selected user changed to administrator once you save the changes. Changing an administrator using the Control Panel involves more steps than one done using the Settings app. However, the final choice depends on which app you are more comfortable with.
The local user will no longer require administrator permission to install apps and change settings.
3. Use Computer Management
You can use Computer Management in Windows 10 to change administrator. The process may seem a bit complicated, but you can use it if you are more familiar with Computer Management.
Search for Computer Management in the Start menu and open the app for the same from the search results.
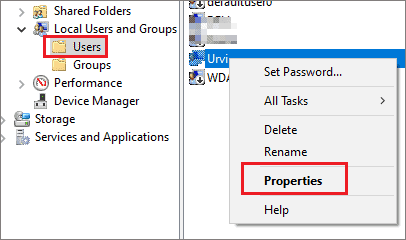
In the Computer Management window, go to System Tools ➜ Local Users and Groups ➜ Users.
Now, right-click on the user account whose type you want to change and select Properties from the context menu.
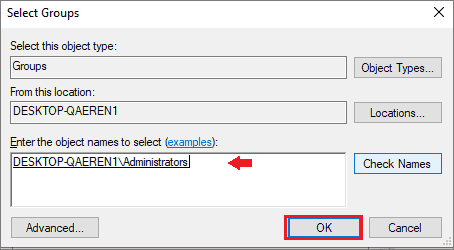
In the user Properties dialog box, go to the Member Of tab and click on the Add button.
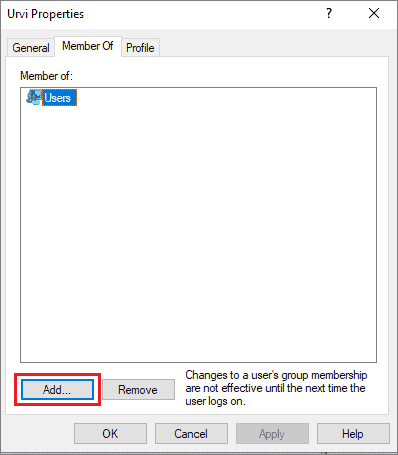
In the Enter the object names to select, add Administrators and click on Check Names. The computer name prefix will be added to the Administrators.
Click on OK.
Now, select Administrators and click on Apply, followed by OK.
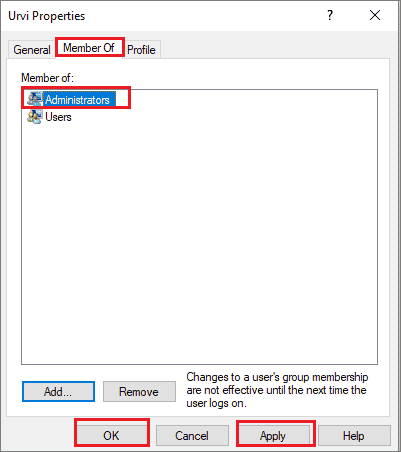
Now, the selected user account will have administrator privileges. You can install apps and change all the settings using this user account. Once you know how to change administrator on Windows 10 using Computer Management, you can efficiently work with many user profiles.
4. Use User Accounts
If you are familiar with the User Accounts dialog box for account settings, you would be pleased to know that one can change administrator using that.
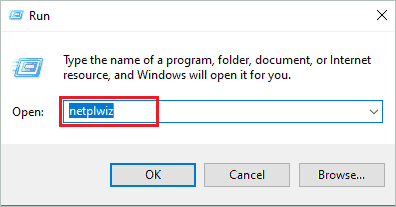
Step 1: Press Windows key + R to open Run and type netplwiz there. Press Enter to open User Accounts.
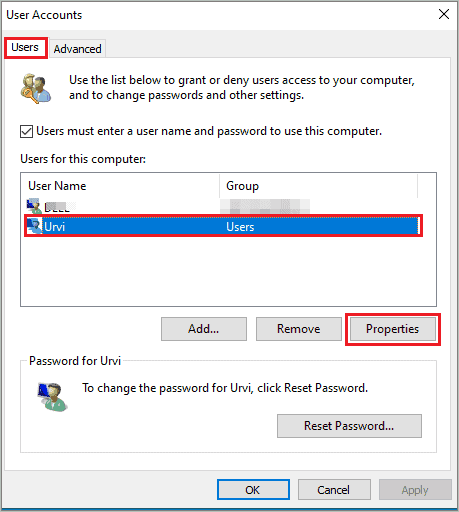
Step 2: In the User Accounts dialog box, make sure you are in the Users tab. Next, click on the user and then on the Properties button.
Step 3: Now, go to the Group Membership tab and select Administrator.
Step 4: Click on Apply, followed by OK to save the changes.
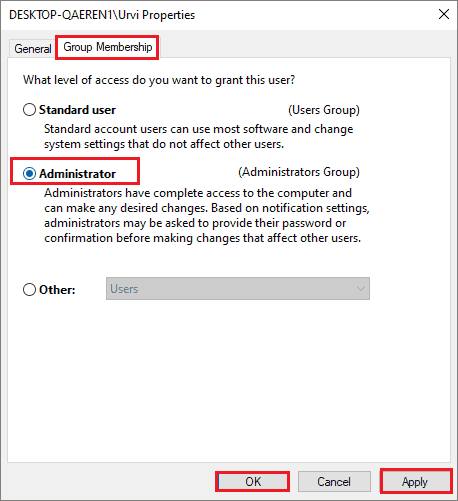
Step 5: Click on Apply and OK on the User Accounts dialog as well.
The standard user account will now be an administrator account.
5. Use Command Prompt
The Command Prompt in Windows 10 allows you to carry out many settings. However, if you like working on the terminal window, you must know how to change administrator on Windows 10 using it.
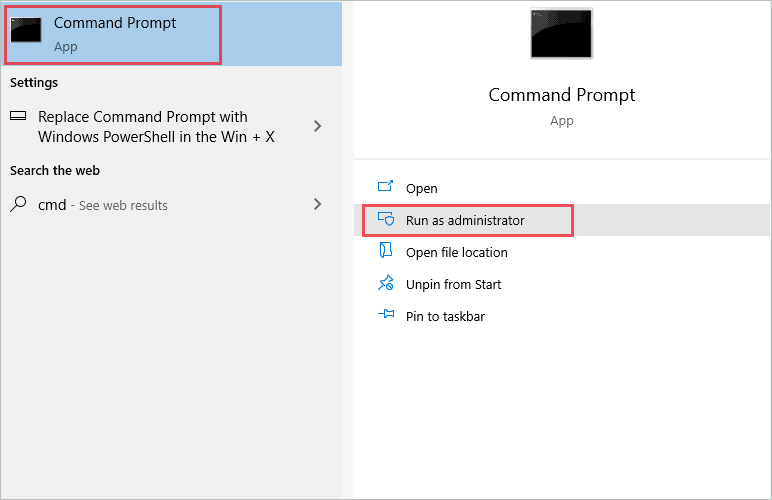
Type cmd in the Start menu’s search bar and click on Run as administrator for Command Prompt.
Once the Command Prompt window opens, type the following command and press Enter to execute it.
net localgroup Administrators "User-Name" /addHere, change the User-Name with the account name you want to change to the administrator. Again, make sure you don’t miss out on double quotes while adding the user account name.
If you have a Microsoft account, use the first five letters of the email address in the command as User-Name.
To check if the changes were successfully made, run the below command in the Command Prompt.
net user User-NameHere, also change the User-Name to the account name.
If the Local Group Membership is shown as Administrators, the changes were made correctly.
Now, sign out and sign in to the changed account again so that you can enjoy administrator privileges.
6. User PowerShell
You can also use PowerShell to change administrator on Windows 10. Check out the instructions below to know how to change administrator on Windows 10 computer.
Press Windows key + X to open the Quick link menu and click on Windows PowerShell (Admin) to open it.
Alternatively, you can open the PowerShell with administrative privileges using the Start menu as well.
In the PowerShell terminal, execute the below command.
Add-LocalGroupMember -Group "Administrators" -Member "User-Name"Here, change the User-Name to the account name.
Once the command is executed, it will change the account privileges, and the user can access administrative tools.
If you wish to change the account type to standard again in the future, execute the below command.
Remove-LocalGroupMember -Group "Administrators" -Member "User-Name"You can remove and grant privileges to any account using the PowerShell terminal.
Final Thoughts On How To Change Administrator On Windows 10
The standard user account may need administrator privileges to carry out some tasks. Instead of logging in and out of the administrator account many times, you can simply change the standard local account to the administrator account in Windows 10. If you don’t have access to an admin account, you will have to ask the administrator to change the account type.
The account type can be changed only via admin account and privileges. Once you know how to change administrator on Windows 10, you can grant and revoke access to any user account as per your wish.


