Key Takeaways:
- You can connect to another wireless display to work on multiple screens at the same time.
- To connect your PC to another wireless display, connect both the devices to the same WiFi network.
- The wireless screen can be a duplicate or an extender to your current screen.
Microsoft allows you to connect your PC to any other wireless display. This saves you from unwanted wire, HDMI cable, and mess on your desk and still connects to another display screen. You can connect to a wireless display like smart TV, projector, or Windows 10 computer.
Windows 10 wireless display feature has evolved over the years, making it effortless for the users to project their screen on another display that supports wireless connection. The entire process is more straightforward than setting up a wireless printer on your Windows 10 PC. Let’s see how you can connect wirelessly in Windows 10.
How to Connect to a Wireless Display in Windows 10?
You can connect Windows 10 PC to any device with wireless connectivity support. For example, many TVs support wireless connectivity, but that needs to be enabled in order to connect. But, again, you can check the manual or manufacturer website for help.
In the case of projectors or other devices, make sure it is turned on and ready to connect. Also, you may need to connect the wireless display and Windows 10 computer to the same wireless network to connect them.
Once everything is done, follow the steps below for PCs with Windows 10 to connect to a wireless display.
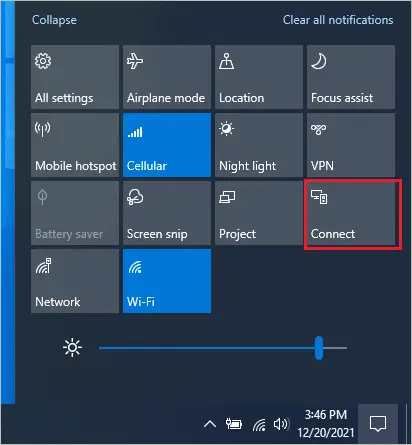
Step 1: Press Windows key + A to open the “Action Center” and click on “Connect.” Alternatively, you can press Windows key + K shortcut as well.
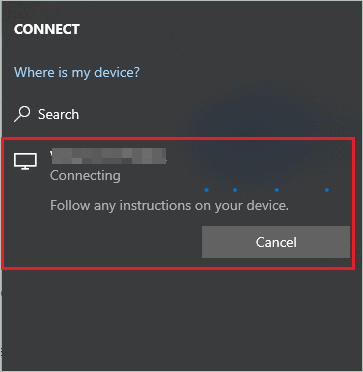
Step 2: Click on the display you want to connect to. As soon as you click on display, the connection process will start, and you will see Connecting under the display name.
If the wireless display does not show up, you can search for it in the search bar.
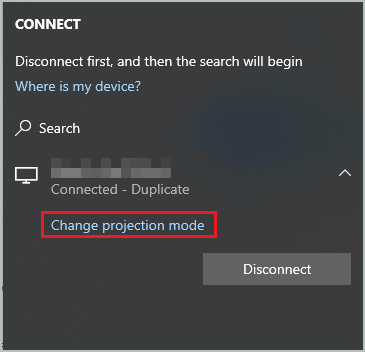
Step 3: Windows 10 allows different projection modes to use the connected display in the way you want. Click on “Change projection mode” to see the options offered.
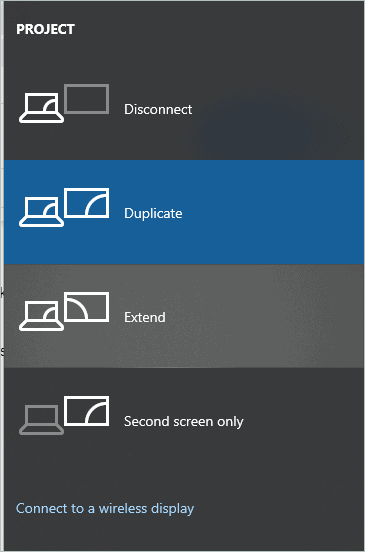
Step 4: Select the projection mode of your choice from the next screen.
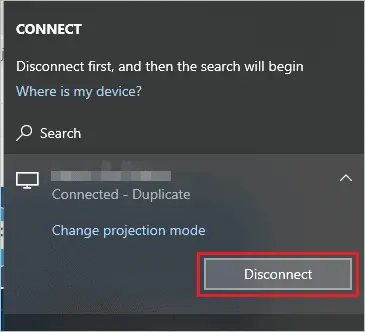
Disconnect – Disconnects your PC’s connection with a wireless display.
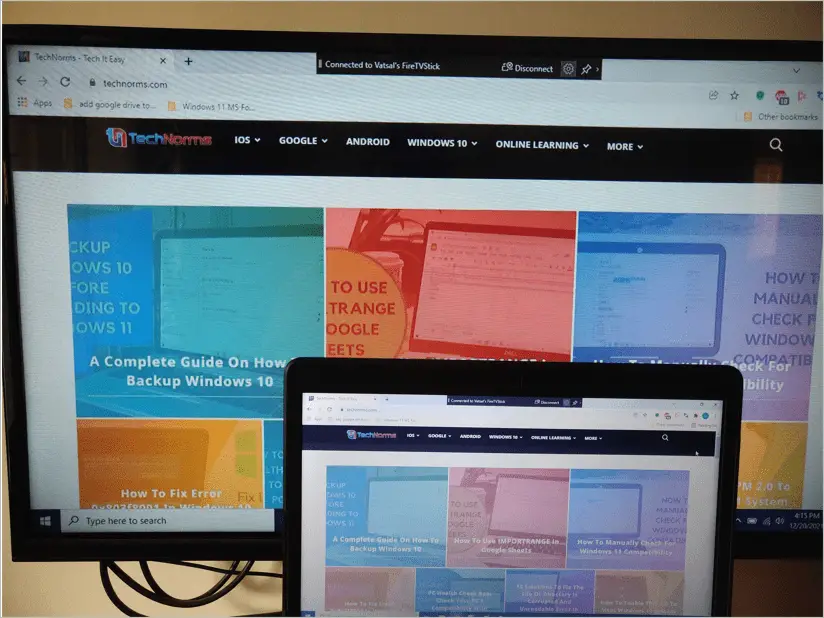
Duplicate – You will see the exact same contents on both the screens: Windows 10 PC and wireless display. It can be helpful when you want to present something to an audience using the big screen. This projection mode will work like wireless screen mirroring.
Extend – It extends the display to a wireless display. So you can play video on one display and work on your Windows 10 PC side by side.
Second screen only – The Windows 10 computer’s monitor will turn off, and you will only see your display on the connected wireless monitor.
You can click on any of the projection modes as per your requirement.
Once the projection mode is selected, you can enjoy the additional display.
At times, you may need to try connecting to the same display multiple times to have one successful connection. Once you are done, press Windows key + K and click on “Disconnect” to stop your connection with the wireless display.
You can also use another Windows 10 PC as your wireless display. Check out the below section to know-how.
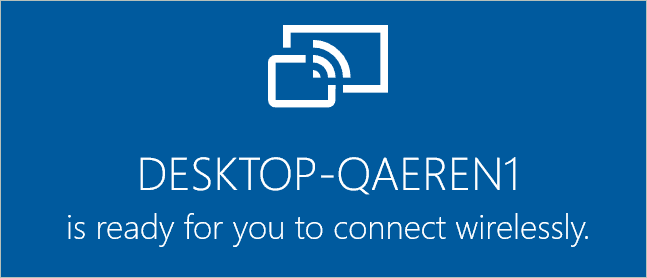
How to Use Another Windows 10 PC as Wireless Display?
If you are using another Windows 10 PC as a wireless display, you can use the Connect app provided by Microsoft. Also, you need to make a few changes in the Settings window before attempting to connect.
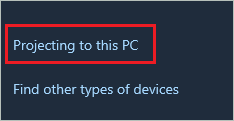
Press Windows key + K shortcut and click on the “Projecting to this PC” link at the bottom of the Connect pane.
Alternatively, you can go to Settings app ➜ System ➜ Projecting to this PC.
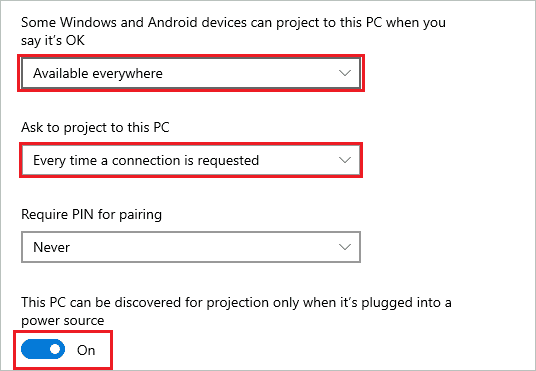
Now, under “Some Windows and Android devices can project to this PC when you say it’s OK,” select “Available everywhere” or “Available everywhere on a secure network” based on your choice. Make sure you don’t select the “Always Off” option.
Under Ask to project to this PC drop-down menu, select the option as per your security concerns.
And lastly, you can enable projection when the power source is plugged in. This applies only to laptops and not desktop computers.
You can search for the “Connect” app in the Start menu and open the same from the search results.
Now, you can attempt to connect to a PC whose projection settings have been changed. You may need to accept the connection.
Once done, you can use your Windows 10 PC as a wireless display/wireless projection.
Final Thoughts On Connect To A Wireless Display In Windows 10
Wireless displays can be helpful when you want to present in a boardroom on a large screen or simply extend your computer screen. Windows allows you to connect to a wireless display in simple steps easily. The above guide shows how to connect to a wireless display in Windows 10 using the built-in mechanism.
You can connect TV, projector, and another Windows PC wirelessly to the current computer. If your TV does not have wireless display capability, you can also use an external wireless adapter. You can also get detailed instructions to convert a Windows 10 PC into a wireless display in the above guide.


