Key Takeaways:
- Print Spooler had three vulnerabilities that could be exploited by attackers and hackers back in 2021
- You can disable the Print Spooler service to protect your PCs from threats and vulnerabilities.
- The easiest way to disable the Windows Print Spooler service is to use the Windows Services app or System Configuration.
Print Spooler is responsible for getting the printing job done on printers and print servers. However, in 2021, this harmless service had become a nightmare for Microsoft and Windows users. There were three vulnerabilities in the Print Spooler service that attackers and hackers can exploit to get into your system. And the only way out of this was to disable Print Spooler service on Windows PCs.
There can be other reasons, like Print Spooler errors, to disable this service. If the printer spooler keeps stopping now and then, you may not be able to carry out your printing job smoothly.
However, if you are panicked about PrintNightmare, disabling the Printer Spooler service can give you some relief.
How to Disable Print Spooler Service in Windows 10?
The Print Spooler service can be easily disabled using Windows Services, System Configuration, PowerShell, Group Policy Editor, and Command Prompt terminal. All these ways are mentioned in the guide below.
You can check out all the way and try out the feasible one. But, first, make sure you use the Administrator account to disable Print Spooler service.
1. Use Windows Services App
Windows services app can be used to disable Print Spooler in Windows 10. It is the simplest way to manage services on Windows devices.
Step 1: Press Windows key + R to open “Run” and type “services.msc” there. Click “OK” or press “Enter” to open the Services application.
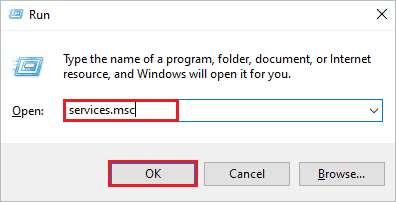
Alternatively, you can search for Services in the search bar on the taskbar and open it from there.
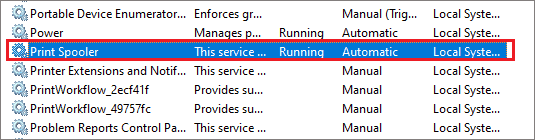
Step 2: In the Services window, search for Print Spooler service and double-click on it when found. This will open the Print Spooler Properties window.
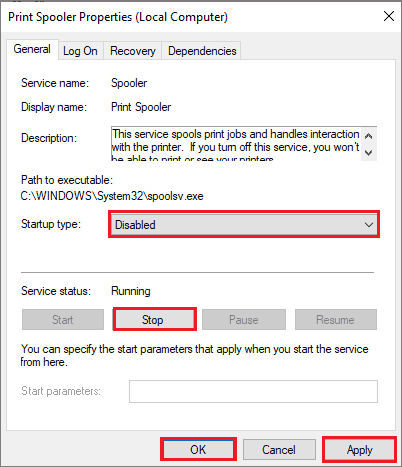
Step 3: When the Print Spooler Properties window opens, make sure you are in the General tab.
Step 4: Select Startup type as “Disabled” from the drop-down menu.
Step 5: Click on “Apply” followed by “OK” to save the changes.
You can now close the Services app, and you are done.
2. Use Local Group Policy Editor
You can use Group Policy Editor to disable Print Spooler service. Unfortunately, the Group Policy Editor is only available for Windows 10 Professional and Enterprise users. If you are using Windows 10 Home, you can check out other ways of disabling Windows Print Spooler.
Step 1: Open the Run window by pressing Windows key + R and type “gpedit.msc” there. Click “OK” or press “Enter key” to open Local Group Policy Editor.
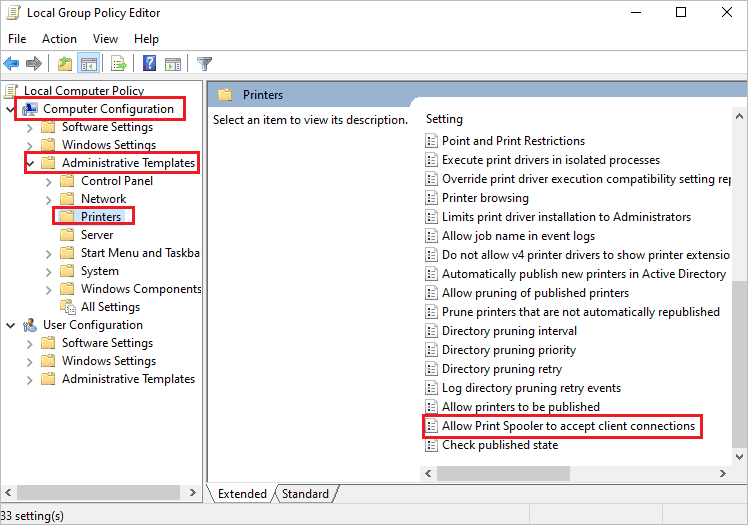
Step 2: When the Local Group Policy Editor opens, navigate to Computer Configuration ➜ Administrative Templates ➜ Printers from the left panel.
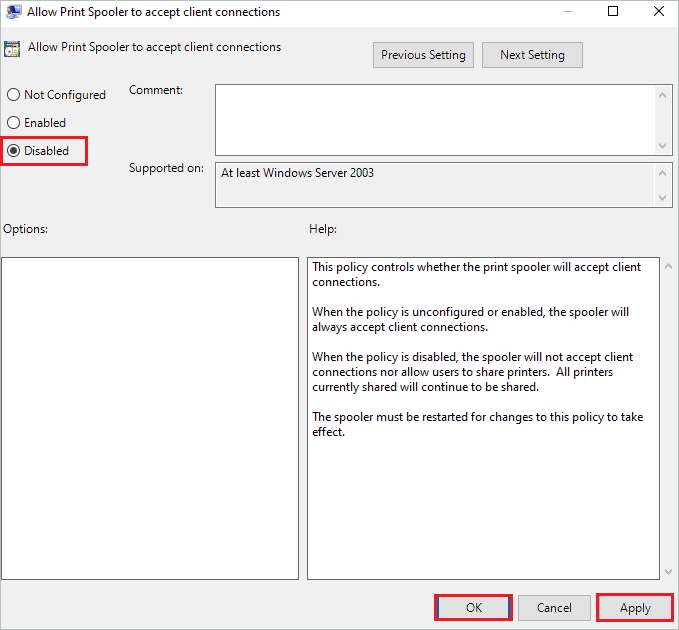
Step 3: Now, from the right frame, scroll down and double-click on “Allow Print Spooler to accept client connections.”
Step 4: Select “Disable” and click on “Apply” followed by “OK” to save the changes.
Close the Group Policy Editor window. Now, the Print Spooler will be disabled until you enable it manually.
3. Use Windows PowerShell To Disable Print Spooler
If you are more comfortable using terminal prompts, especially Windows PowerShell, you can disable Printer Spooler service using it as well. All you need is to execute two commands, and Print Spooler will be disabled until you re-enable it.
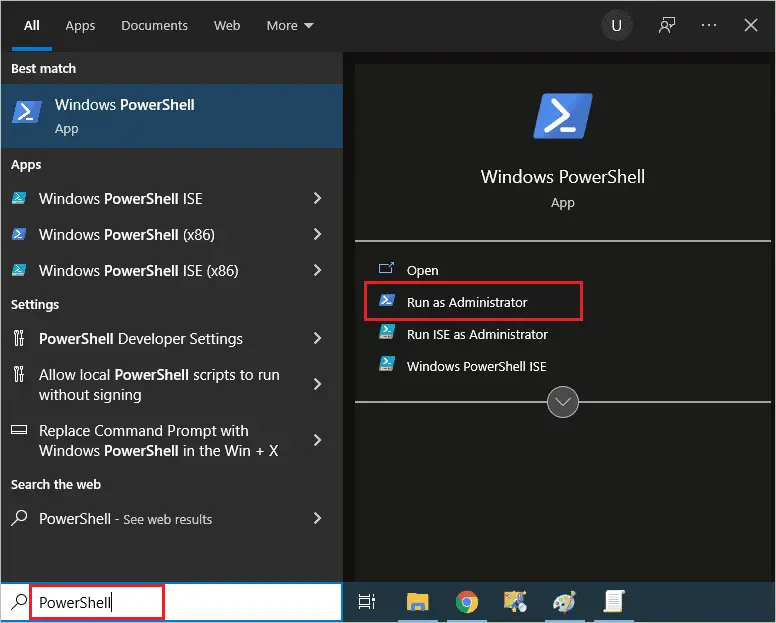
Step 1: Type “PowerShell” in the search bar and click on “Run as administrator” for Windows PowerShell. This will open Windows PowerShell with administrator rights.
Step 2: In the Windows PowerShell window, type the below command and press “Enter” to execute it.
Stop-Service -Name Spooler -Force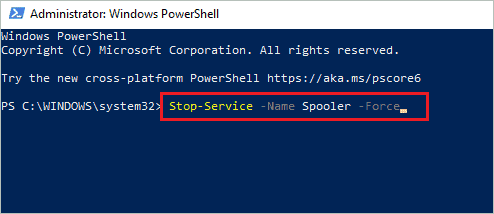
Step 3: Once the Print Spooler service is stopped, you can disable it by executing the following command.
Set-Service -Name Spooler -StartupType Disabled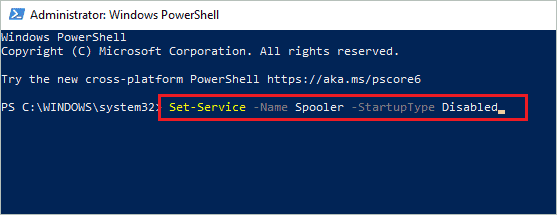
Once the commands are executed, close the Windows PowerShell.
4. Use System Configuration
Another simple way to disable Print Spooler is to use System Configuration. Windows Home, Professional, and Enterprise users can use this way.
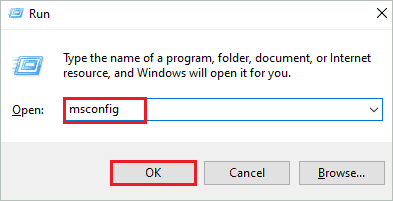
Step 1: Open the Run window and type “msconfig” there. Click “OK” to open System Configuration on your computer.
Step 2: Now, go to the “Services” tab and search for “Print Spooler.” Searching for services here is a tedious process.
Step 3: Once found, uncheck the checkbox next to “Print Spooler.”
Step 4: Click on “Apply” and “OK.”

Once the changes are saved, you can exit the System Configuration.
To re-enable Print Spooler in the future, you can follow the same process and check the checkbox next to Print Spooler.
5. Use Command Prompt
The traditional Command Prompt can help you turn off Print Spooler. But, well, this will only work to stop the Print Spooler service till you are logged in.
The Print Spooler service will get enabled again after you restart your PC next time, as it is set to start automatically.
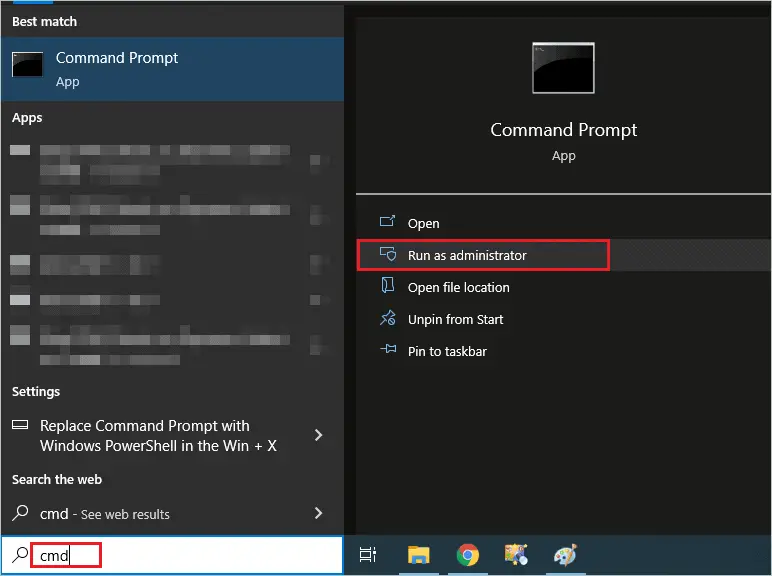
Step 1: Type “cmd” in the search box and click on “Run as administrator” for Command Prompt. This will open an elevated Command Prompt.
Step 2: In the Command Prompt window, firstly execute the below command to start the service.
net start spoolerStep 3: Once the command is executed, you can stop the Print Spooler service by running the below command.
net stop spooler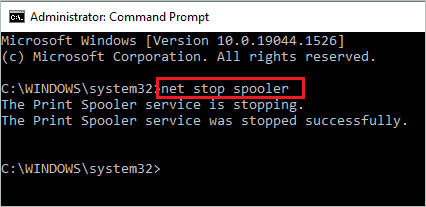
The service will now be stopped until the PC shuts and restarts again. If you wish to disable Print Spooler permanently, you can use any other ways mentioned above.
How to Enable Windows Print Spooler Service?
There can be a situation where you have to re-enable the Print Spooler service. It can be to get the printing job done or anything else. You can simply follow the ways mentioned below to enable Print Spooler service.
If you have disabled Print Spooler via Command Prompt, a simple reboot will start the service again for you. Also, in the case of System Configuration, checking the checkbox next to Print Spooler can help you enable the Print Spooler service on your computer.
1. Use Windows Service App
Open the Services app by typing “services.msc” in the Run window. Then, double-click on “Print Spooler” to open its Properties dialog box in the Services app.
Change the Startup type to “Automatic” instead of the Disabled option and then click on the “Start” button to restart Print Spooler service.
Click on “Apply” and “OK” to save the changes.
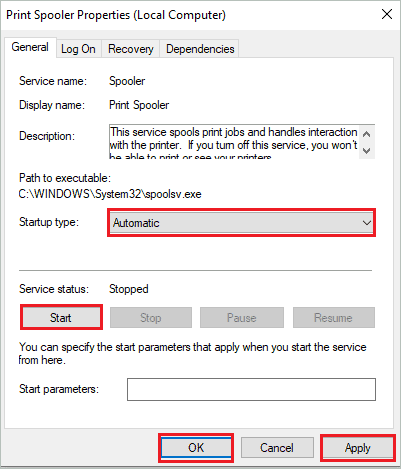
The Print Spooler service will now be enabled on your Windows 10 computer.
2. Use Windows PowerShell
Open Windows PowerShell with administrator rights and execute the below commands one by one on the terminal prompts.
Set-Service -Name Spooler -StartupType AutomaticStart-Service -Name SpoolerThe above commands will set the Print Spooler to start automatically and will also start the service for you.
3. Use Group Policy Editor
Launch Local Group Policy Editor via Run window on your computer. Next, go to Computer Configuration ➜ Administrative Templates ➜ Printers.
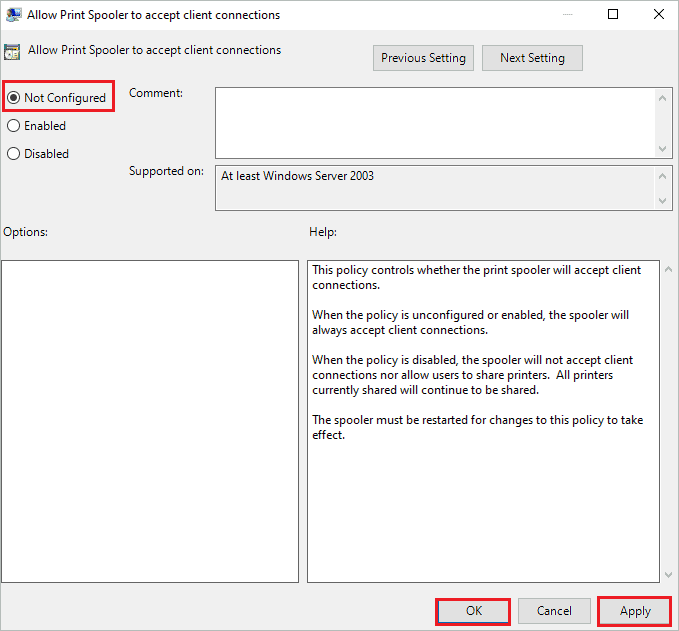
In the right panel, double-click on “Allow Print Spooler to accept client connections.”
When the Allow Print Spooler to accept client connections window opens, select “Not Configured” and then click on “Apply” and “OK” to save the changes.
Close the Local Group Policy Editor. The Print Spooler will no longer be disabled via Group Policy Editor on your computer.
Conclusion
The PrintNightmare vulnerability could be a real nightmare for users if hackers and attackers get into their system. However, disabling Print Spooler can protect you against the Print Spooler vulnerability. And also, it is a good idea to disable this service if you are not using a printer and doing any print jobs on your Microsoft Windows PC.
If you disable the Print Spooler, your PC will be protected from printer vulnerability attack. The above guide can help you with different ways to disable Print Spooler in Windows 10. When you disable Print Spooler, you won’t be able to carry out any print job on your PC. So, you can re-enable this service whenever required using the ways mentioned in the guide.
FAQs
What happens if you disable the Print Spooler?
The print and fax job on your computer cannot be completed if you disable the Print Spooler service.
How do I turn off the Print Spooler service?
You can open System Configuration and go to the Services tab. Now, uncheck the checkbox next to Print Spooler and click on Apply, followed by OK. The Print Spooler will be turned off on your device.
How do I disable Print Spooler using PowerShell?
Open Windows PowerShell with administrator privileges and execute the below commands one at a time to disable Print Spooler.
Stop-Service -Name Spooler -Force
Set-Service -Name Spooler -StartupType Disabled
Do we need a Print Spooler?
If your computer is physically connected to a printer, you need a Print Spooler service to manage printing jobs for you. However, if you don’t use a printer, you can disable this service on your Windows computer.


