Key Takeaways:
- ADB is a command line tool for effective communication between your PC and Android device
- But users often get the ADB not recognized in Windows 11 error when executing ADB commands.
- You can fix the issue by making a few tweaks.
Android Debug Bridge, or ADB, is a powerful command line tool that connects your Android device to your computer. The utility comes as part of Google Android SDK. But users often get the ADB not recognized in Windows 11 error. When you try to execute ADB commands, you get the message that ADB is not recognized as an internal or external command, operable program, or batch file.
If your PC cannot detect your device, it cannot communicate with it effectively. The error message might pop up when you use ADB for the first time. You will likely see the error message due to disabled USB debugging on your Android device, missing ADB drivers on your Windows 11 computer, and improper connection mode, among others.
How To Fix ADB Not Recognized In Windows 11
The ADB not recognized in Windows 11 error is common, so panic is unnecessary. However, if you try to use ADB for the first time, ADB and Fastboot drivers may not perform as intended. But following the solutions we have included here can make your ADB on Windows a smooth sail. So, here is how to fix an ADB is not recognized error on Windows 11.
1. Change Directory In CMD
It is important to run ADB commands from the directory where you have saved the ADB files. Otherwise, you will get the ADB not recognized in Windows 11 error. You can use the cd command in the Command Prompt to change the directory so the command is run from the path specified.
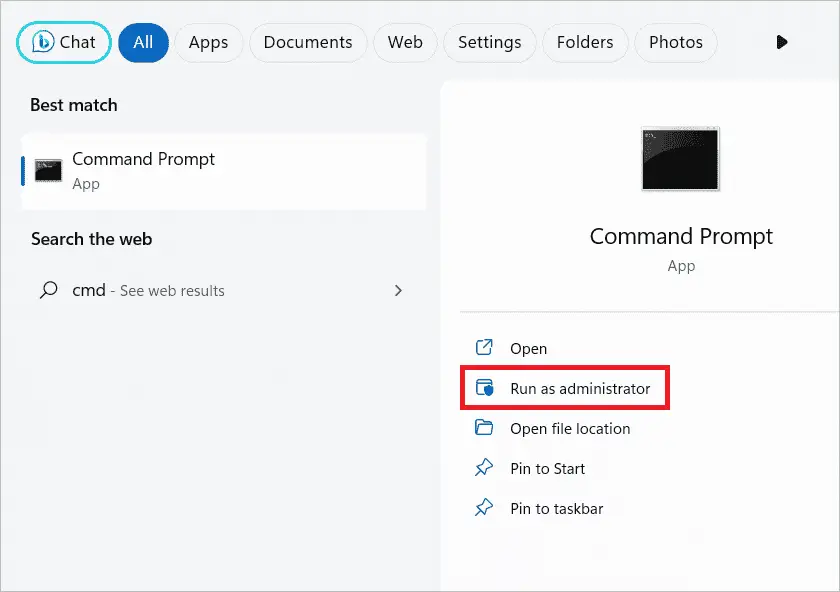
Type cmd in the search bar. When the Command Prompt option comes up, select “Run as administrator.”
Type the following command in the Command Prompt window and press Enter.
cd c:\[path]\platform-tools\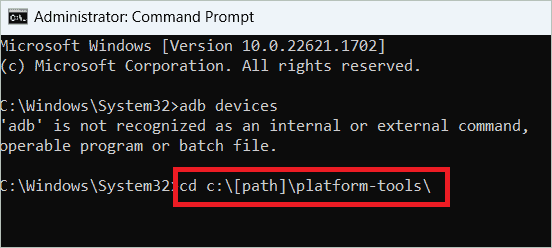
Here, ‘path’ is the platform-tools folder path.
Now, determine if the error still exists when you type ADB devices.
Alternatively, you can open the Command Prompt from the installation folder. Navigate to the ADB file folder and click on the address bar. Type “cmd” and press Enter. You can now execute the ADB command from here.
2. Enable USB Debugging
When you connect an Android device to your computer to use it with ADB, the USB debugging option needs to be enabled. If the feature is disabled, you may encounter the ADB not recognized in Windows 11 error. It is just a matter of toggling on the feature to help detect the device. So, we will see how.
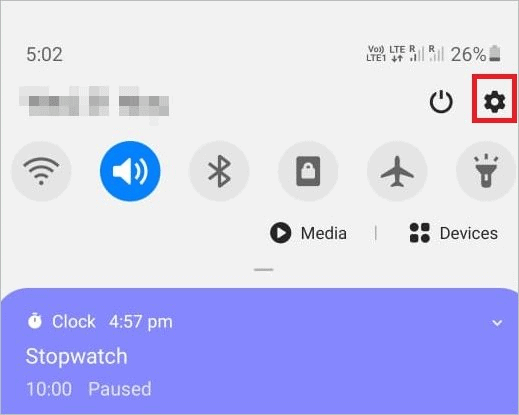
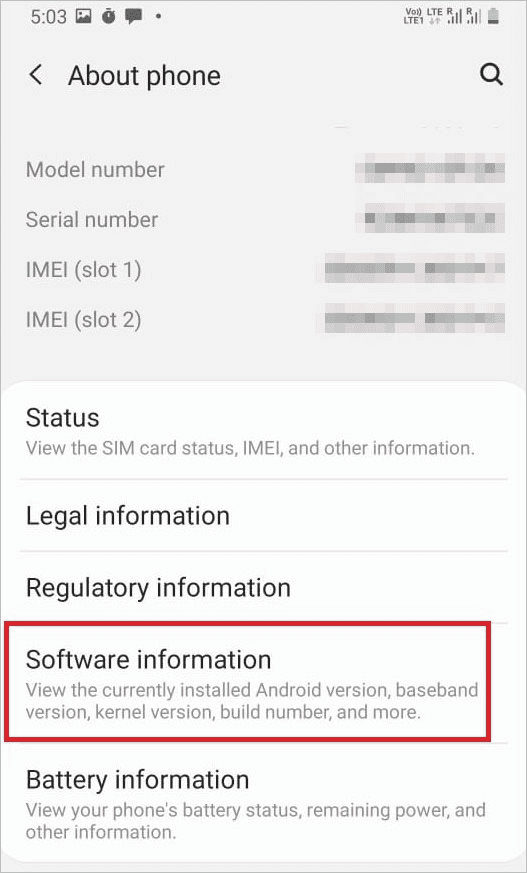
Tap the gear button on your Android phone to open Settings.
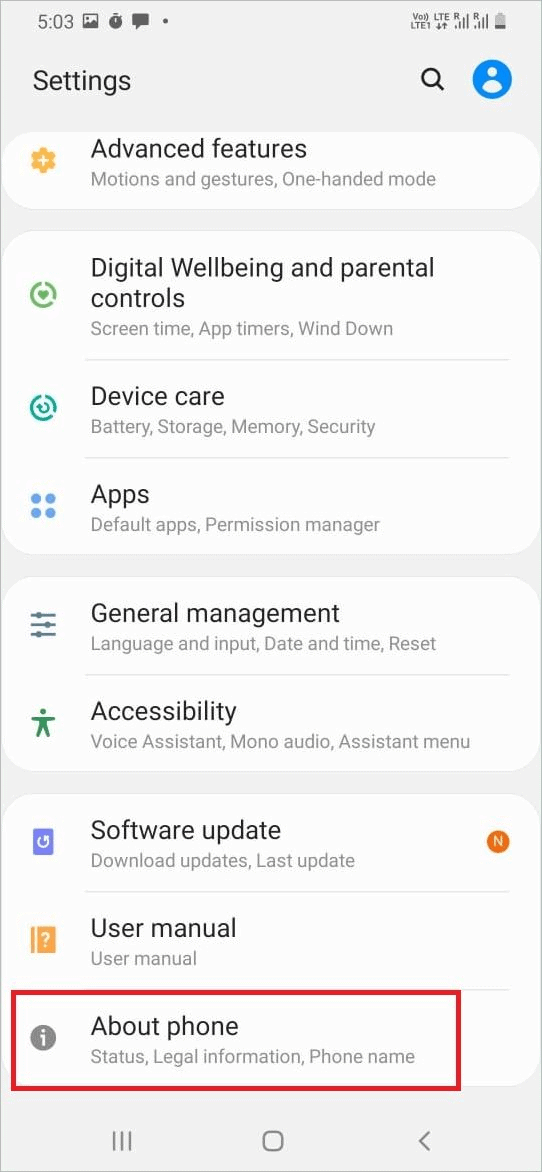
In the Settings page, select “About phone.”
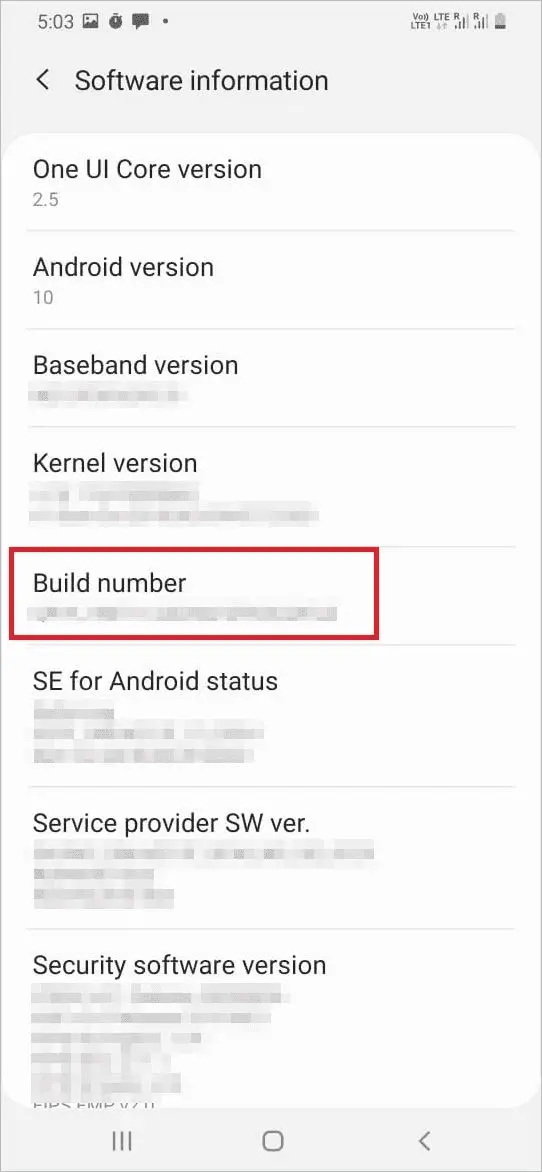
Now, select “Software information.”
Here, you will see an option called “Build number.” Tap it seven times to turn on Developer Mode.
Go back to Settings and select System Settings > Developer options. Then, toggle on the USB debugging option and click “OK” to confirm.
Now, try connecting your phone to the PC.
3. Add ADB To Environment Variables
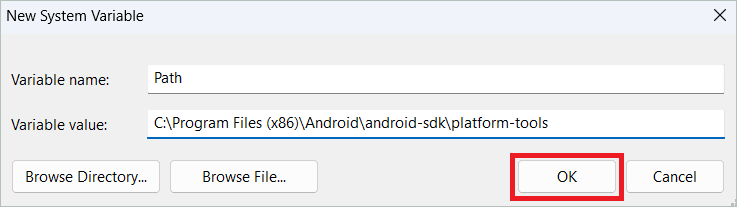
To execute the ADB command, ADB must be an environment variable. If ADB path is not listed as an environment variable, you will face the ADB not recognized in Windows 11 error. To do this, you may need to go to the location where ADB.exe is stored and copy the path. Typically, the following is the path, but you may confirm it by opening the location on your device.
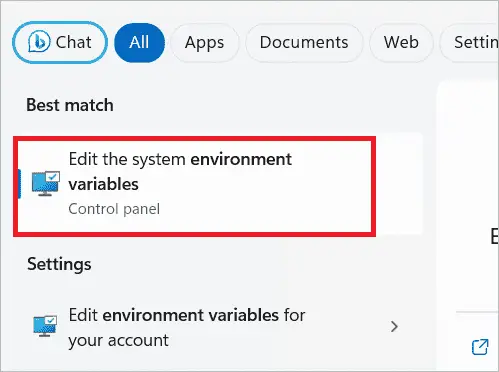
C:\Program Files (x86)\Android\android-sdk\platform-toolsType “Environment variables” in the start menu and open “Edit the system environment variables.”
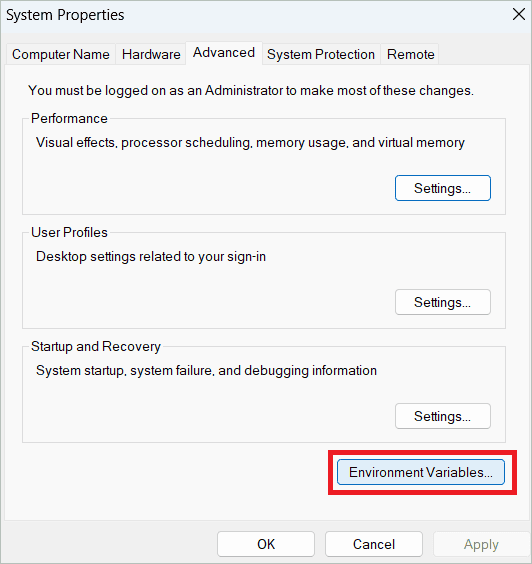
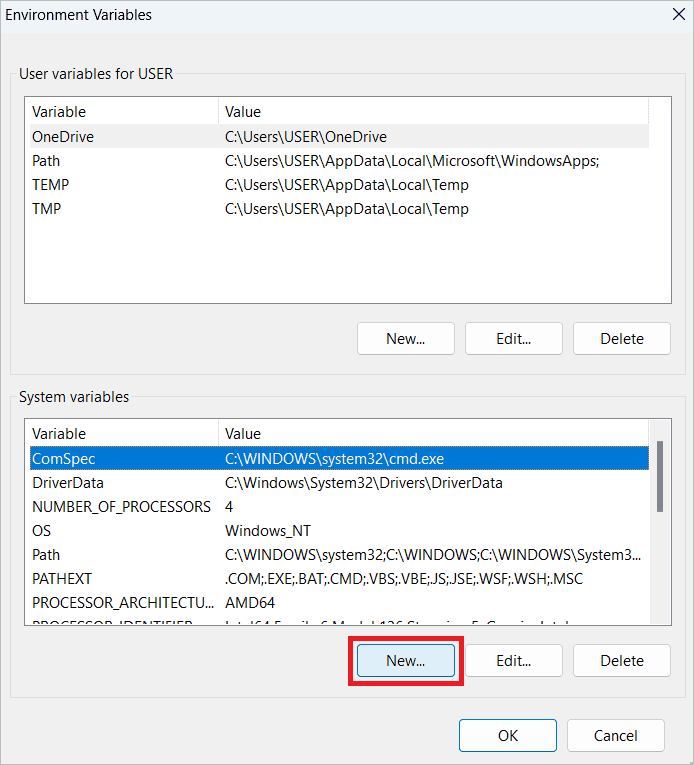
In the next window, click “Environment Variables.”
Select an item under System variables, and click “New.”
Enter “Path” in the variable name field and the copied path of ADB in the Variable Value field. Finally, click “OK” and restart your PC.
Now check if the error persists.
4. Choose The Correct Connection Type
When you connect your Android phone to the PC, it gives many connection types to choose from. For example, you can choose from only charging, transferring files, etc. Here, we must select the ADB-supported connection type to avoid getting the ADB not recognized in Windows 11 error. The name varies from phone to phone so that you can select the right one from your list.
Using a USB cable, connect the phone to your computer. Swipe down from the top of your phone’s screen and tap the connection option. Choose the ADB-supported connection type. Then, run the following command in the command-line tool to get the device list.
adb devicesOn the” Allow USB debugging” prompt on your phone, select “Allow,” and your Android phone name will appear on the list on your computer.
5. Restart The ADB Server
Similar to how you restart your PC to resolve minor issues, you can restart the ADB server to fix issues associated with it. When ADB restarts, it disables all the ADB features and reloads them. Here are the steps.
Open the Command Prompt and type the following command to turn off the ADB server, and press Enter.
adb kill-server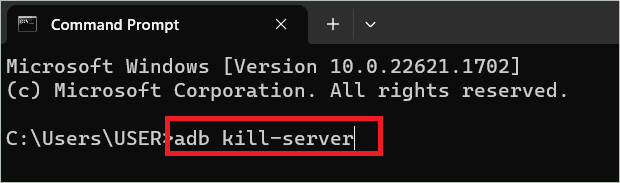
Type the following command to restart the ADB server and press Enter.
adb start-server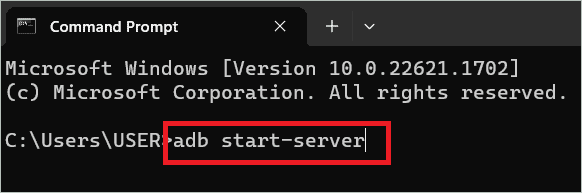
Now, the ADB must work on your PC.
6. Install ADB Drivers
Like any other device that requires a driver to communicate with the OS, an ADB driver is important to communicate with ADB-enabled devices. If the driver software is absent or you have an outdated version of ADB driver, you will get the ADB not recognized in Windows 11 error. So, we will see how to download the latest driver.
Type SDK Manager in the start menu. When it appears, select the “Run as administrator” option. The SDK Manager will now open. First, expand the Extras folder and select Google USB Driver. Next, click the Install 1 package button.
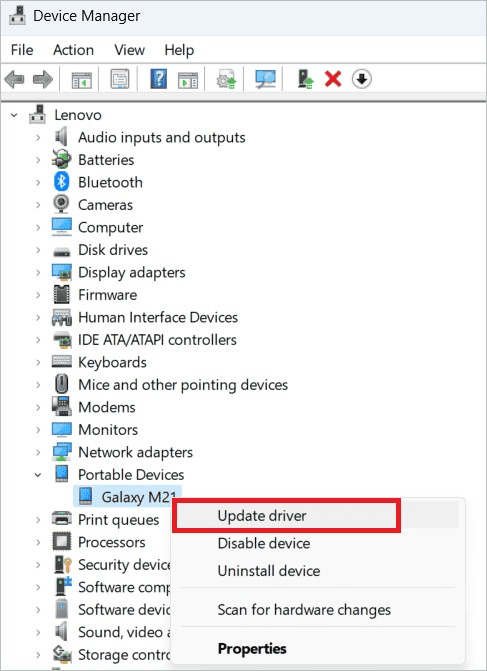
When the installation is done, connect your Android device. Open the Device Manager on your PC by searching for it in the search box.
Select Portable devices > Android Phone. Right-click on Android Phone and select “Update Driver.”
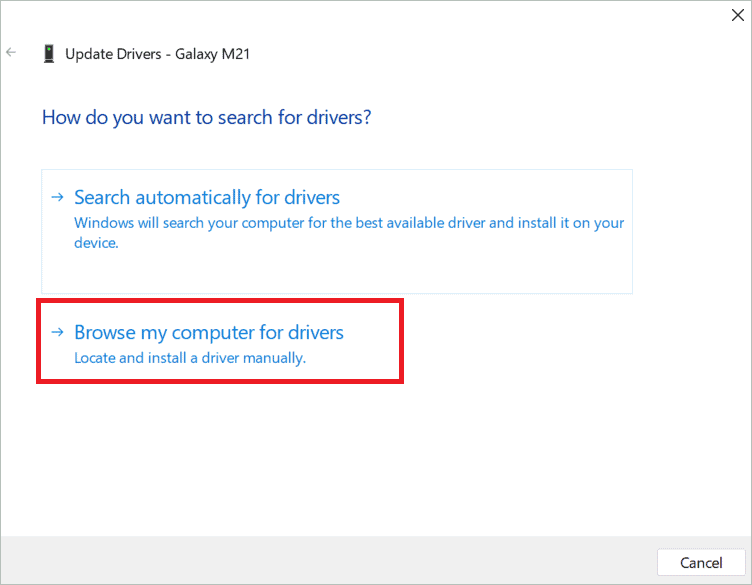
In the next window, select “Browse my computer for drivers.”
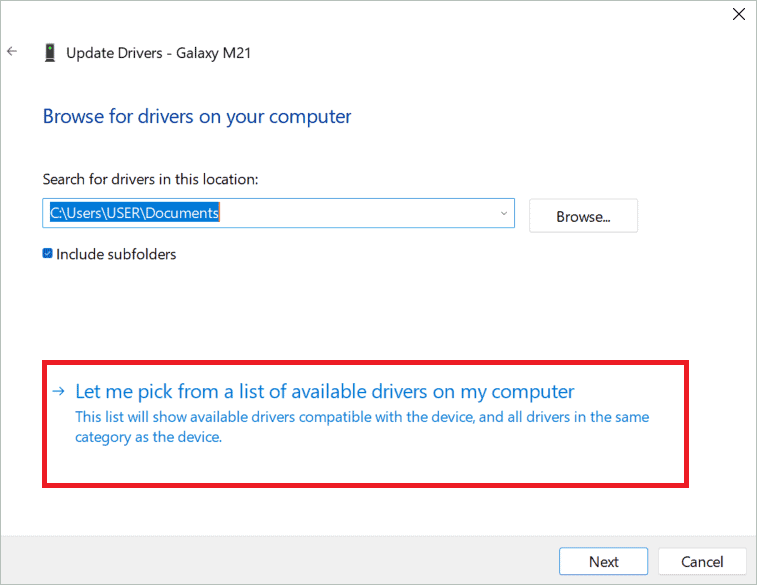
Now, select “Let me pick from a list of device drivers on my computer.”
Next, click the “Have Disk” button.
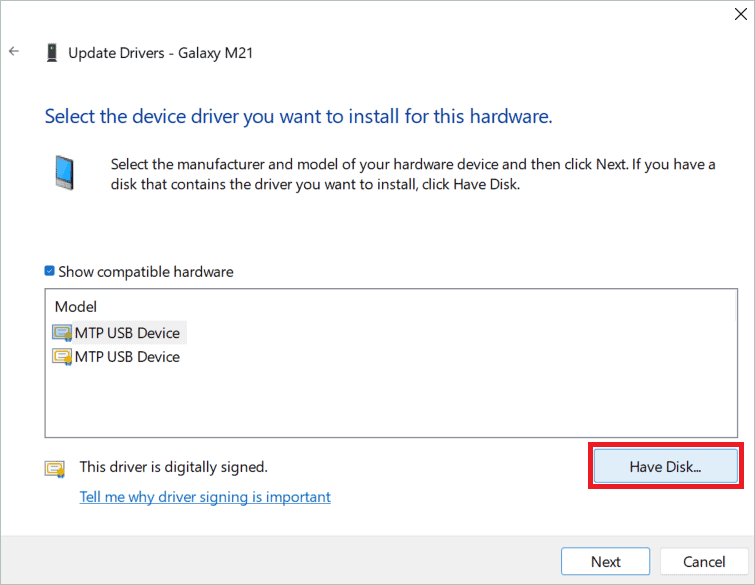
Next, click the Browse button to select the Google USB driver you downloaded.
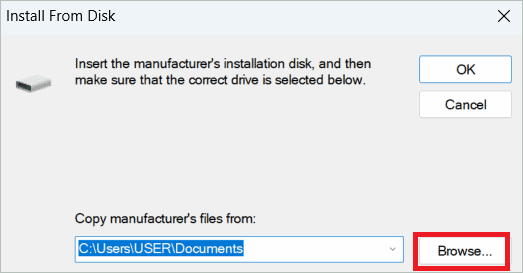
Finally, click “OK.”
Final Thoughts
ADB stands for Android Debug Bridge, a tool that helps connect your Android device to your Windows computer. The ADB driver allows interaction with the ADB-enabled devices. But sometimes, users report ADB not recognized in Windows 11 error, especially when trying to set up ADB for the first time.
The error occurs if the driver is missing from your computer, USB debugging feature is not enabled on your Android phone, etc. The article helps fix the issue using different solutions. You can troubleshoot by trying them one after the other and fixing them once and for all.


