
To save on download speeds or physical media space, websites will oftentimes offer zipped files for downloads. This is useful to both combine several objects in one folder and also to ensure the files and folders are compressed to save space. We covered using WinRAR for opening compressed zip, RAR, and other file types but today we’ll look at another useful program called 7-Zip.
7-Zip offers many different file types to be opened in its File Manager. Anything from RAR, ZIP, and TAR to less common ones like FAT, ARJ, and XAR. Use 7-Zip to combine multiple files and folders into one archive file with a massive ratio for compression. Set options like password protection or self extraction for both privacy and ease-of-use. Split up an archive into multiple part files for easy transfer or combine downloaded part files together for easy viewing.
Using 7-Zip from the File Manager
The File Manager is where we’ll access all the settings and options available.
After downloading and installing, search for “7-Zip” from the Start menu and open the “7-Zip File Manager” to manage options. Choose “Tool > Options” to open all the available settings.
The first tab of “System” is where you need to ensure the file types are set for use with 7-Zip. Select “Select all” to quickly add all the compressed file types to the list of those that use 7-Zip or manually select them.

The “7-Zip” tab identifies settings for using the manager in Windows Explorer. It’s common to select all these features, as they are set this way be default. We’ll look at using the context menu below so ensure this checkbox is selected.
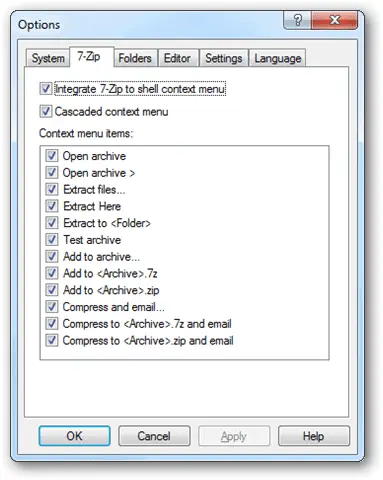
The rest of the settings in the remaining tabs can be left as they are by default. Little settings, for example, like the “Single-click to open an item” is something you can enable by choice under the “Settings” tab.
Archive a file in 7-Zip
There are two ways to use 7-Zip for extracting or archiving files and folders. It’s commonly the case to use Windows Explorer’s context menu but the File Manager could be used as well. I personally think it’s easier to use in Explorer. Let’s take a look at both of these methods below.
To use File Manager to put files and folders in a compressed folder, highlight the desired objects like so:
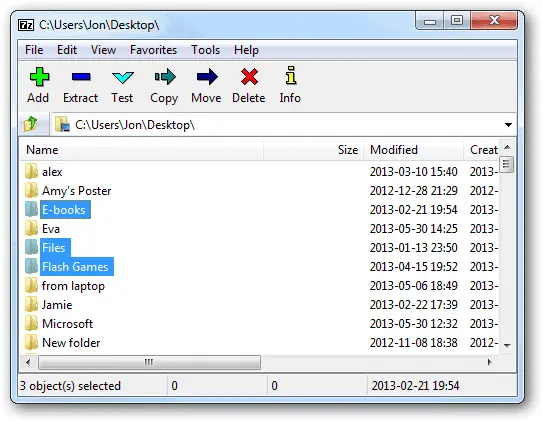
Navigation is done just like in Windows Explorer. Enter or browse for a folder from the navigation box or open folders from the bottom pane. After the objects have been selected, click the green “Add” plus sign button from the top menu.
This “Add to Archive” window is the display mostly seen when using 7-Zip. It’s here you’ll find all the options that can be put into an archive.
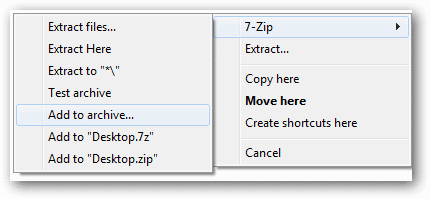
Alternatively access this same window from Windows Explorer by selecting the folders and/or files and right-click+drag into an empty area on the screen. Choose “7-Zip > Add to archive.”
Begin my renaming the archive from the top text area as well as browsing or entering a location for the output file. The “Archive format” dropdown allows 7z, tar, wim, and zip extensions. Some of these have different options. For example, choosing 7z allows self extracting archives. This is very useful for people who know very little about computers.
Make a self extracting archive file by selecting the “Create SFX archive” from the “Options” section. Notice the file extension of the archive changes to an executable. Simply have them double-click the executable and it will ask them where to output the extracted files.
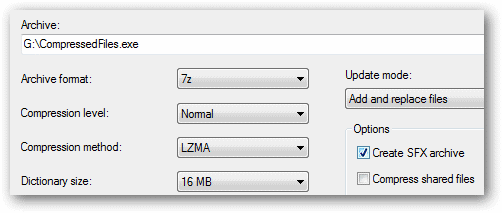
Adjust the compression level from the corresponding dropdown. “Store” will not compress the files and folders at all. This simply allows them to be zipped up. “Ultra”, on the other hand, provides the maximum compression level for a 7z file. Only the 7z and zip archive formats support anything above a store compression level, so if compression is desired, select one of these two formats.
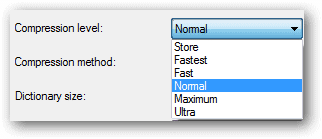
The 7z boasts the most variety set of options, so we’ll look at this format. When the compression level “Ultra” is selected, notice the two memory usage stats change. As more processing power is required to compress the objects, so also is the amount of resources needed to decompress that same file.

Similar to changing the level, the number of CPU threads used can be altered to, thus changing the amount of memory usage for compressing. This helps utilize all the CPUs you can to compress the objects at the fastest speed possible. This is helpful if compressing many large files that could be sped up using multiple processing units.
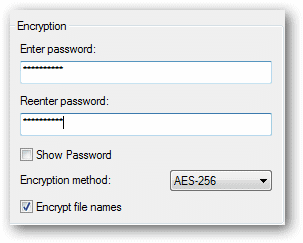
Password-protect an archive file in 7-Zip by simply choosing one under the “Encryption” section. Again, this is only available for 7z (both SFX archives and regulars) and zip files. “Encrypt file names” to secure the identify of the objects contained in the archive. It’s possible to open an archive and view the files without needing the password until you attempt an extraction. It’s here that privacy is compromised unless you encrypt the file names.
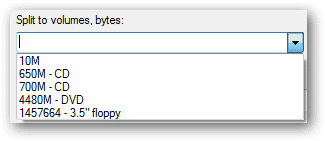
If an archive file is too large for putting on a CD or DVD, consider the option to split it into different volumes. Select “700M – CD” to ensure the volumes can fit nicely on a regular CD.
When finished, press “OK” to watch the progress of the compression. The total size before compression was 217 MB. With the compression level set to ultra, the resulting archive file was 162 MB in size. This is a good compression ratio that can drastically save time while uploading for sharing this file, for example.

If too much is going on at the same time while using the allocated memory and CPU power for compression, the computer may temporarily lockup. One way to see if the archive if finished without terminating the process early is to see the resulting filename in its destination directory. If “.tmp” is at the end of the file, it’s not yet complete. The 7-Zip icon and proper file extension will be present on completion.

Extract files and folders with 7-Zip File Manager
Like archiving, extracting can be done in two ways.
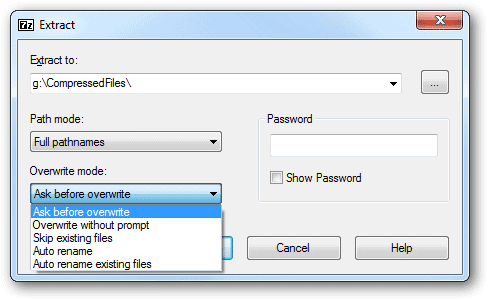
With the File Manager open, find the resulting archive and press the blue “Extract” minus sign button from the top menu. Enter a password, if required, and optionally select an overwrite decision in the even files are already detected in the destination directory. Browse for or accept the default destination directory and press “OK.”
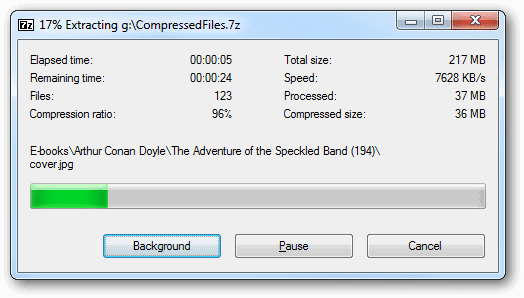
Now the extracting progress window will display. If you remember, the memory usage for decompressing was much lower than that of compressing, so this task didn’t take long at all.
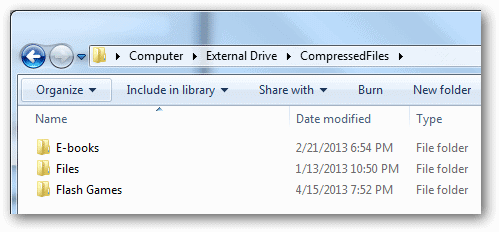
The result is in the same directory structure of that that we began with.
Extract files and folders from Windows Explorer
The other method of extraction is using Windows Explorer. Right-click the archive file and select “7-Zip” from the context menu for some quick options. This is where I find many people choose an undesired option.

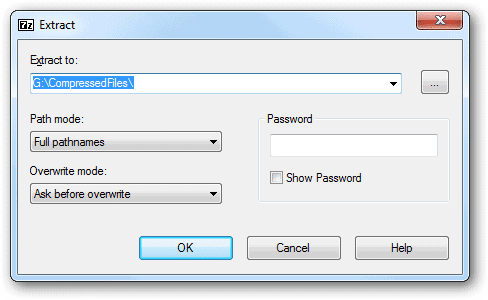
“Extract files…” will open a window to manually specify where the destination should be:
“Extract Here” will take the files and folders that are in the archive and output them to the same directory the archive file is at, with no prompt for confirmation.

“Extract to “Archive Name” will extract the files and folders to a folder (that’s named after the archive file) in the same directory as the archive file. The only difference from this option and the one just previous is that the results are contained in a nice folder for easy identification of where they came from. If you have multiple archive files in the same directory and you attempt to extract them all under the “Extract files…” option, you will end up with many files and folders without knowing from which archive file they originally resided.
To extract multiple archive files at once, highlight the archive files and select the “Extract to *\” option from the “7-Zip” menu.

This will put the resulting files and folders in recognizable folder names in the same directory as the archive files.
Combine zip files with 7-Zip
Likely the most confusing task I’ve found people try to do with zip files is merge multiple splits into one workable file. Some downloads come in split up volumes to accommodate slow network speeds. Other times, like above, people can split archives into multiple volumes for placing on CDs. The most important things to remember before attempting this is ensuring the filenames were not changed. Each part of this set of archive files need to be named and contained in the same structure they were when they first were split up.
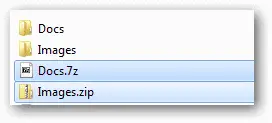
Below, we have 17 archive part files. This is indicative from their filenames of increasing numbers.

Combining and extracting part files is simple with 7-Zip. Select every part file and then right-click on one of them to choose “7-Zip > Extract to *\” from the context menu. Don’t choose any other option, as selecting “Extract Here,” for example, will extract every part file into their own directory, thus breaking the files into little pieces, making them useless.
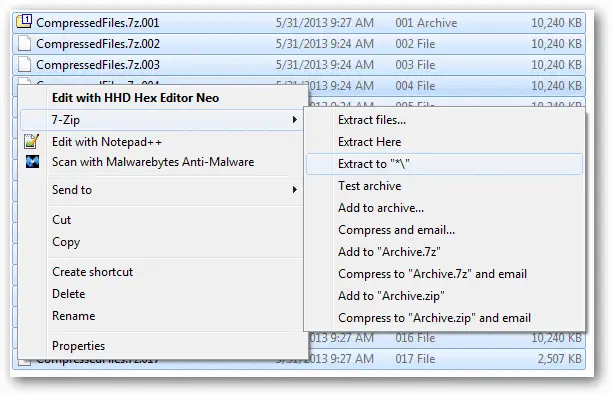
Aside from not knowing the fundamentals of extracting, another major issue with these types of files is the fact that those who archived the original part files oftentimes do it wrong, leaving some files out or wanting to rename some of them. They need to be exactly the way they were when they first were archived. This makes extracting part files hassle free.
Fix ‘Incorrect command line’ error
A common error I see with users of 7-Zip that I feel needs to be addressed is due to an association issue. One way or another, the File Manager was disassociated with certain file types, resulting in the “Incorrect command line” error.

The fix takes less than one minute to complete. On the error-causing file, right-click and choose “Properties” from the context menu. Select the “General” tab and notice the program it uses to open the file.

Using the GUI of 7-Zip is incorrect, so click “Change” and find the 7-Zip directory (usually C:\Program Files\7-Zip). Choose “7zFM.exe” instead of “7zG.exe.”

Click “Open” and “OK” out of any open prompts to successfully open the archive file with 7-Zip.
Conclusion
7-Zip has always been my favorite archiving program. I like the simplicity in the context menu so you don’t have to actually ever use the full-blown File Manager window. Encryption and password protection is easy to configure, making privacy concerns a thing of the past.
If you’re using 7-Zip solely for compression to save disk space, consider cleaning up junk files with CCleaner, JetClean or some other free tools.


