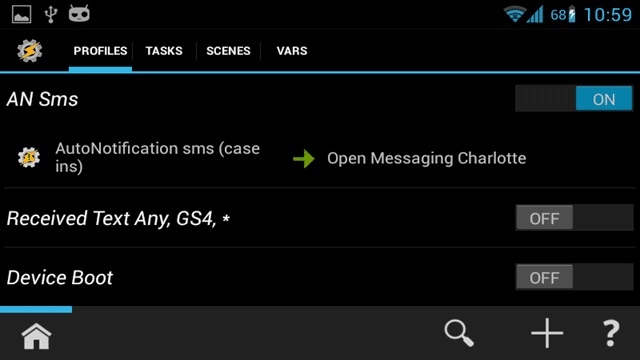
Tasker is the most versatile apps ever created for any platform. We’re not exaggerating. It can do seriously amazing work within its confines and help automate your phone to keep things running smoothly. We never tire of having fun with Tasker and thinking up new ways to do crazy things that other phone platforms can’t even dream of. Tasker is the gift that keeps on automating.
The app supports a wide array of extensions that add even more functionality. We’ve gotten a lot of mileage out of AutoNotification, an app that provides richer notifications from Tasker. The app by itself isn’t much… but when used in conjunction with custom variables and specialized input data, you can do extraordinary things with it.
The only problem with AutoNotification is that its interface is best described as cryptic. Once you get how to use it, the app is simple enough. Until then, things can get confusing. We spent far too much time struggling with the interface, trying to figure out how to get things working. Here’s how to use AutoNotification with Tasker to create a better expandable notification.
Use AutoNotification with Tasker to Get Richer Notifications
Why AutoNotification?
Tasker recently added support for expandable notifications and custom actions for Jelly Bean devices. This is a great step forward, but it’s not quite complete. Excess data is not shown on the notification, opting to be restricted to one line only.
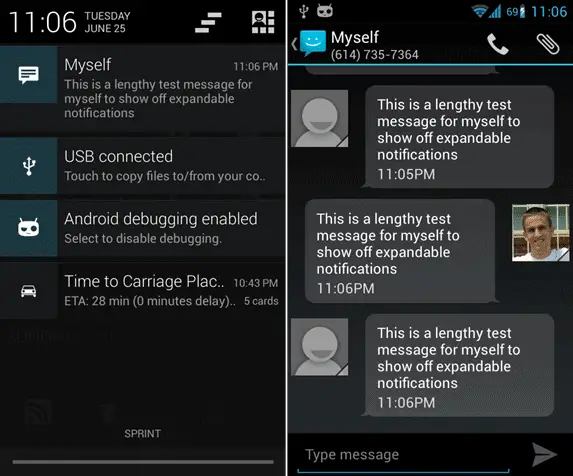
AutoNotification is cool because it expands that one line into many. Lengthy strings of data can be shown in their full state without resorting to a single line ending with an ellipsis.
We were working on our custom SMS notification setup and were trying to build specialized notifications from one particular contact. When we get a text from her, it shows in a custom pop-up.
Unfortunately, the app is crippled in its free mode. You’re better off biting the bullet and buying the app from the in-app purchase. It’s worth it for the extra capabilities.
How to Send an AutoNotification
To add a custom pop-up, add a new action to whatever task you want. AutoNotification actions are filed under Plugin. Once you’ve added that, tap the “Edit” button next to “Configuration.”
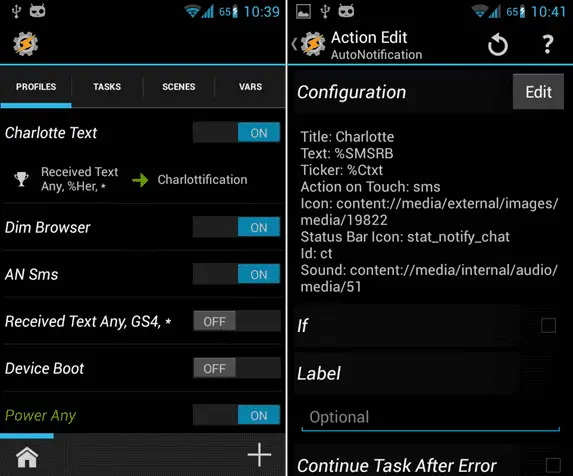
Now it’s time to dig into the array of menus. “Title” is what appears in the large print on the notification. We use it to display the sender’s name for this custom SMS receiver.
“Text” is the body of the notification. This is where we put the body of the text. “Subtext” is further text within the notification. Same for “Number,” except it displays a number. “Content Info” is similar to “Number,” except it can display any string of letters or numbers.
“Ticker” is important. It contains a string shown across the status bar when the notification is first received. It’s useful for displaying whatever you’d like.
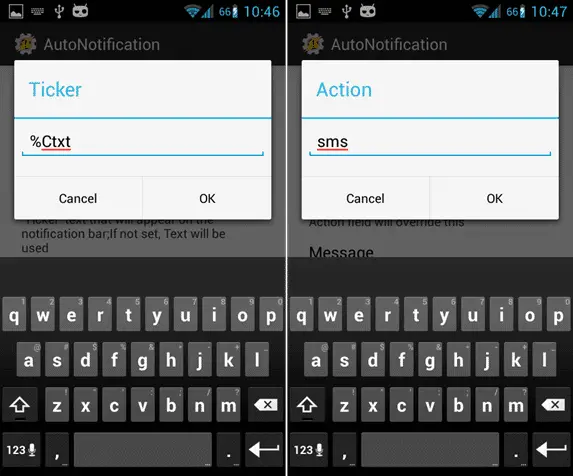
The next few boxes contain the actions that can happen when you tap the AutoNotification. “URL,” “Message,” “Action” and “Action on Dismiss” are all fields which can be used to execute further tasks.
We used “Action” to send a message labeled “sms”. We’ll get back to the sent action and what that does later. For now, take a look at the rest of the options to see extra options for the notification’s presentation.
The last three buttons are custom buttons that you can add to the expandable notification. They’re like the buttons in Jelly Bean notifications, and they can do whatever you’d like.
Executing Actions
In order to perform an action when you tap your AutoNotification, add a new profile and select State > Profile > AutoNotification.
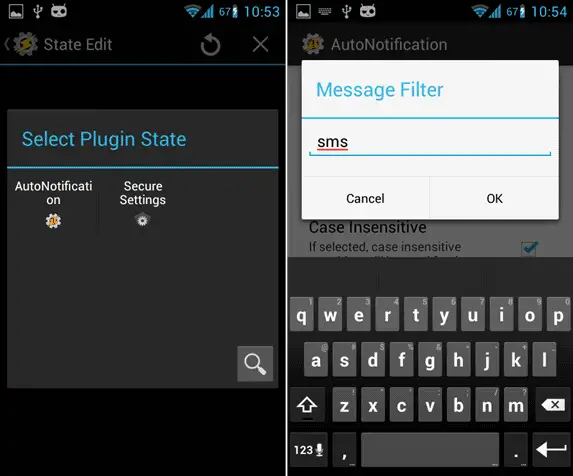
Look through the configuration and add a message filter, preferably the same as the action you put in your AutoNotification. In our case, we put “sms”. The filter catches all actions labeled “sms” and executes a set of tasks based on that. You can see the potential here. An AutoNotification can do whatever you want.
Once you’ve set up the profile, add a new task to perform. In our case, we have it set to open the Messaging app to the contact who texted us. This way we could respond to her text. It’s simple and effective.
Final Thoughts
AutoNotification is a powerful if slightly confusing way to pass data from Tasker to your notification bar. If you can understand how to use it, we’d recommend the app. Notifications this good are too nice to pass up.


