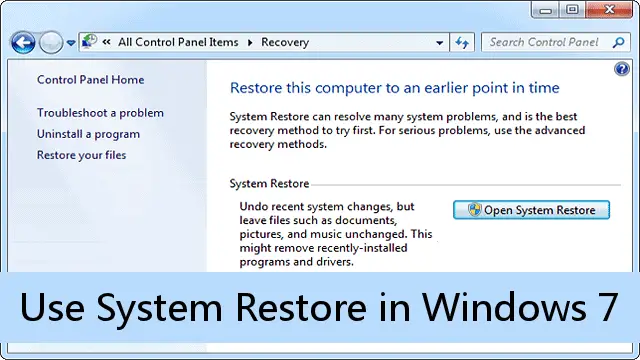
System Restore is an under-utilized tool within Windows 7 and 8 that allows users to revert their computer back to a previous state when a problem arises. Windows 7 System Restore relies on system protection features built into the OS that saves a quick restore state before any major upgrade, installation, uninstallation and other functions performed on your PC. If you’ve ever updated a driver, installed a new program or even installed Windows Update, chances are you’ve seen a system restore save take place.
Windows System Restore doesn’t save files or folders, instead focusing on the current state of your OS. This includes saving registry settings, system information, and OS state. System Restore simply rolls back your Windows 7 PC to a previous state that is either automatically or manually created at key points of usage.
Before you use System Restore in Windows 7, keep in mind that it’s not necessarily a catch-all tool that can fix your PC. Make sure you’re made a recovery drive or media, along with utilizing the cloud or removable media for your files and folders. Only by protecting your computer and its contents from multiple angles can you truly recover from a PC disaster.
Use System Restore in Windows 7 from the Control Panel
In order to get started with System Restore in Windows 7, open your “Control Panel.”
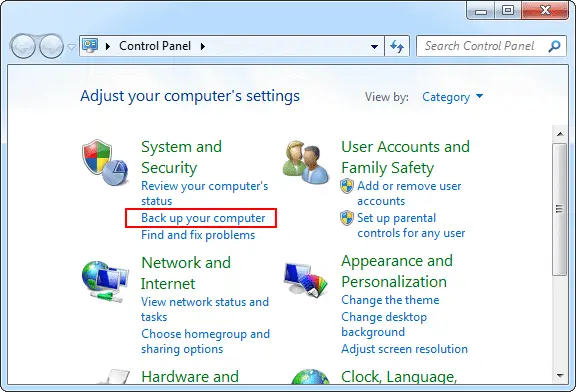
Now, click “Back up your computer” under System and Security.
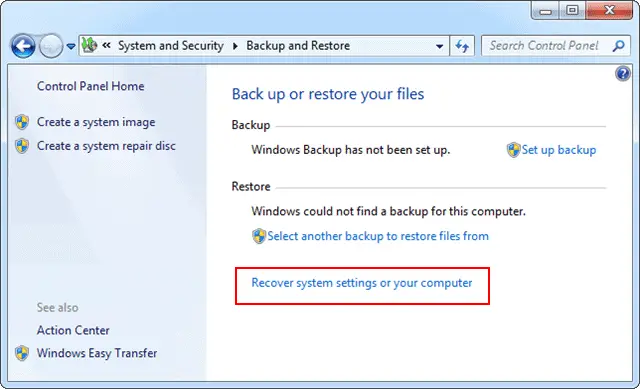
Then, click “Recover system settings on your computer.”
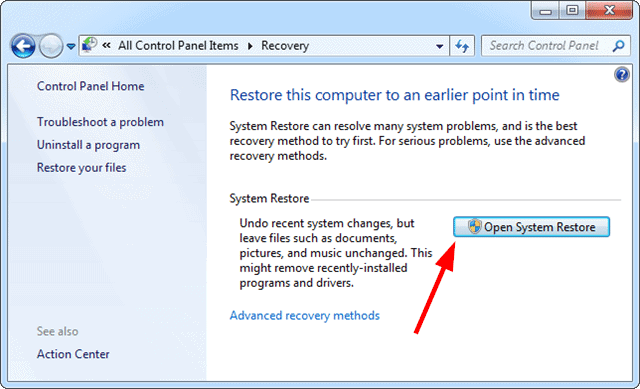
Click “Open System Restore.”
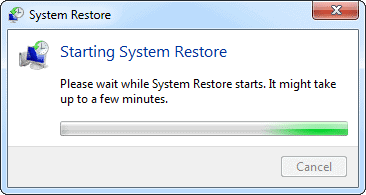
It’ll take a few moments for Windows 7 to open System Restore.
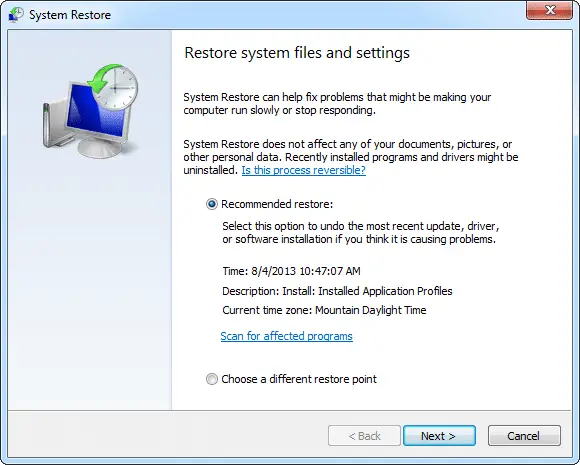
Once open, you’ll be given the option to use what Windows recommends is the best restore point.
Windows 7 saves several restore points as you do various things on your PC. This allows you to roll back your computer to certain time frames which can help pinpoint what caused the issue you’re having in the first place.
If you click “Choose a different restore point,” you’ll be given the option to choose another time frame to restore.

You’ll be given a list of the reasons why a restore point was created. In this case, we have several drivers that were installed along with a system initiated restore point.
Clicking “Scan for affected programs” to let System Restore try and locate issues on your computer that can be potentially fixed by a restore.

You’ll be shown restore points that can be deleted; you’ll also be shown points tat might need to be restored because something went wrong during the process.
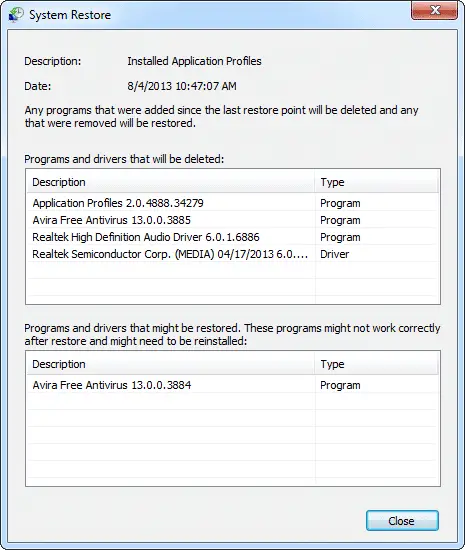
You can click on any of these points to use them as your restore point.
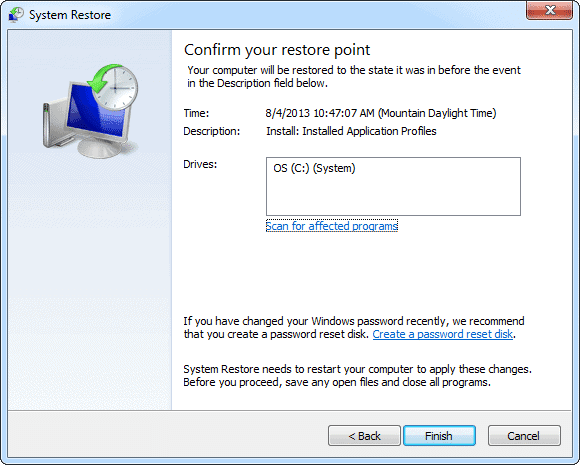
Once you’ve chosen the restore point you want to restore, you’ll be able to confirm where it’ll be restored to – in most cases, that’ll be your primary drive where the Windows OS resides – and you can click “Finish” to start the restore process.
The restore process will restart your computer and begin to overwrite your current OS with the restore point. This process can take anywhere from ten to 15 minutes to a couple of hours depending on the issue at hand. If anything occurs during the process, it’ll be aborted automatically and Windows will load regularly.
If that occurs, you may need to boot into Safe Mode to troubleshoot the issue further on your PC.
Use Windows 7 System Restore from My Computer
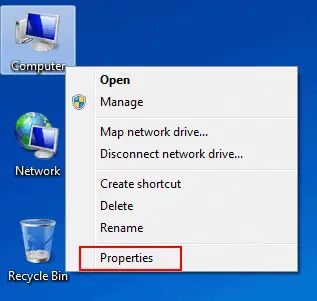
If you want to access System Restore outside of its normal parameters, you can “right-click” My Computer and click “Properties.”
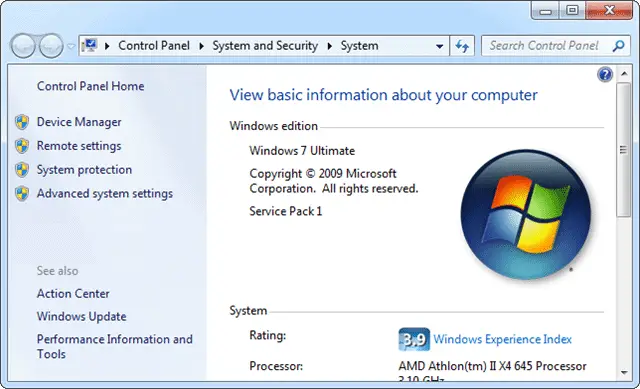
Now, click “Advanced system settings” in the left-hand menu.
Click the “System Restore” tab.
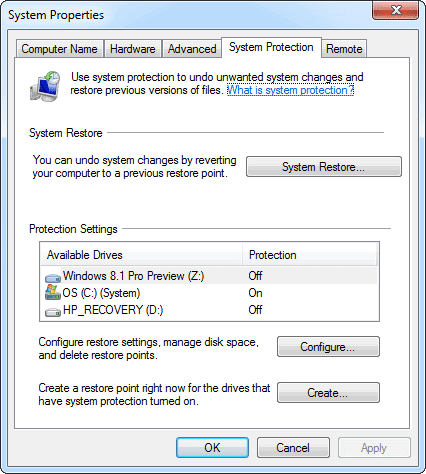
From here, you can turn on and off System Restore by clicking “Configure” next to Configure restore settings….
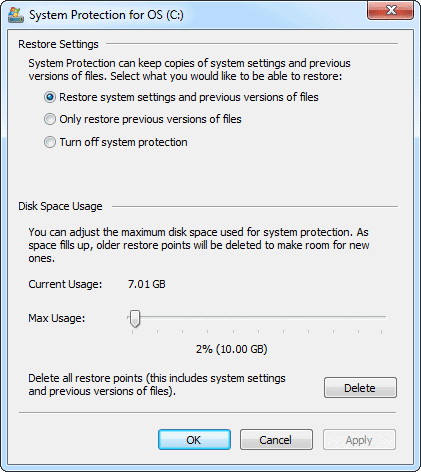
You can choose what you want to restore, how much disk space you want System Restore to use and you can also delete all restore points from here.
Make sure to click “Apply” and “OK” to save your settings.
You can also click “Create…” next to “Create a restore point…” to create a manual restore point of your system’s current state.
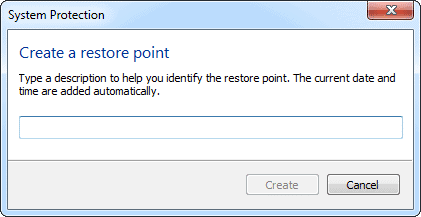
A pop-up will appear asking you to name the restore point, click “Create” after naming it.

Then, Windows 7 will begin creating a manual restore point for you. This can take a few minutes to a bit longer, so let it run its course. Unfortunately, there’s no way to stop the process once it starts unless something comes up.

If at any time you want to manually restore your PC to a previous state, you can also do it from this menu as opposed to the Control Panel by clicking “System Restore….”
As you can see, Windows 7 System Restore is relatively easy to use, you can create your own system restore points as well as rely on what Windows 7 creates on your behalf.
Conclusion
If you aren’t taking advantage of Windows 7 System Restore by either enabling it or just never using it at all when something goes wrong, you’re turning your back on a powerful tool to keep your system from being unrecoverable when you make changes to it. Whether you’re updating drives, tweaking the registry or simply updating Windows, Windows System Restore should always be enabled and in use so you can revert back if something goes horribly wrong on your PC.


