Sticky Notes have been a great way for me to keep track of everyday tasks right on my Desktop. It works flawlessly except when I start using my laptop and have to keep referring back to the other computer to read the notes. Windows Sticky Notes lack the ability to sync the data across various computers.
However, there is a simple workaround that’ll allow users to sync the Sticky Notes data across computers. It can be set up to ensure a perfect update on one when the other is updated or changed.
Using Google Drive and a nice system command, this task will surely be worth it after following the steps.
Synching Windows Sticky Notes: How It Works
In Brief: We will set up the Sticky Notes file, which contains all the notes data, to sync with Google Drive through the downloadable Drive program available from Google. We’ll then set up Google Drive on another computer and then set up Windows to recognize the Google Drive Sticky Notes file as the one Windows will use.
This will let two computers constantly stay updated with their Sticky Notes through Google Drive. Not only does this provide continuity, but it also ensures your Sticky Notes are constantly backed up with your Google account.
This isn’t only possible with Google Drive. We’ll look at using Dropbox and SkyDrive to sync Sticky Notes as well.
Note: One caveat of this process is that it will only work when you restart the Sticky Notes program to call the newly synced and updated file. You must close and reopen the Sticky Notes process to update them. Be sure to check the details regarding this below.
Sync Sticky Notes Using Google Drive
Step 1: Copy the Sticky Notes Folder
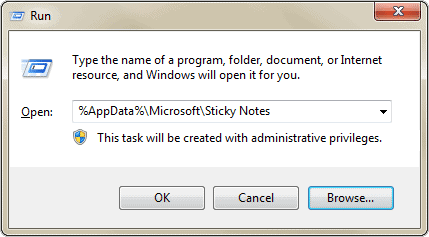
Open the Run dialog box with “Windows Key + R” and enter “%AppData%\Microsoft\Sticky Notes.”
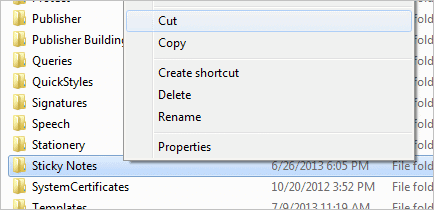
A new window will show, and you’ll need to find the folder called “Sticky Notes.” Right-click and choose to “Cut” this folder. Or you can left-click once and enter “Ctrl + X.”
Before moving forward, paste this folder somewhere safe as a backup in the event something goes wrong while walking through these steps. Choose your Desktop or another desired location.
Step 2: Sync Sticky Notes with Google Drive
Download and install Google Drive on your PC. If you haven’t already, you can Sign up for Drive account here and then choose “Download Drive for PC.”
(Note: If you wish to use Skydrive or Dropbox to Sync Sticky Notes data, read on, understand the method, and follow the process for those alternatives as shown below.)
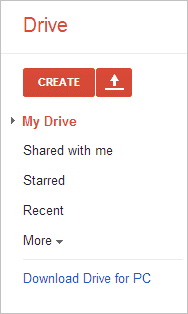
When Google Drive is completed with its install, open the folder it created and paste the Sticky Notes folder you made into your Google Drive. You can select any folder or make an entirely new one for this purpose.
For example, we’ve posted ours in “C:\Users\Jon\Google Drive\Windows Notes Sync\.”
Now open the command prompt from the Start menu by searching for “Command Prompt.”
Copy the following command:
mklink /j “%AppData%\Microsoft\Sticky Notes”
Now right-click in the command prompt and click “Paste.” Put a space after the pasted command and a new quotation mark (“). It should look like this:
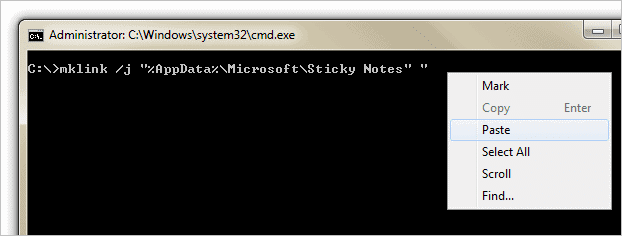
Go back to the Google Drive folder and open the “Sticky Notes” folder you previously pasted so you can see the “StickyNotes” file inside it. Now copy this location from the address bar like this:
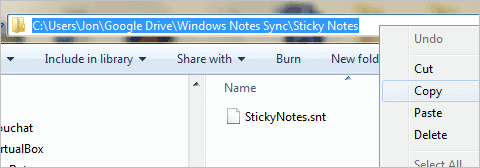
Return to the command prompt and paste this new command. Close this command with one more quotation mark (“). These steps will result in a command very similar to this one:
mklink /j “%AppData%\Microsoft\Sticky Notes” “C:\Users\Jon\Google Drive\Windows Notes Sync\Sticky Notes”
Essentially, this command makes a link from the Google Drive directory of the Sticky Notes to the place Windows looks for where the notes should be. Any time the notes are updated in Windows, they’re reflected in this hard link in the Google Drive folder.
Press “Enter” to submit these commands. The command has completed successfully when you see the result “Junction created,” like so:

If you check back at “%AppData%\Microsoft\Sticky Notes”, you’ll see the folder and file are there again.
Step 3: Set Up a Second PC
The exact same process outlined in Step 2 is necessary for any and all other computers that will be using the synced Sticky Notes file. But with one exception: You must delete the “Sticky Notes” folder in Windows found at “%AppData%\Microsoft\Sticky Notes” at every computer involved in this sync process. The rest of Step 1 is unnecessary because we already have the proper Sticky Notes file in Google Drive.
In short, to add another computer, install Google Drive, delete the original “Sticky Notes” folder and enter the same command you entered for the final instruction in Step 2.
Sync Sticky Notes Using Dropbox or SkyDrive

Google Drive isn’t the only solution for this task. If you prefer to use Dropbox and not install another cloud storage program, you can use your existing Dropbox application to perform the same task. Download Dropbox here.
The exact same rules apply to Dropbox as with Google Drive.
However, Step 2 will involve using the Dropbox application instead of Google Drive. Also, because the location of Dropbox on your computer is not the same as Google Drive (which is %username%\Google Drive\ for most people), you need to adjust the command at the bottom of Step 2 to work with the different location. Finally, because the location is different than Google Drive, pasting the Sticky Notes folder appropriately is a requirement. Anything this guide explains that involves Google Drive will need to be replaced by Dropbox.
For example, the Dropbox location on my own computer is “C:\Users\Jon\Downloads\Dropbox.” This means the Sticky Notes folder would be copied to that folder and the code in Step 2 would look like this:
mklink /j “%AppData%\Microsoft\Sticky Notes” “C:\Users\Jon\Downloads\Dropbox\Sticky Notes”

You can also use SkyDrive from Microsoft, which you can download here. The process, again, is extremely similar with the only difference being the location of the SkyDrive folder.
You should notice a trend by now: No matter what cloud service you use, if you can sync between multiple computers, simply adjust the line of code to correspond to the appropriate sync location and ensure the Sticky Notes folder is placed correctly in the folder.
Here’s an example of the command used for SkyDrive:
mklink /j “%AppData%\Microsoft\Sticky Notes” “C:\Users\Jon\SkyDrive\Sticky Notes”
Again, the “Sticky Notes” folder needs to placed in the SkyDrive folder and the code above (adjusted to your own naming convention) entered in a command prompt.
How to Restart the Sticky Notes for Updating
As we mentioned in the introduction, you must restart the Sticky Notes service to properly update. This is necessary because the Sticky Notes file cannot be updated while it’s in use. Here are two ways to do this.
Manually Restart the Service
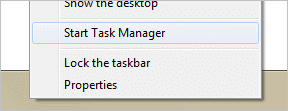
Open “Task Manager” by right-clicking the taskbar and choosing “Start Task Manager.”
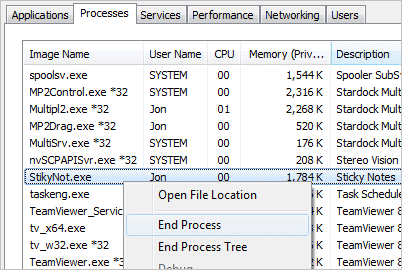
Under the “Processes” tab, end the “StikyNot.exe” process by right-clicking the name and choosing to “End Process.”
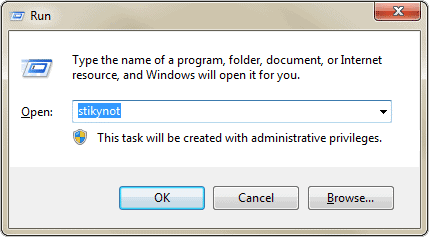
You can open it again with “Windows Key + R” and entering “skitynot.”
Schedule a Restart Every Hour
An easier way is to schedule an update every hour by making the application close and reopen on a schedule. If you need to update sooner, just use the manual method above.
Download this batch file here. It contains the following text:
taskkill /F /IM StikyNot.exe
ping 127.0.0.1
start StikyNot
This will kill the task by force, ping the local computer to ensure some time has passed before trying to open it, and then it will start the Sticky Notes application again.
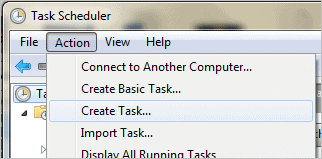
Now open “Task Scheduler” from the Start menu and choose “Action > Create Task.”
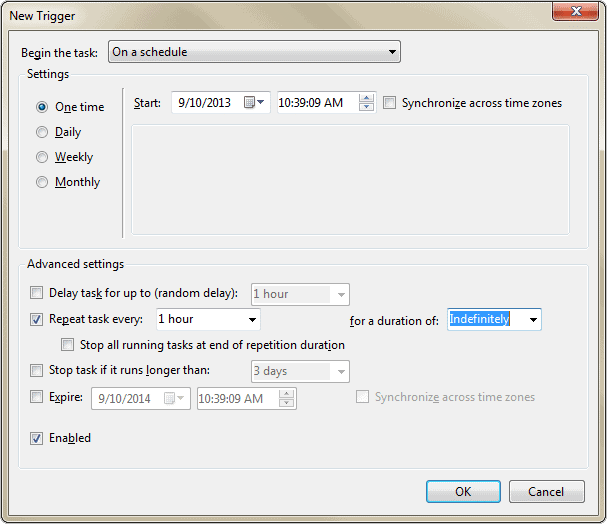
Enter a task name in the “General” tab and choose “New” from the “Triggers” tab so it runs every “1 hour” for a duration of “Indefinitely.” Adjust these to your liking if you prefer a different launch time.
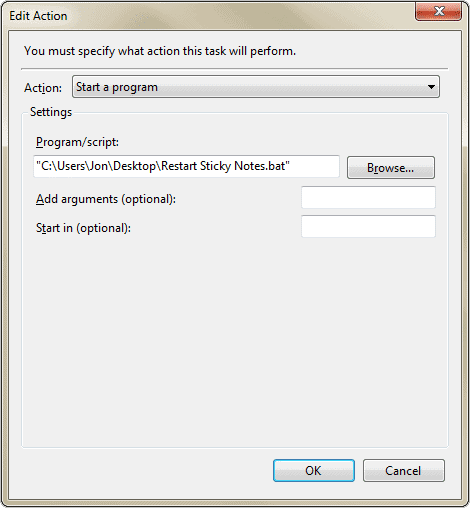
“OK” out of this window and click “New” under the “Actions” tab to “Start a program.” Browse for the downloaded batch file and press “OK.”
“OK” out of any other open prompts and the Sticky Notes application will automatically close and reopen per your schedule, pulling the most up-to-date file to use with the application.
You can also program it to open every few hours or once a day according to your requirements.
Conclusion
No matter the service you use, you can sync the Windows Sticky Notes between different computers. If you prefer Dropbox over Drive, just adjust the tutorial based on that location and you’ll be good to go. If you use a lesser-known cloud service program, you may also be able to adjust these instructions to work with that as well.


