Mac OS X is a robust operating system that lacks little functionality. Everything you expect a modern desktop OS to do, it can do. Well, almost everything. Multi-monitor support of Macs could use some work.
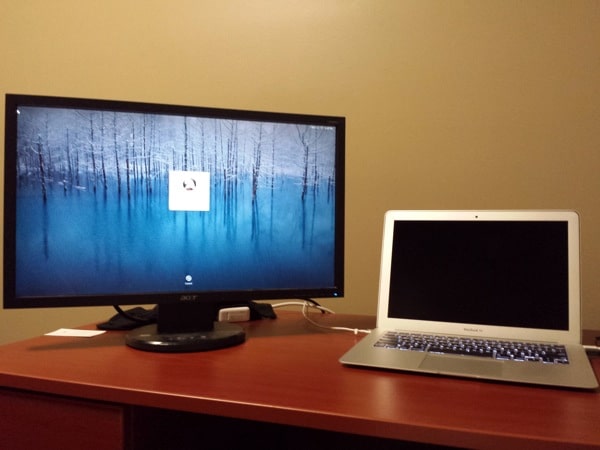
One thing that endlessly annoys me when I try to game on Mac is the output display problem. On Windows, you can right-click the desktop and select an option to output only to an external display. I prefer this setup for games, as playing on a 23-inch display beats my MacBook Air’s 13-inch internal display. You want to output video to only one display for better performance. On a gaming-unfriendly machine like the Air, you need every bit of help you can get.
And yet Apple somehow left out the option to select your output display. There’s no native way to use just the external monitor. Thankfully, there’s a way to get what Apple missed. Here’s how to use only an external display with your Mac.
See Also: 2013 MacBook Air Review: The Best Laptop Money Can Buy
Steps to Enable the External Display on MacBook
Step One: Have Root Access
In order to do this trick, we’ll need root access from the Terminal app. Quick background: Root-level access lets you change any file you want, even mission-critical ones. We’ll need that in order to use the special command.
From Apple’s website:
- From the Apple, menu choose System Preferences….
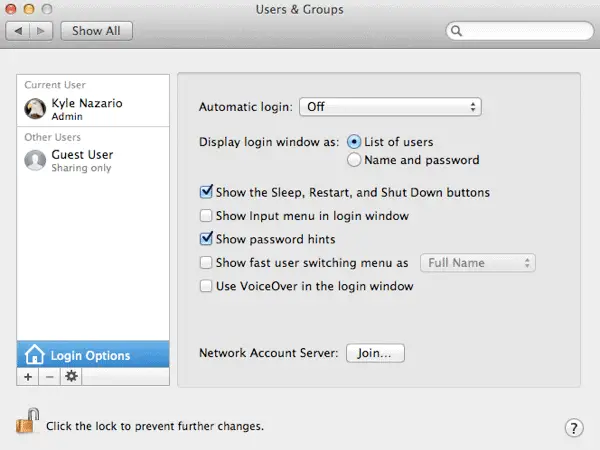
- From the System, menu choose Users & Groups.
- Click the lock and authenticate as an administrator account.
- Click Login Options….

- Click the “Edit…” or “Join…” button at the bottom right.
- Click the “Open Directory Utility…” button.
- Click the lock in the Directory Utility window.
- Enter an administrator account name and password, then click OK.
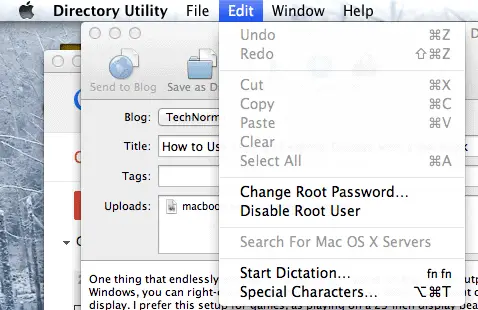
- Choose Enable Root User from the Edit menu.

- Enter the root password you wish to use in both the Password and Verify fields, then click OK.
Step Two: Enter the Command
Open the Terminal app and type in this command:
sudo nvram boot-args=”iog=0x0″
Press enter and reboot your computer. Now the system will recognize the new files and behave the way we want it to.
Step Three: Trick the Mac Into External Display Only
Plug in your external display if you’d like to output to only that. This should go without saying.
Now plug in some kind of USB attachment. I use a wired mouse for my computing, and it works just fine for this trick.
Lastly, plug in the power cord so your Mac is charging. Flip the lid shut.

This is where things change. Normally, closing a MacBook’s lid while it’s charging will output to the external display only. Opening the lid switches it back into dual-monitor mode.
Instead, the computer will go to sleep. Let it shut itself off. Once it’s done, wait a couple seconds and click the mouse. Keep doing that until the computer wakes up. If everything has worked, it’ll only wake up the external display.
Now open the lid and type your password. The internal display should remain dark. You’re good to go!
Step Four: Going Back to Normal
Switching back to using the MacBook’s internal display is easy. Just unplug the external display or close and open the lid without using the mouse to wake the computer. OS X will reset itself.
If you’d like to get rid of this tweak entirely, enter the following command in Terminal:
sudo nvram -d boot-args
Press Enter and Reboot your MacBook to apply the changes.
Final Thoughts
This trick helps gaming immensely. Now you can play on an external monitor without worrying about the heat from the laptop potentially damaging your screen. It’s just easier this way.


