TunnelBear for iOS provides a mobile solution to accessing the Internet over a virtual private network (VPN). If you need to block web trackers that are tracking your every move while online, it’s fortunate TunnelBear is extremely easy to implement.
Download the app, follow the on-screen instructions, and within minutes you’ll have installed a set of settings called a profile. Your iOS device will use these files to configure a location-specific VPN tunnel that all your data is filtered through. There is a free option available with TunnelBear in addition to two account types that cost a monthly fee.
Read on to find out how to easy it is to setup a VPN on your iPhone or iPad. We’ll also look at how to get a free gigabyte of data every month to make your free version last that much longer.
Configure TunnelBear on an iOS Device
TunnelBear requires their app to be installed for the necessary steps to be taken for implementing the VPN. Download TunnelBear for iOS here.
Either sign on to your existing account or choose “Create a free account” to make a new one. If making a new account, check for an email from TunnelBear.
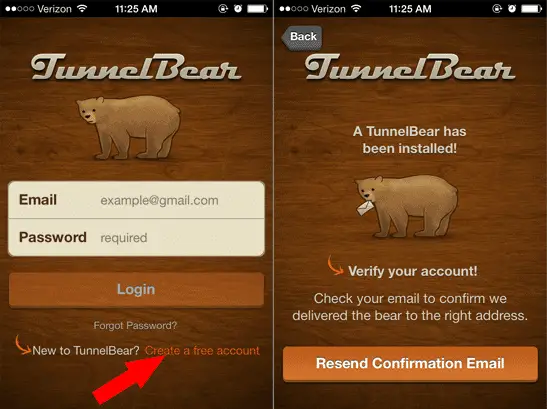
Click the confirmation link from the email to confirm your account. If doing so from the device, you can simply choose to open the app after confirmation. The app will open and you must confirm the install of the necessary VPN settings.
See Also: Create an Encrypted VPN on a Group of PCs for Sharing Files and Applications With Comodo Unite

Choose “I’m Ready” to continue to the Settings app. A group of settings need to be installed for the VPN to work. Click “Install” to do this, confirming it with the “Install Now” button.
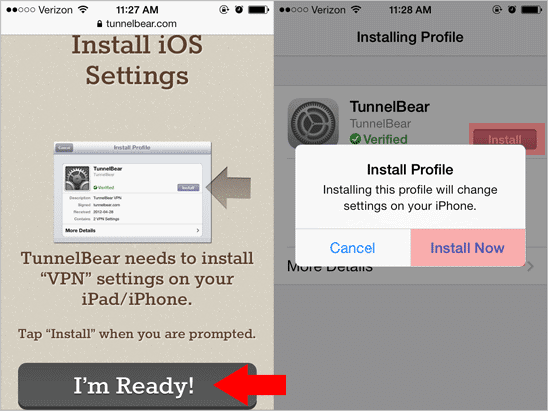
At this point the necessary files that are included in the TunnelBear profile have been added. The final step is to simply enable the VPN.
Enable a VPN by navigating to “Settings > VPN” and toggling the status to the on position. Then select the proper configuration that was just installed. Because I’m in the US, I’ll choose that TunnelBear VPN profile.
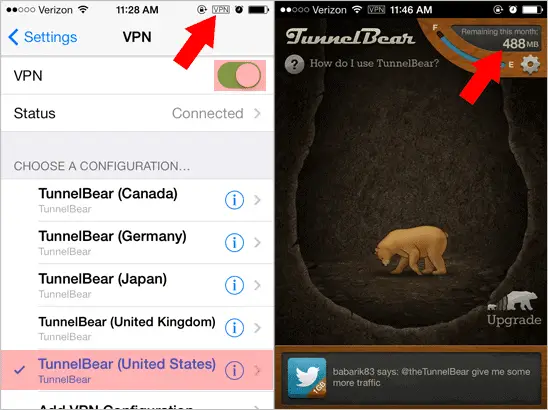
After the VPN has been running for awhile, the TunnelBear app will indicate how much more VPN data you can use up before the end of the month. Notice the small VPN icon near the battery indicator of your device to know when the VPN is being used.
See Also: How to Set Up a VPN on Android for Secure Browsing
Increase the VPN Data Cap
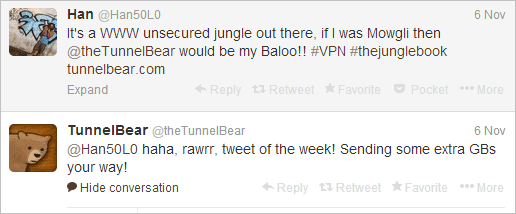
There are two ways to get more data to use with the TunnelBear VPN. Either upgrade your account at a cost for unlimited data, or tweet a simple message to @theTunnelBear to get an extra 1 GB for the month.
Including the free one, three account types are available:
Free:
- No cost
- 500 MB/month (Or 1.5 GB if given extra)
- 16.5 MB/day (Or 51.2 MB if given extra)
Giant:
- $5/month, or $60/year
- Unlimited data
Grizzly:
- $4.17/month, or $50/year
- Unlimited data
Pay for more data from the within the app itself by choosing the “Upgrade” icon on the bottom right.
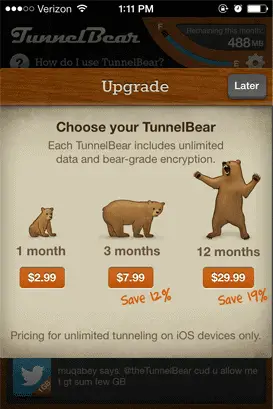
Also do this from the website via your account page, found here.

If you don’t feel you need unlimited data, get an extra 1 GB for the month at no cost by asking nicely on their Twitter page. You can do this once per month.
Final Thoughts
The free version of TunnelBear is great, especially if you get the extra 1 GB every month. I suggest turning on the VPN only when you find it necessary, which ensures your data cap won’t be reached when you really need it.


