Google is irritating sometimes. Take the time they removed push notification support for Gmail for iPhone’s Mail app. Say you wanted to run all your mail through the stock app and not download third-party stuff – if you want instant Gmail, too bad. Google doesn’t let you.
Unless, of course, you know how to game the system. There are a couple creative hacks you can set up to make sure your messages come through on time to your Gmail without having to wait in 15-minute intervals. Here are the options for getting emails instantly.
Also See: Google’s New Translator App for iOS is Jam-Packed With Amazing Features
How to Get Gmail Push Notifications on iPhone
Option 1: Use a Puppetmaster account
This is a little hacky and complicated to set up, but here’s how it works. You’ll use a secondary iCloud account to send and receive mail through your Gmail account from an iDevice.
Fair Warning: This will make inbox management of your Gmail account from the desktop very bad. If you set this up, it’s basically transferring everything important to the iCloud account. That means no more Gmail in the browser – you’re better off using iCloud from a desktop app like Thunderbird.
To get a secondary iCloud account, go to Settings > Mail, Contacts, Calendars > Add Account > iCloud > Create a new Apple ID. Follow the setup there.
Go back to Mail, Contacts, Calendars > iCloud > Mail > SMTP. Now we’ll set the iCloud messages to go through Gmail’s servers.
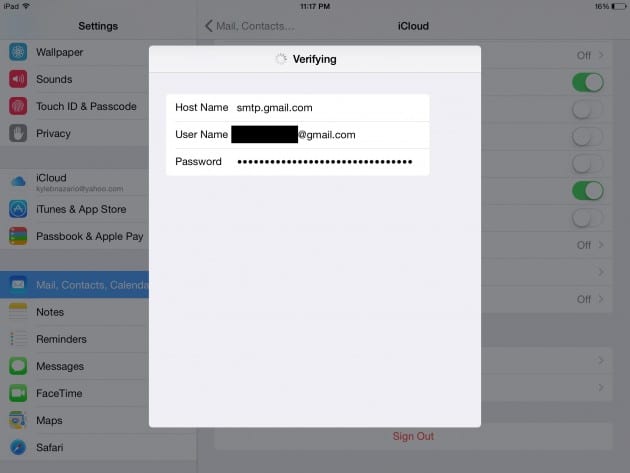
Tap “Add Server.” For Host Name, enter smtp.gmail.com and your full Gmail username and password. It may take a while to verify.
Now tap iCloud SMTP Server and turn Server off, then Done. The Gmail server should be on. This will force all messages sent from that iCloud account to run through Gmail and look like they’re coming from your Gmail.
To set up receiving mail, just set your Gmail to forward all messages to your iCloud address. Open up a desktop browser and go to Gmail > Gear > Settings > Forwarding and POP/IMAP > Add a forwarding address.
Google will send a confirmation message to your iCloud email to make sure you want the forwarded messages. Open the message’s link to confirm. Go back into Gmail settings and select “Forward a copy of incoming mail to [your iCloud address] and archive Gmail’s copy. Then hit save changes.
Option 2: Use Gmail for iOS
I know, I know. You don’t want to use a third-party app. You’d rather run all your email accounts through the iOS Mail app. I get it.
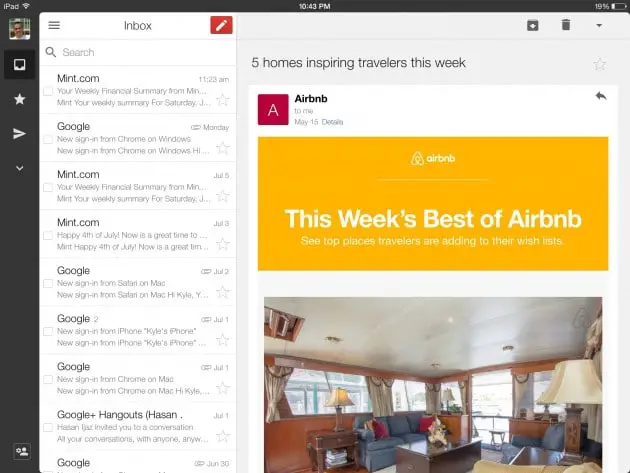
If you don’t mind downloading something else, though, there’s always Google’s Gmail app for iOS. It does push notifications right out of the box, no setup required.
Option 3: Set up Gmail as an Exchange Account
This option is only available to paid Google Apps users. If you’re willing to pay Google for your Gmail domain, then it’s pretty easy to set up.
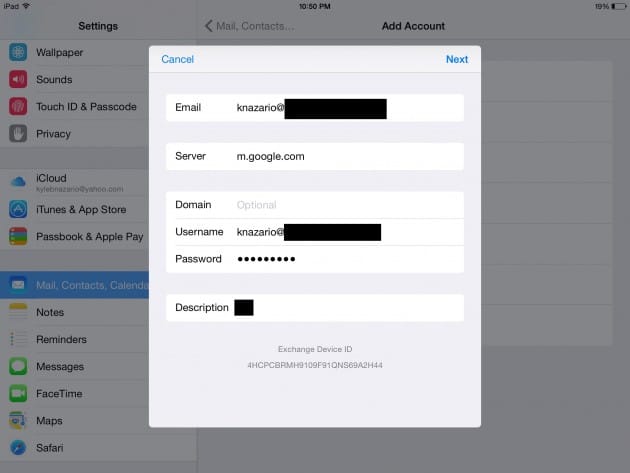
Go to Settings > Mail, Contacts, Calendars > Add Account > Exchange. Enter your email account and password. Next the box will expand and ask for more info. In the Server field, enter:
m.google.com
Leave domain blank. In Username, enter your full email address again. Tap Next, choose what to sync, and the account should be ready.
To make sure you’re set up to receive push notifications, stay under Mail, Contacts, Calendars and go to Fetch New Data > (your Google Apps account). Under Select Schedule, “Push” should be checked. Everything should work after that. If you’re running into trouble, check Google’s help page.
Final Thoughts
It would be nice if Google didn’t make us jump through so many damn hoops just to have that instant gratification of knowing exactly when a new message arrives. Is it really so bad to support push on free accounts?
(Yes, because then Mountain View wouldn’t have a carrot to push people toward the Gmail app instead of Apple Mail. But I digress.)
The Exchange option for paid Google Apps users is pretty great, and I’d highly recommend it for your work email. By far the least amount of setup required there. Otherwise, try that alternate iCloud account. It’s that or wait 15 minutes.
Further Reading: How to Play YouTube Videos in the Background on iOS


