When you are using a laptop or a desktop, you want all the possible conveniences and essentials to be absolutely hassle-free, but your privacy and the system security becomes of prime importance for your personal as well as professional life.
The earlier versions of Windows supported the option to allow Guest Users to log in quite easily but as safety and privacy issues took center stage, Windows 10 disabled this feature. This was simply to give precedence to protect your crucial data and not have any tampering with the settings of your preference.
Also Read: How to Enable or Disable Adaptive Brightness in Windows 10
How can a Windows 10 Guest Account Help?
The Windows 10 Guest Account feature limits the access of a guest or a visitor to your system so that nothing can be changed, interfered, installed or deleted; so all your apps, settings, files and folders are safe.
The visitor can do basic actions like surfing the internet or open their email account which are normal activities performed by anyone who wants PC access.
You are likely to find many tips and articles to enable the Guest Account on Windows 10 but listed below here are simple easy steps for the same.
Use the Command Prompt to add a Windows 10 Guest Account
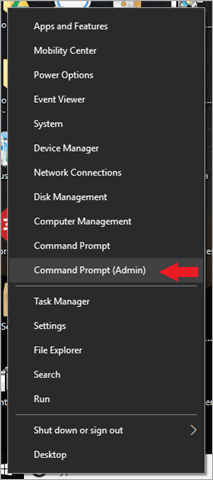
To start with the process to add guest account windows 10, open the Command Prompt (Admin) by doing Right-Click on Windows icon and select Command Prompt (Admin).
Or, Press Windows key+X to get access to the Windows Menu and select Command Prompt (Admin). You must have the admin access to create a guest account in Windows 10.
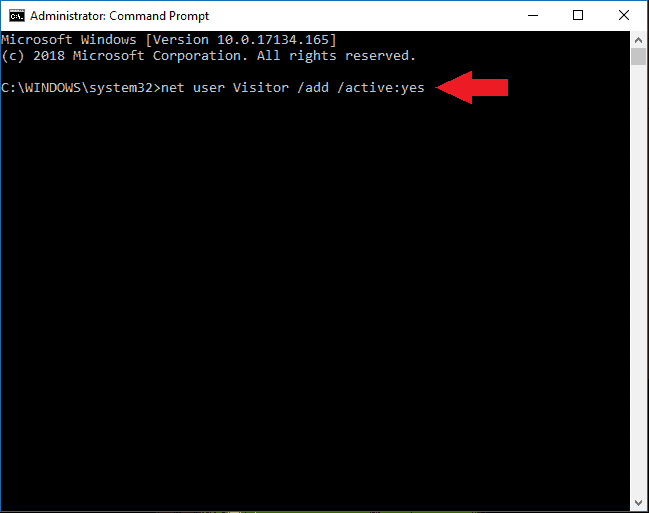
Now, as the Command Prompt window comes up, type net user Visitor /add /active:yes, and press Enter.
This will create a guest account named Visitor (you can customize the name as you want).
Since Guest account is already a default name in Windows, let us use ‘Visitor’.
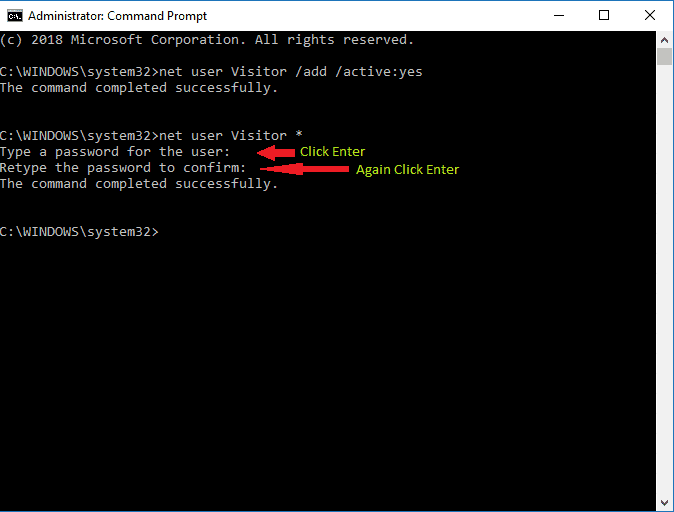
Since the Visitor account has limited access and we need not secure the account with a password.
So it is basically a ‘blank password’.
To set a blank password (or no password), type net user Visitor *.
You can see the command completed successfully.

When it asks you for a password (Type Password); Simply press Enter.
It will ask again to Retype the password, again press Enter.
New users are always placed in the Users group, and they have all the permissions that a standard user has. But we want the guest users to have only a limited access, we place it in the Guests group.
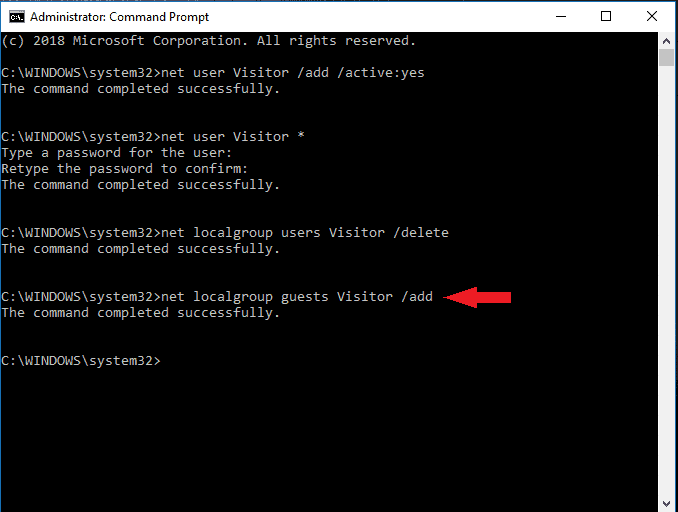
We will need to delete the Visitor user from Users group. To achieve that, type the command net localgroup users Visitor /delete.
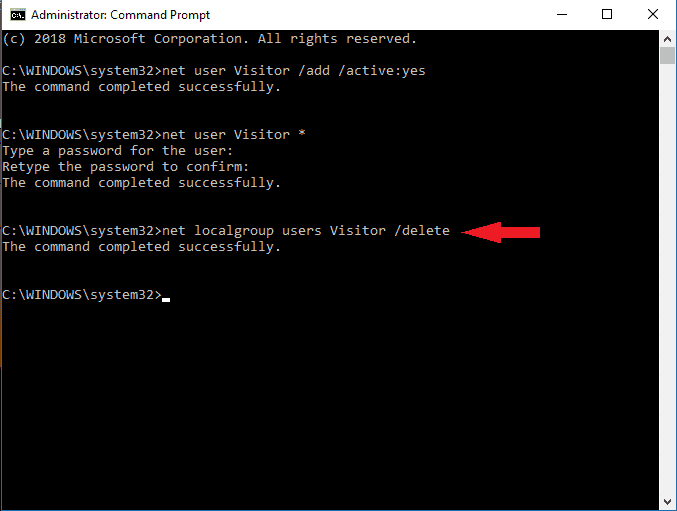
Now type net localgroup guests Visitor /add to add the Visitor user to the Guests group.
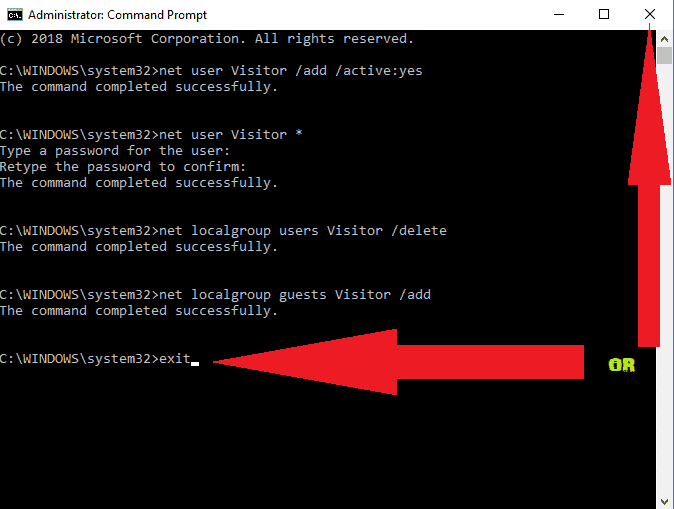
Now close the Command prompt either by clicking on exit cross button at top right corner or type Exit in the Command Prompt and press Enter to exit.
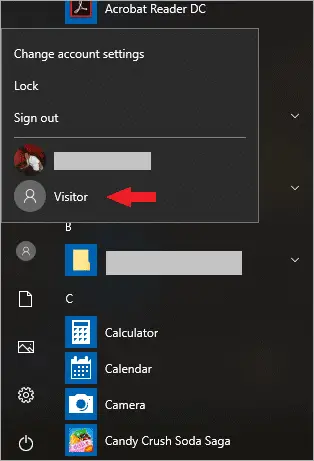
Now, click on the Windows icon, and click on User Icon from the menu. There you can see the Visitor account is added with other users account.
There can be multiple users logged in at the same time; The Visitor account will not be able to access those accounts. Even if they try to access others’ accounts, they will be asked for the password.
Conclusion
So the solution for How to add a guest account on Windows 10 is quite easy with these simple steps.
If you have other methods or simpler tips to manage the enable guest account Windows 10, do share in the comments below.
So now if you have an unexpected guest or a user you can’t refuse the use of your computer or laptop, simply follow this to create guest account Windows 10.


