The Windows computer has a few glitches, and the IP configuration error is one of the most annoying flaws that you will come across.
It does not allow you to connect to the internet over WiFi saying ‘No network access.’ If you run the Windows Troubleshooter, it shows an error notification that says, WiFi doesn’t have a valid IP configuration.
Although it is unclear why this error occurs, the good news is that there are multiple solutions available.
This error occurs when there is an issue with the TCP/IP stack in your computer. It could also be due to a network configuration issue that could arise due to a variety of reasons like incorrect network settings, faulty network, hardware issues, or disabled Windows network services.
See Also: How to quickly check IP address with Google
Fix the WiFi doesn’t have a valid IP configuration Error
Solution 1: Renew IP address for your computer
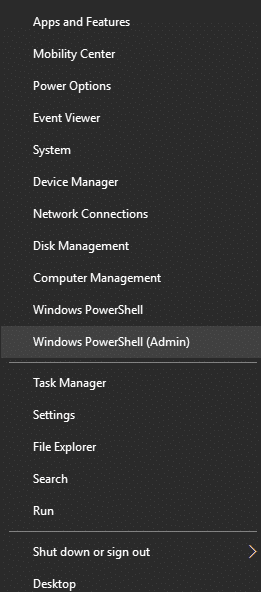
- Press Windows Key and X to open the power users menu
2. Select Command Prompt (Admin). If you are on Windows 10 Creators update, it is called Windows PowerShell (Admin)
3. Type the command – ipconfig /release and press enter
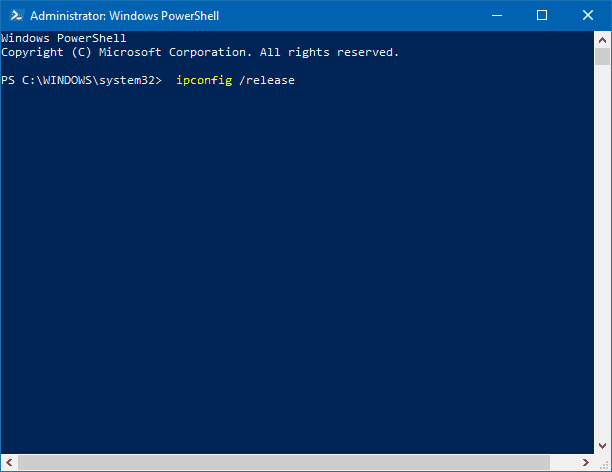
4. Now enter the command – ipconfig /flushdns and press enter
5. Finally, type the command- ipconfig /renew and hit enter
6. Type Exit and hit enter to close the Command Prompt.
7. Restart your computer and check if the Wi-Fi IP Configuration error was resolved.
Solution 2: Manually assign IP address
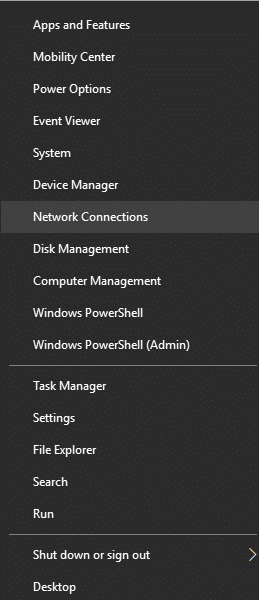
- Press Windows and X and choose Network Connections
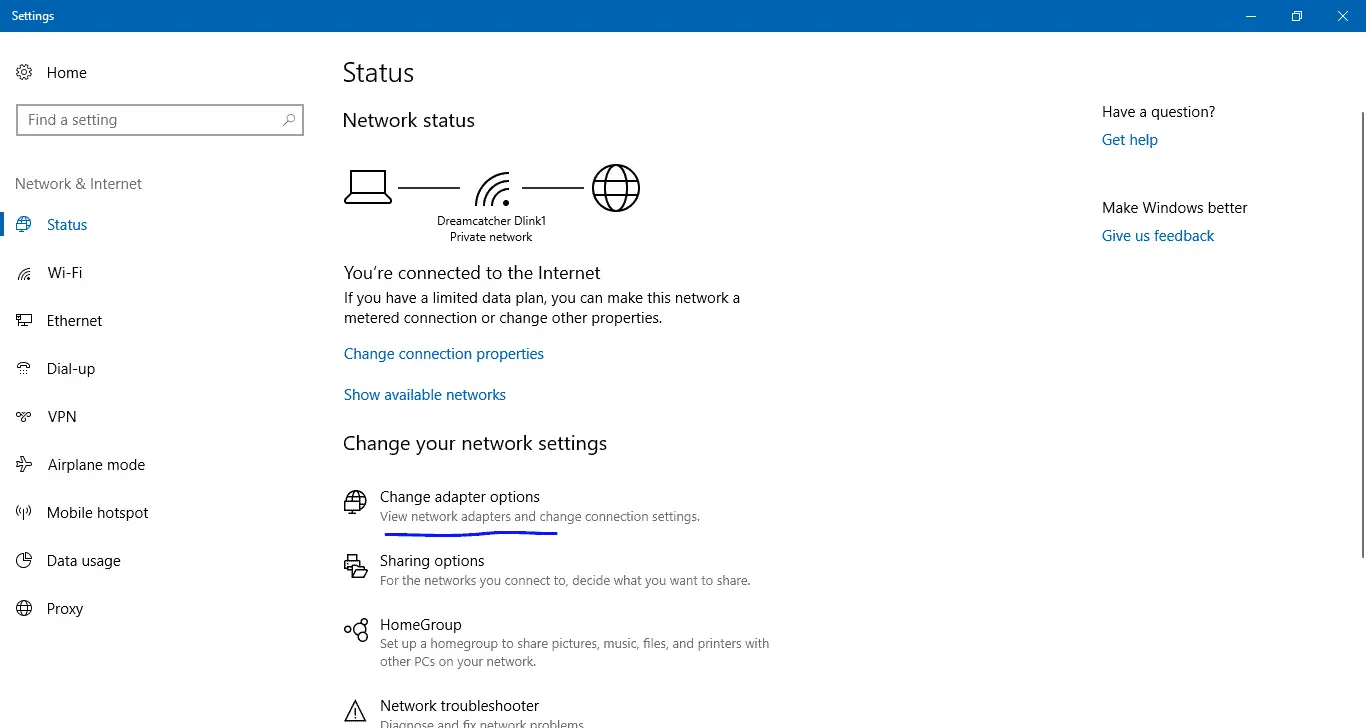
2. Click on Change Adapter Options
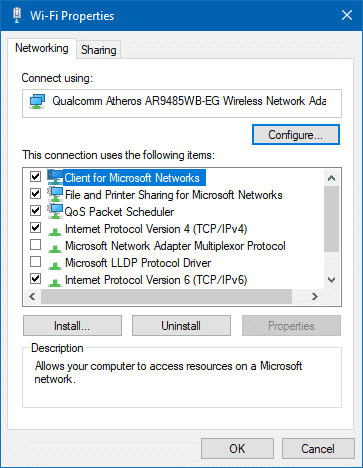
3. You will see your network connections here. Right click on your wi-fi connection and select properties
4. Select Internet Protocol Version 4 (TCP/IPv4) to highlight it and then click on Properties
5. Select Use the following IP address and enter your IP address, subnet mask, default gateway, preferred DNS server, and alternate DNS server.
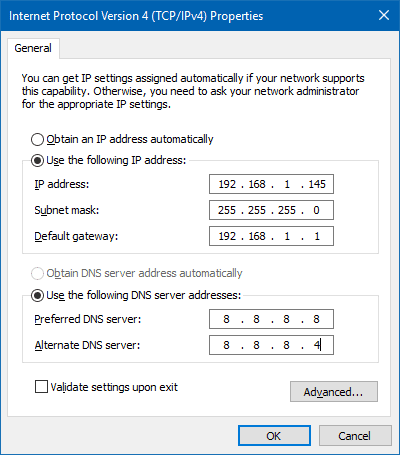
6. Click OK and restart your computer and check if the error has been fixed.
Solution 3: Reset TCP/IP
- Press Windows + X and open Windows Command Prompt in administrator (or Windows PowerShell (Admin) in Creators Update)
2. In the Command Prompt Window, type in- netsh winsock reset and press enter.
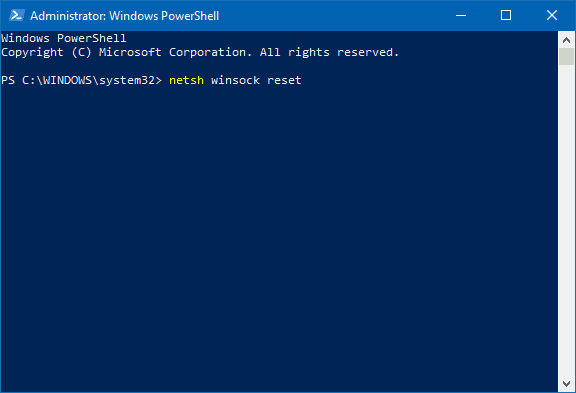
3. Type in netsh int ip reset and press enter.
4. Restart your computer and check if the IP configuration failure error has been resolved.
Solution 4: Perform a clean boot
This is yet another effective method to correct the WiFi doesn’t have a valid IP configuration error.
A clean boot helps in fixing the IP configuration error in Windows because it disables third-party applications on your computer that might be interfering with your wireless connection.
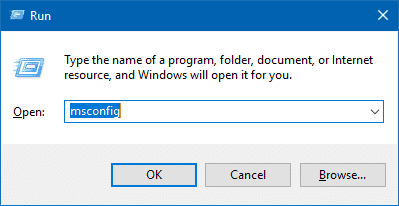
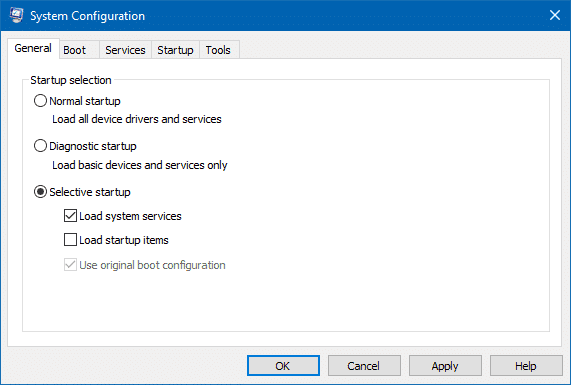
- Press Windows +R keys and type in msconfig in the dialog box and click OK
2. In the System Configuration window that opens, select selective startup and uncheck load startup items
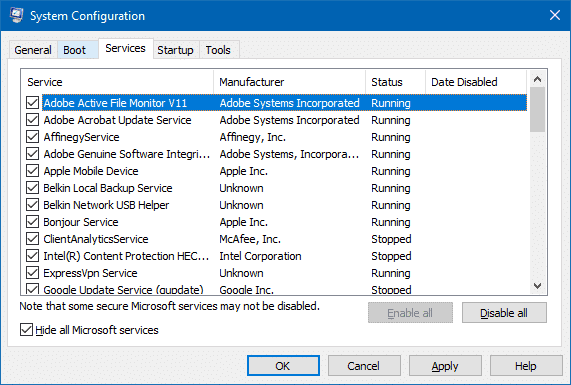
3. Go to the Services tab and select Hide all Microsoft services at the bottom of the window. Click on Disable all.
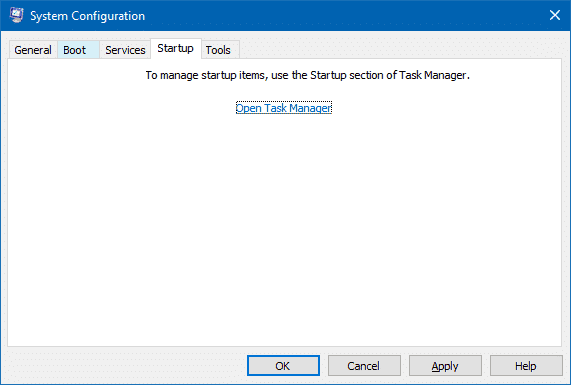
4. Go to the Startup tab and click on Open Task Manager
5. In the Task Manager, there is a list of startup applications. Right click on each application and choose Disable
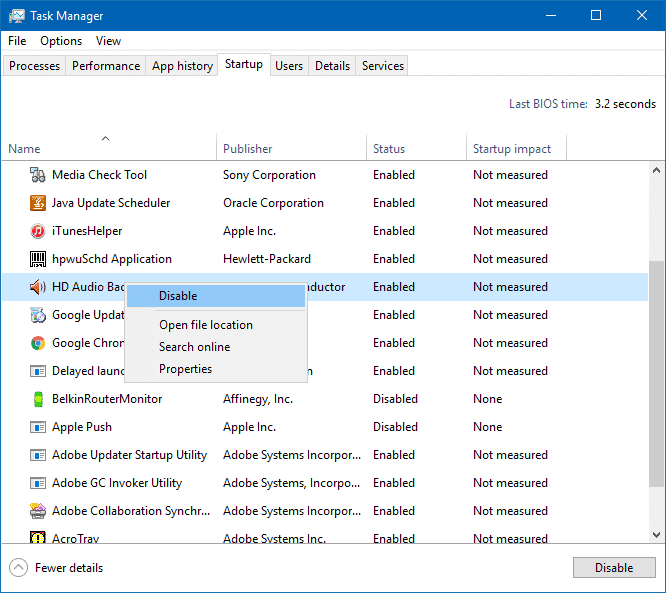
6. After you have disabled every application on the list, close the Task Manager.
7. Go back to the System Configuration Window and click on Apply and Ok.
8. Restart your computer. Check if the error was resolved. If you can connect to the Wi-Fi network after a clean boot, enable the disabled services one by one to find out which service or application was causing the error and fix it by updating the service or removing it.
Solution 5: Remove your antivirus software
There have been instances when the antivirus software or a firewall in your computer has caused the Wi-Fi IP configuration error to appear. The simple fix for this is to temporarily disable all your antivirus software and restart your computer to check if the error has been resolved.
If the problem has been fixed, then update your antivirus or uninstall it if there are no upgrades available. Remember to install a better and updated antivirus solution instead.
Solution 6: Uninstall wireless adapter driver
Another way to resolve “WiFi doesn’t have a valid IP configuration error” is to remove the wireless adapter driver. Follow the process shown below.
1. Press Window + X keys and select Device manager
2. In the Device Manager window, locate your wireless device and right click on it. Choose to uninstall
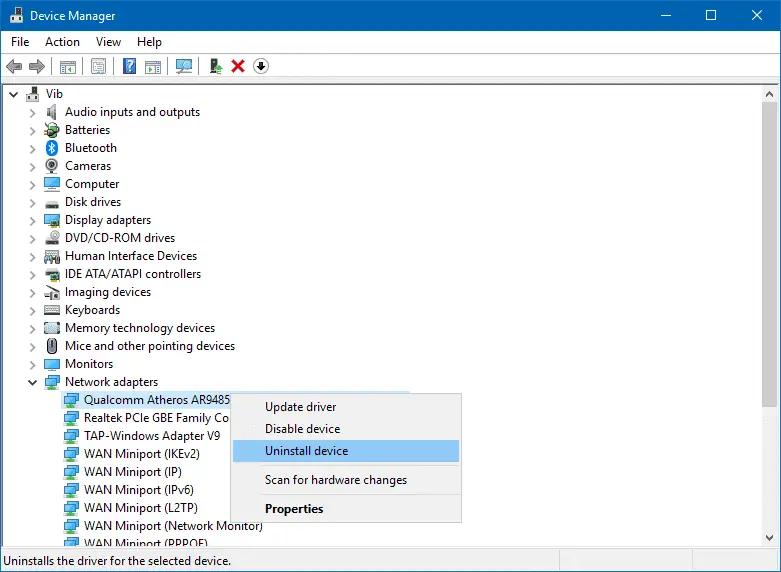
3. After the uninstall, restart your computer.
4. When your computer restarts, it will automatically install the default driver. Or you can download the latest driver and install it manually.
Solution 7: Change wireless SSID and password
Changing the wireless SSID password on your modem can sometimes fix the wifi IP configuration error. You can change the password by connecting your PC with your modem using the Ethernet cable.
Check your modem’s manual on how to access the settings online and change the password. Restart the modem, disconnect the Ethernet cable and try connecting to wi-fi.
Solution 8: Increase the number of DHCP users
DHCP is responsible for assigning IP addresses to the devices in your network. Some routers set the default to 50 users, and this sometimes causes the Wi-Fi doesn’t have valid IP configuration error.
You can get access to your router settings manually and fix this by increasing the number of DHCP users. Check the router’s manual to see how to use the settings.
Conclusion
These are the most common solutions for the WiFi doesn’t have a valid IP configuration error on Windows 10 computers. Do try these first for an easy fix. We are sure one of these should work for you and resolve this issue.
Further Reading: Use Wi-Fi Sense in Windows 10 to Share WiFi Networks With Contacts


