There are times when you are working on your personal files on the PC and some errors. Lots of time one can simply “undo” the action and begin again.
When the same kind of situation occurs while working on the operating system on your PC, you may wonder if there is any way to “undo” your latest actions. Thankfully there is and it is known as System Restore in Windows 10.
Understanding Why We Need A System Restore in Windows 10
There are times when we make an error with the system’s working condition or unintentionally install malicious software or app. Ultimately this can lead to some damage or even a system crash that can occur.
Reinstalling Windows 10 is not always the best option to troubleshoot major issues. Going into the safe mode is also a good option, but a simpler option would be the one we are discussing in this guide.
With System Restore in Windows 10, it is possible to create a restore point for your system. System Restore is an effective way to resolve the majority of computer issues when things don’t work well.
A system restore point is the earlier stage of your system settings where everything was functioning properly.
By default, Windows creates a restore point just before you perform an action like installing an app, software or device driver. This may even happen when you are updating your Windows program.
Here is how it works practically:
If you install a device driver and the system crashes then this is what has actually happened. Before you install, by default Windows will have created a Restore Point for your system.
If the crash occurs, all you need to do is go back to the settings where the Restore point was created.
Of course, you also have the option of simply uninstalling the problematic driver or software and that is also likely to work.
Read our guide to installing Windows Drivers, which tells you how to keep drivers updated to make sure your PC runs like a well-oiled machine.
Are Your Files and Software Affected By This Process?
If you assume that all your files will be backed up when you do a windows system restore, then it would be a wrong assumption. Windows 10 System Restore has nothing to do with your hard drive and its contents.
System Restore has been designed to work with Windows settings and system, but not for the content on your PC. Windows 10 System Restore will not restore any files that may be lost during a system crash. It will only bring your system back to a suitable state where it was working flawlessly.
Any software that you installed after that System Restore point will be lost. You will have to reinstall them if you need them.
Software installed before creating that System Restore point will not be affected in any way. Software that you uninstalled after making that System restore point will be restored with a warning. The apps that get restored will not operate until you reinstall them.
Note: Windows System Restore has nothing to do with Viruses and Malware. Yes, performing System Restore will not remove any virus or malicious stuff. Since a good Malware software is not enough to provide security to your system, pairing it with a good Antivirus can ensure double safety.
How to System Restore Windows 10
If you’ve wondered where is system restore in Windows 10, we’ve got the answer for you. By default System Restore is enabled for System Drive (C).
But there are chances that sometimes you even install apps on other drives. Hence, enabling System Restore for other drives is also a good idea. This, however, depends upon what kind of hard drive space do you want to dedicate to this feature.
Nonetheless, we will show you how you can enable System Restore for specific drives.
Go to the Start menu.
Type Restore in the search dialog box.
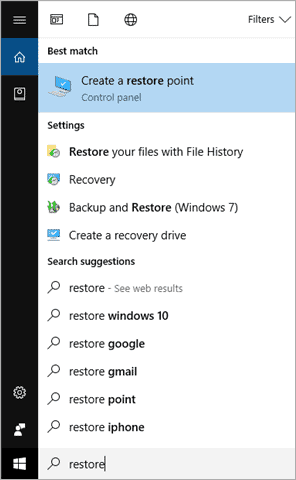
Click on “Create a Restore Point”.
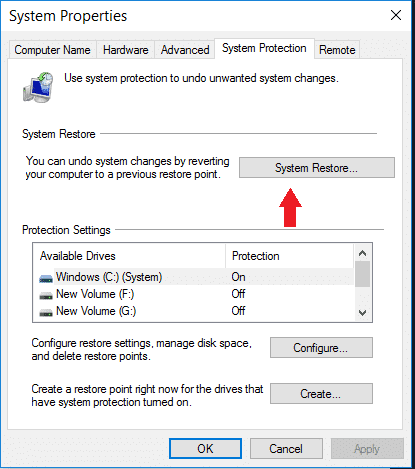
Now you see a System Properties window with various Advanced options.
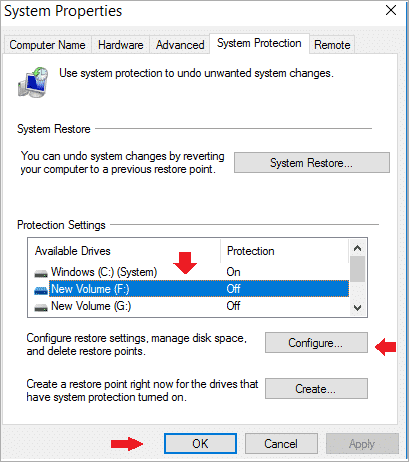
From the System Protection tab, under Protection Settings, you will see the name of all the drives and weather protection for these drives is On or Off.
To enable system restore protection, select the drive and click on Configure.
As you can see, the system protection is already enabled for Drive C, to do the same for other drives we have already asked you to click on the respective drive and click on Configure and see the options presented for that specific drive.
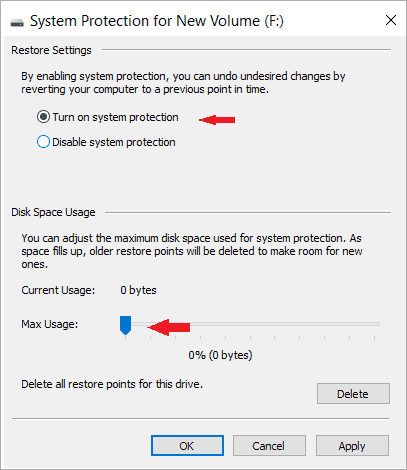
Click on “Turn on system protection”.
You can also configure the “Max Usage” to allow the amount of disk space the System Restore can use.
And finally, click on OK.
Now as you have enabled the System protection, whenever the Restore point is created by Windows or manually by you, System Restore will create a restore point for all that drives that are system protection enabled.
Now we know how to enable System Restore in Windows 10.
Next, we are going to configure how to create a Restore Point.
How to Create a Restore Point in Windows 10
Although Restore point is created by System Restore every week and whenever you install new software, you can manually create one. This is how it is done.
Go to the Start menu.
Type Restore
Click on Create a restore point as we saw in the steps above.
Under the System Protection tab, click on Create option just below the Configure button.
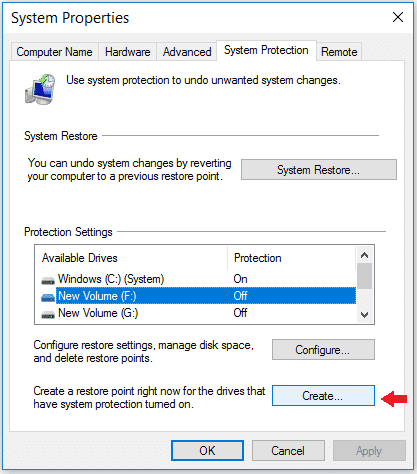
Type a description that helps you identify the restore point to understand when you created that restore point. The time and date will be automatically saved.

After it’s done, you get a dialog box saying “The Restore point was created successfully”.

You are now fully prepared for all eventualities in case of system damage. We have successfully enabled and created a Restore Point.
How and When To Use System Restore in Windows 10
What if your system stops working in the way it should?
Even then if your system is not performing well, then we recommend that you go in for a System Restore to an earlier point as soon as possible.
However, since it is not as simple as creating a Restore point, here are the steps for it.
Go to Start Menu and type “Restore”.
Click on “Create a restore point”.
Under “System Protection”, click on “System Restore” button.
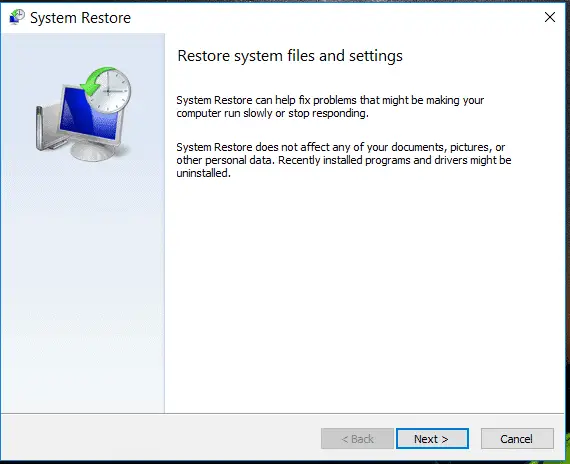
A dialog box will be opened, and you will see a small description of the process. Simply Click On Next.
You have to select any one of them that you remember or want. It is recommended to go for the most recent one.
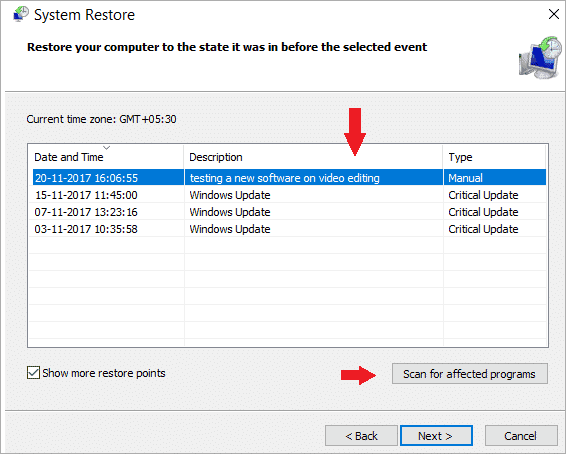
Now, you can see all the available Restore points that you have created earlier along with weekly ones that the system creates automatically.
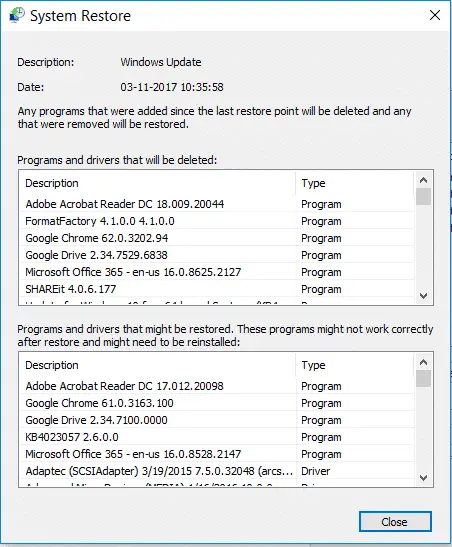
Below is the Example for selecting a restore point, let’s say for “Windows Update”.
Click “Scan for affected programs”. This step you can skip but if you want detailed information then it is better to go with this step.
Now you will see two lists.
First, one listing “Programs and drivers that will be deleted”
The second one for the “Programs and drivers that might be restored.
These programs might not work correctly after restore and might need to be reinstalled.”

Do the same for the recent Restore Point like we have selected “testing new software on video editing”. So that you can see what apps are affected.
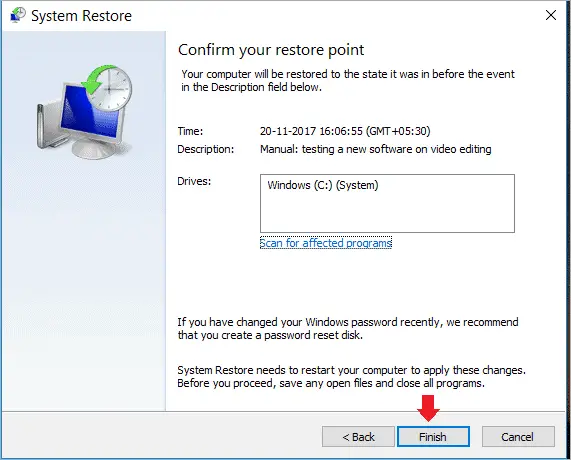
After you have selected the Restore point, click on Next.
Now a dialogue box will ask you for the confirmation.
Click on Finish.
Now finally, you will be asked that once you started the process, it cannot be interrupted. Select “Yes” to continue.
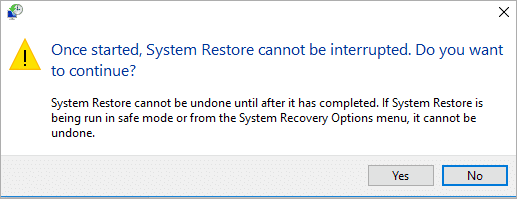
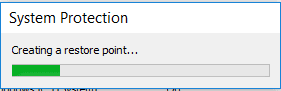
Now the system will be restarted, and the restore process will begin.
It may take up to a few minutes. Once it finishes, your system will go back to its restore point.
You may check if everything is working fine or the issue continues.
One thing to keep in mind that when this process of System Restore in Windows 10 takes place, Windows automatically creates a new restore point, so if you want to undo the process, you have the option to do the same.
Conclusion
It is more than just an easy set of processes to System Restore in Windows 10 if it’s affected by malicious software. Sometimes you unintentionally perform some erroneous action. This may lead to system damage or a crash.
Not to worry, we have provided you with the initial and useful steps that you can take to avoid all those nuisances. If you have any doubt, you may email us and we would be happy to help you.


