The Windows settings application is one of the most crucial applications to use if you wish to customize and configure the operating system. It offers a variety of options that allow users to adjust settings as per their preferences. Slowly but steadily, the settings application has also started eclipsing the Control Panel based on the number of functions it offers. In such a case, it would be a real headache if your Windows 10 settings won’t open properly.
Not being able to open settings deprives the users of the customization options. What’s more, you also won’t be able to fix various other Windows 10 operating system issues if you aren’t able to open the settings app in the first place. For instance, if Windows 10 won’t sleep or your File Explorer won’t work, it would be nigh impossible to resolve such issues if the settings app has crashed.
Solutions To Fix Windows 10 Settings Won’t Open Issue
It is incredibly vital to have the Settings application in fine working condition to solve any other issue on your Windows computer. If you can’t access your settings, here are some solutions to help you fix the problem.
1. Use the Keyboard Shortcut
The standard way of opening the Settings application is to click on the Start menu logo, type Settings in the search box, and click on Open. However, if this method doesn’t work, press the Windows key + I shortcut combination.
One alternative way to follow if your Windows 10 settings won’t open is to use the Run window. Press the Win key + R to open the Run window and enter ms-settings: in the address bar. Hit enter to run the command and open the Settings window. Alternatively, you can also try opening the settings window through the Action Center. These methods will also help you gauge if the Settings application does have a problem starting up and force it to open.
2. Check the Registry and Group Policy Settings
If your settings won’t open in Windows 10, you need to run a check through the Group Policy and Registry settings to ensure if the app has been enabled.
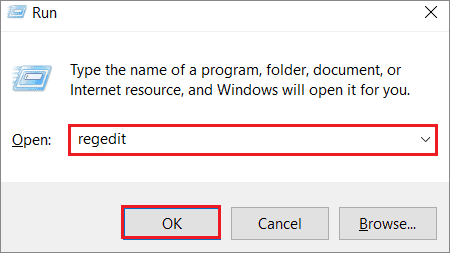
To begin with, open the Registry Editor from the Start menu or by running the ‘regedit’ command in the Run window.
Next, navigate to the following path:
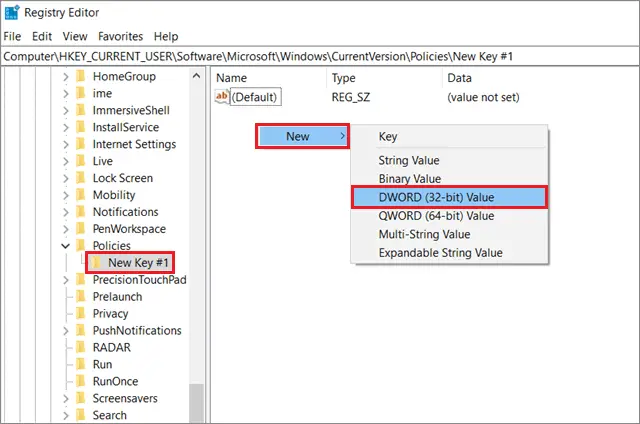
HKEY_CURRENT_USER\Software\Microsoft\Windows\CurrentVersion\Policies\Explorer If you don’t find the Explorer, right-click on Policies, and select New key to create a new one.
Then, select New key, right-click on the right pane and select New. Choose DWORD (32 bit) Value. Rename it to NoControlPanel.
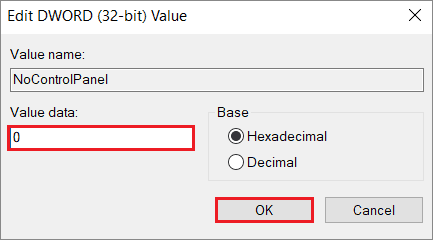
Double-click on the key and ensure if the Data Value is 0. This means that the settings app has been enabled.
Moving on, execute the ‘gpedit.msc’ command in the Run window to open the Group Policy Editor.
Then, navigate to the following path:
User Configuration\Administrative Templates\Control PanelNow, double-click on Prohibit access to Control Panel and PC Settings and disable it. Click Apply and select Ok to save the settings. Following these two checks, the Windows 10 settings app will start running smoothly on your computer.
3. Run SFC and DISM Scans
A System File Checker scan, better known as SFC scan, is used to identify and improve the corrupt system files on a computer. If system files have been corrupted due to any reason, the Windows 10 settings won’t open properly. To ensure that this doesn’t happen, follow the guide on how to perform a file check using the Command Prompt window.
To run the DISM scan, open the Command Prompt with administrative rights.
Now, enter the following command:
DISM.exe /Online /Cleanup-image /Restorehealth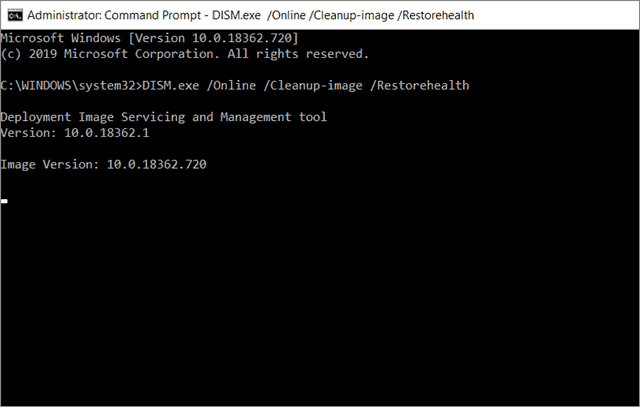
After the process is over, make sure you restart the computer and check if the Windows 10 settings app has started working.
If the DISM scan doesn’t work, try using your installation USB flash drive or DVD and run the following command.
DISM.exe /Online /Cleanup-Image /RestoreHealth /Source:C:\RepairSource\Windows /LimitAccessReplace the ‘C:\RepairSource\Windows’ with the path of your USB or DVD.
The Deployment Image Servicing & Management(DISM) scan is used to deploy the system image and refresh all the features of the system.
4. Run the Update Troubleshooter
The next method to resolve the Windows 10 settings application issue is to run the Update troubleshooter. Many users are accustomed to updating the operating system using the settings application. Here, we will do it via the Control Panel.
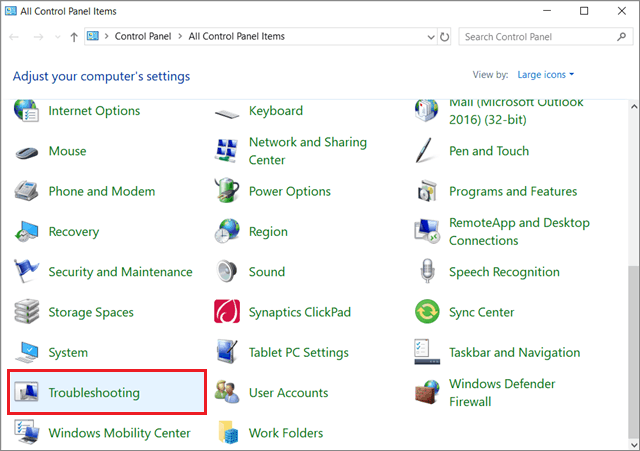
Type Control Panel in the Start menu search box and open it. Then, click View and select Large icons.
Now, select Troubleshooting from the list of available options.
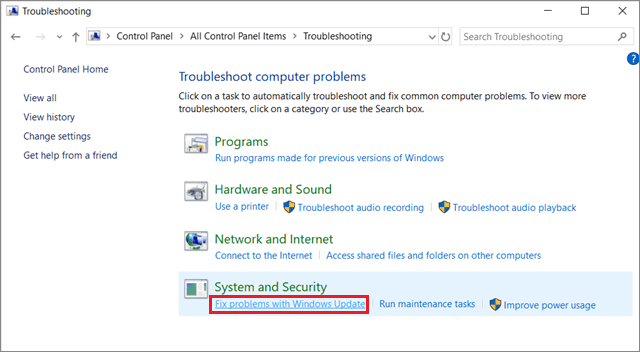
Under System and Security, click on Fix problems with Windows Update.
When the Windows Update window opens, click on Next and follow the screen instructions to run the troubleshooter.
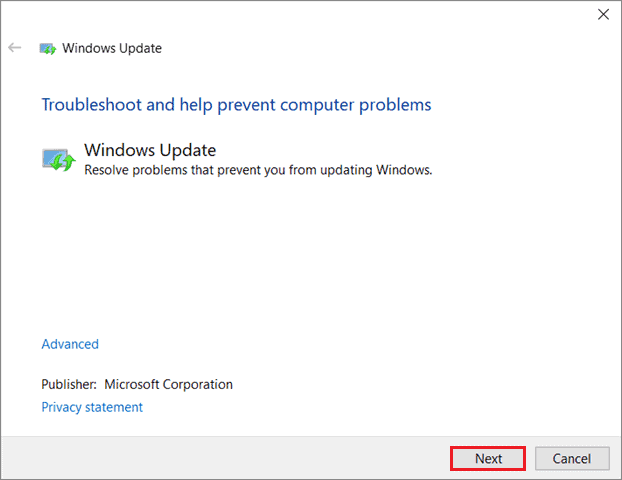
Check if the Windows settings app starts working after the troubleshooting is completed.
5. Reinstall the Settings App Using Powershell
If the Windows 10 settings won’t open after applying all the aforementioned solutions, consider reinstalling the Settings app through Powershell.
To begin with, open the Powershell window with administrator rights from the Start menu search box. Then, type the following command.
Get-AppXPackage | Foreach {Add-AppxPackage -DisableDevelopmentMode -Register “$($_.InstallLocation)AppXManifest.xml”}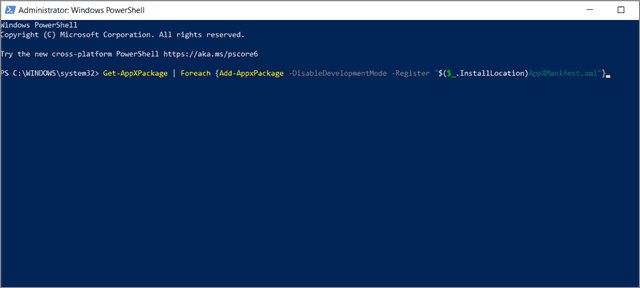
If the Microsoft Windows settings won’t open after you use this command, try logging in through another user account and see if the settings option works.
6. Create a New User Account
If the Windows settings won’t open properly, you can try creating a new user profile through the Command Prompt. However, you need to make some tweaks to the Microsoft Common Console Document.
To create a new user account, open the Run window and run the following command:
lusrmgr.mscIn the left pane, right-click on the Users folder and select New User.
Enter the username and the password.
If you have the Windows 10 Home edition, you need to use the Command Prompt to make a new user account.
Open the Command Prompt as a user with admin rights and enter the following command.
net user newusername newpassword /addMake sure you replace the terms ‘newusername’ and ‘newpassword’ with the actual username and password that you intend to use.
Next, enter another command and hit Enter key.
net localgroup administrators newusername /add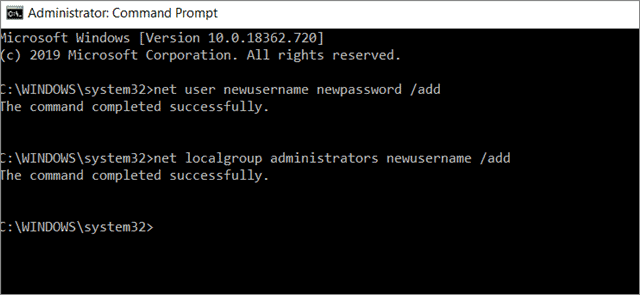
Now, Go to the Control Panel, select User Accounts, and choose Manage another account. Select the new user account you created and change the account type to Administrator.
Next, you need to sign out of the account and sign in with the new account. The settings app should ideally start working after this method.
7. Install Windows Update
If you haven’t installed the latest Microsoft Windows 10 updates, that might be the reason why your Windows 10 settings won’t open and work properly.
The only way to update the Windows 10 OS in the absence of the settings app is to use the Windows 10 Update catalog. You need to find the latest update, download and install it from the Windows Update catalog.
Another way to check for updates is by using the Command Prompt.
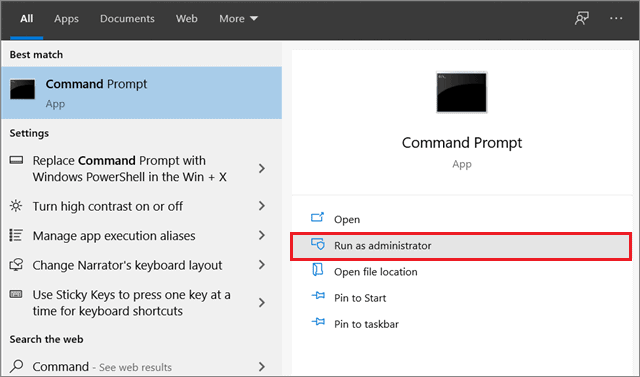
Type cmd in the Start menu search box and click on Run as administrator. Then, enter the following command.
wuauclt.exe /updatenow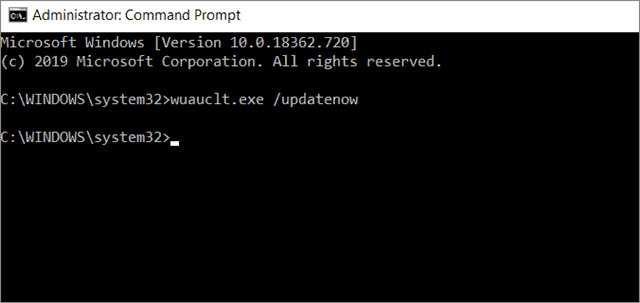
After you run this command, wait until the update process completes the PC restarts itself. Then, check if the Settings app has started working.
8. Uninstall Onekey Theatre
If you have a Lenovo laptop, consider uninstalling the Onekey Theatre application. This is a pre-installed app on the PC that can corrupt the Settings app sometimes. To uninstall this app, select Control Panel from the Start menu. Then, change the view mode to Large icons.
Click Programs and features. Then, find Onekey Theatre in the list of options and uninstall it.
Check if the crashed Settings app has started working again.
9. Reset Microsoft Windows 10
Users need to make sure they have tried all the methods before going ahead with this solution. Before reinstalling Windows 10, we recommend creating a backup of important files for safety purposes.
To start with the reset process, open the Start menu, and click on the Power button. Now, press and hold the Shift key and simultaneously click on the Restart button.
In the next window, you will get three options. Click on Reset this PC.
Next, you need to choose between ‘Remove everything’ or ‘Keep my files’ depending on whether you wish to delete all the files or keep them. If you want to restore the default settings, you can go witht ‘Keep my files.’
In the next window, Windows will warn you that you won’t be able to switch back to the previous version. Click on Next to continue.
Then, you will see all the actions that will take place in the Reset process. Click on the Reset button, and select Continue in the next window to start the Reset process. Restart the PC and check if the settings application has started working properly.
Conclusion
The settings app is a crucial part that cannot be ignored when it comes to configuring the Windows 10 operating system. If the Microsoft Windows 10 settings won’t open quickly, it might be due to a variety of reasons. The absence of the settings app means you can also face problems in various other Windows operating systems.
The solutions mentioned in this article can be helpful for fixing the settings issue as soon as possible. If none of these methods work and deliver the results, consult a computer technician or an expert regarding the same.


