If you wish to convert a soft copy into a hard copy, a printer is a mandatory device to have for that purpose. Printers are mostly used in the corporate world for producing paperwork, albeit you can also look to it for personal use. Given that it is the only device that helps produce hard copies, users often get irritated and panic if the computer can’t find printer.
Since there are two types of printers available, viz. Wired and wireless, there could be various reasons you cannot detect them on a PC. Hence, when you encounter any issues with printer detection on a computer, it’s essential to determine the type of printer you have and then refer to the appropriate solutions to fix the problem.
Computer Can’t Find Printer? 22 Solutions To Fix It
On the other hand, it’s also essential to know that the internet plays a valuable role in using a wireless printer. Ensure that you have a stable internet connection sans connectivity issues if you are using such a printer. Let’s examine what to do if and when your computer can’t find printer.
1. Reboot Your PC
Rebooting a computer is one of the most simple steps you should go for if you experience any new problems related to printer detection. This is not a guaranteed fix, but restarting a Windows 10 PC helps many users resolve various issues related to the Windows operating systems.
2. Check the Printer Connection
Before you have concluded that either one of the printers or the computer has issues in establishing a connection, it’s essential to check if the printer is connected correctly. The green light on your printer indicates a stable connection. If the light is not visible, you can unplug the device and add it again. You could also restart the PC and verify if it’s possible to establish a stable connection.
3. Check Other Printer Items
If the computer can’t find printer in Windows 10 or any other Windows OS, ensure that you check the availability of paper in the printer tray. The scarcity of printing paper can cause the printer to turn off. If there isn’t enough ink or toner, that can also be the reason why your device is malfunctioning. To check their levels, you can keep an eye on the front panel display. If everything is well stocked, see if there is a paper jam that has caused the device to turn off.
4. Disable Your Antivirus Software Temporarily
An antivirus program helps users to safeguard their Windows computer against phishing attacks and various threats and viruses. However, these tools can interfere with the smooth functioning of other applications on a Windows 10 PC. If you cannot see your printer or scanner on the network, you can choose to disable the antivirus software for some time and see if the problem is fixed. If there is a positive result, you have to consider replacing your antivirus software.
5. Restart Your Router and Modem
If you try to connect the printer via the internet, you can restart the router and modem to check if they aren’t causing any problem. In case you have a wireless router, restart it too. This is not a guaranteed fix, but one of the basic solutions to follow if the printer is not connecting to the PC.
6. Update Router Firmware
If the Windows computer can’t locate the printer, you can verify if the issue is resolved by updating your router firmware. You have to enter the router’s network address and access the router administration page for this purpose. Ensure you follow these steps only after confirming that restarting your router and modem doesn’t fix the issue.
7. Update Windows 10
Sometimes, outdated systems can often block the printer from establishing a stable connection. Hence, you have to check for new updates to avoid this issue.
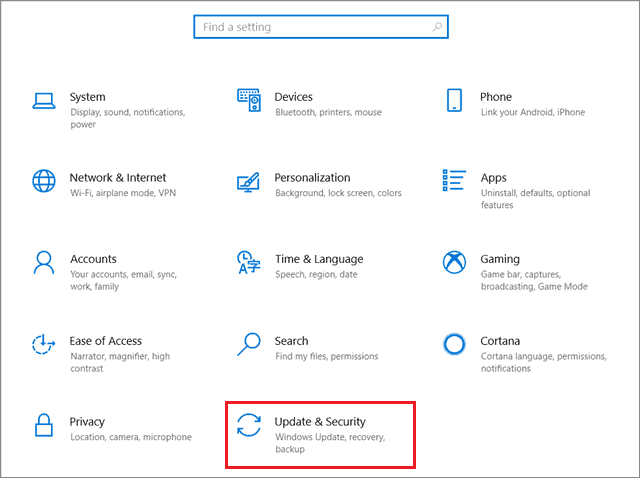
Open the Settings window using the Win key + I shortcut and choose Update & Security from the given list of options.
Then, click on Check for updates.
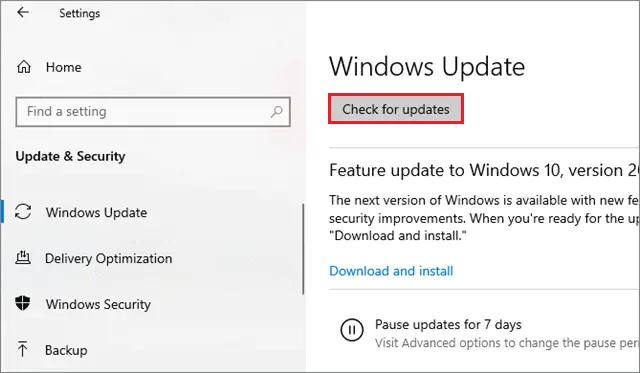
If any new update is available, it will be downloaded and installed automatically. Reboot the computer and see if this solution allows the Windows computer to find the printer.
8. Run the Printer Troubleshooter
Windows 10 PCs have a built-in printer troubleshooter that you can use to gauge the printer issue.
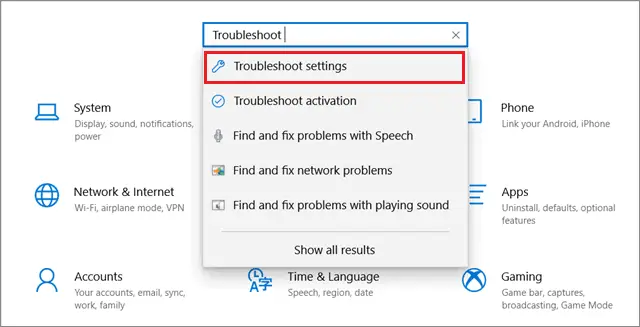
Press the Windows key + I to open Settings; enter Troubleshoot in the search box and click on Troubleshoot settings.
Now, navigate to the Printer icon section and select Run this troubleshooter. Follow the on-screen prompts of the troubleshooter and wait until the process is completed.
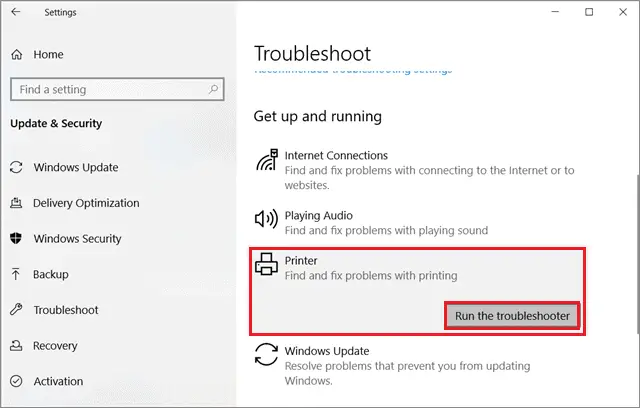
Restart the PC after the troubleshooting process and check if the printer is connected following this method.
9. Update Printer Driver
Updating a printer driver is an essential process to implement if the computer can’t find printer in Windows 10. Driver updates are vital for improving security and eliminating various bug types that mitigate the Windows computer speed. Installing the wrong version of a driver can affect the performance of a PC. To solve the spooler issue, you need to update your printer driver. Check the quick guide on how to update various types of drivers in Windows 10.
10. Delete Unnecessary Print Files And Restart Spooler Service
The presence of unnecessary print files in the spooler can also result in the printer not being found.
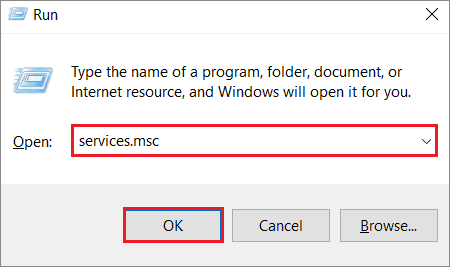
To avoid this situation, open the Run command by pressing the Win key + R shortcut. Then, run the services.msc command to open the Services window.
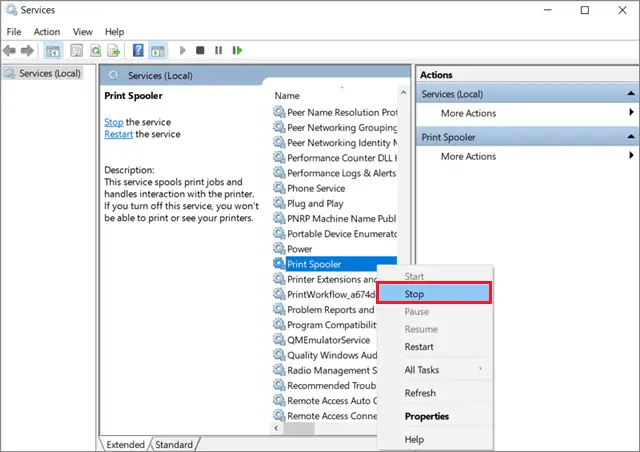
Locate and right-click on the Print Spooler service and choose Stop; minimize the Services window after this stop.
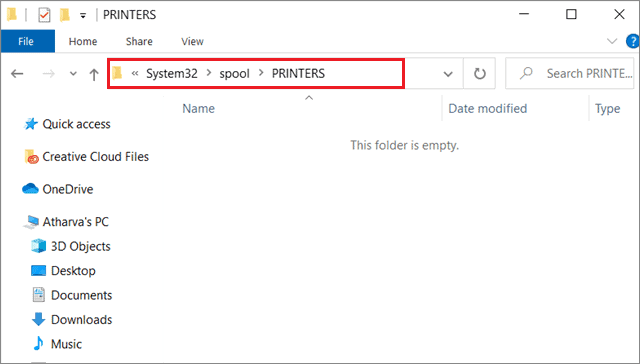
Now, open the Windows 10 File Explorer and navigate to the following locations. Make sure you accept the administrative privileges while opening these folders.
C:\Windows\System32\spool\PRINTERSC:\Windows\System64\spool\PRINTERSDelete all the files present in the PRINTERS folder in both paths. Remember, you have to delete only the folder contents, not the entire folder itself.
Now, open the Services window that you minimized earlier. Right-click on the Print Spooler and start it.
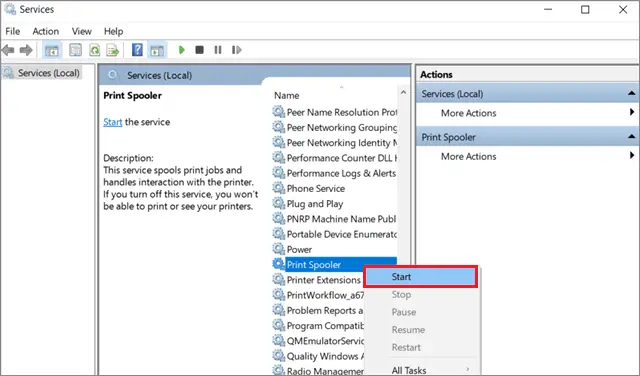
Then, disconnect your printer from the PC and reconnect it after a few minutes. Check if the computer can’t find the wireless printer after following this selection.
11. Add the Network Printer Properly
Users often end up messing with the process of adding a new printer to the network. If you are using a wireless printer, you have to add it to the local network first and then make some essential changes to your Windows 10 or Windows 8 system to detect that printer.
First, turn on the wireless printer and follow the instruction manual to understand how to connect it properly to the network. Once the printer is visible, you need to tweak a few things on your computer.
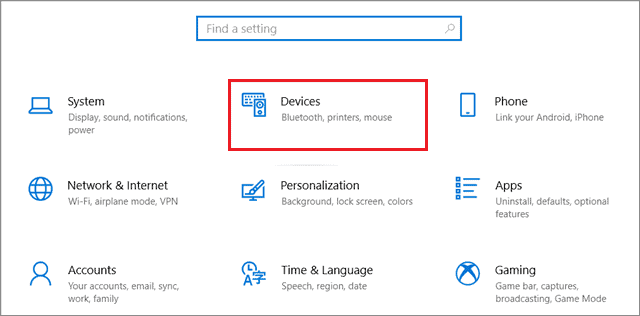
To begin with, open the Settings window using the Win key + I shortcut. Select Devices from the list of the available options.
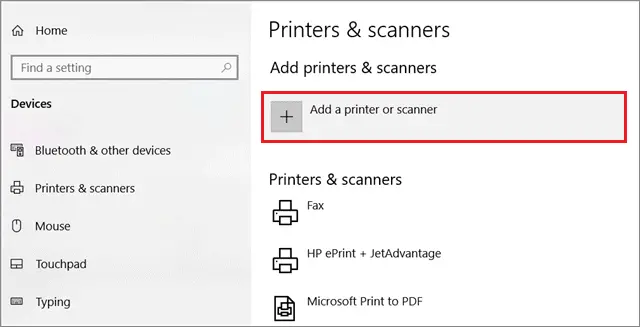
Then, choose Printers & Scanners in the left pane; click on ‘Add a printer or scanner’ in the right pane.
Once the computer starts scanning for new devices, check if the wireless printer appears in the search results.
12. Use Advanced Printer Setup
If you have uninstalled the printer because you can’t locate it on your PC, you can try installing it using the Advanced setup method. You can install the printer correctly using this method.
To start with, open the Settings window and click on the Devices tab.
Then, select Printers and scanners in the left pane and click the ‘Add a printer or scanner’ option in the left pane.
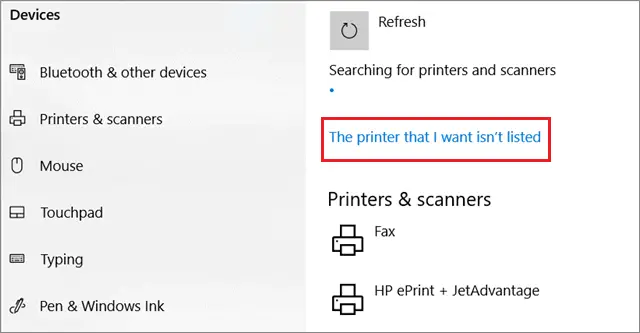
Select ‘The printer that I want isn’t listed.’
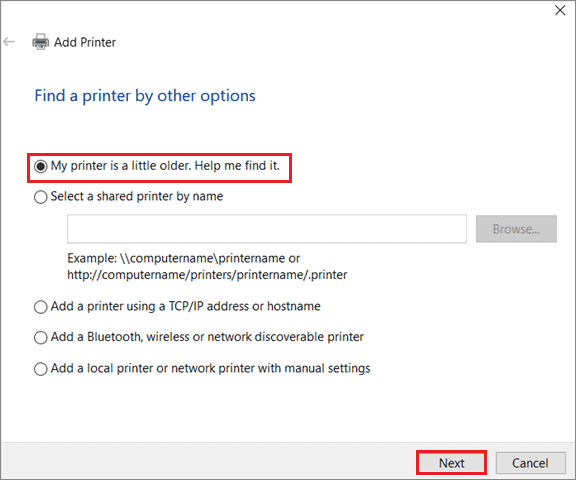
In the dialog box, select ‘My printer is a little older. Help me find it.’ Then, choose your printer from the list and click Next.
Type the name of your printer and press Next again.
Select ‘Do not share this printer option’ and press Next again.
Then, click on the ‘Print a test page’ option to confirm if the device is in a proper working condition. Select the Finish button to end the setup and check if you can locate the printer on the same network as the computer.
13. Re-Enable the Network Adapter
If the network adapter is responsible for causing the printer detection issues, you can choose to disable it and enable it again. This method can help you gauge if your computer can’t find printer because of the adapter.
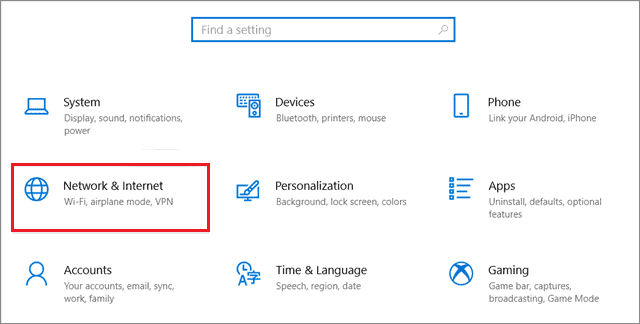
Open the Settings window and click on Network & Internet from the given options.
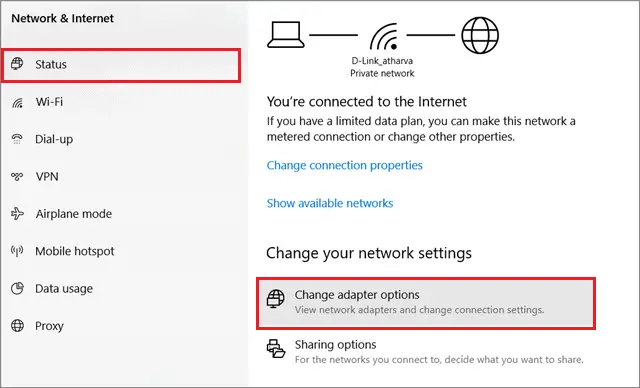
Then, select Status in the left pane and choose ‘Change adapter options’ in the right panel.
In the next window, right-click on the network adapter and select Disable from the context menu.
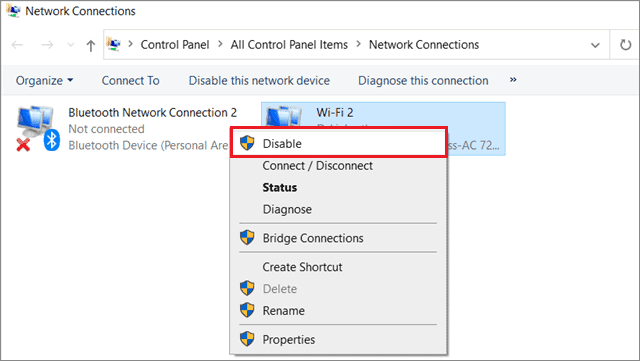
Wait for a few minutes and right-click on the network adapter again to enable it. Once done with the process, verify if the computer can successfully detect the wired or wireless printer.
14. Run the Network Troubleshooter
The network troubleshooter helps users in identifying the underlying issues that may indirectly affect the printer detection process.
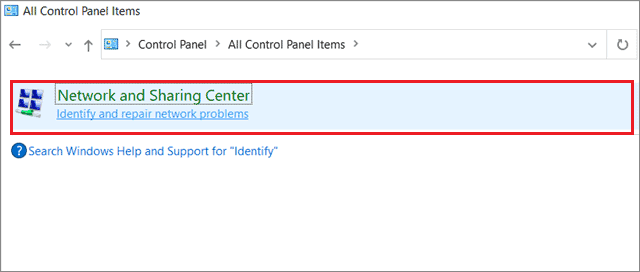
First, open the Control Panel from the Start menu search box.
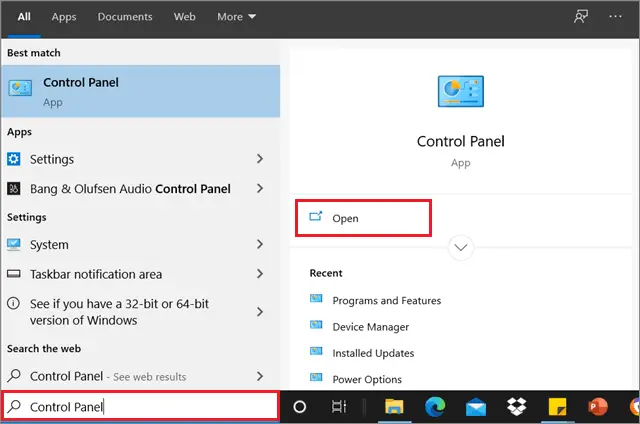
Enter ‘network troubleshooter’ in the search bar on the right corner. Select ‘Identify and repair network problems’ from the search results.
If the troubleshooter detects any issues, you can resolve them and check if the printer is not connecting properly.
15. Check The Printer Status And Compatibility
If the computer can’t find a printer in any of the Windows operating systems, you need to verify the printer status to determine what should be done next.
To begin with, open the Control Panel window and choose Devices and Printers from the given list of options.
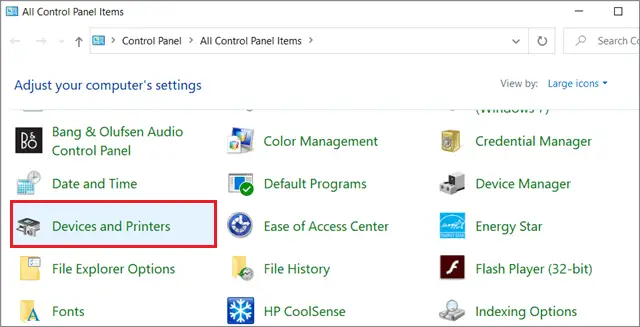
Navigate to the Devices list and locate your printer’s name and icon.
If the printer is under the Unspecified section, there is a possibility that the object might not be compatible with the operating system.
In such cases, you need to update your driver and ensure your printer is properly connected physically. Users can also connect the printer to a PC via the USB port by using a USB cable.
If this does not work, you can also try uninstalling and reinstalling the printer to resolve the issue.
16. Check the Default Printer Settings
If the computer can’t find printer in Windows 10, you need to run a thorough check through the default printer settings to ensure any tweaks haven’t caused the issue.
First and foremost, open the Settings window using the Windows key + I shortcut and select Devices in the options list.
Then, click Printers and scanners in the left pane and uncheck the box that says ‘Let Windows manage my default printer.’

This step is useful if your computer switches the default printer automatically. See if this fixes the printer not connected issue on your PC.
17. Delete Unnecessary Print Jobs
If you have queued up too many print jobs in the spooler, it can affect the printer’s functionality. The simpler way to mitigate the print jobs is to use the printer management software and keep an eye on the print status of all the print jobs. You can either cancel or restart or any of the jobs and lessen the load on the available printer.
18. Update the Printer Firmware
The printer firmware is software installed in the printer that informs the device about all the essential aspects of functioning smoothly in tandem with the computer. You can check the instruction manual on updating the firmware or seeing the menu options on the printer to update it. Download and install any newly detected firmware updates; reboot the PC to let those updates come into effect and verify if the computer can’t find printer or not.
19. Configure IP Address
You can consider configuring your router to assign a static IP address to your printer if your computer cannot detect it. This will allow you to locate your wireless printer at a specific address. The reboot process often tends to change this address. The best way to do this is to open the router’s administrator page, locate your device on the list of devices available on the network, and tweak the settings to assign a specific address to your device.
20. Choose An Alternative Connection Method
If you are facing any difficulties in connecting the printer to a computer using a WiFi network, you can opt for Bluetooth or a direct Wi-Fi connection. In addition to this, you can also connect the printer to the computer via Apple’s AirPrint or Google’s Cloud Print. Make sure to enable network printing options in your printer’s settings.
21. Enable Plug and Play Settings On the Router
If the computer can’t find printer in Windows 10, you can choose to enable the universal plug and play settings on your router to connect the printer. You need to enter the administrative settings to make this change. You have to just enable a checkbox to enable these settings; the plug and play settings can help your printer connect more easily to your computer.
22. Contact Your Printer Manufacturer
If you have tried all the solutions mentioned above and the printer issue still exists, the last option would be to contact the printer manufacturer and explain to him your issue specifically. If that doesn’t work as well, you may have to replace your printer.
Conclusion
Not detecting and adding the printer on your Windows 10 PC could be annoying if you use it daily. After all, it’s the only device that converts digital files into paper. However, you need not fret too much about it since there are many solutions to help you out.
However, before moving forward with these solutions, it’s essential to know the type of printer you have. Once you determine that, you can easily decide the solutions to go with. If the computer can’t find printer even after trying out all the solutions mentioned above, it’s prudent to consult a technician.


