Google Docs is a common application used for storing subjective data on the internet. There’s ample space for users to enter information in a Google Doc, but some users also need a special text box within the Google Doc to highlight some information. In such cases, you need to learn how to insert text box in Google Docs.
There are multiple ways to insert a text box in a document. You can opt for any style like bold the text, underline it, opt for a border, or use colors to highlight it. Using a text box is just one of the many ways to highlight text and make it stand out within the document. Not only text, but you can also insert videos in Google Docs using the text box.
3 Different Ways To Insert Text Box In Google Docs (In Details)
Before we get into the details of three different ways to insert text box, let’s check the quick steps to add text box in Google docs using the drawing tool.
How To Insert Text Box In Google Docs Using Drawing Tool
1. Click on Insert and select Drawing in a Google document.
2. Select the text box icon in Drawing canvas.
3. Create the shape and enter the text.
4. Click on Save and Close to enter the text box in the document.
Now that you know the quick steps to insert a text box using the drawing tool, let’s check out some more solutions to insert text box in Google docs. The solutions provided below are in detail along with screenshots for each step.
1. How To Insert Text Box In Google Docs Using The Drawing Tool
The Google Drawing tool allows users to create various shapes, lines, arrows, and other graphics to insert it in a Google Docs text document.
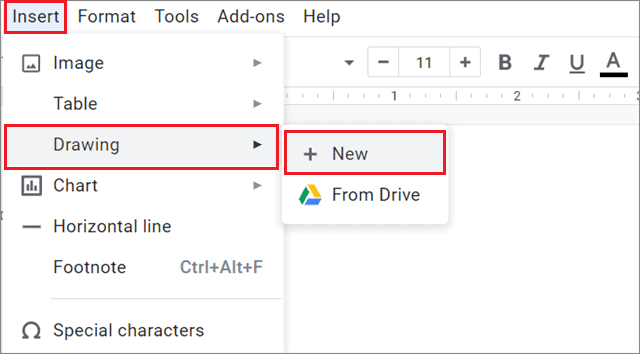
1. Click on Insert, select Drawing and choose New
Open your document and navigate to Insert > Drawing > New.
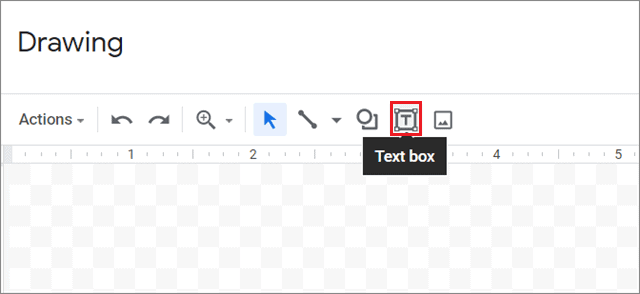
2. Select the text box icon
Now, click the text box icon.
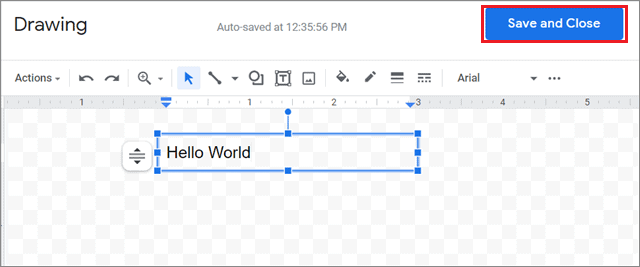
3. Create the shape and save the changes
Click and drag the mouse pointer within the drawing area to create a shape of any size. Once you do this, enter the text and click on the Save changes button.
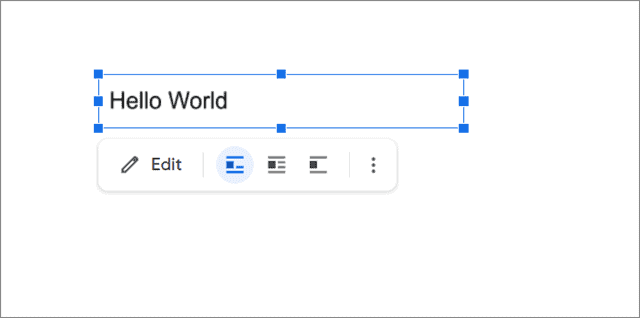
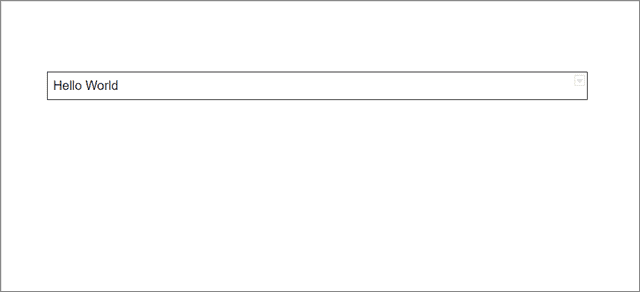
4. View the result in the Google Doc
After you press the button, you can check how the text box looks in the document.
2. How To Use Shapes To Create A Text Box
You can also insert a text box within Google Docs using the shapes provided in the Drawing tool.
1. Click on the Shapes command.
Once you have opened the Drawing canvas to create a text box, click on the Shapes option in the menu bar. Next, you can select Shapes from the drop-down menu.
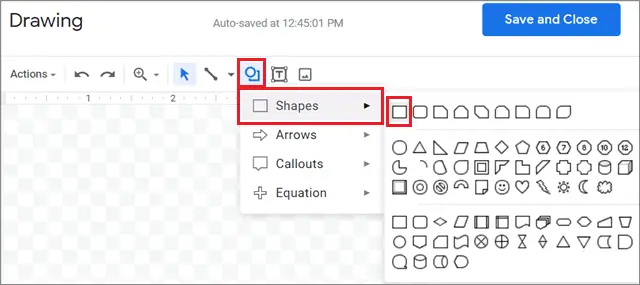
2. Create the shape
Create a shape of any size by dragging the mouse cursor over the canvas. After you create the shape, double-click inside it and enter the text.
Click on Save and Close to finalize your text box creation.

3. How To Insert Text Box In Google Docs Using Single Cell-Table
Inserting a text box is also a simple task using the single-cell table in Google Docs.
1. Insert a single-cell table
Open the Insert menu tab, select Table, and choose a single-cell table in Google Docs.

2. Enter text in the table
When the table appears, you can directly start typing in it and use it like a text box.
Users can also execute the table method on their smartphone to insert text box in Google Docs. However, you cannot use the Google Drawing option to create a textbox on your smartphone in the Google Docs app.
Conclusion
Google Docs offers various options for customization and formatting of a document. Users can color text, underline it, or insert images in the documents to support the content. One such feature is the option to add a text box in a Google Doc. And if you know Google Docs shortcuts, it is a blessing in disguise.
We have seen the simple ways to insert text box in Google Docs. It’s not mandatory to use a text box to highlight any special text, but in comparison to other ways, the text does stand out in the content in a better manner. In the end, users are free to choose any method for highlighting the text in their respective documents.


