Google Docs is an alternative to Microsoft Word for users searching for solutions to store data online. Mail merge in Google Docs is a process that allows users to import data from a Google sheet into text documents for emails or forms without much hassle. Basically, it inserts values from spreadsheet cells and inserts them into a document. As a result, you have a single consolidated document from which you can generate similar documents.
If you have to send a single document to multiple recipients, but you need to personalize that letter with every recipient’s name, the mail merge is your savior in this case. Instead of personalizing every letter manually, you can import the contacts of all recipients from a spreadsheet and export them to the document which contains the Gmail draft.
How To Mail Merge In Google Docs Using Autocrat
Autocrat is a famous tool used for merging Google Spreadsheets into documents seamlessly and creating consolidated data. Meanwhile, mail merge can be done internally in a word document or excel spreadsheet using the built-in options. Let’s delve into the details of how to mail merge in Google Docs using Autocrat.
1. Get Your Data & Letter Template Ready
The first step for performing a mail merge in Google Docs is to have your data and templates ready at hand.
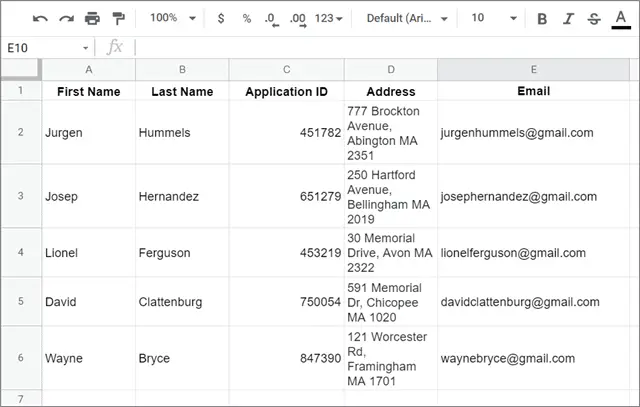
The first important google document is the Google sheet from which you need to import the data into the Google Doc.
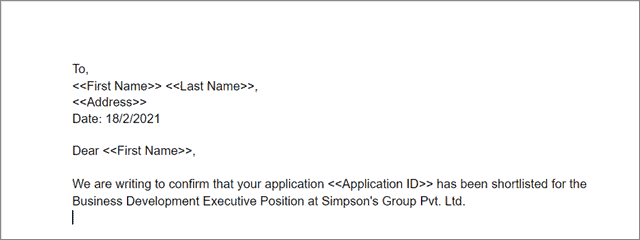
Next, make sure you have a template ready with merge tags using the << >> format. Use this merge tag format in places where you need to insert the information and create personalized emails.
Follow the given example to understand the concept better.
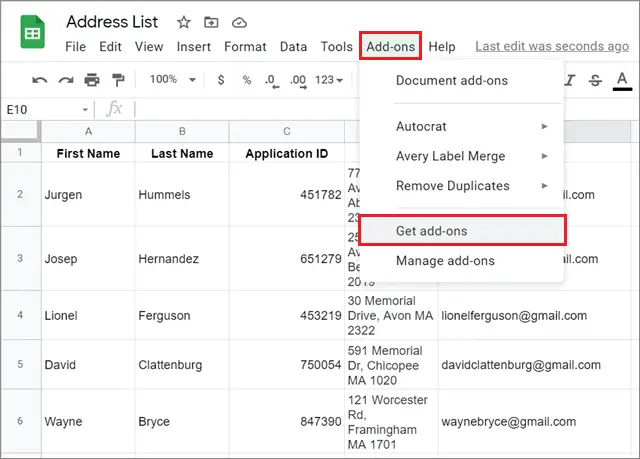
2. Go To Get Add-ons
To install the Autocrat add-on, open the Google spreadsheet and click on Add-ons. Select Get add-ons from the drop-down menu.
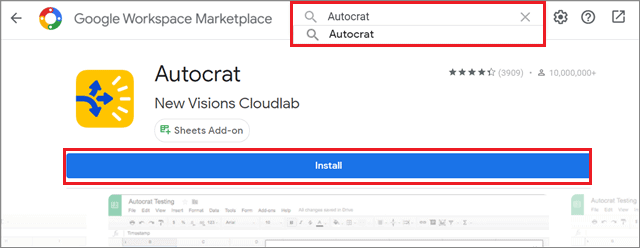
3. Install Autocrat
Search Autocrat in the search box situated in the top right corner. Click on the Install option to download the tool.
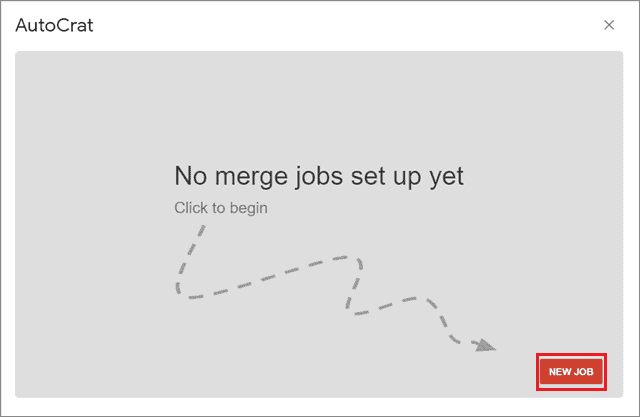
Now, you have to configure the settings in the Autocrat dialog box so that the add-on creates files according to your requirements.
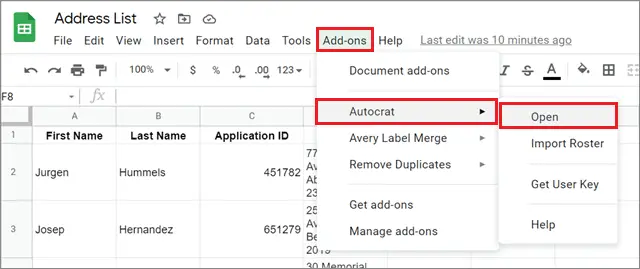
First, open the Autocrat add-on from the Add-ons tab.
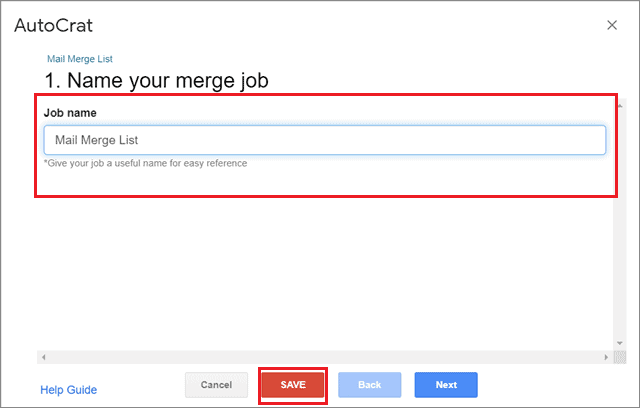
Then, give your job a good name and click on the Next button.
Then, give your job a suitable name and click on Save.
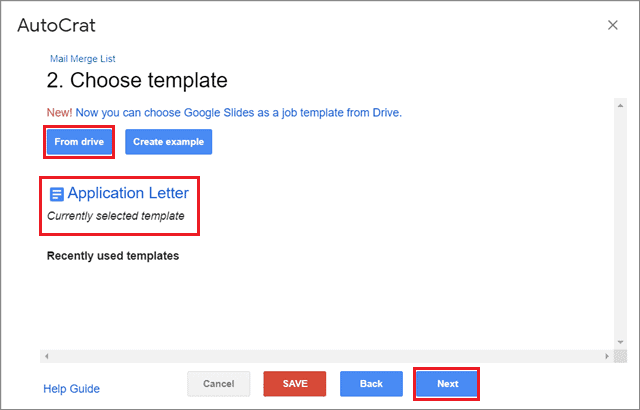
Click on the From drive option and select your template document from Google Drive connected with your Gmail account. Click on Next to continue the process.
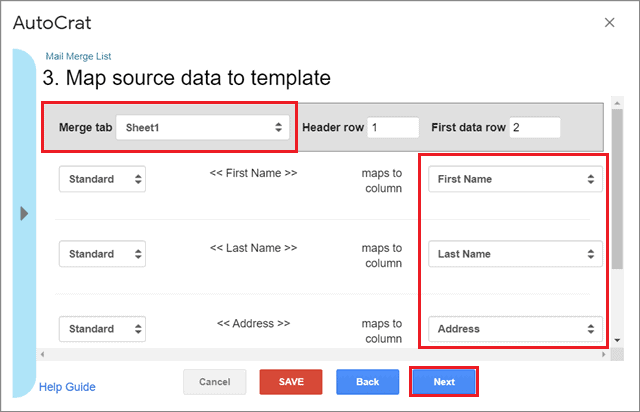
4. Match The Merger Tabs And Columns
Change the Merge template tab box to the name of the tab containing the data. Then, match the merge tags to the column header in your spreadsheet using the drop-down boxes on the right side of the configuration window.
Select Next after you match all the tags and columns properly.
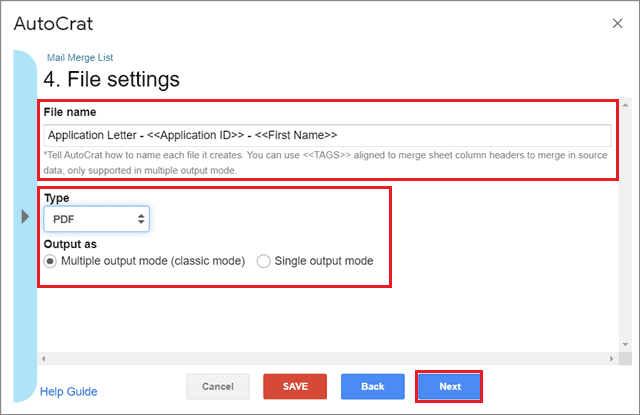
Now, You need to give a proper file name to all the files. The name can be a combination of the regular text and column headings from the Google Sheets document.
Make sure that the column headings encased in << >> are exactly the same as mentioned in the spreadsheet and not the Google Docs document.
Next, choose the output format of the file. Here we have selected the PDF document format.
Then, choose the multiple mode output if you want to put each letter in an individual document; go for the single output mode if you want to combine all the letters in a single document.
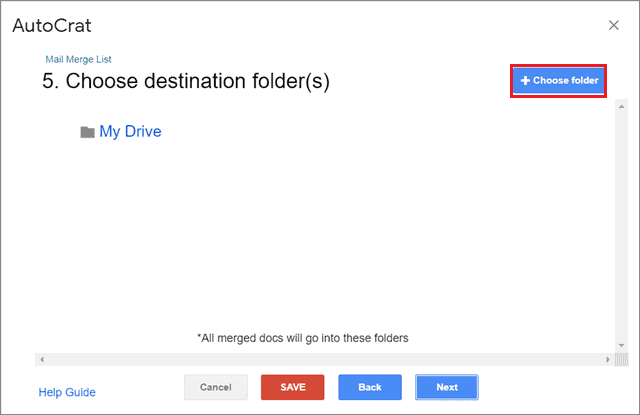
Now, select the Choose folder button and select your preferred folder for storage. Click on Next after this step.
Now, Skip the dynamic folder reference and merger condition screens.
You will face two windows, viz. Folder reference screen and merger condition screen. Click Next for both windows.
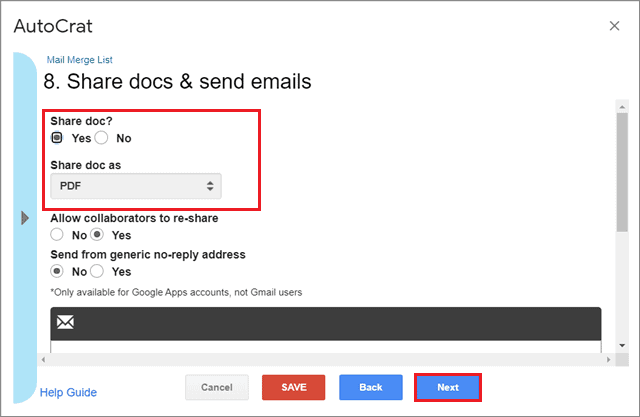
5. Edit The Document Sharing Settings
In the next window, select Yes for the ‘Share doc?’ setting and ensure that the ‘Share doc as’ setting is set to PDF.
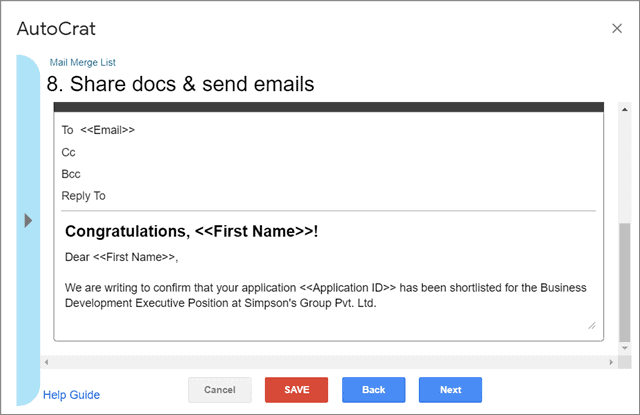
6. Compose The Email
Scroll down until you arrive at the email Google Docs template box. Here, you can compose your email by entering all the required details.
Ensure you use the enclosed << >> sign in all the fields where you need to insert information from the spreadsheet. Also, the column headings you insert in the message body should be exactly the same as they are in the spreadsheet and not the Google Doc.
Click on Next after you finish composing the email.
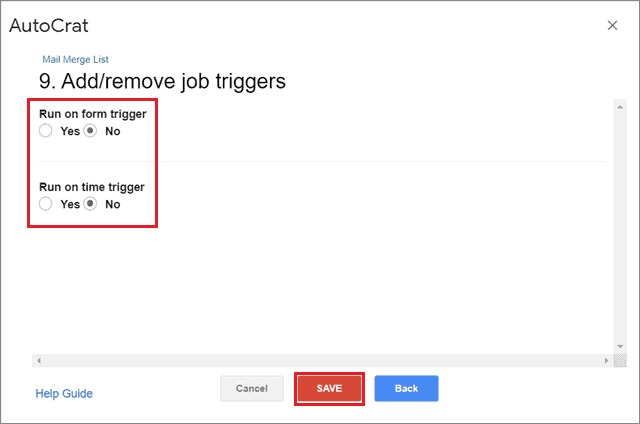
Leave the options on the Add/remove job triggers screen set to ‘No’ and click Next. Click on Save to complete the configuration process of Autocrat.
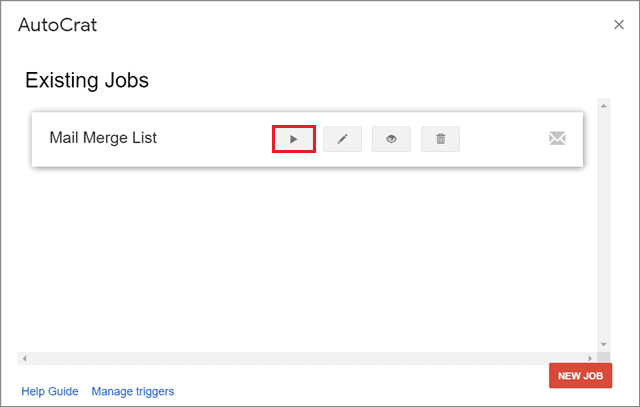
Now, you will return to the Jobs window, where you can see the job you just created. Click on the Preview button with the eye icon to test your mail merge in Google Docs.
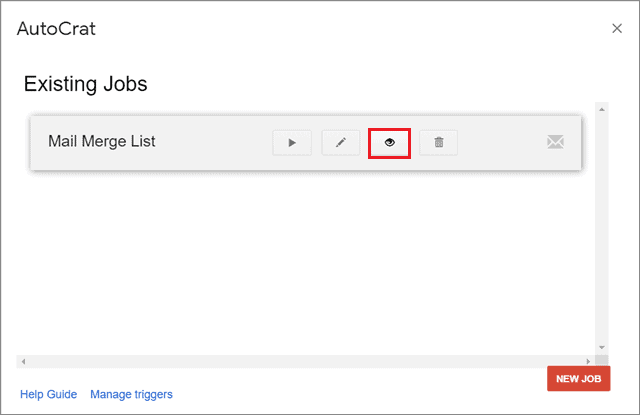
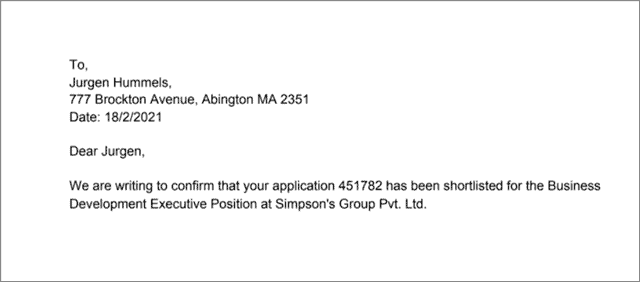
Once you click the Preview, you can see the result of your mock test.
7. Run The Mail Merge In Google Docs
Once you preview the mail merge process, click on the Play button to run it. You will notice that Autocrat provides a progress screen for the process.
Close the window after the mail merge is complete. You will notice that Autocrat has added some extra columns to your Google Sheets document to record the merge process results. You can find the multiple emails you sent in the Sent Mail label and the PDF file in the Google Drive folder that you specified in the confirmation.
Mail merge is a blessing especially for marketers as it allows them to send one document to multiple recipients at once. What if you want to know how many of the recipients have actually read your email? If you know how to add read-receipts in Gmail, you can easily answer that question.
Knowing how many recipients have opened the email will help you understand the number of recipients that are ready to engage with you and whether it’s okay to continue communication with them.
Conclusion
Personalizing the main document multiple times to send it in mass emails to your mailing list is a downright boring and time-consuming process. The mail merge in Google Docs is built to help users save this time and get done with the task in the blink of an eye.
Autocrat is a renowned tool used for this purpose as you can merge documents and spreadsheets along with the required customizations. You can also use the merged document and consolidated data as per your requirements.


