Google Docs is the best alternative for creating documents, as it is pretty similar to Microsoft Word. Images are an integral part of documents created in Google Docs as they help users visualize the text. You might need to adjust images, and hence it is essential to know how to rotate an image in Google Docs.
Many users are often confused about flipping an image and rotating it. Flipping an image means you can create its mirrored version, whereas rotating an image means changing its orientation. For example, if your image is very lengthy, you can choose to rotate and fit it horizontally in the document, provided the content in the picture is understandable.
How To Rotate An Image In Google Docs Easily
Image rotation is a cakewalk, and you can complete this process with a few simple clicks. You need to follow only three steps to carry out this task. Let’s take a glance at how to perform this process.
How To Rotate An Image In Google Docs in 3 Steps
1. Insert an image you want in the Google Docs document.
2. Click on the picture.
3. Click and hold the blue circle and rotate the picture.
Let’s get into the detailed process, now that you have understood the steps of rotating an image in a Google Doc.
How To Rotate An Image In Google Docs
To begin with, how to rotate an image in Google Docs, you need to open the Google Docs editing tools on your Chrome browser and follow the instructions given below.
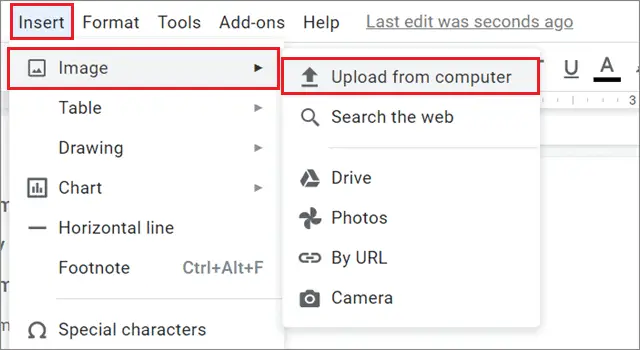
1. Insert the image
Click on the Insert tab and choose Image from the drop-down menu to insert an image. Choose the destination from which you will import the image.
2. Click on the image
Once you have opened the image in Google Docs, click on it to select it. You will see that the image is surrounded by small boxes on its edges along with a blue circle at the top. This circle is also known as the rotation handle.

3. Click and hold on the circle and rotate an image
Click and hold the rotation handle and rotate clockwise or anticlockwise as per your requirements.

Alternative Method To Rotate An Image
If you find this method tedious, you can use the image settings to rotate the images in Google Docs.
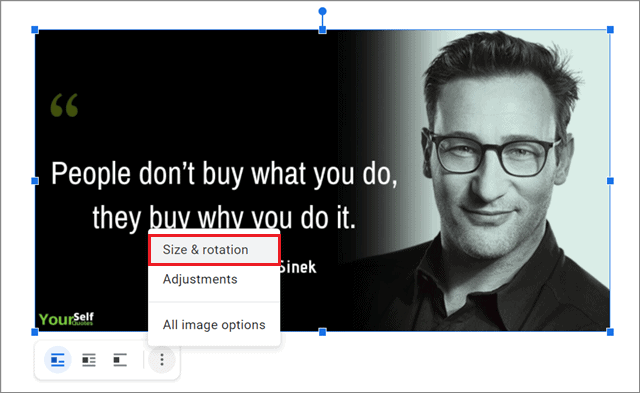
1. Click on the image and click on the vertical dots
Once you insert the image in the document and select it, click on the vertical dots and choose Size and rotation from the drop-down menu.
2. Rotate the image in Google Docs
The image size and rotation window will open on the right side of the screen. Under the Rotate section, you can change the angle or rotate the image by 90 degrees.

If you wish to do more in terms of editing images, you can check out Adobe Lightroom alternatives to fulfill your basic image editing requirements.
Rotate the Image Using the Google Drawing Tool
You can also use the Google Drawing tool to input images and rotate them in Google Docs.
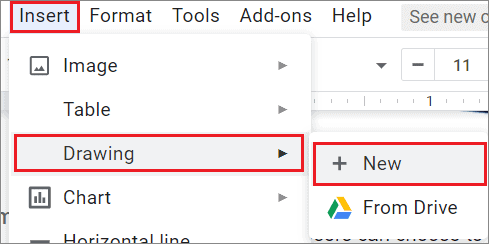
1. Open the Google Drawing tool
Click on Insert, select Drawing, and click on New.
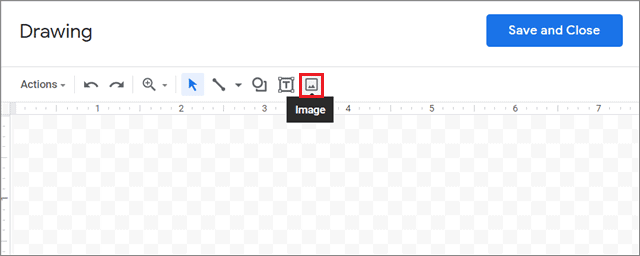
2. Click on the Image option
Select the Image option in the menu bar.
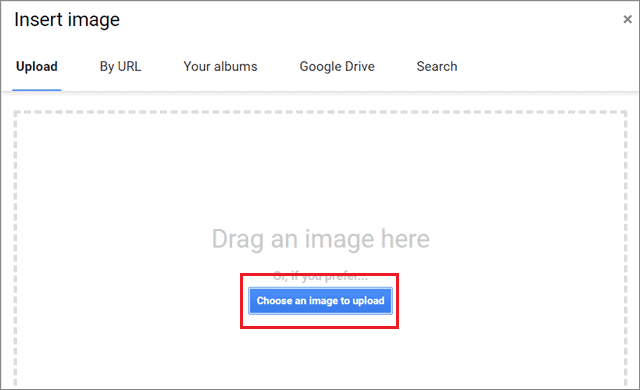
3. Insert an image
Insert the image by clicking on ‘Choose an image to upload.’ You can also insert an image from an online source using the image URL.
4. Rotate the image and save it
Once the image appears on the canvas, rotate it using the blue circle. Click on Save and Close after you have rotated it.

Once you save it, the image object will appear in the Google document. Users can choose to follow any of the given methods to rotate an image in Google Docs as per their preference.
Conclusion
Rotating pictures is an important process done to adjust them properly to align with the page orientation in Google Docs. You can perform the rotation process in simple steps, even though Google Docs doesn’t have a specific button to execute this task. Since the orientation of pictures is essential with respect to the overall appearance of a document, it’s vital to know how to rotate an image in Google Docs.
Remember that rotation of the image is only correct if the picture doesn’t get distorted. Hence, you need to check if the rotated image is correctly readable before finalizing it.


