With applications like Skype, Zoom, and Google Meet, you can attend meetings and conferences comfortably. You can also do video calling, video chat, and audio calls using these apps on your PCs, iPad, and smartphones. With technological advancement, online meetings, video calls, and conferences, one must know how to share screen on Skype.
The skype user can explain anything using the sharing feature and presenting your screen to all the people available on call. You can also record the Skype call for future references. The screen sharing option is possible on your computer and smartphones.
Note: There are three sections in the article based on the different platforms where Skype is used; you can refer to the one you need to know how to share screen on Skype
How to Share Screen on Skype on PC
You can use Skype on Windows as well as the macOS platform. We have used the shared screen option on our Windows 10 computer, and the steps mentioned below explains how to share screen on Skype.
You can download the Skype application and log in using your credentials or Microsoft account to share the screen with friends/colleagues.
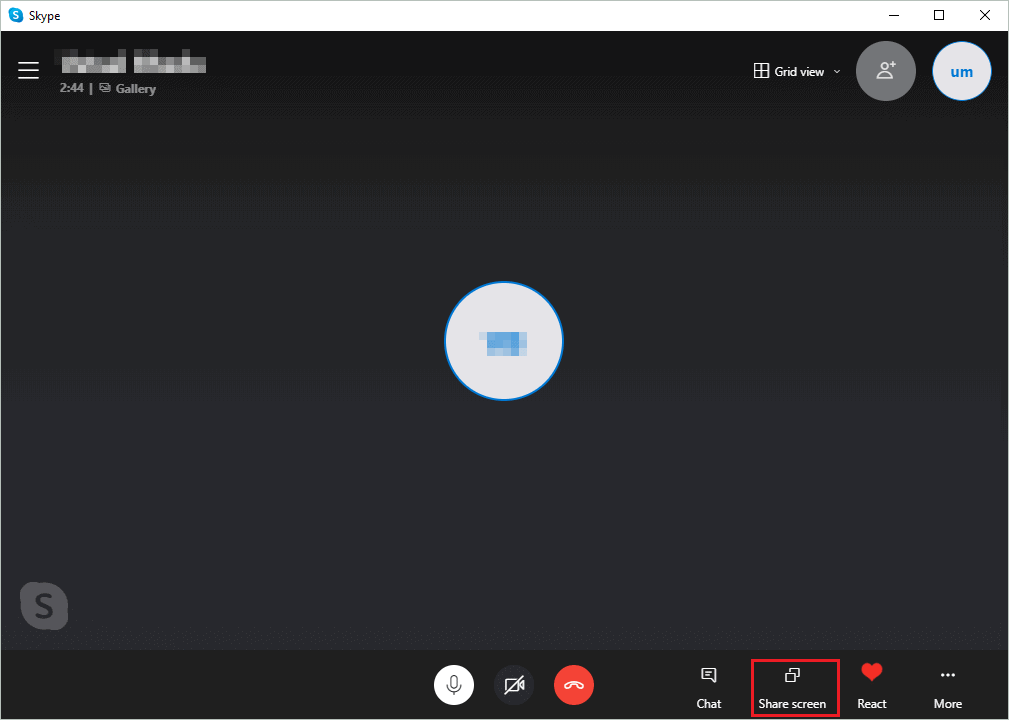
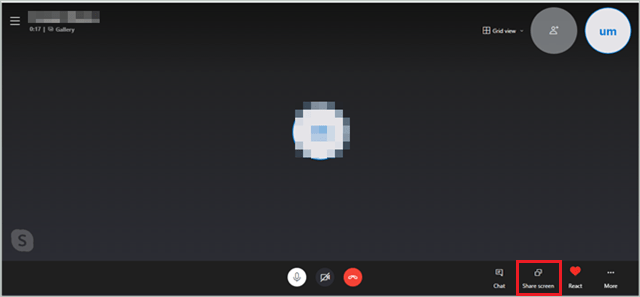
Once you log in, you can join/host the meeting or make/attend the call. On the Skype screen, click on the screen sharing button icon in the bottom-right corner, as shown in the below screenshot.
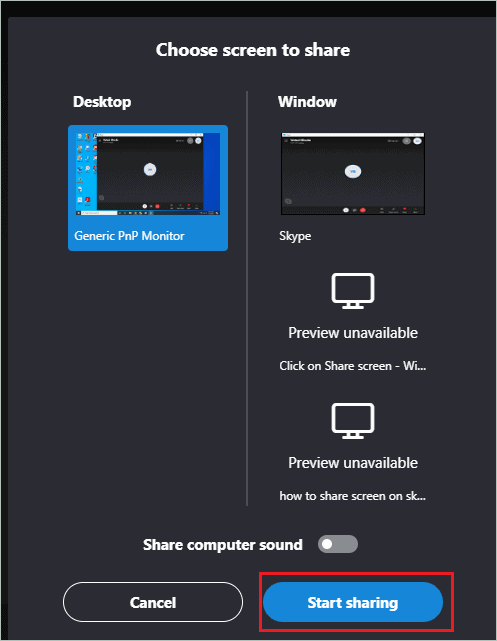
You will now see the option to share a specific window or an entire desktop screen; click on the one you wish to share. If you want to share the computer sound, toggle the switch next to ‘Share computer sound.’ You can also select between multiple monitors/ multiple screens if you have them connected.
Once you make appropriate changes, click on the Start sharing button.
Now, all the people connected to the call or business meeting will be able to see your Skype screen. If you wish to stop screen sharing at some point, you can again click on the Share screen button and then click on Stop sharing.
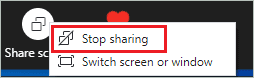
You can also switch computer screen or windows if you have selected to share only one window in the sharing session. All you need to do is click on the Share screen button on the Skype window and then on the Switch screen or window.
How to Screen Share on Skype with Browser
If you don’t wish to install the Skype application on your computer, you can use Google Chrome or Microsoft Edge browser. The below steps are according to the Google Chrome browser.
You just need to make sure your browser is updated to the latest version, as the screen sharing feature is not supported in the older version of browsers. The Skype web app is supported only on Google Chrome and Microsoft Edge browser.
Open the Skype web app link on your browser. You may have to log in to your Skype account to connect via call.
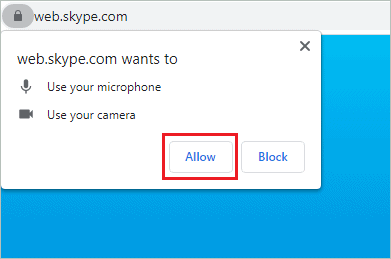
To make/attend a call, you need to allow a microphone and camera via the browser. There will be a popup as soon as you try calling someone or to attend the incoming call on Skype; you need to click on Allow.
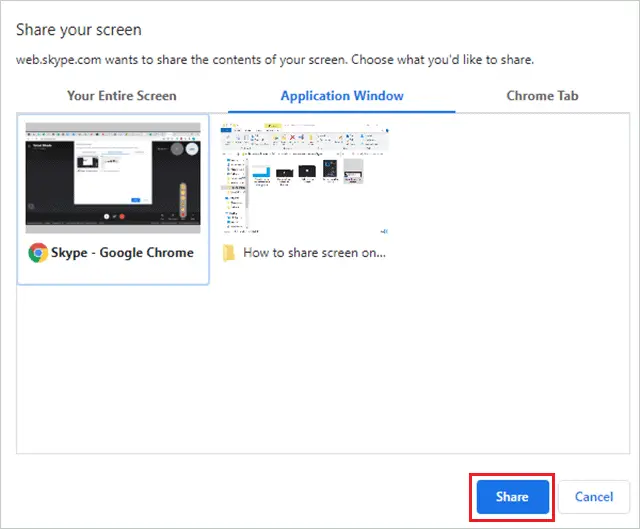
Now, click on the Share screen option in the lower-right corner.
When you share the screen via Chrome, you get an option to share individual tabs as well. You can navigate through the desktop sharing option and select the application window, entire screen, or Chrome tab to share. After making the proper selection, click on the Share button.
To stop sharing the screen, you can either click on Share screen ➜ Stop sharing or click on Stop sharing option seen on the calling screen.

The process of sharing a screen via browser is similar to sharing it via the desktop application.
How to Share Screen on Skype using a Smartphone
We use our smartphones more compared to any other device. Skype gives you an option to attend meetings and share the screen via Skype Android and iOS applications, just like you would do using a browser or desktop app.
We have used the Android mobile device below to share the screen in an ongoing call.
Download the application from the Google Playstore or Apple store. You can then log in using your credentials.
Once the call/meet starts, click on the three dots in the bottom-right corner of the phone screen.

Now, tap on the Share screen option.

In Android smartphones, there is only an option to share the entire screen; you are not allowed to share a specific app window.
You can click on the Stop sharing link on the top left corner of the screen to stop sharing the screen with users.

Smartphones are handy and give us the freedom to attend meetings anywhere, even when you are not carrying your laptop.
Conclusion
Skype app makes it easy to work with a team even when working from home. You can chat, host a meeting, and use the sharing toolbar to share the presentation. It is available on most platforms, making it even easier for anyone to use it.
You know now how to share screen on Skype on multiple platforms. The screen share feature is one of the added advantages of Skype, which lets you share your software code, presentations, doubts with your teammates without sending screenshots over emails.


