Skype comes pre-installed on many Windows 10 PCs, and if it doesn’t, users download it on purpose. The app is really helpful for communication, but it can get annoying when it starts automatically every time you turn on the computer. Well, there are different ways to stop Skype from starting automatically in Windows 10.
The automatic launch of the Skype program during startup can often slow down your computer, and you are stuck with endless buffering while opening any other applications. However, with some small changes in your Skype app and Windows PC settings, you can disable Skype on startup.
5 Ways To Stop Skype From Starting Automatically In Windows 10
There are 5 ways in which you can stop a Skype desktop app from starting automatically on startup in Windows computer. If you are not using it at all, we recommend uninstalling it from your PC completely. However, if you intend to use it in the future or need it currently, you can go through the below-mentioned ways to turn off Skype on startup.
1. Sign Out from Skype App
If you are using the most recent Skype version, you can simply sign out from the Skype app to stop it from starting automatically.
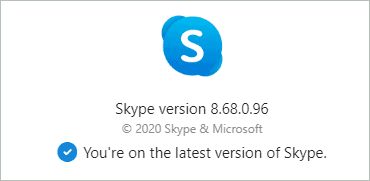
To check if you are using the latest version, click on the 3 dots next to your account name/ profile picture and click on Settings. Next, go to the Help & Feedback section, and there you will see the version number of Skype.
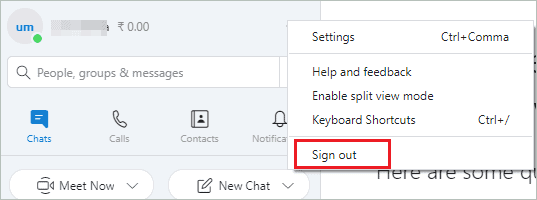
Once you check the version number, click on the 3 dots again on the Skype window, and this time click on Sign out.
You can now restart your computer and check if Skype launches post restart.
2. Make Changes in Skype’s Auto-start Settings
If Skype is still starting as soon as you turn on your computer, you can disable it via Skype setting. The below steps are as per Skype version 8.68.0.96.
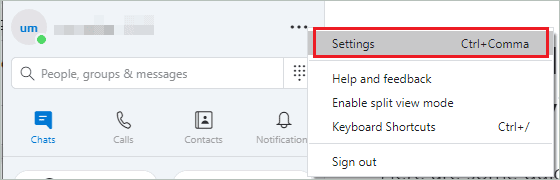
Launch the Skype application and click on the 3 dots menu next to the user name. Select Settings from the menu. Alternatively, you can press Ctrl + Comma keyboard shortcut.
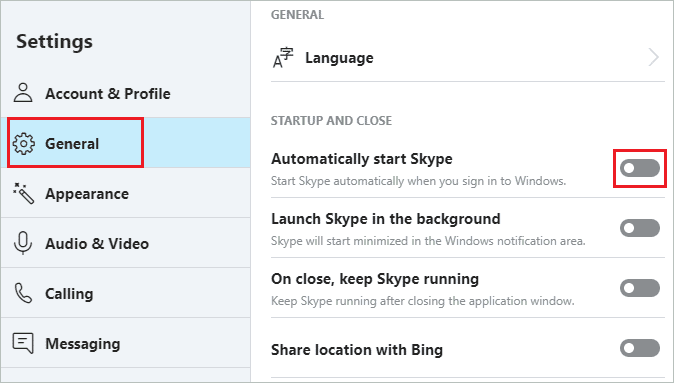
In the Settings window, click on General and then toggle the switch next to Automatically start Skype, such that it is disabled. You can also disable ‘Launch Skype in the background’ and ‘On close, keep Skype running’ by toggling the switch.
You can now close the Skype app and reboot your PC to check if this settings change was able to stop Skype from starting automatically in Windows 10 PC.
3. Disable Skype from Task Manager
You can disable Skype directly from the Task Manager in Windows 10.
Press Ctrl + Shift + Esc simultaneously to open Task Manager. In the Task Manager window, go to the Startup tab and then search for Skype in the list of apps.
When found, right-click on Skype and click on Disable. Alternatively, you can select Skype and click on the Disable button.
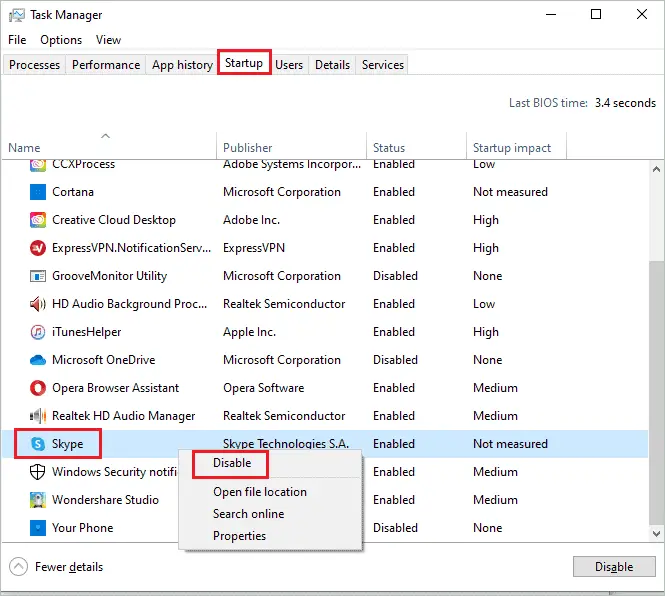
This will disable Skype on startup and stop Skype from starting automatically in Windows 10.
4. Stop Skype from Starting Automatically via Windows 10 Settings App
If you still see Skype launching automatically as soon as you log in, you can make changes in the Settings app.
Press Windows key + I to open the Settings app and go to Apps.
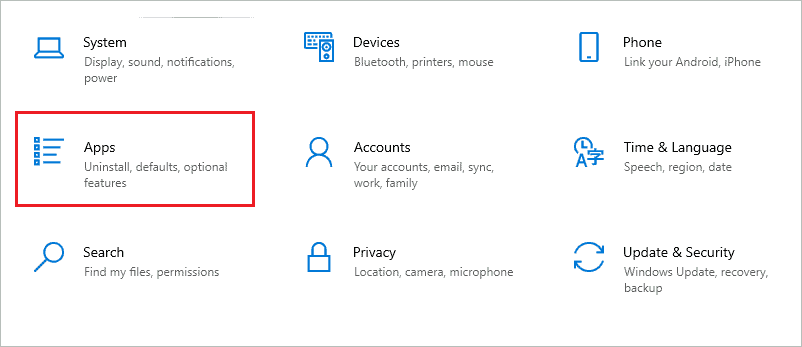
In the Apps settings screen, navigate to the Startup from the left panel to access startup app settings. Search for Skype and toggle the switch next to it to turn it off.
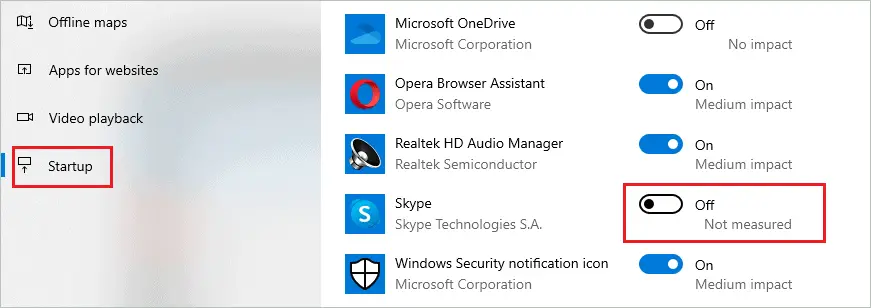
You can also disable Skype from running in the background. To do so, go to the Privacy settings from the Settings app and click on the Background apps tab in the left pane. Search for Skype and turn it off by toggling the switch.
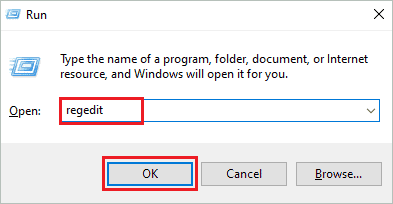
5. Use Registry Editor
The last resort to stop Skype from starting automatically in Windows 10 computer is to use the Registry Editor and delete the file. You can back up the registry before deleting the mentioned registry.
Press Windows key + R to open Run and type regedit. Click OK to open the Registry Editor.
In the Registry Editor window, go to the below-mentioned path.
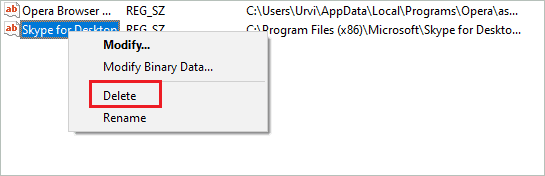
HKEY_CURRENT_USER\SOFTWARE\Microsoft\Windows\CurrentVersion\RunNow, search for Skype and when found, right-click on it. Click on the Delete option from the context menu to remove it from the registry.
You can now close the Registry Editor and restart your computer to check if Skype launches again automatically.
Conclusion
Many applications are launched during automatic startup; Skype can be one of them. However, the applications and services we don’t require can also be on the list of startup apps, eventually slowing down the entire system. If you use Skype and need it as soon as you log in to the computer, you can start it automatically on startup.
Well, if you don’t want to autostart Skype, you need to make few changes in the settings. We have explained the best ways to stop Skype from starting automatically in Windows 10. You can opt for any way depending on your comfort level.


