All the Windows 10 features are beneficial and help users carry out their work. One such useful feature is screenshots – users can easily take multiple screenshots on Windows 10 computers using different inbuilt tools and keyboard shortcuts. Although it is easy to take screenshots, most people would not know where are screenshots saved.
The answer to this depends on the way you used to take screenshots on your Windows 10 computer.
Where Are Screenshots Saved?
There are four different ways one can take screenshots in Windows 10, and in all the methods, the screenshot’s location changes. You can refer to the below ways to know where you can find the taken screenshots.
1. Screenshot taken using Windows key + Print Screen key Shortcut
If you use Windows + Print Screen (PrtScn button) keyboard shortcut to take a screen shot on your Windows computer, you can find it at –
C:\Users\User name\Pictures\ScreenshotsHere, the username is the account name you used to log in.
In some cases, the shortcut key combination can be Windows logo + Fn + Print Screen keys or Alt + Print Screen. However, the default screenshot location remains the same in all the scenarios.
2. Screenshot taken using Print Screen key
When users are in a hurry to take a full-screen screenshot, they often press only the Print Screen button for screen capture. In this case, the screenshot image is not saved in any folder; instead, it is copied to the Windows clipboard. Even if you press Fn + Print Screen (PrtScn key) on laptop keyboards, the screenshot will be copied to the clipboard.
You have to open an application like Paint and paste the screenshot by using Ctrl + V shortcut. And then you can save location of the paint file wherever you want. It is a convenient option when you want to draw something on the screenshot or paste it directly to the document without saving it.
3. Screenshot taken using Snipping Tool
‘Where are screenshots saved when taken using built-in Snipping Tool’ can be on your mind when you accidentally save the Windows screenshot in an unknown location. Well, to find that out, you can take another shot with the Snipping Tool and see the location it is saving when you click on the Save icon.
You can find the previous screenshot at the exact location. By default, the Snipping Tool saves all the screenshots in the following folder-
C:\Users\Username\Pictures4. Screenshot taken using Windows Snip & Sketch App
Snip & Sketch is another inbuilt screenshot tool that can help you take the screenshot in Windows 10. It is similar to Snipping Tool but has some advanced features. You can avoid taking a screenshot of the entire screen with this tool.
If you are searching for the screenshot file taken using Snip & Sketch, you can look in the Pictures folder, as it is the default location. However, if you have changed the location, simply take another screenshot and check where it is saving it. In this way, you can find the last saved screenshot you were searching for.
If you want to find deleted screenshots, you can check the Recycle Bin for that.
How To Change The Default Folder For Screenshots?
At times we need to save screenshots at a specific location in File Explorer. Well, you can do so by changing the default Screenshot folder to some other folder. To do so, follow the steps given below to change the default location.
Step 1: Open the File Explorer window by pressing Windows key + E.
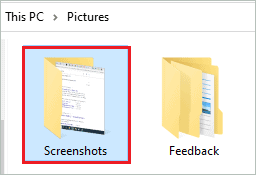
Step 2: Now, navigate to the Screenshots folder location, that is –
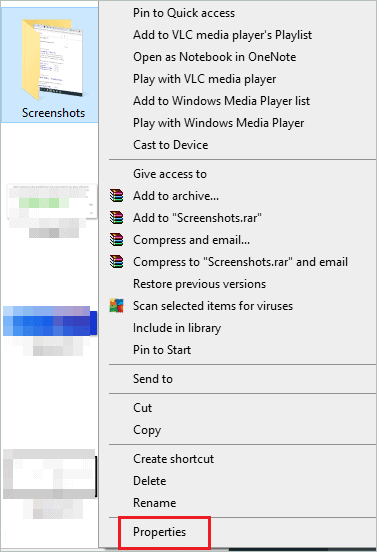
C:\Users\Username\PicturesStep 3: Right-click on the Screenshots folder and select Properties from the context menu.
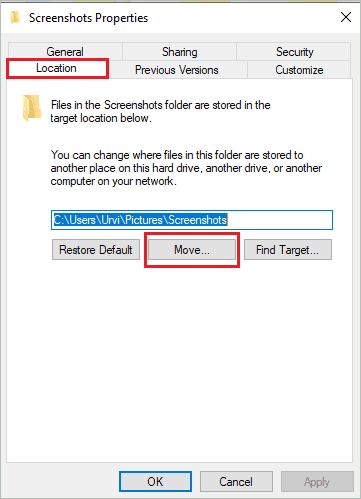
Step 4: In the Properties window, go to the Location tab and click on the Move button.
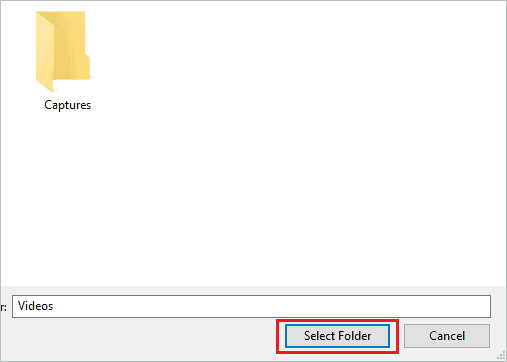
Step 5: Navigate to the folder you want to save the taken screenshots and then click on the folder. Once done, click on the Select Folder button.
Step 6: On the Properties window, check the location once to confirm it. Click on Apply and OK to save the changes.
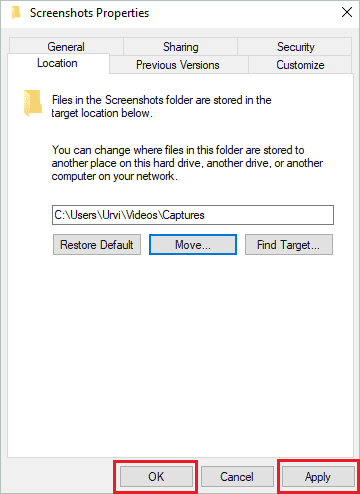
If you wish to change the location back to the Screenshots folder in the future, you can follow the above steps and click on the Restore Default button.
Conclusion
The screenshot feature helps you save the information on your screen without noting it down. With Windows 10 built-in tools, you can just capture the part of your screen or a specific window. Well, it can be frustrating when you don’t know where are screenshots saved on your device. Windows 10 keeps the screenshots depending on how it was captured.
You can refer to the above guide to know where screenshots are saved and how to change the default folder for screenshots. The section-wise division will make it easy to understand where you can search for the captured screenshots based on the way it was taken.


