Google Sheets and Microsoft Excel spreadsheet files are predominantly used for storing numerical data, but these tools can also come in handy if you want to store text data. You can keep lists of items or even short descriptions in cells. However, the real issue arises when the text spills out of the cell. That’s why users need to know how to wrap text in Google Sheets.
Text wrapping is a feature that allows you to avoid text spilling out of a cell in a Google document. When you apply this feature, the text adjusts itself in the same cell, increasing the row height in the process. As an alternative, you can choose to clip text if you don’t want to affect the text box(cell size). You can also choose to split text in columns if you’re going to sort your data.
How To Wrap Text In Google Sheets To Organize Data
None of us would like to look at a sheet with text extending to the adjacent cell or out of cells in multiple cells! It is definitely not a good sign of organization.
Let’s take a glance at how you can win over this situation using the wrap text feature.
How To Wrap Text In Google Sheets
1. Open Google sheets and select the cell.
2. Select the Wrap text option.
3. View the result.
Note: Now that we know the basics, let’s talk about how to wrap text in Google Sheets in detail with images.
How To Wrap Text In Google Sheets
Performing word wrap in Google Sheets is simple and requires only three steps.
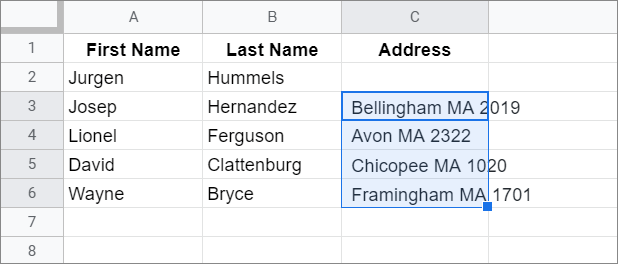
Step 1: Select The Cell
First and foremost, click on the cell or the table in which you want to insert the text wrap feature. Here, we have selected multiple lines and cells for wrapping text.
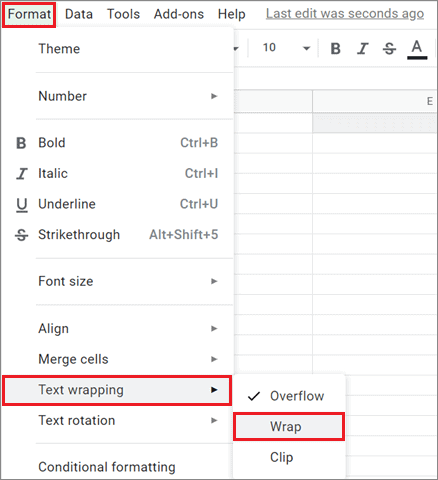
Step 2: Wrap The Text
Now, click on the Format menu tab, select Text wrapping, and choose Wrap in the Google Sheets spreadsheet.
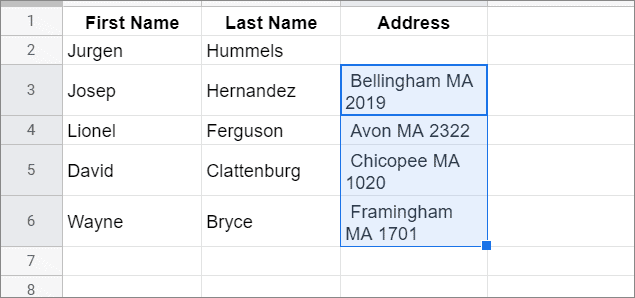
Step 3: View The Result
You can view the result in the image given below.
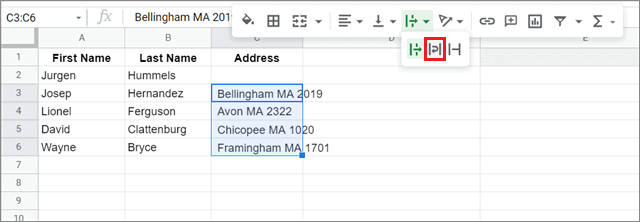
Shortcut To Wrap Text In Google Sheets
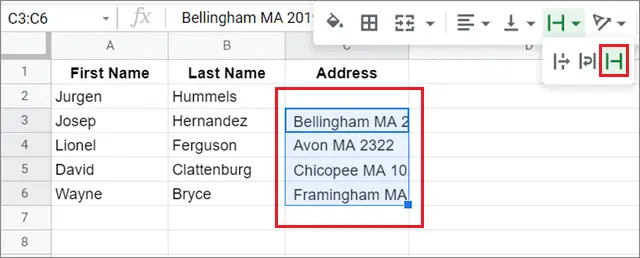
For those who want an easier way for how to wrap text in Google Sheets, there is a shortcut too. To avoid the detour above, you can select cells and choose the Wrap text feature from the features bar.
As shown in the image below, Google Sheets offers text wrap icons. You can also decide to overflow the content and clip the same instead of wrapping it.
How To Clip Text In A Google Spreadsheet
If you don’t want to know how to wrap text in Google Sheets, you can directly choose the clip text feature from the features bar. Using this feature, you can hide a specific part of the text and avoid overflowing in other cells.
How To Wrap Text In Google Sheets App (On Smartphone)
If you are working on a Google spreadsheet in mobile, you can choose to wrap text in the Google Sheets app in just two simple steps.
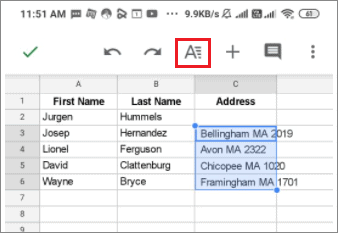
Select The Cells
To begin with, open the Google sheets.
Now, select the cells in the Google sheet and click on the Format icon in the menu bar.
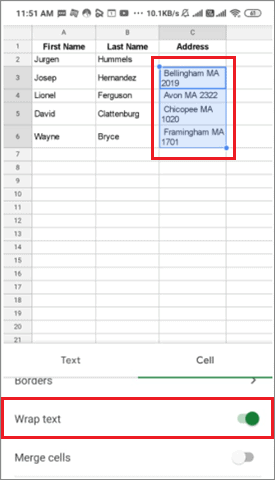
Enable Wrap Text Feature
Enable the Wrap text feature in the Cell tab to apply the text wrapping option in the selected cell.
That’s all about how to wrap text in Google Sheets. You can also merge cells and increase the column width to ensure you have enough space to fit the entire content in a single cell.
Conclusion
The Wrap text feature allows users to hide the part of the cell content so that it doesn’t spill out of the cell. The wrapped text also helps you organize your sheets in a better manner, as opposed to having text overflowing out of their cells in multiple places. Hence, daily users need to know how to wrap text in Google Sheets.
The process to wrap text is very simple and can be executed in two simple steps. It can be used in cases where you have to store customer names or addresses in Google Sheets. The decision to wrap overflowing text depends on the user’s requirements. However, there’s no doubt that using this feature helps in creating an organized datasheet.


