Java is one of the famous programming languages that is used to develop many web and desktop applications. You need Java installed on your computer to run specific applications or the developed Java program. Whatever the reason is, it is essential to know how to update Java on Windows 10 computers to stay updated with the latest security patches and features.
You also need to update Java to fix the application blocked by the Java Security issue. Java usually sends notifications regarding updates, and you can simply click on them to complete the update process. However, if you cannot see any update notifications, you can perform a Java update manually.
How to Check Java Version in Windows 10?
Before updating Java, it is essential to know what version of Java SE you are currently using. There are two ways to do this: use the Command Prompt terminal, and the other is to use the About Java application.
You can take help from any of the ways to get information regarding the Java Runtime Environment installed on your Windows computer.
1. Use Command Prompt
You can find out the JRE’s current version using command line arguments. This way is recommended for professionals who can get information from the build number.
Type cmd in the Start menu’s search box and open Command Prompt from the search results.
In the terminal window, type the below command and press Enter to execute it.
java -version
You can get the build information from the command output.
2. Use About Java
Another option to check the version is to use the About Java page.
Press Windows key + S and search for About Java. Then, double-click on About Java from the search results to open it.
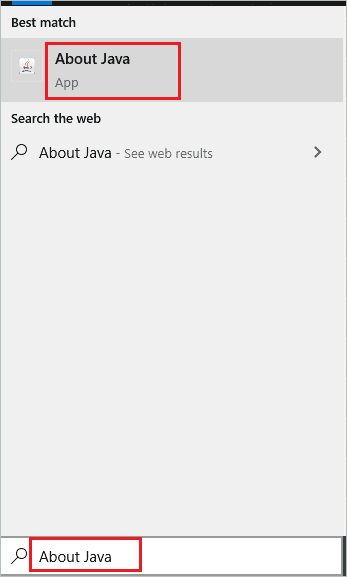
Once the About Java app opens, you can find the required information.
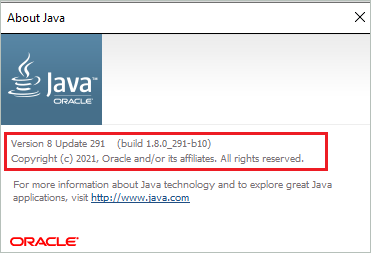
You can know which update and version are installed on your computer. For example, as per the above screenshot, Java 8 is installed on the computer. This way of checking the version is straightforward and gives out information.
How to Update Java on Windows 10?
Once you know the version, you can update Java on Windows 10 accordingly.
Suppose you want to upgrade Java from 8 to 11. In that case, you need to uninstall the older version of Java and install the latest version by downloading Java SE from Oracle or Java official websites. You can keep two versions of Java on your computer, but it can create unwanted confusion for apps using Java. So, therefore our team of experts recommends you have only one version of Java installed on your computer.
If you just want to know how to update Java on Windows 10, you can follow the steps given below.
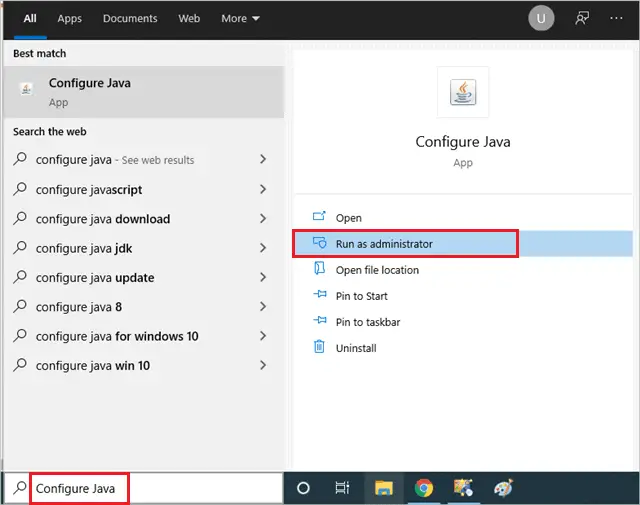
Search for Configure Java in the Start menu and click on Run as administrator for the same from the search results.
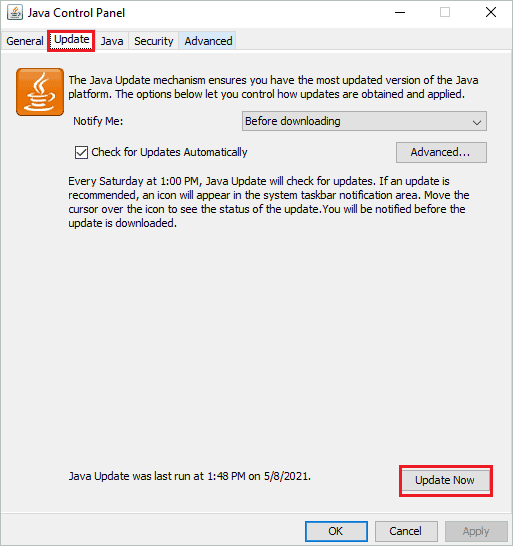
When the Java Control Panel opens, go to the Update tab. Next, click on the Update Now button to update Java with the most recent version.
Now, follow the instructions on your screen to complete the Java update process.
Modify Update Settings of Java
You can modify the automatic update settings of Java to avoid manual updates. The changes are to be done in the Java Control Panel. So, open the Java Control Panel by searching for Configure Java in the Start menu, as shown above.
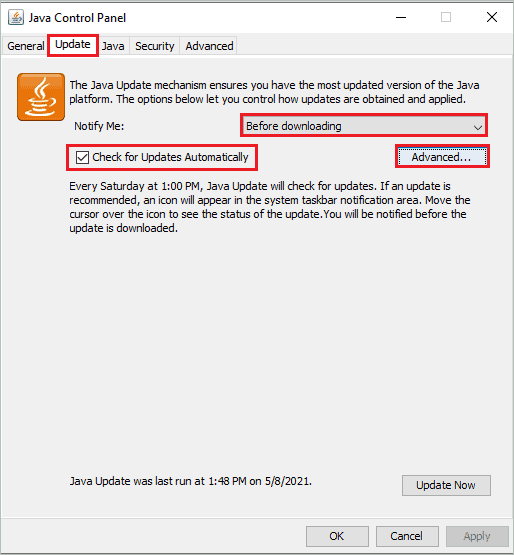
Navigate to the Update tab. You can change the Notify Me option to Before downloading or Before installing from the drop-down list, depending on when you want to be notified about the update.
Also, make sure the checkbox next to ‘Check for Updates Automatically’ is checked. Once the changes are made, click on Advanced.
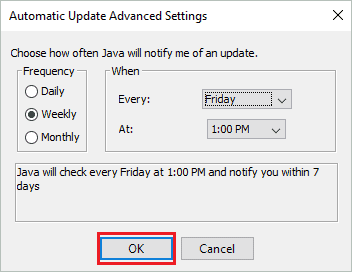
In the Automatic Update Advanced Settings, you can change the Frequency to Daily, Weekly, or Monthly. Based on the selected frequency, Java updates will run based on the selected frequency.
You can also set the on which day of the week and what time Java Update will run. Once everything is modified as per your requirements, click OK to save the changes.
Close the Java Control Panel. Now, the Java updates on your computer will be performed automatically. In addition, you will receive the popup message whenever the update needs to be downloaded or installed based on your settings.
Conclusion
Some specific java-based applications downloaded from third-party sources cannot be used without Java. For example, Windows users have Java installed on their computers for development or application uses. However, many of us don’t update Java frequently, keeping us away from essential security patches and features.
You need to update Java frequently and configure it so that it checks for updates from time to time. With the above article, you will know how to update Java on Windows 10. In addition, you can learn how to check the Java version, update it, and modify the update-related settings.


