Usually, when we start our computer, it boots from the main SSD drive, which contains the operating system. However, to boot the PC from a USB, CD, or DVD drive, you need to change boot order in Windows 10. The need to boot from a bootable external device or hard drive arises when running a recovery program or testing out an operating system.
The Windows boot order is also known as boot sequence or boot options alternatively. When a Windows 10 computer starts, it checks itself to ensure everything is well and running correctly and then loads the minimum operational software followed by the operating system. The boot sequence specifies how the computer should check the devices for boot files and then startup.
How To Change Boot Order In Windows 10
If you face the Windows 10 slow boot issue, you can utilize specific solutions to fix it. Also, you need to enter the BIOS utility setup of your PC to change the boot sequence. Let’s take a look at how to do it in simple steps.
1. Use Advanced Options To Change Boot Order
The first way to change boot order in Windows 10 is to use the advanced boot options of the operating system. To do this, you need to close all the running applications on your PC and restart it.
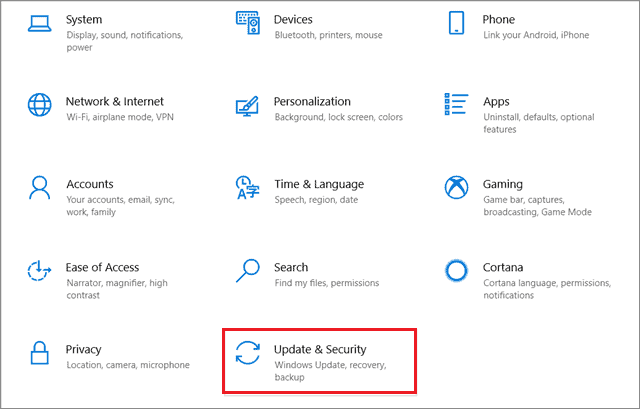
Step 1: To enter the BIOS settings setup, press the Windows key + I keyboard shortcut; this will open the Settings app. Then, you have to choose Update & Security.
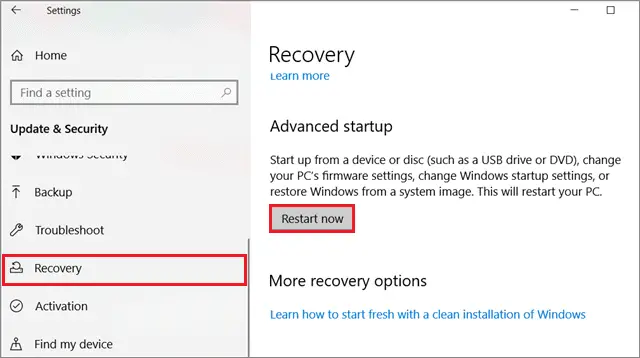
Step 2: Select Recovery in the left pane and click on the Restart now button under the Advanced startup tab.
Step 3: Once the PC restarts, you will see the Advanced Startup screen. Select Troubleshoot from the options.
Step 4: Choose Advanced options in the next window and select UEFI Firmware Settings.
Once you do these steps, you will enter the BIOS screen.
Note: You can also go through the PC manufacturer’s website or the user manual for instructions on how to enter BIOS.
Step 5: Check out the instructions at the bottom of the BIOS utility screen to know how to navigate through the menu.
Step 6: Go to the Boot menu in the BIOS setup utility.
Step 7: You will see an order of hardware devices that the BIOS will boot. Now, follow the instructions at the bottom of the screen to change the first booting device.
The instructions may differ in the case of different manufacturers and model numbers.
Step 8: Move to the Exit tab in the BIOS utility setup and select the Exit Saving Changes option.
Step 9: Once you choose the Save and Exit option, you will get a setup confirmation prompt. Select Yes to confirm the change.
All the changes made to the BIOS utility, including those in the boot order, will be saved following this step.
Once you are done changing the boot sequence, start your computer again to check if the settings are working effectively. BIOS will attempt to boot the first device specified in the boot order. If the first device isn’t bootable, it will move on to the next.
2. How To Boot From USB Device In Windows 10
Booting from USB in Windows 10 and then changing the boot order is a simple process to understand and execute.
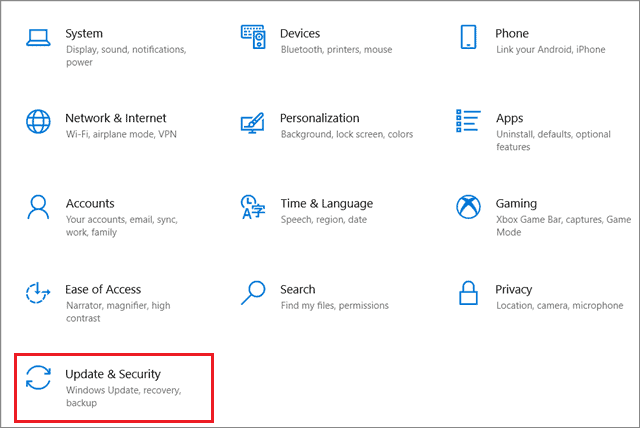
Step 1: Connect the bootable USB device to your computer and press the Win key + I keyboard shortcut to open the Settings window.
Step 2: Click on the Update & Security option.
Step 3: Select the Recovery tab in the left pane and click on the Restart now button in the Advanced Startup section.

Step 4: Now, click on the ‘Use a device’ option to access the Windows Boot Manager.
The ‘Use a device’ option will be available only if you have connected a bootable drive or media.
Step 5: Click on your USB drive or any other removable device when you see it listed.
Your computer will then restart and boot into the environment (or installation wizard) on the USB disk.
You can now change boot order in Windows 10 in the installation wizard.
Step 6: Once you restart your computer, click on the Troubleshoot option and select Advanced Options.
Step 7: Choose UEFI Firmware Settings; this will let you restart the PC. After the boot process completes, you will be taken to the Firmware settings.
Step 8: Now, select the Boot option tab; use the arrow keys or the + and – keys to change the UEFI boot order.
Step 9: Go to the Save and Exit tab to save the settings.
When you boot, it will follow the boot priority you have set in your computer’s BIOS or UEFI Firmware Settings.
Conclusion
A boot order allows a PC to specify which devices need to be checked for boot files. We usually boot a PC from the main hard disk, but you may need to change the sequence in case you want to boot the PC from an external boot drive or USB boot device. You need to access the boot menu in BIOS to change the boot sequence.
Users can change boot order in Windows 10 as per their preferences. For instance, if you don’t plan on booting the PC using the boot disk drive or any other external hard drive, you can place the built-in hard drive at the top of the sequence.


