Our computers come with default screen resolution, but you have an option to change it. You can make it sharper or set it to low resolution as per your needs. There is an option to change screen resolution in Windows 10. Although it is an excellent option to keep the screen resolution to the recommended option, you can set it as per your wish.
Some apps and games look better at specific resolutions, or you want to explore different resolutions; therefore, one must know how to change screen resolution in Windows 10 the easy way. Windows 10 gives you a lot of freedom when customizing your PC as per your liking. You can move the taskbar as well on Windows 10.
How To Change Screen Resolution in Windows 10
The recommended resolutions are 1920 X 1080; however, it also depends on your monitor size and resolution. In addition, the newer versions of the monitor may support better resolution quality and recommend a different resolution.
You can change the screen resolutions conveniently using the Settings app without any issues. Other methods of changing the screen resolution in Windows 10 include third-party apps.
1. Use Settings App
The simplest way to change the screen resolution is to use the Settings app. However, there might be changes in text and pictures on changing the screen resolution, so proceed with caution.
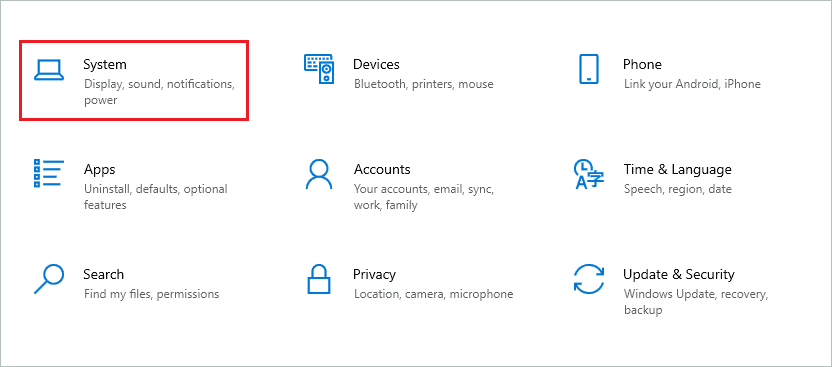
Step 1: Press Windows key + I to open the Settings app and go to System settings.
Step 2: Ensure you are in the Display settings window and then scroll down to Display resolution.
Step 3: Select the resolution you want from the display resolution drop-down menu.

You will be prompted if you want to keep these display settings; click on Keep changes.

You need to click within 15 seconds; otherwise, the changes will be reverted.
If you wish to change the screen refresh rate along with resolution, continue following the steps below.
Step 4: Click on Advanced display settings.

Step 5: On the next screen, click on Display adapter properties for Display 1. If you want to change display resolution for display 2 or 3, click on those display adapter properties accordingly.

Step 6: In the Properties dialog box, make sure you are in the Adapter tab and click on List All Modes.

Step 7: Select the resolution with hertz in the List All Modes window.

If you are prompted to confirm the changes, do confirm it. You can now enjoy the resolution of your choice on your computer.
2. Use Command Prompt or Script
If you are more comfortable with commands and scripts, you can change screen resolution in Windows 10 using that. You will need QRes – Windows screen mode changer third-party utility to change screen resolution via Command Prompt.
Download QRes – Windows screen mode changer and extract it. Make a note of the location where you extracted the software.
Now, type cmd in the Start menu’s search bar and open Command Prompt from the search results.

In the Command Prompt terminal, go to the directory where the software folder was extracted and execute the command below.
qres x=1280 y=768Here, change the x and y figures as per your requirements. Your screen resolution will be changed as soon as the command is executed.
You can also run scripts to change the screen resolution in Windows 10 using QRes – Windows screen mode changer.
Open the Notepad and type the below line in it.
"C:\Users\Urvi\QRes\QRes.exe" /x:1280 /y:768Here, instead of C:\Users\Urvi\QRes\QRes.exe, enter the location where the software was downloaded and extracted. And also, change the x and y number as per your requirement.
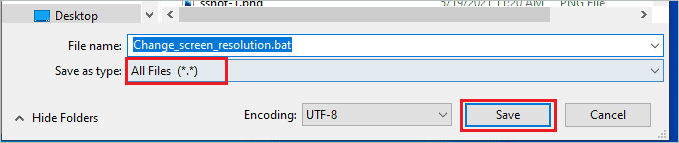
Once the changes are made, click on File ➜ Save and give the name to your file with the .bat extension. Then, in the Save as type, change the option to All Files.
Once done, click on Save to save your file.
Now, double-click on the batch file to run it. If there is any problem running the batch file, open Command Prompt and go to the batch file location.
You need to type the batch file name with extension here to run the script.
Once the script is executed, the screen resolution will be changed. This method of changing the display resolution is a lengthy process, but you can give it a shot if you love working with scripts.
3. Use Third-party Applications
You can use third-party apps to change screen resolution in Windows 10. In addition, with third-party applications, you can create custom resolutions that are not available in the Settings app.
You can use Custom Resolution Utility (CRU) as your helper to change resolution. It is free software and can be used by anyone with Windows Vista and above versions.
Download and install it on your computer. You can then add your custom resolution. Once the resolutions are set, go to the extracted folder and run the Restart file.
This will change your screen resolution by restarting the display adapter.
4. Use Display Adapter Software To Change Screen Resolution In Windows 10
Many graphics driver manufacturers have software that can be used to change screen resolution in Windows 10. You can visit the manufacturer’s website or check the manual to know about the software that can be used for your display driver.
The Intel graphics card driver has an Intel Graphics Command Center app that can change the display settings, including screen resolution. You can find similar apps for your graphics card and use them as per requirements.
Final Thoughts
If you are a gamer and want to experience vintage games in less resolution, you can do so with Windows 10. You can also use the sharper resolution to see how a specific website looks. Well, you can change screen resolution in Windows 10 easily. You don’t need any fancy extensions, utilities, or apps to change the screen resolutions.
However, if you want a custom resolution that Windows OS is not providing, you can use a third-party app for that. Also, some utilities can help you change the screen resolution by Command Prompt terminal and scripts.


