Key Takeaways
- Users face the 0xC1900101 Windows 11 error code while installing or updating Windows 11.
- The error is usually caused by driver issues, which can be checked from the Device Manager.
- You can check different hardware and software components and once the error is identified, apply the right fix for it.
You are not alone if you have encountered the 0xC1900101 Windows 11 error while trying to install the new Windows 11 update. When the latest OS version was introduced, users were glad to install it, only to be disappointed by similar issues. Whether they are trying to upgrade from Windows 10 or going for a regular update, this is true.
The generic Windows 11 0xC1900101 error code is usually related to driver issues. For example, you might get one of the following error codes: 0xC1900101 0x2000c, 0xC1900101 0x20004, 0xC1900101 0x20017, 0xC1900101 0x40017, 0xC1900101 0x30018 and 0xC1900101 0x40021. Outdated device drivers, problems with installed apps, or any other – all of your issues are addressed in the article to help decrease the chance of error code.
13 Solutions To Fix 0xC1900101 Windows 11 Error
The 0xC1900101 Windows 11 issue can be caused by anything from insufficient storage space, network connectivity issues, and driver errors to damaged system files and outdated software. We have considered all the options to give practical solutions to the common error. So, find out what your real issue is and use the correct fix for it.
1. Check if your Disk has Sufficient Storage Space
You might come face-to-face with the 0xC1900101 Windows 11 error if your hard drive has insufficient disk space. Both installation and update of Windows 11 call for some minimum hardware requirements and installation prerequisites.
Microsoft says that Windows 11 requires a minimum storage of 64 GB for a successful installation. When you try to enable certain features or download updates, it will again expand the memory requirement. So before you go for an update, check if your OS drive has enough drive space to accommodate Windows 11.
To get additional storage space, consider emptying the Recycle Bin, clearing large or unused files, uninstalling nonessential applications, or even moving some files to an external storage device. When you finish the cleanup operation, you can continue with the installation or upgrade process.
2. Run Windows Update Repeatedly
You might have tried to run the Windows update to solve the 0xC1900101 Windows 11 issue but to no use. The trick is to run the update process a few times in a row so that any pending updates get installed. This includes all hardware and software updates and third-party driver updates.
Type “settings” in the search bar and open the Settings app.

Select the “Windows Update” option in the left menu. Now, click the Check for updates button on the right side. The pending updates will be listed. You can install them by following the on-screen directions and getting rid of the update issue.

3. Run Windows Update Troubleshooter
The Windows update troubleshooter is the best place to troubleshoot the 0xC1900101 Windows 11 generic error. Here are the troubleshooting steps.
Press the Windows key + I to open Settings. Next, select “System” on the left side and “Troubleshoot” on the right.

Click “Other troubleshooters.”

Then, click the Run button beside Windows Update.

It is recommended to restart your system once the process is completed. Now, check for updates as in the previous method and install updates if available.
4. Download and Install any Third-Party Driver Updates
Updating the device drivers solves the upgrade or installation issues of Windows 11 in many cases. Remember to follow the device manufacturer’s instructions whenever you update a driver. You can also go through these steps for reference.
Press the Windows key + I to open Settings. Select “Windows Update” on the left pane.

Now, select “Advanced options” under More options.

Select “Optional updates” under Additional options.

Under the Driver updates, you can see the pending updates, if any. Select them and click “Download & install.” Once done, the issue in question will disappear.

5. Remove Extra Hardware
Any additional hardware you plug into your device might result in the 0xC1900101 Windows 11 error. Remove all the devices that don’t affect the basic functionality of your PC. This includes all the docks, drives, storage devices, and other peripheral devices. Secondary devices like printers and USB flash drives will also come under this category.
Besides unplugging nonessential hardware devices like external drives, you can unplug the cables connected to the hard disk and clean the physical space. You can also try reconnecting the external devices like keyboard and mouse so that no stone is left unturned.
6. Check Device Manager
You can check the Device Manager for clarity if there is an error in any of your devices. You can look for the yellow exclamation mark that indicates faulty third-party drivers that lead to the 0xC1900101 Windows 11 issue. You may have to check each hardware category to unearth specific problems.
Type “Device Manager” in the search bar and open Device Manager from the list.

You will see a list of devices. Double-click on each of them to find the problematic driver. If you see any device with a yellow mark, right-click on it and select “Update driver” or “Uninstall device” to sort the upgrade error.

7. Disable Third-Party Security Software
Third-party security programs like third-party antivirus software provide strong protection against malware. But if you cannot upgrade or install Windows 11, you should uninstall them for some time until the problem is resolved. You can trust Windows Defender to protect your PC at this time.
You can go to the Control Panel to uninstall third-party tools like antivirus programs. Keep product keys handy for the reinstallation process. If you don’t want to uninstall it, you can choose to disable it for the time being. Once done, check if the upgrade failure persists.
8. Repair Hard-Drive Errors
If you are facing the 0xC1900101 Windows 11 issue while trying to install the OS, check if there are logical and physical errors on the installation drive. You can use the CHKDSK command to repair the hard-drive errors.
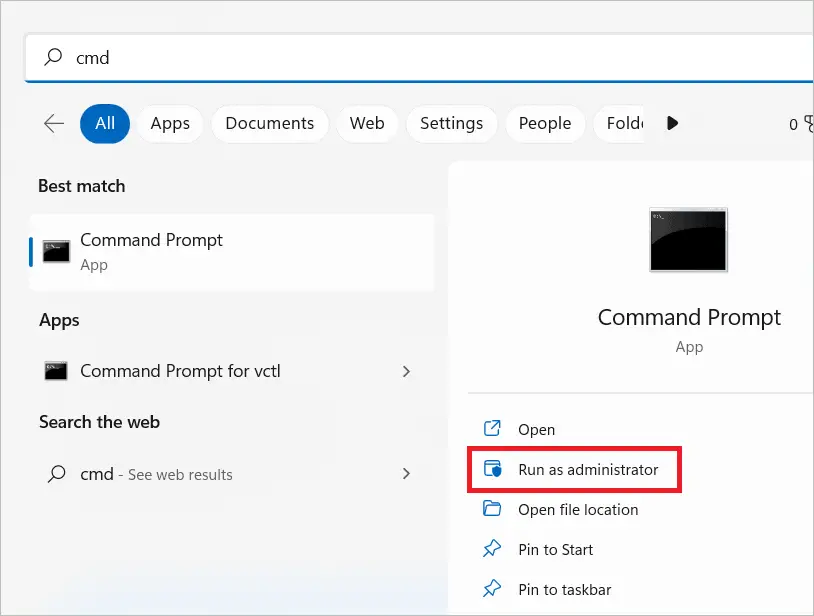
Type “cmd” in the search bar and open the administrative Command Prompt by selecting the Run as administrator option.
Type the following command and hit Enter.
chkdsk/f C:
The automatic repair starts, and you can restart your computer once it finishes.
9. Perform a Clean Restart into Windows 11
A clean boot in Windows 11 is used to start the OS with only the minimum programs and drivers needed to run. This lets you identify what program prevents you from performing the upgrade or installation steps resulting in the 0xC1900101 Windows 11 issue. When you do a clean boot, you can decide the programs you want to run at startup. Let us see the basic steps for a clean restart.
Log in to your device with an administrator account. Type “msconfig” in the search bar and open the System Configuration.

Go to the Services tab, select “Hide all Microsoft services, ” and select “Disable all.” Next, click “Apply.”

Go to the Startup tab, and select “Open Task Manager.”

In the Startup tab, select each item and click the Disable button. Close the Task Manager once the disabling is complete.

Select “OK” in the System Configuration dialog box. Restart your PC to go into the clean boot environment. You can troubleshoot the issue from here.
10. Repair and Restore System Files
When changes are accidentally made in the registry or default settings, the system files get corrupted or lost. As a result, your upgrade or install process may get hindered, leading to a 0xC1900101 Windows 11 error. However, you can restore and repair the files through a DISM scan.
Type “cmd” in the search bar and open Command Prompt by selecting Run as administrator.

In the Command Prompt window, type the following command and press Enter.
DISM.exe /Online /Cleanup-image /Restorehealth
After executing the command, restart your device and see if the install error persists.
11. Uninstall Recently Added Applications
If you have downloaded some applications recently, try uninstalling them to solve compatibility issues. If these are interfering with the upgrade or installation of Windows 11, removing them might help. Here are the steps.
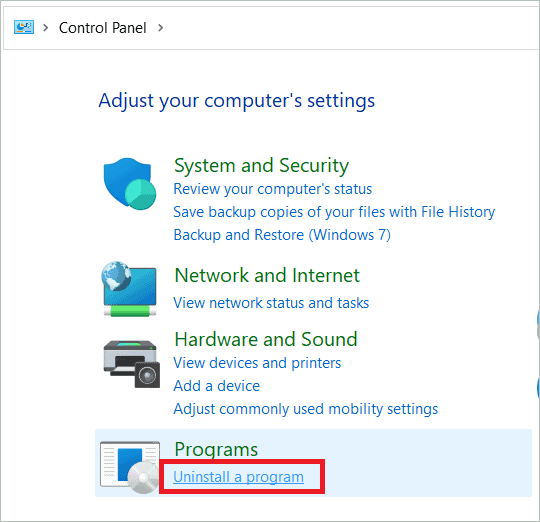
Type “control panel” in the search bar and open the Control Panel.

Under Programs, select “Uninstall a program.”
The following window shows a list of applications. You can select the recent applications, right-click and select “Uninstall” to remove the app.

Now, the installation error might not be present. You can reinstall the apps post upgradation if needed.
12. Run the SFC Command
Like the DISM scan, the SFC tool can be used to solve the 0xC1900101 Windows 11 issue. SFC/System File Checker scans the system files to uncover and repair any damages. Find the steps to run the command here.
Type “cmd” in the search bar and open Command Prompt by selecting Run as administrator.

Type the following command in the Command Prompt window and hit Enter.
sfc/scannow
Now, see if you still get the error message during the upgrade process.
13. Disable Network Adapter
If no other method works, you can disable your network adapter. When you do this, you won’t be able to perform upgrades or installations online. Once you disable the adapter, you can use a bootable Windows installation media like a USB flash drive to upgrade or install Windows 11.
Type “Device Manager” in the search bar and open Device Manager from the list.

Double-click on Network adapters to expand it. Right-click on each item and select “Disable device.”

Now, restart your system and try installing Windows 11 using a bootable media like a USB device. You are not likely to get any installation error code.
Final Thoughts On 0xc1900101 Windows 11 Error
A failed Windows feature update can be frustrating if you don’t know where to start. The 0xC1900101 Windows 11 issue is a common one that pops up when you try to install Windows 11 or upgrade from a previous version. The error is primarily due to the driver issues in your PC.
You can try many fixes for your Windows 11 update error 0xC1900101. Whether it is the lack of space, software conflicts, or the internet connection stopping the installation process midway, you can troubleshoot the error code 0xC1900101 and fix it in no time.


