Key Takeaways
- Windows 11 automatically checks for updates and installs them at the right time.
- Sometimes, users face the Windows 11 update stuck issue where the updates are stuck and don’t take place completely.
- Various reasons like update service not running and corrupt system files can be the reason for the stuck updates.
Windows update is a necessary process that keeps the operating system up-to-date and running. With software updates and security patches, these updates come with enhanced features. But many users face the Windows 11 update stuck issue, where the updates get stuck, and nothing happens for hours. Even with a strong internet connection, they get stuck at a certain percentage, as updates are stuck at 100%.
The error in the downloading process can be due to many underlying issues not directly related to the Windows 11 update getting stuck. These include conflicting drivers, too many apps taking up disk space, and the update service not running, among many others. Whether you know the cause of the download stuck problem or not, you can rely on the article to fix the issue.
15 Ways To Fix Windows 11 Update Stuck
Sometimes if you take minor steps, you can fix the Windows 11 update stuck issue. For example, waiting until the latest Windows update is complete, unplugging non-essential components, checking the network status and power supply, and running antivirus and Windows 11 installation from a bootable USB can sometimes save the situation. Still, if the update is stuck, you should dig deeper to find a solution. So let us do just that.
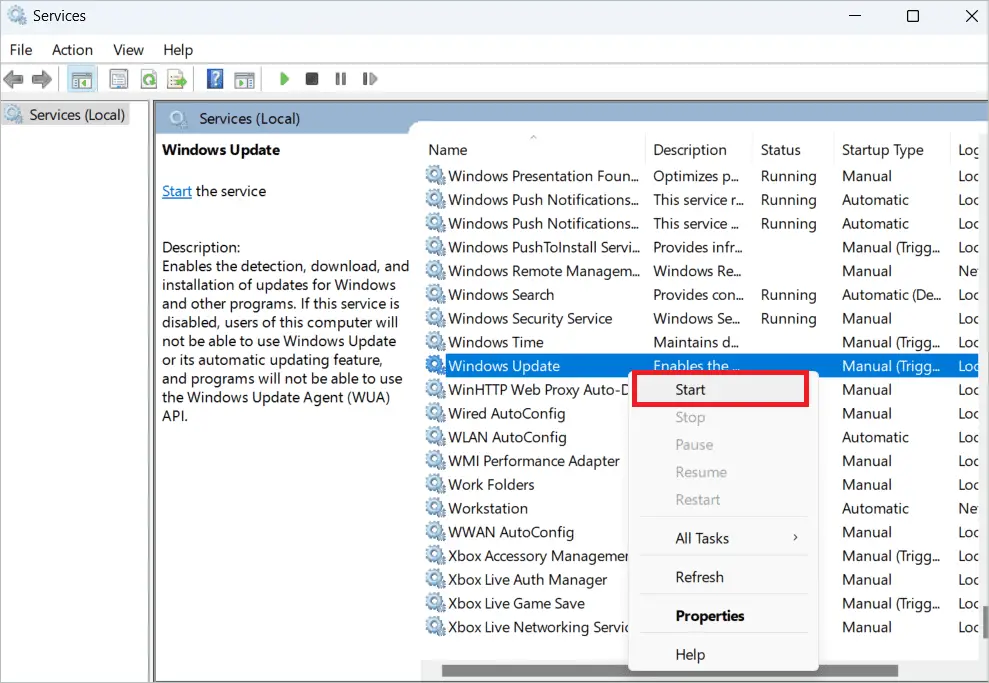
1. Check If Update Service Is Running
The Windows Update Service must run in the background for the updates to get installed successfully. So if you face the Windows 11 update stuck issue, first check if the service is running.
Search for “Services” and open the Services app.
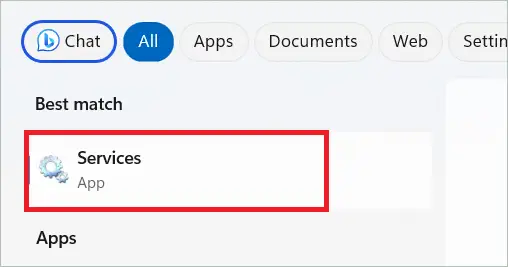
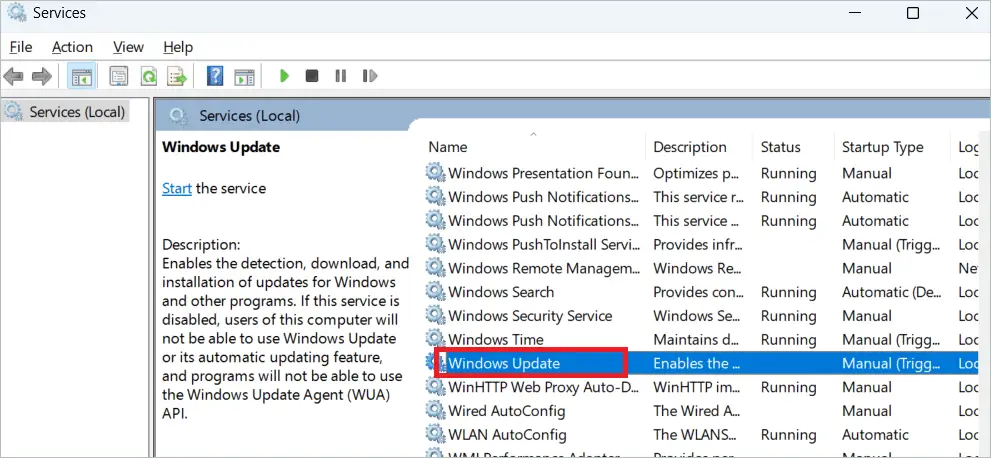
Double-click on “Windows Update.”
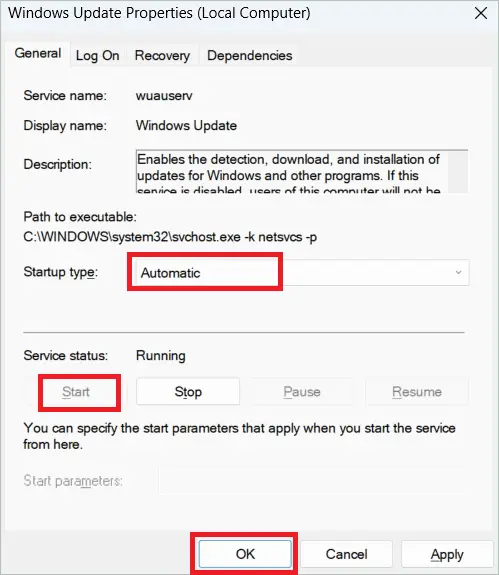
In the window that appears, select Startup type as “Automatic” from the drop-down menu. If the Service status says ‘Stopped,’ click the “Start” button to start the service again. Finally, click “OK.”
Restart your PC now to run the update installation process successfully.
2. Pause Windows Update And Restart It
As you know, Windows automatically checks for updates and installs them. But you can pause and restart the updates if the updates are stuck at some point. So let us see the steps for the same.
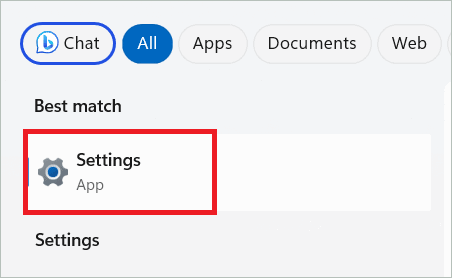
Type “Settings” in the search bar and open Settings.
Select “Windows Update” in the left pane. Click the “Pause for 1 week” button near Pause updates under More options. Restart your PC.
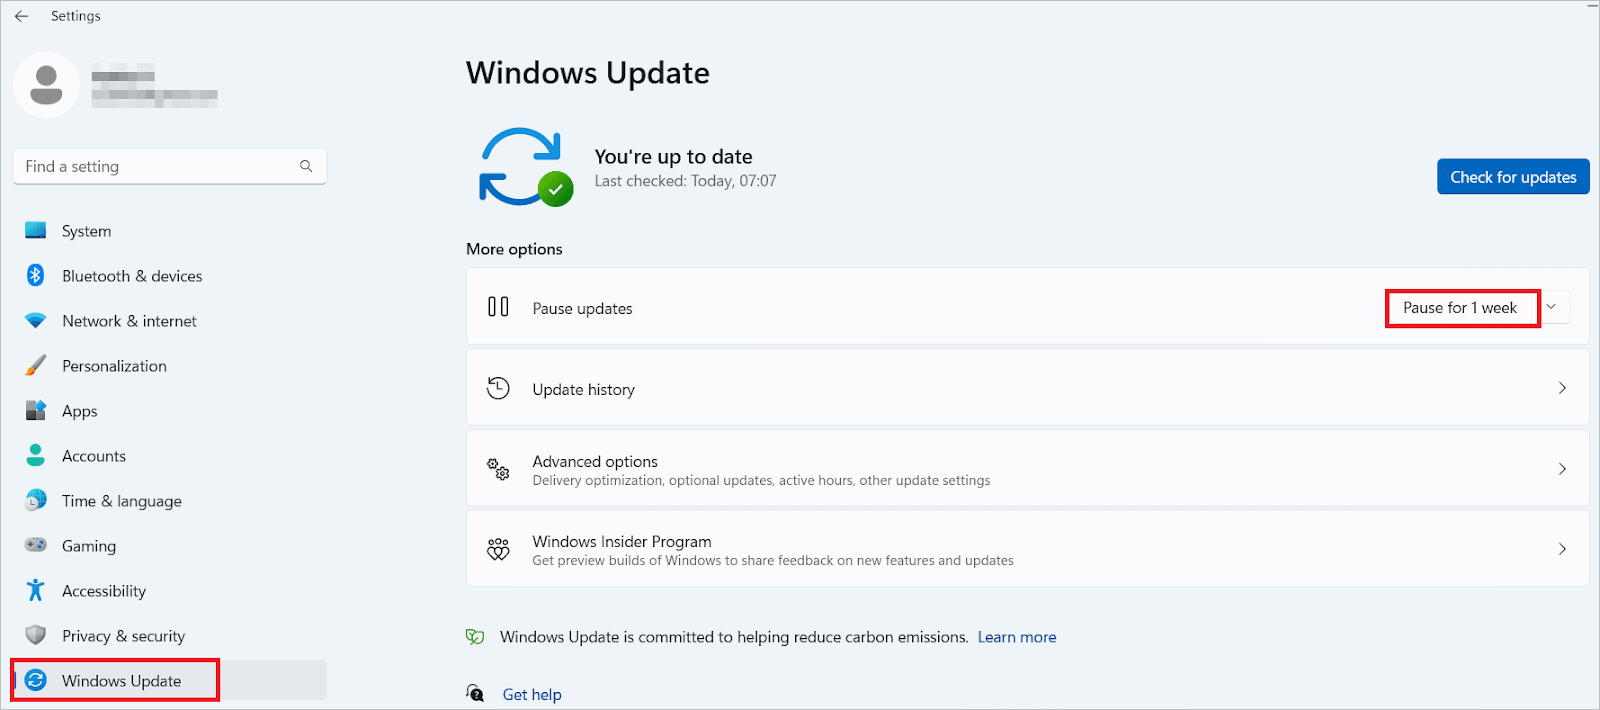
Go to the same page as above and click “Resume Updates.” Now click the “Check for updates” button on the top of the page to install updates, if any.
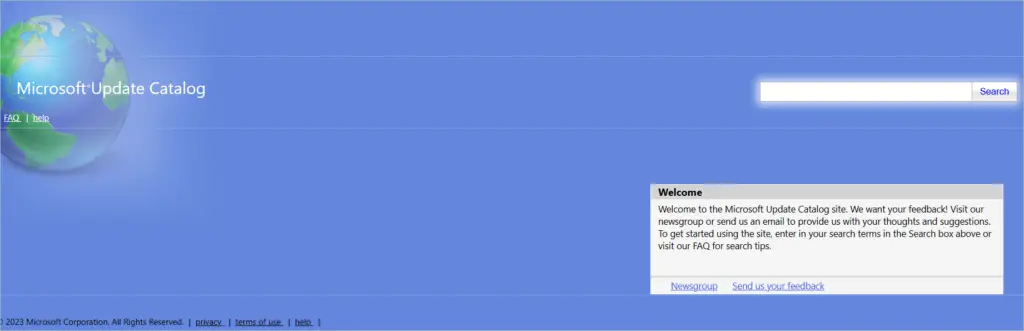
3. Download The Updates Manually
If the Windows 11 update stuck issue occurs often, you can get the Windows update package directly from the Microsoft Update Catalog. When you enter the KB number, the available downloads will be listed, and you can select the required one.
Go to the Microsoft Update Catalog. Type the KB number of the stuck update in the search bar and click the search button. You will be able to save the update files to your computer. Once the download is complete, run it as administrator.
4. Run Windows Update Troubleshooter
The built-in Windows troubleshooters are very helpful in unearthing the problems affecting the OS. However, different troubleshooters cater to different services. Here we will use the update troubleshooter to check and resolve the problem with Windows update.
Open Settings by pressing the Windows key + I and select System in the left panel. Next, click on Troubleshoot in the right panel.
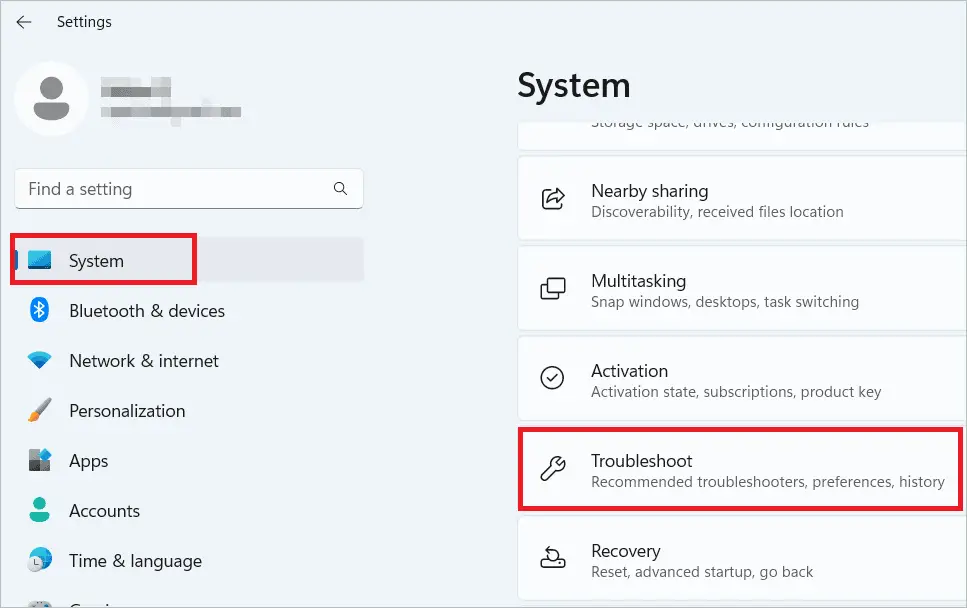
Select “Other troubleshooters” under Options.

Click the “Run” button beside Windows Update to run the Update troubleshooter.
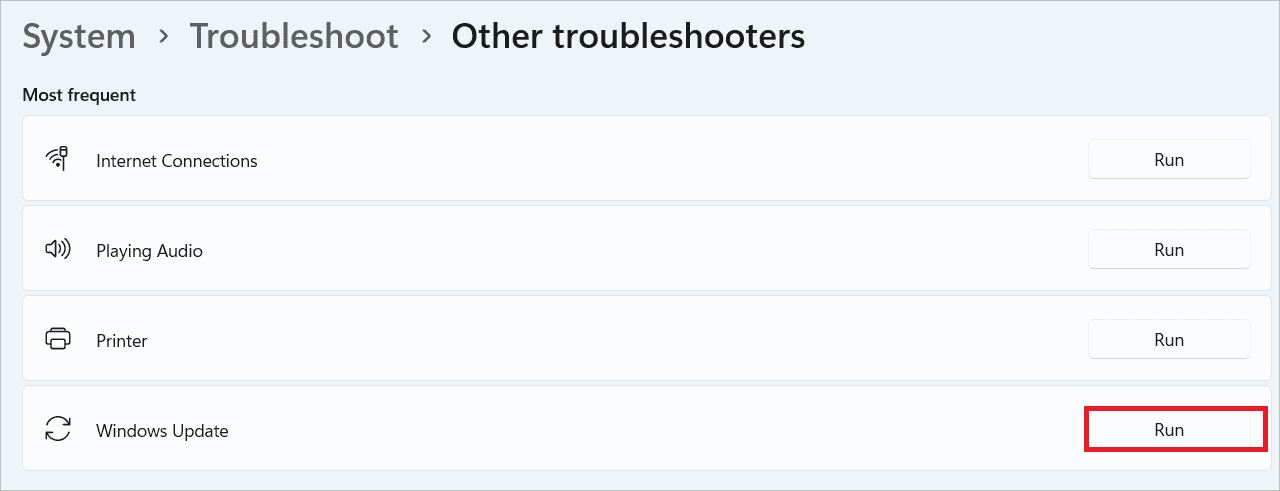
The troubleshooter will now try to detect the cause for the updates stuck issue. Then, on identification, it will try to fix the problem.
5. Run SFC And DISM Commands
If the system files are corrupted, you may have to deal with the Windows 11 update stuck issue. The SFC and DISM utilities of the OS can help identify such files and replace them to start the update again. Follow the steps below.
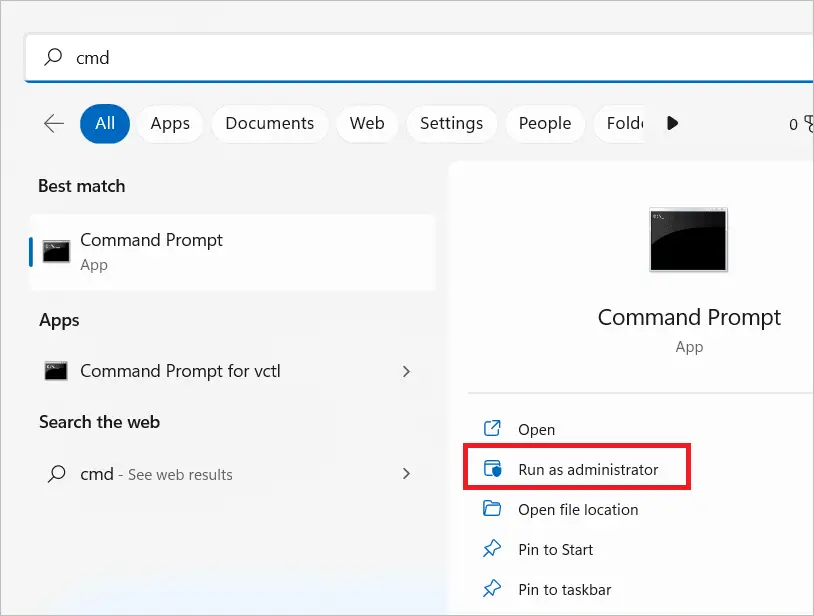
Type “cmd” in the search box and open Command Prompt by selecting “Run as administrator.”
Type the following command and hit Enter to run the SFC scan.
sfc /scannow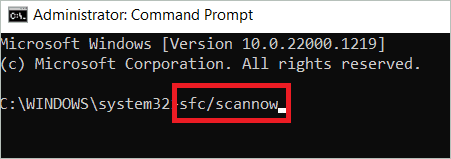
Wait for some time, and then restart your computer. If it doesn’t help, run the following DISM command.
DISM /Online /Cleanup-image /Restorehealth6. Uninstall Conflicting Drivers
Only some devices will be welcome on your computer. If you feel that some device drivers are not acting well and you have trouble installing updates, you can choose to uninstall them. Here is how you can do it.
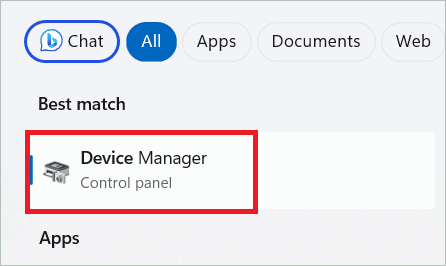
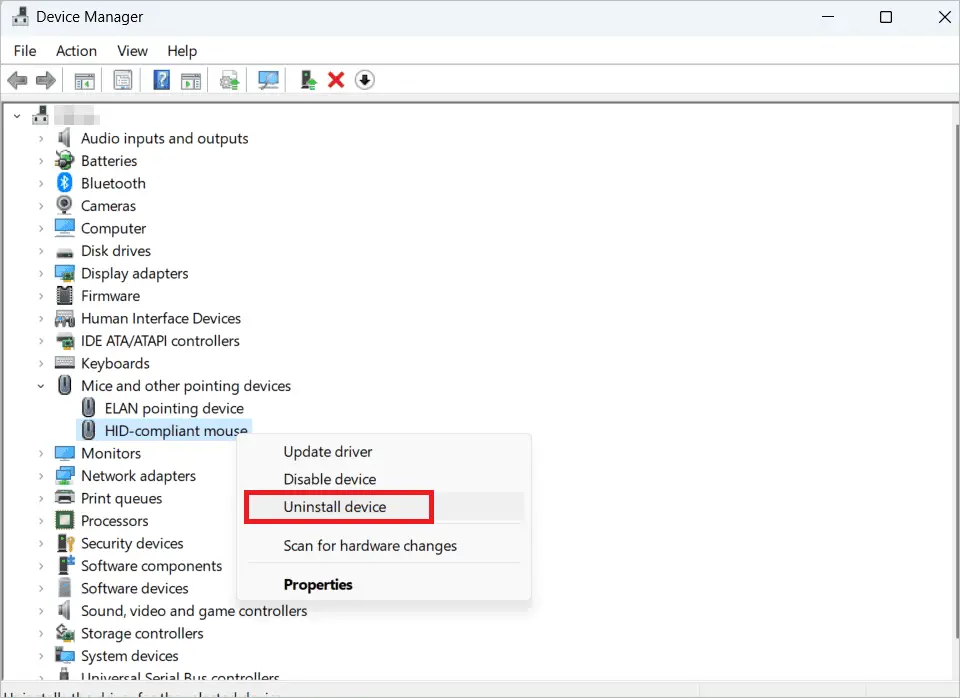
Type “device manager” in the search box and open Device Manager.
Identify the device you want to stop. Right-click on the device and select “Uninstall” to remove the device driver.
7. Restart Windows In Safe Mode
Starting Windows in safe mode will load only the essential programs. So, there won’t be any unnecessary applications that interfere with the update process. Below are the steps to switch to the safe mode that will end the Windows 11 update stuck issue.
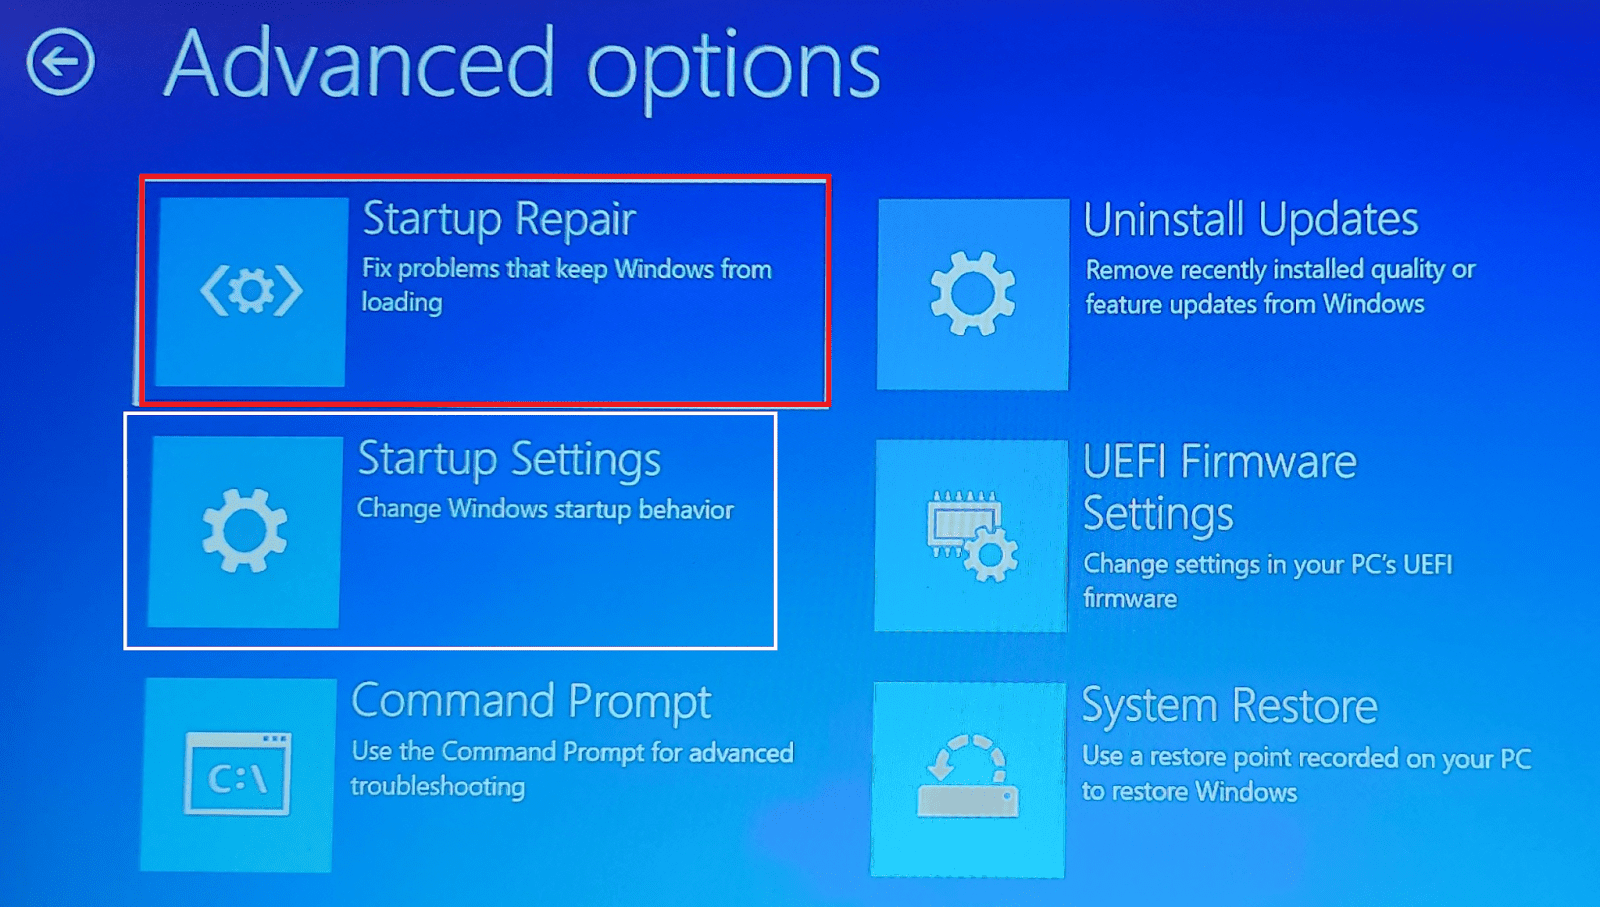
Press and hold down the Power button for ten seconds to turn off your device. Now, press it again to turn on the device. Repeat the steps three times. You will see the Automatic Repair window. Click “Advanced options” to enter the Windows Recovery Environment.
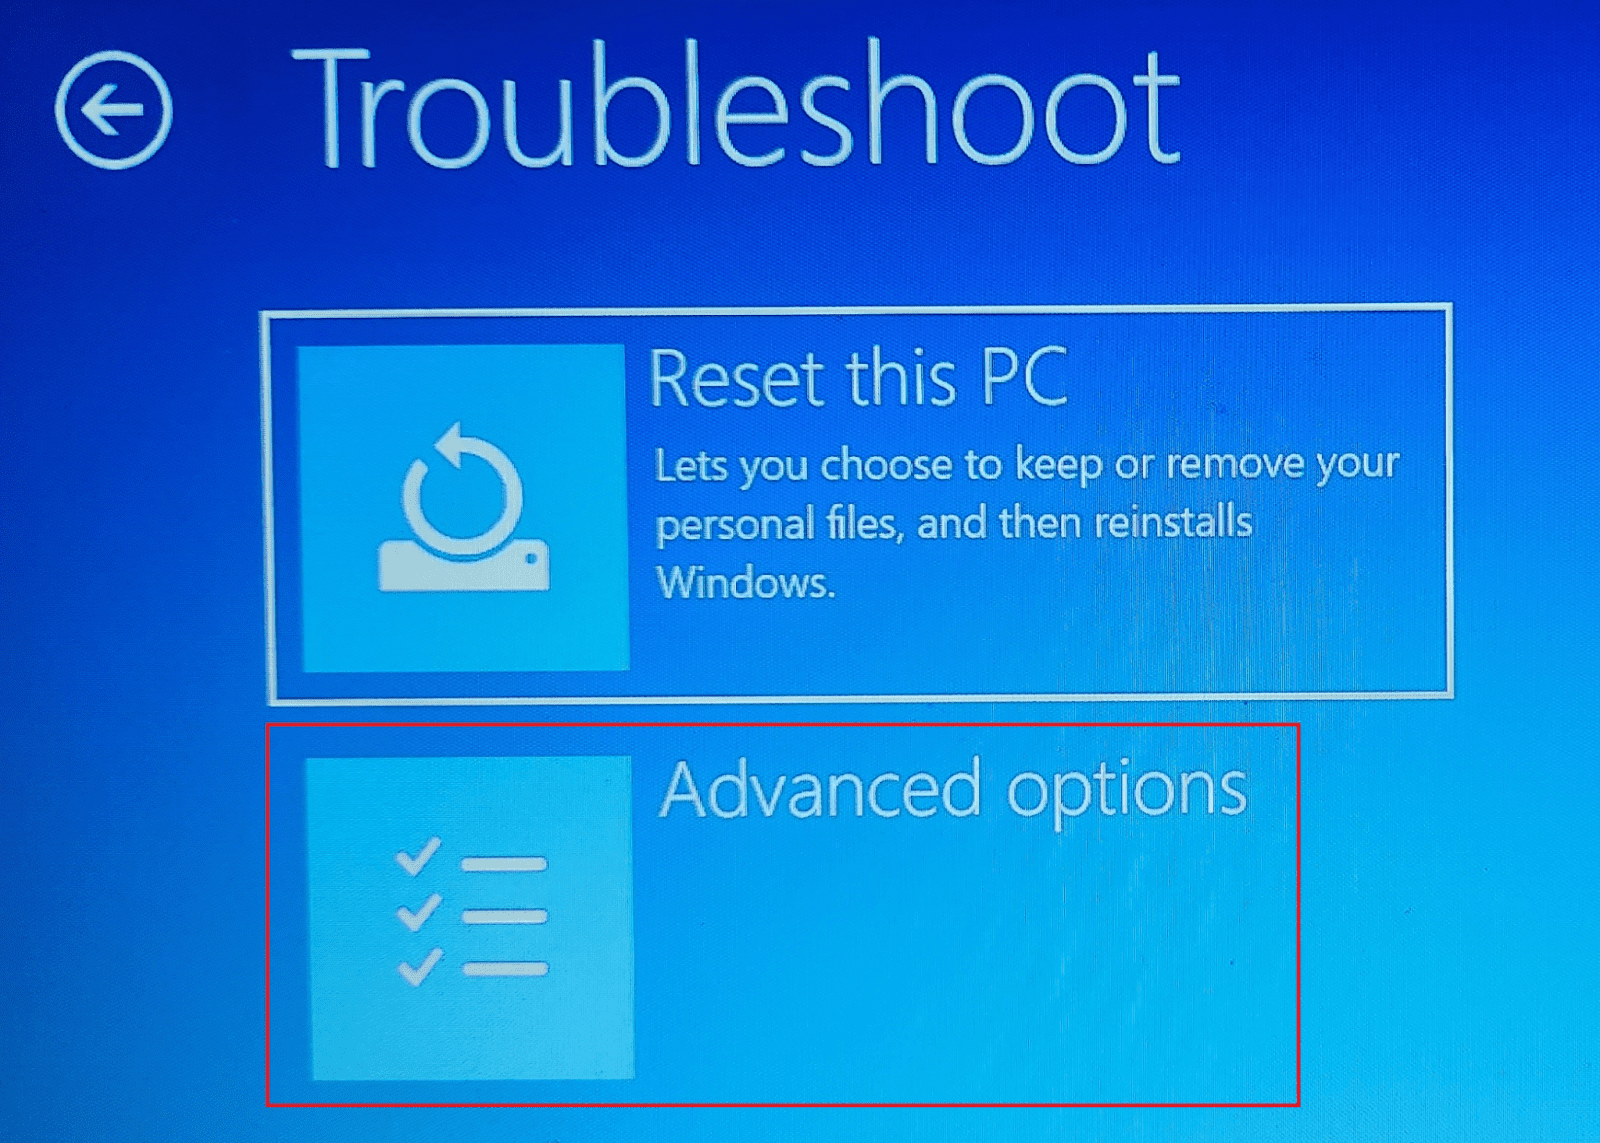
Now, click Troubleshoot.
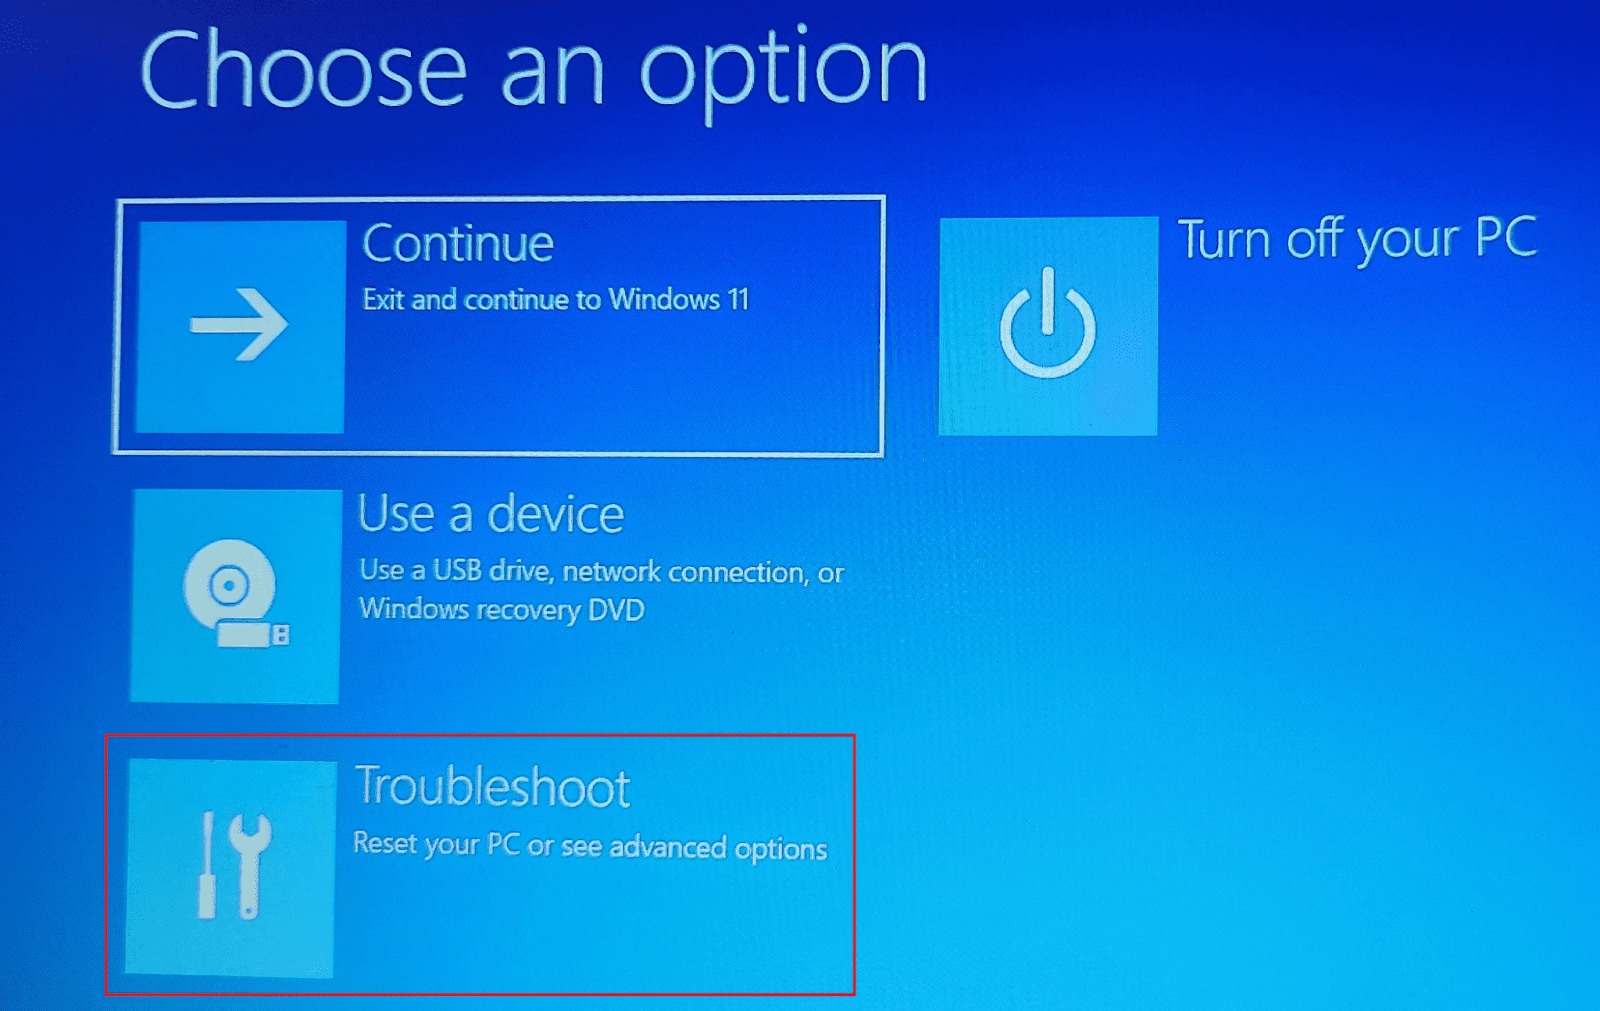
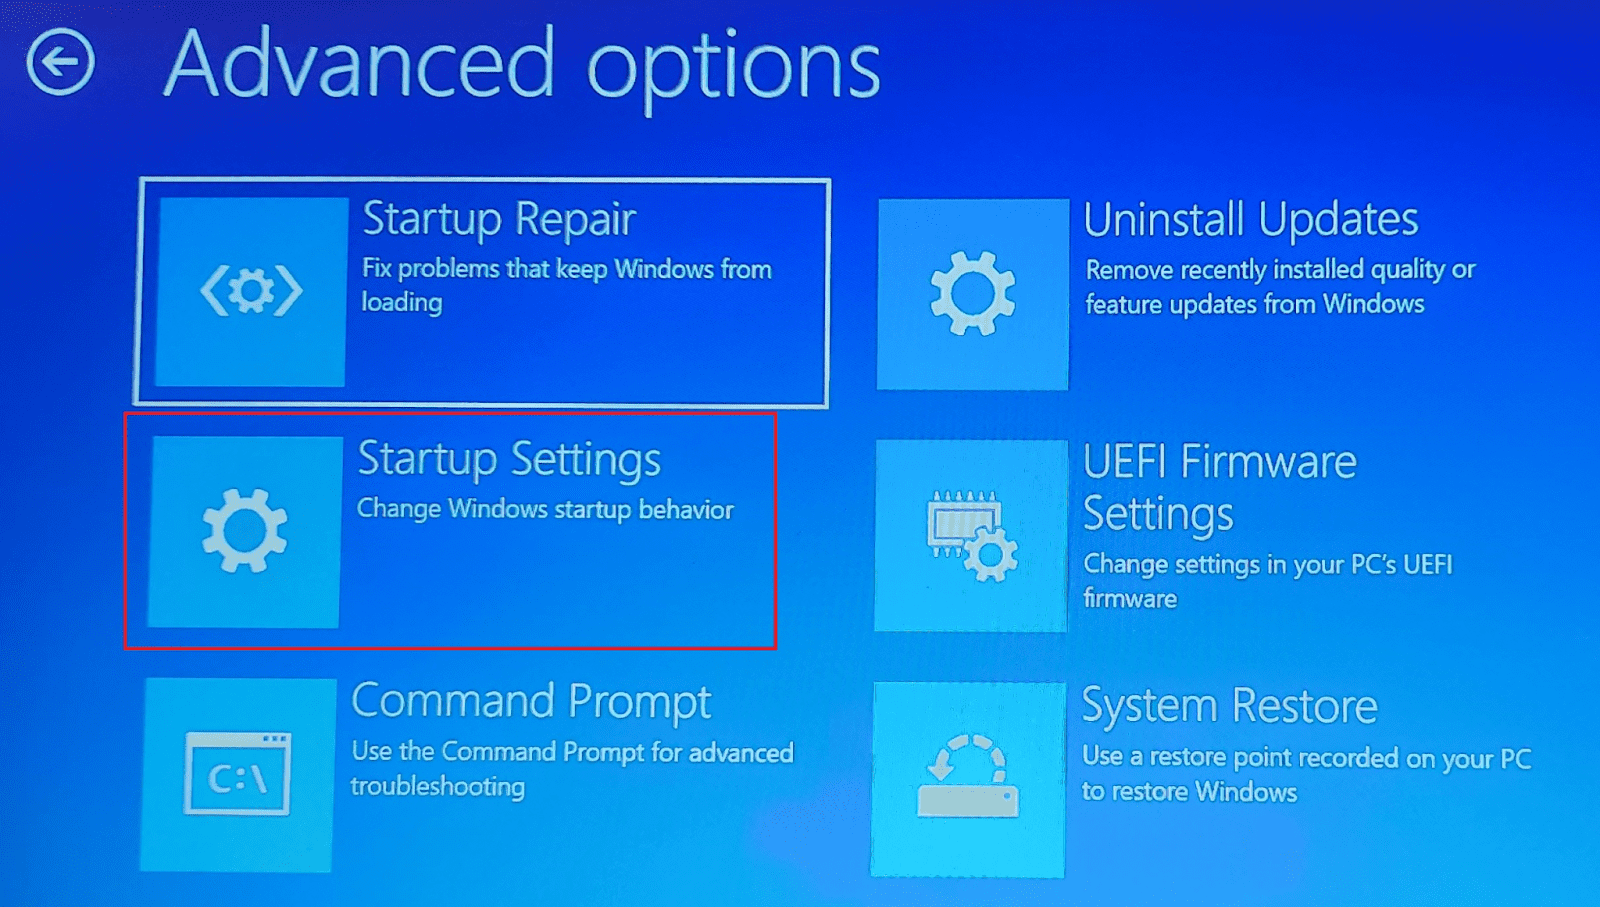
In the Troubleshoot window, click “Advanced options.”
When the Advanced options screen loads, click “Startup Settings.” If this option is not visible, click “See more recovery options” to get it.
In the Startup Settings window, you will be notified that you can change Windows options after restarting. Click the Restart button.
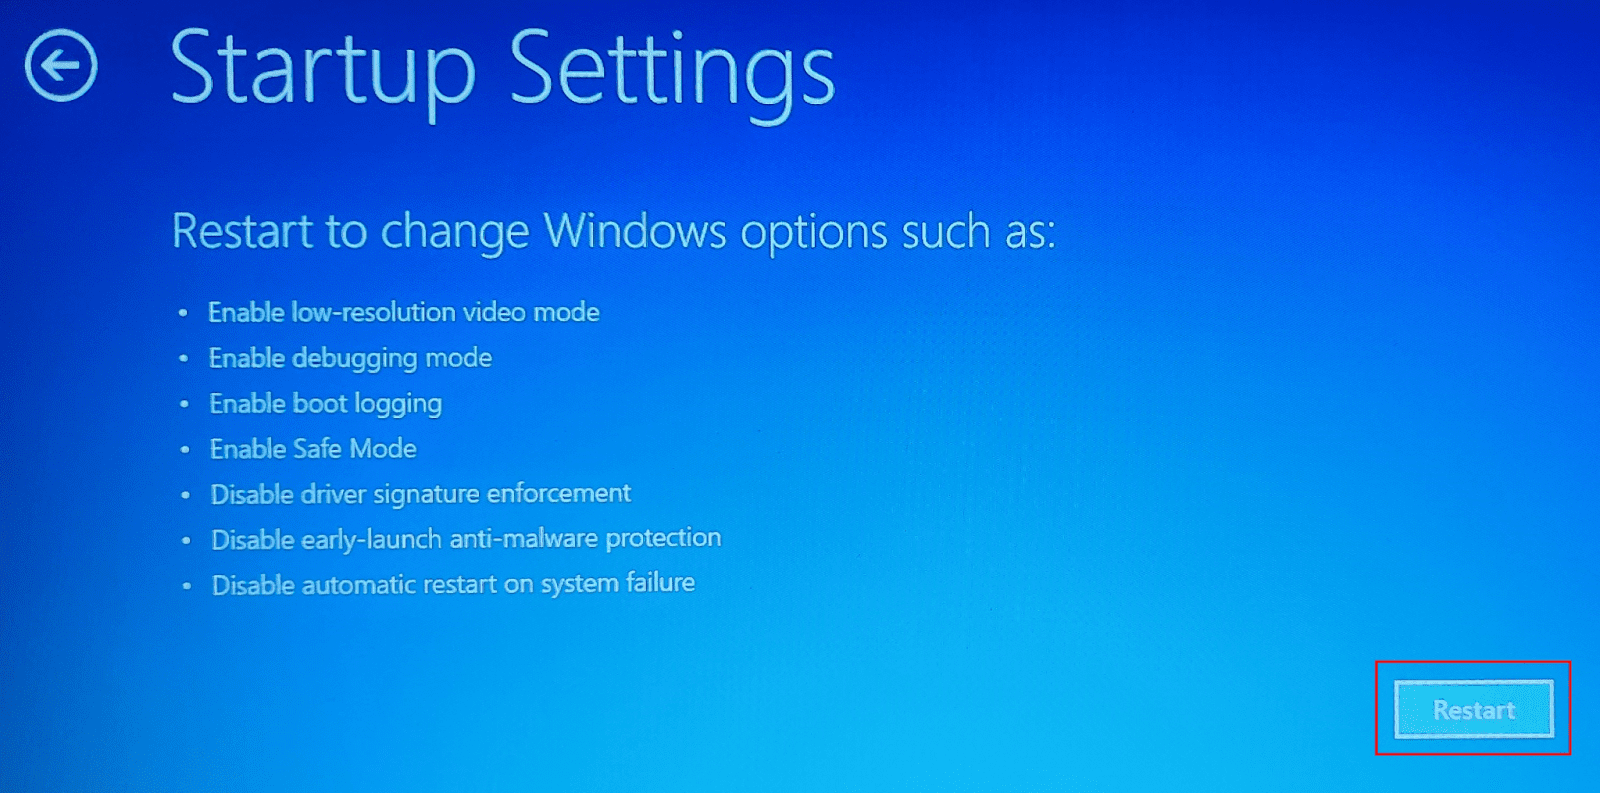
Once restarted, you can boot into safe mode by pressing F5.
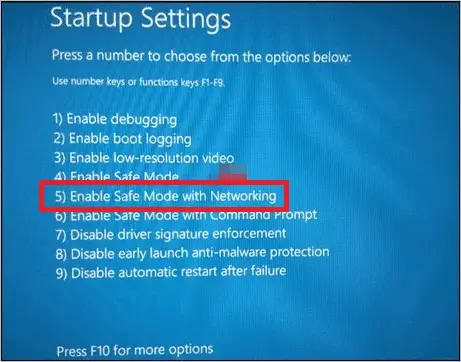
Caption: Press F5
Check if the updates are being done now.
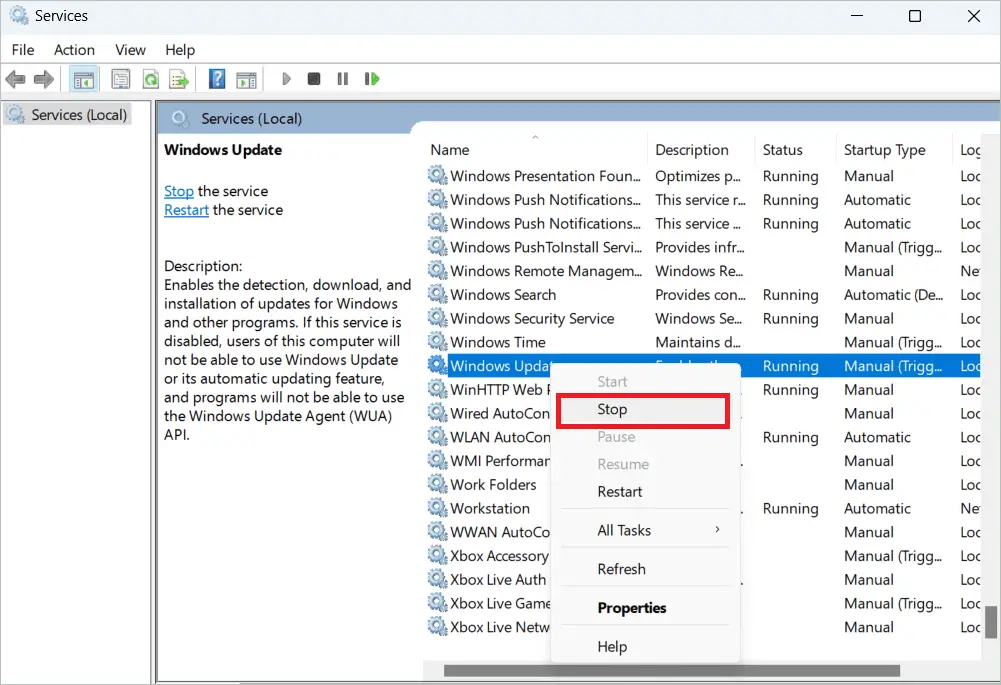
8. Restart Windows Update
Restarting a device or process sometimes does wonders. So, here we will restart the update service and also delete the cache to see if the problem gets resolved.
Open the Run dialog box, type “services.msc” and click “OK”.
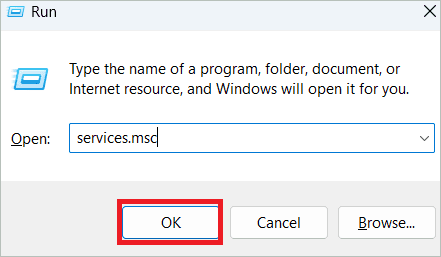
Caption: Type services.msc and click OK
Locate Windows Update and right-click on it. Select “Stop” to stop the update service.
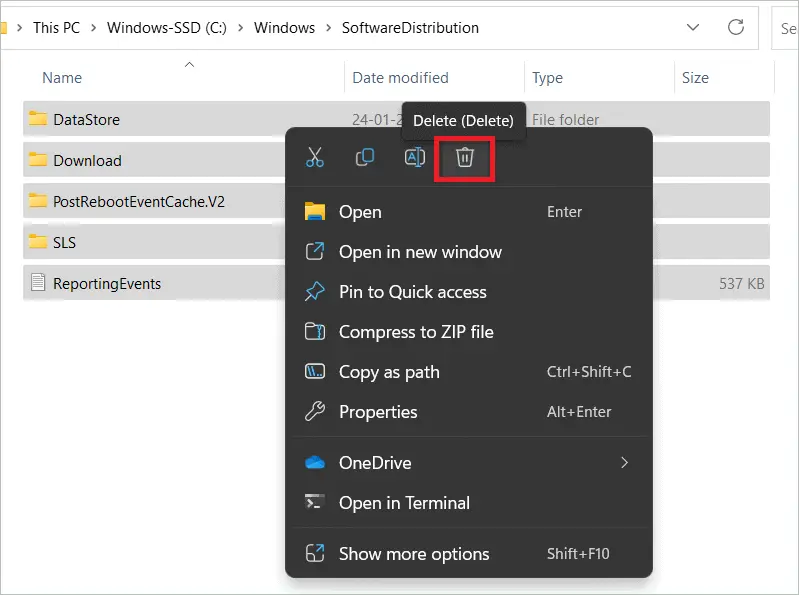
Go to the following path in File Explorer.
C:\Windows\SoftwareDistributionPress Ctrl + A to select all. Right-click and click on the Delete icon to delete everything in the folder.
Now, go to Windows Update again, right-click, and select “Start” to restart the service.
9. Uninstall Unnecessary Apps
Some of our PCs may be rich in applications, most of which are unnecessary. These will take up a lot of space on the disk. The reason for updates getting stuck can be insufficient storage space. Uninstalling these apps will free up space, and you will no longer face the Windows 11 update stuck issue.
Type “control panel” in the search bar and open the Control Panel.

Select “Uninstall a program” under Programs.
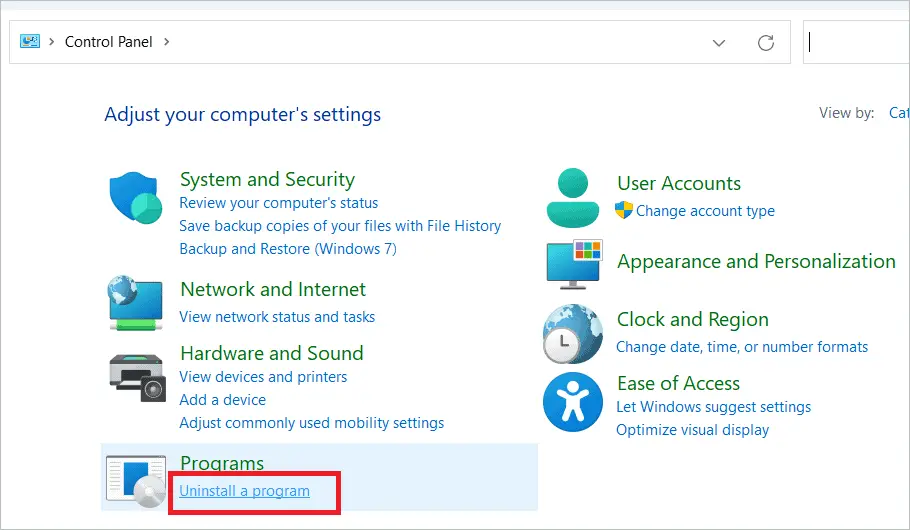
Select the apps you want to remove, right-click, and select “Uninstall.”
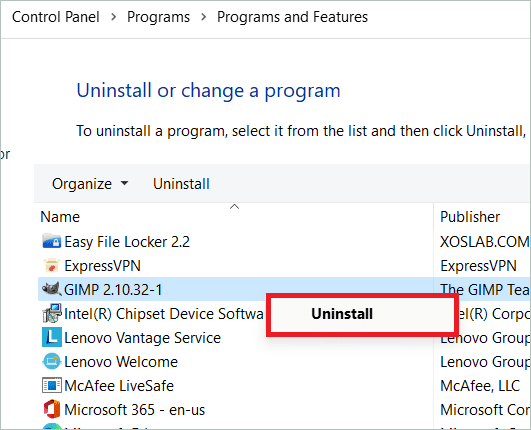
This frees up the disk space of drive C. The next time you download a file, you can change the path to store it in another drive so there is enough space in the C drive for updates.
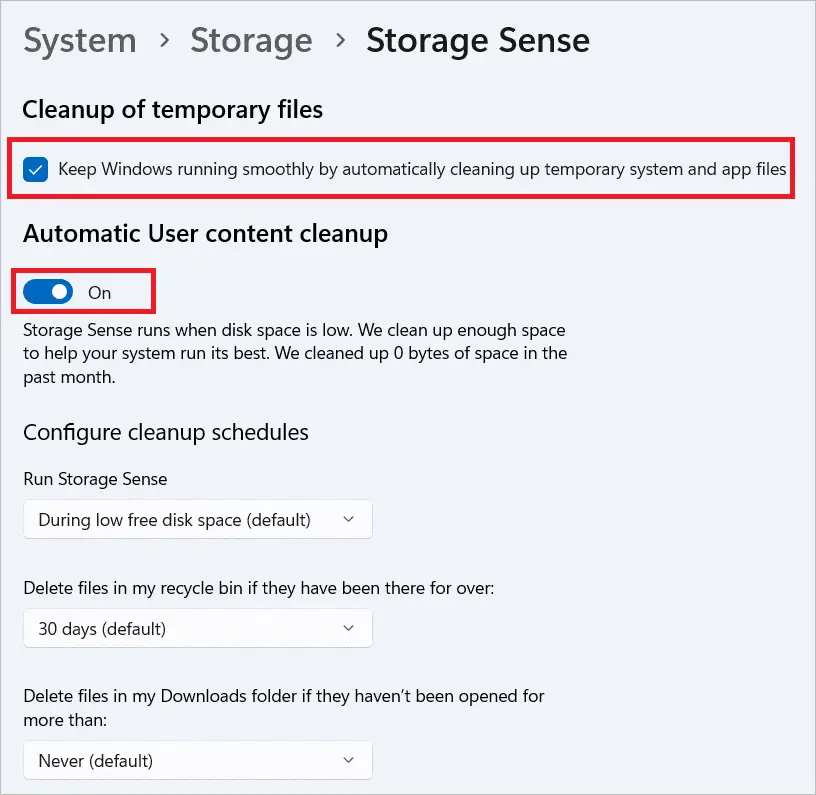
10. Set Automatic Disk Cleanup
Running disk cleanup is vital to make space for the new updates. Windows does the job automatically for you if you schedule it. Here is how you can schedule the clean up so the updates are not stuck.
Open Settings and select System > Storage.
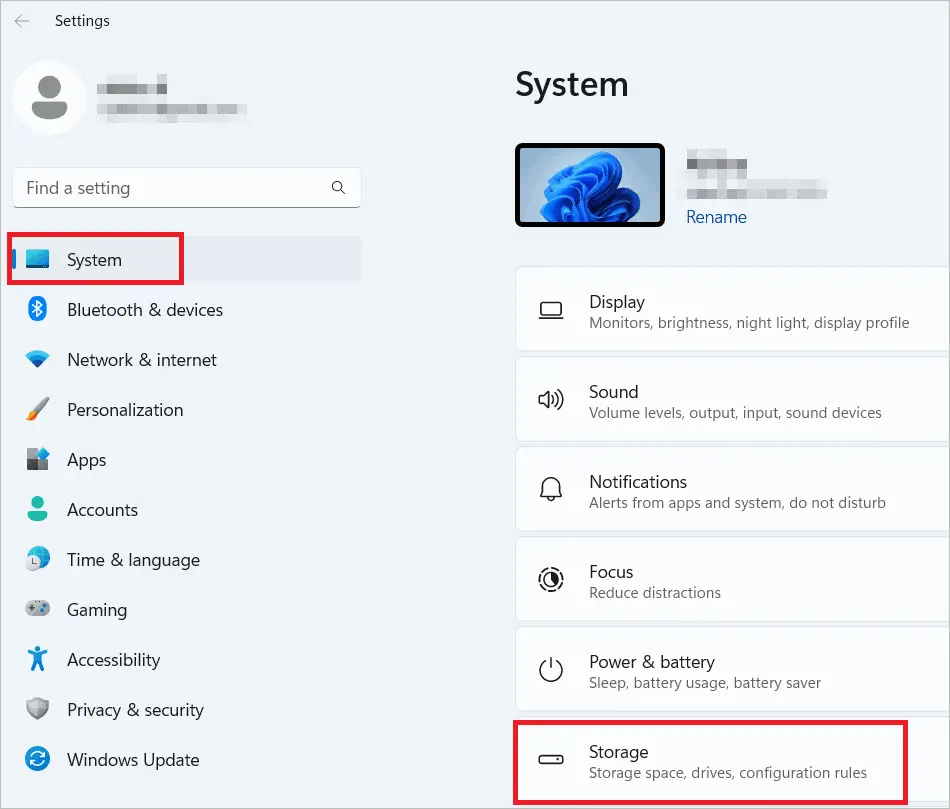
Select Storage Sense under Storage Management.
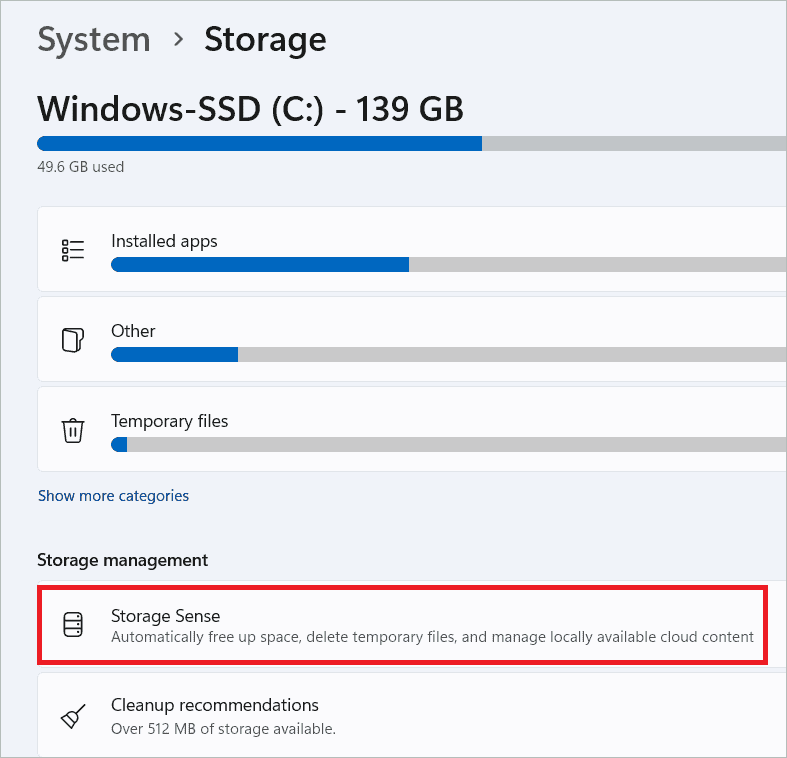
Check the “Keep Windows running smoothly by automatically cleaning up temporary system and app file” box. Toggle on “Automatic User content cleanup.” You can change the selected options in the drop-down boxes under Configure cleanup schedules. Close the Settings window, and you are done.
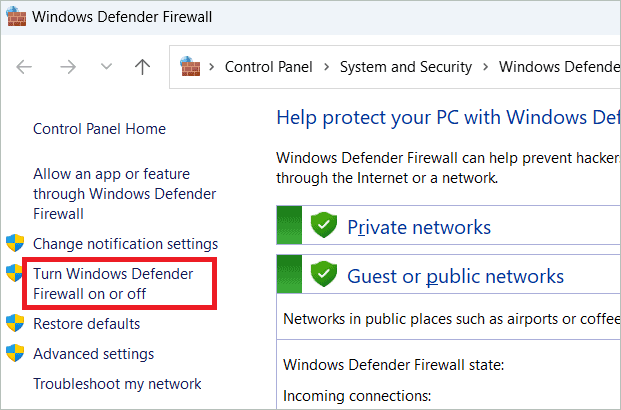
11. Disable Firewall Temporarily
A firewall is important for your computer to restrict the entry of harmful content. Sometimes, it so happens that the firewall blocks the download process. If the Windows 11 update stuck issue is caused by a failure to get the update files downloaded, you can disable the firewall for a while.
Type “firewall.cpl” in the Run dialog box and click OK.

Select “Turn Windows Defender Firewall on or off” from the left pane.
Select “Turn off Windows Defender Firewall off” under Private network settings and Public network settings.
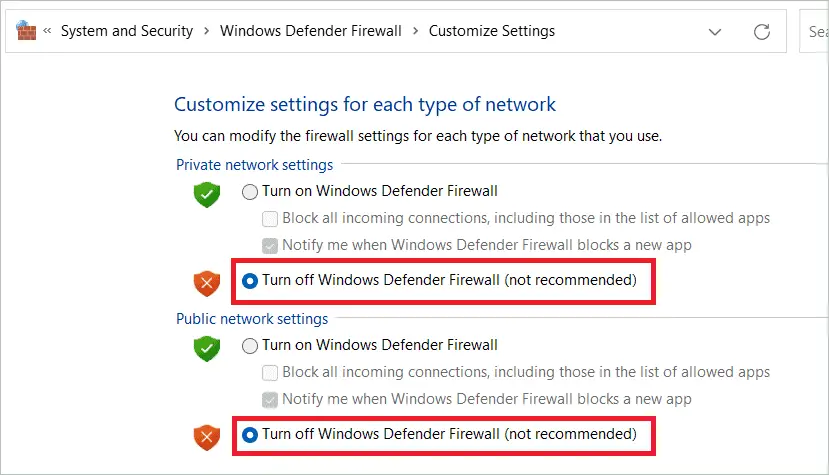
Remember to turn on the firewall again once the updates are done.
12. Run Startup Repair
Startup repair is a tool you can use to address issues or corruption in your Windows 11 OS. It fixes software issues; thus, the updates will occur smoothly without getting stuck. Follow the given steps.
Enter the Windows Recovery Environment by forcefully shutting down and turning it on three times in a row. You will now see the ‘Preparing Automatic Repair’ screen, after which you will go to the Advanced options.
Select the “Troubleshoot” option.

Next, select “Advanced options.”

Select “Startup Repair” to initiate the repair.
13. Update In Clean Boot
Clean boot will load only a predefined set of drivers and startup programs. So, if the Windows 11 update stuck issue is caused by some driver conflicts preventing the updates, updating in the clean boot can help.
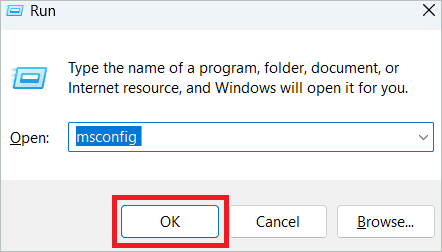
Type “msconfig” in the Run command box and click “OK.”
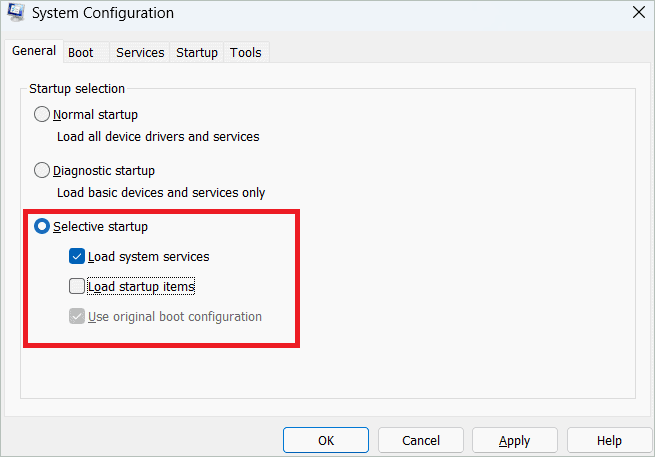
In the System Configuration window, go to the General tab and Select the Selective Startup radio button. Then, check “Load system services” and “Use original boot configuration” and uncheck “Load startup items.”
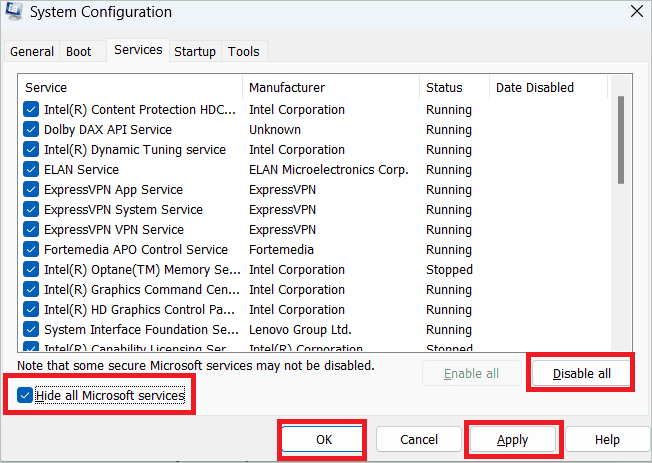
Select the Services tab, check the “Hide all Microsoft services” box, and click the “Disable all” button. Next, click “Apply” and “OK.”
Now restart your PC and check for updates.
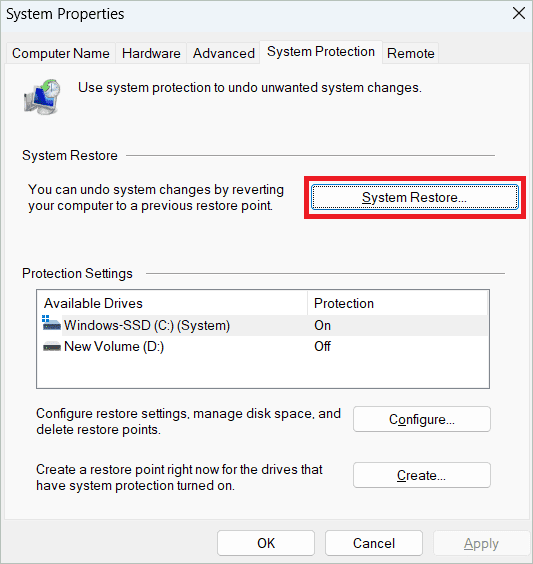
14. Run System Restore
Reverting your system to a previous point can be an ideal way to load the updates successfully. This method is possible if you have created a restore point previously.
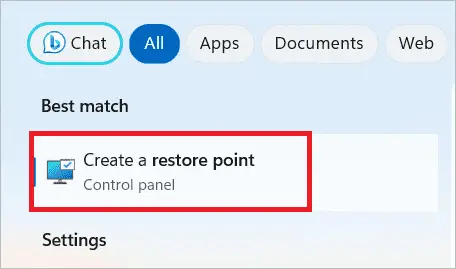
Type “restore point” in the search bar and open the option.
Select the System Protection tab, click the “System Restore” button, and select the restore point in the next window.
Your PC will restart, after which you can check if updates are occurring.
15. Reset PC
The last resort to all your PC issues, like Windows 11 update stuck issue, is resetting your PC. The following steps will reset your PC to its factory settings, thus making way for successful updates.
Go to the Windows Recovery Environment window, and select Troubleshoot > Reset this PC. You will see two options – Keep my files and Remove everything. It is recommended to select the first to retain all your files. Next, you can choose between Cloud download and Local reinstall and follow the on-screen instructions to reset the PC.
Final Thoughts
As and when Microsoft releases new updates, Windows 11 installs them on your PC, just like Windows 10. These are important to bring about the latest features to stabilize the system. But if you face the Windows 11 update stuck at 0 or any other percentage value for a long time, you may have to look for any issues. Identifying and resolving them will download and install updates quickly.
If you have tried minor fixes for the update installation stuck issue, the article will give you more solutions. Each caters to a different problem that can cause the update failed dilemma. One of them will be your lifesaver and help install Windows 11 updates.


