It is natural to upgrade to the latest Windows operating system once it is released. But what happens to the particular programs on Windows that adamantly refuse to run or run poorly on the specific version of Windows? If you want to run old programs on Windows, you can enable Windows 11 compatibility mode. The compatibility mode in Windows allows the apps to run in an older version of the OS, with settings particular to that OS.
When a Windows OS is developed, it is usually capable of backward compatibility. When you use compatibility mode on Windows 10 or Windows 11, you can run the program correctly as the OS mimics the settings from an earlier version of the operating system. As a result, you can run applications that were not working correctly after the upgrade.
How To Run Old Programs In Windows 11 Compatibility Mode
There are several ways to run an app in Windows 11 compatibility mode. You can decide whether to run the compatibility troubleshooter automatically or enable compatibility mode settings for individual programs. As these methods work well with Windows 10 and 11, you can get the programs running without encountering any compatibility problems. Here are the ways to enable compatibility mode in Windows 11 and 10.
Run Compatibility Troubleshooter From App Properties
To run a program in Windows 11 compatibility mode, you may open the Properties window of the program and find the troubleshooter there. Note that this works for both versions of Windows, Windows 10 and 11. The steps are the same, but the interface look may vary.
To run the app in compatibility mode, open it in the file location and locate the executable. Right-click on it and select “Properties”.
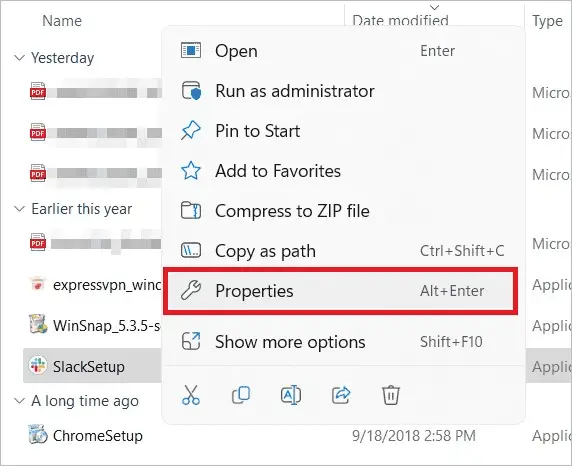
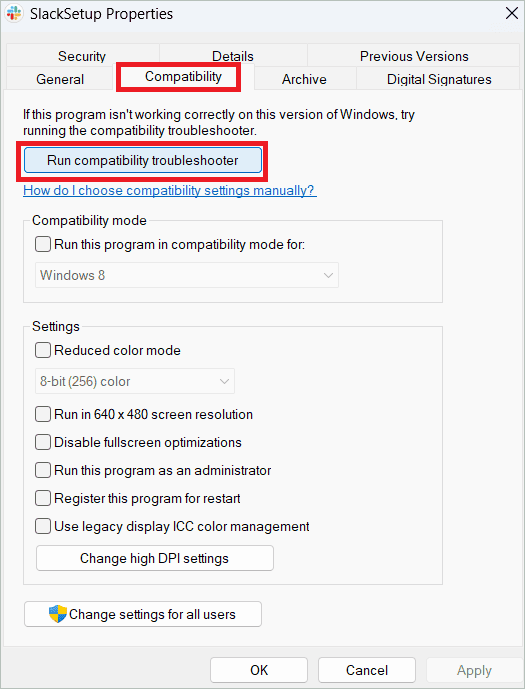
In the Properties window, select the Compatibility tab. Click the “Run compatibility troubleshooter” button.
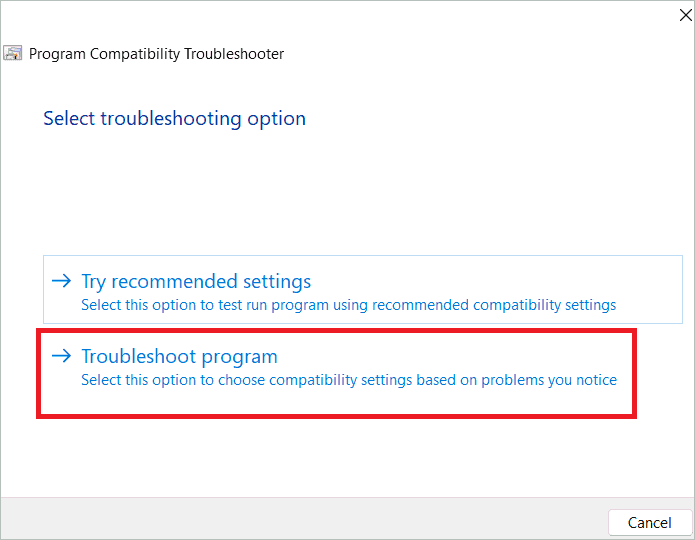
The troubleshooter launches, and you can select one from the two options – Try recommended settings and Troubleshoot program. You can try the recommended settings first. If that doesn’t solve the issue, opt for the second option of troubleshooting.
In the next window, check the problems you notice while running the program. On clicking “Next”, Windows will choose the compatibility settings suited for your program.

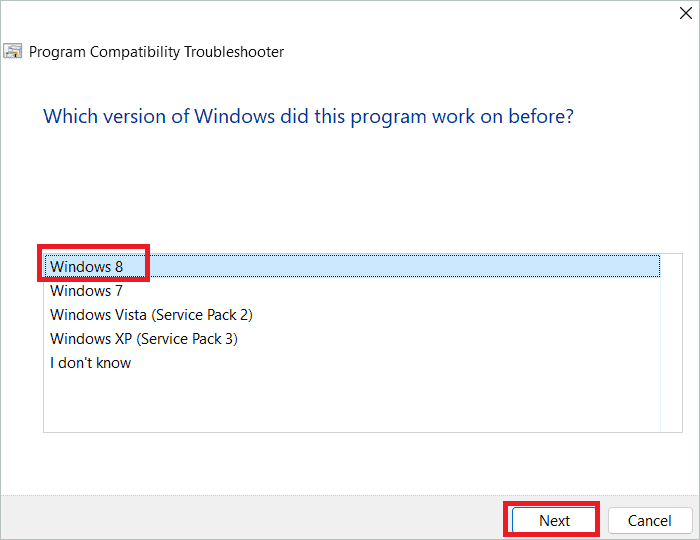
In the next window, select the OS and click “Next”.
Click the “Test the program” button to test the settings first. Once the testing is over, exit and click “Next”.
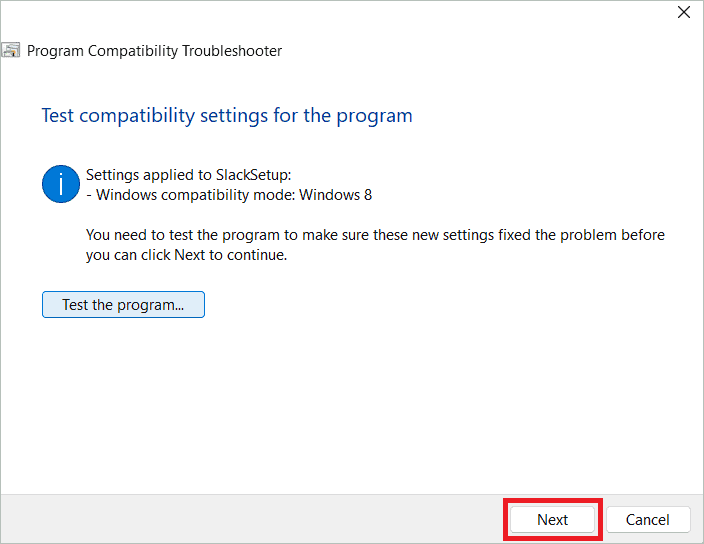
After the troubleshooting is completed, you can select one from the three options – “Yes, save these settings for this program”, “No, try again using different settings”, and “No, report the problem to Microsoft and check online for a solution”. You may also click “Cancel” to close the troubleshooter if you don’t want to save the settings.
Run Compatibility Troubleshooter From Settings
Alternatively, you can open the troubleshooter from the Settings menu. After troubleshooting, you can run the program in Windows 11 compatibility mode. The steps to reach the troubleshooter are different for Windows 10 and Windows 11, as you will see below.
Windows 11
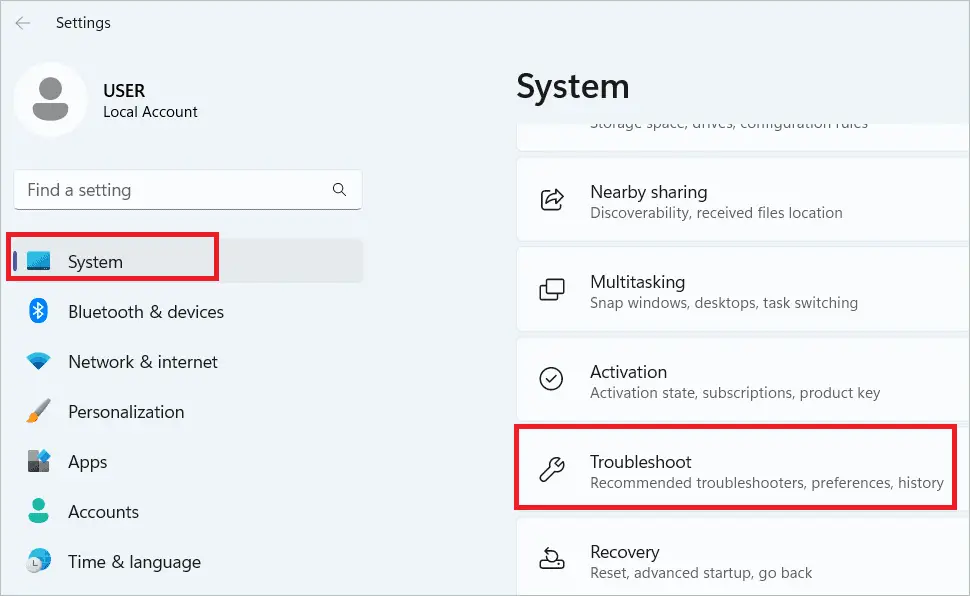
Press the Windows key + I to open Settings, and select System > Troubleshoot.
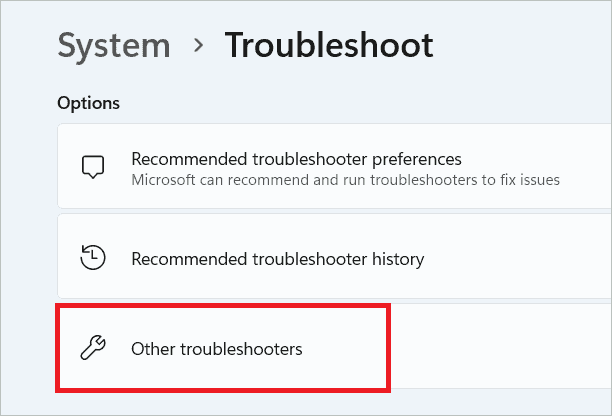
On the right panel, select “Other troubleshooters”.
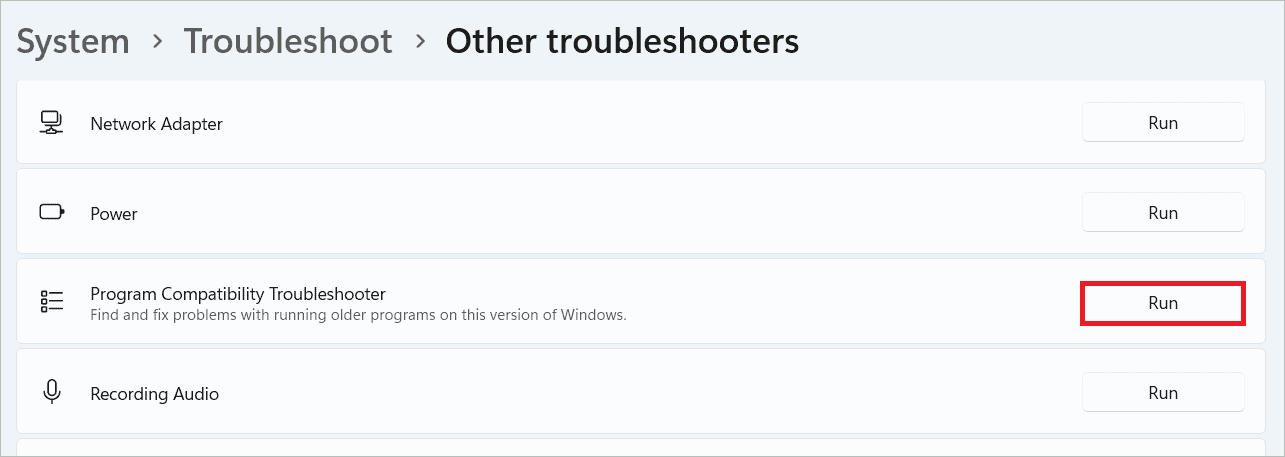
Locate Program Compatibility Troubleshooter and click the “Run” button near it.
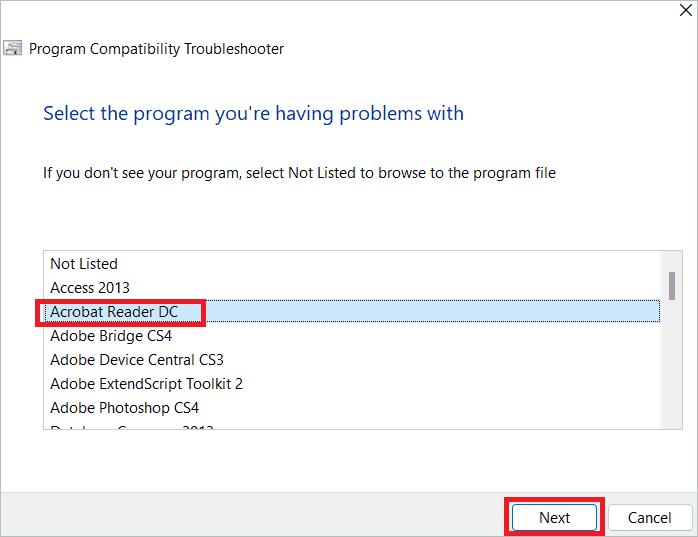
Select the program in the next window and click “Next”.
Now, continue as in the above steps to troubleshoot and rectify the issue.
Windows 10
Open Settings by pressing the Windows key + I. Select “Update & Security” from the options.
Next, select “Troubleshoot” in the left pane and “Additional troubleshooters” in the right.
Click “Program Compatibility Troubleshooter” and click the “Run this troubleshooter” button.
Follow the on-screen instructions to troubleshoot and fix the compatibility issue.
Note: The troubleshooter can also be run by navigating the Control Panel.
Open the Control Panel and select Programs > Run programs made for previous versions of Windows. This will open the troubleshooter.
Select The Compatibility Settings Manually
You can go to the same Properties window of the problematic app and run the old app in Windows 11 compatibility mode. Here, you get the privilege of selecting the older operating system where the program is working well. So, let us get into the steps.
Right-click on the executable file of the application and select “Properties”.
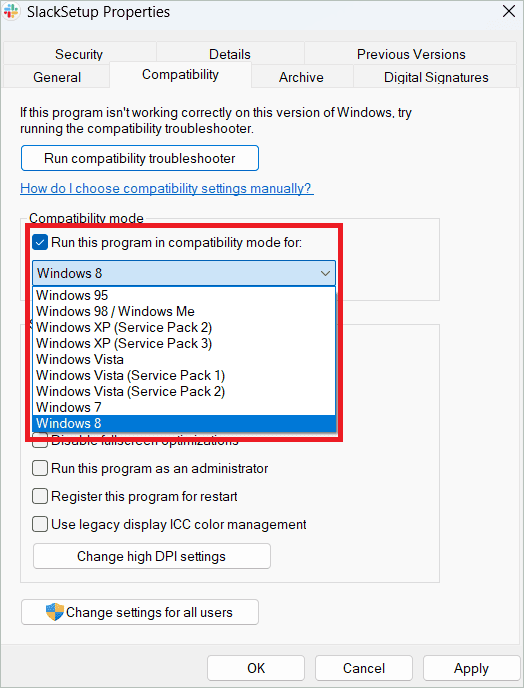
Check the “Run this program in compatibility mode for” box and select an earlier version of Windows from the drop-down box. Here, you will find versions from Windows 95 to Windows 8.
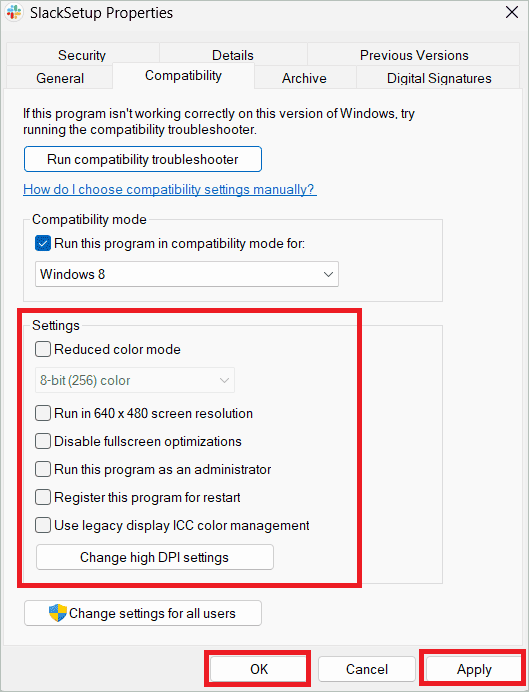
After selecting the OS, check one or more appropriate compatibility settings from the list. Finally, click “Apply” and “OK”.
You have now enabled the compatibility mode for the application. It will run in compatibility mode the next time you launch it.
Disable The Driver Signature Enforcement
The Driver Signature Enforcement policy can sometimes cause issues when you try to run older apps like old games. The driver issues may not let the older software run in Windows 11 compatibility mode. So, we will disable the Driver Signature Enforcement.
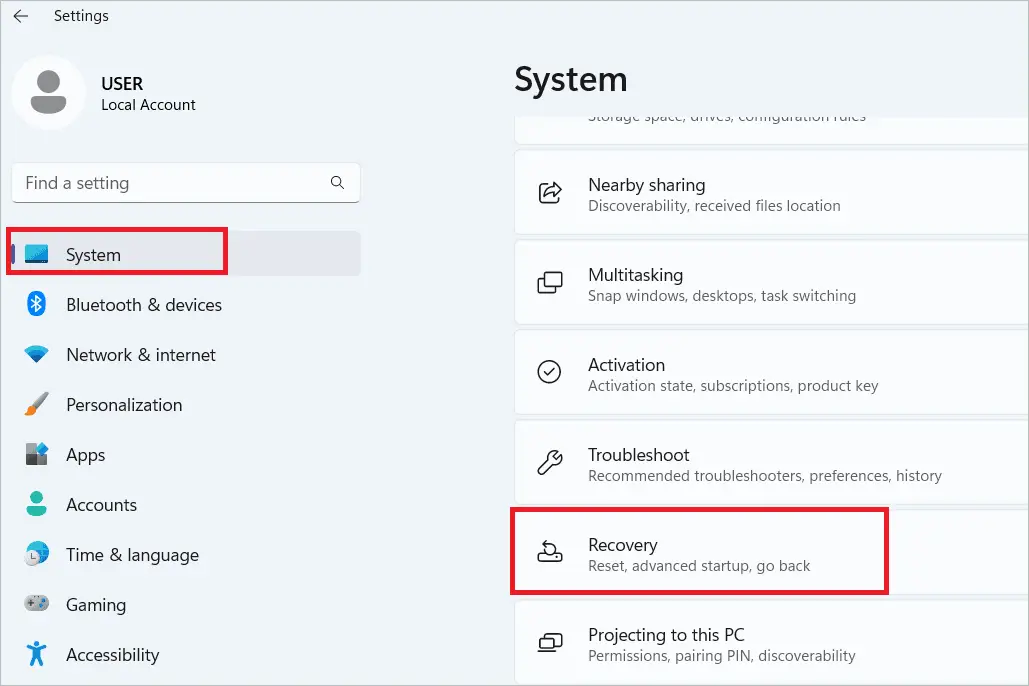
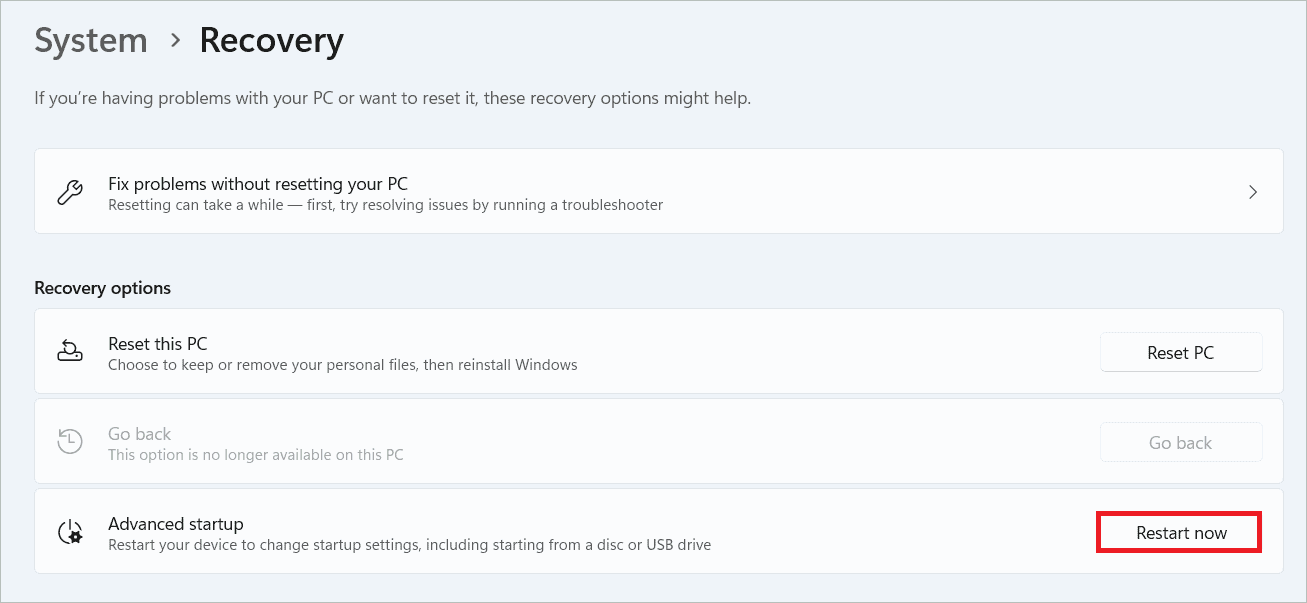
Open Settings and select System > Recovery.
Click the “Restart now” button near Advanced startup.
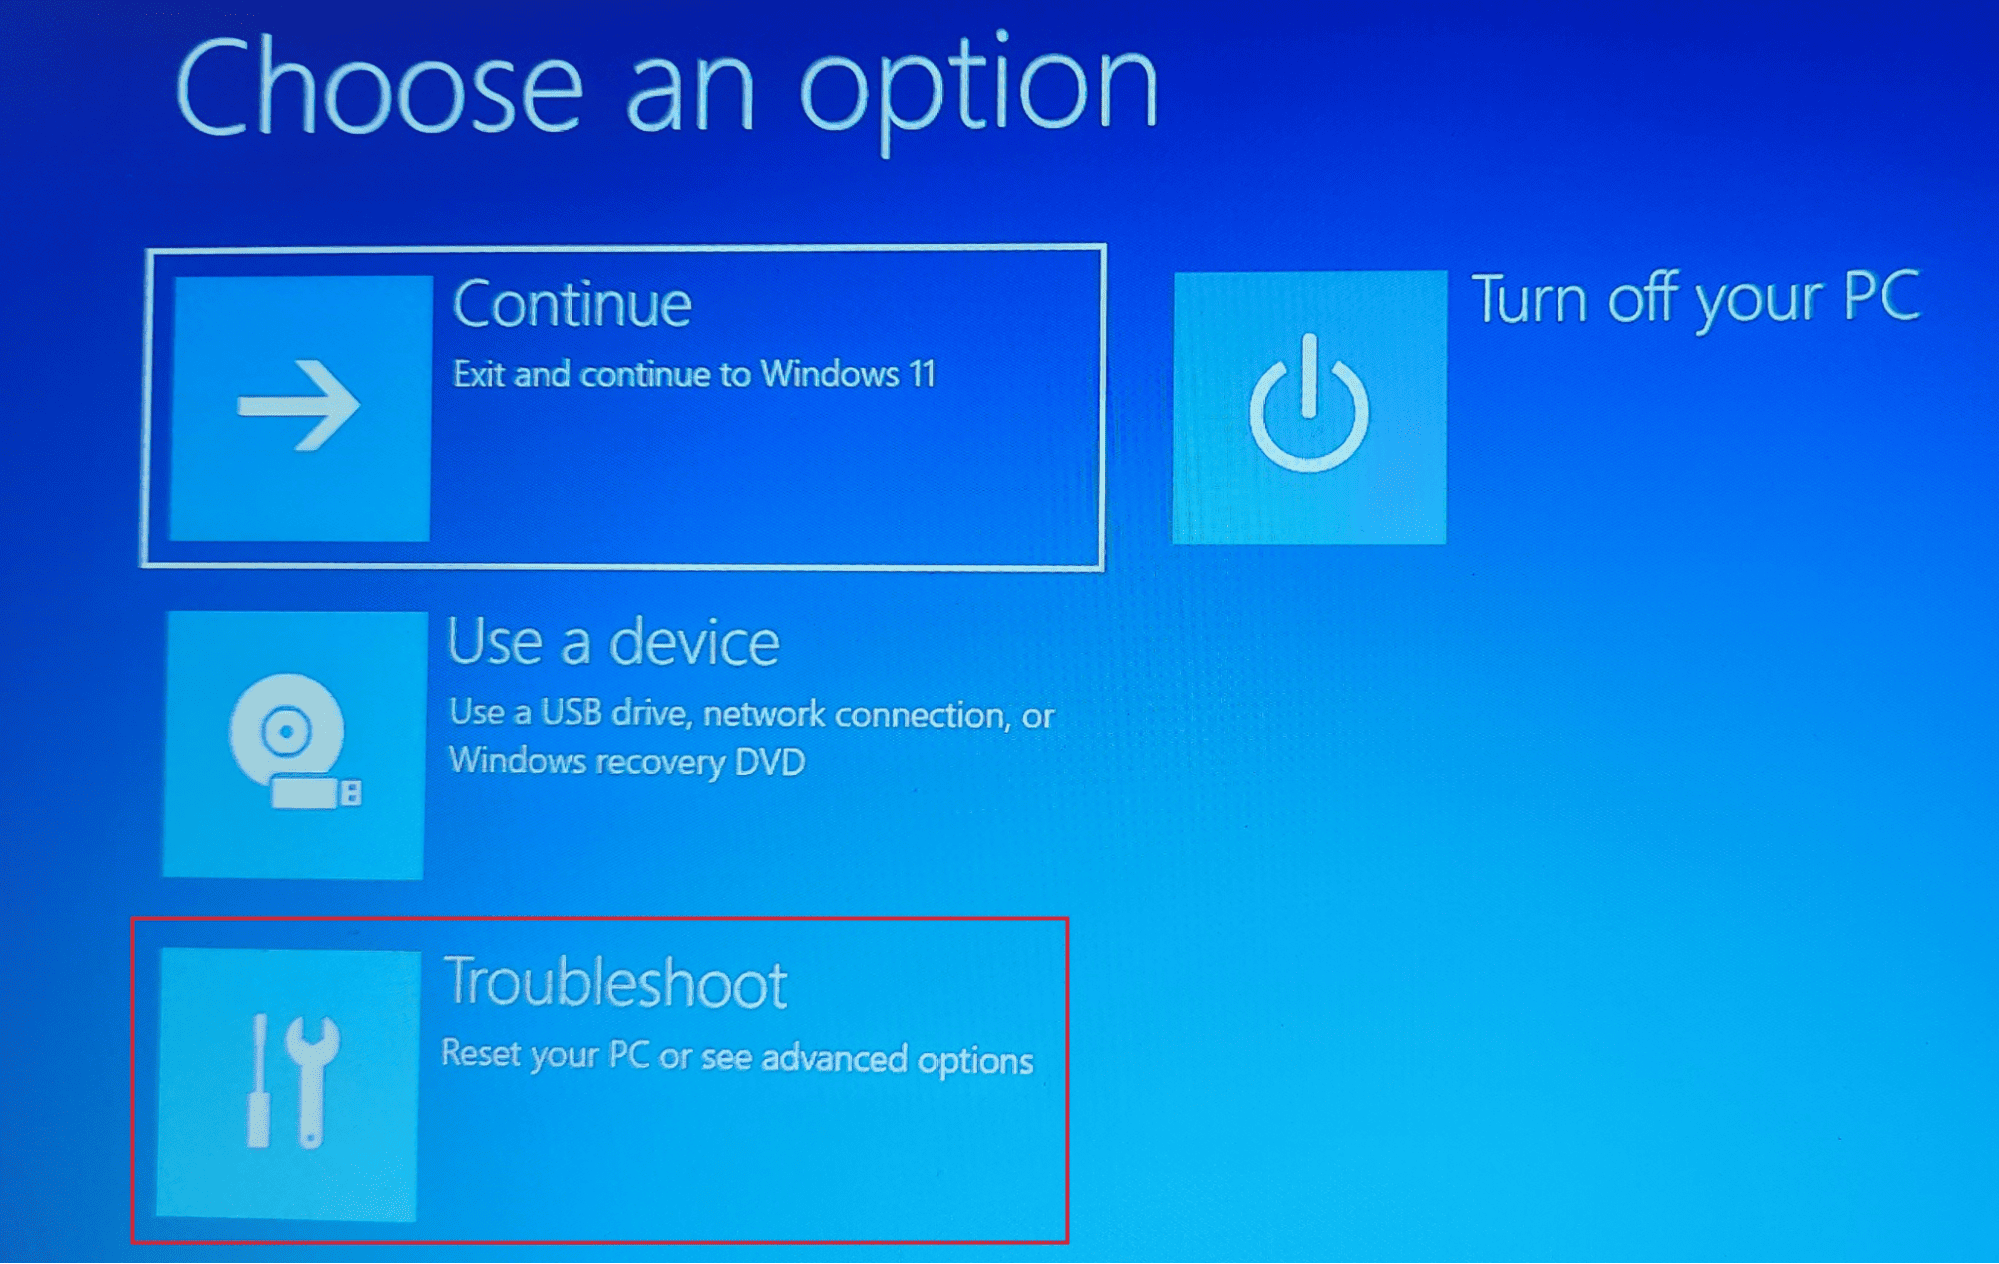
When your computer restarts, select “Troubleshoot”.
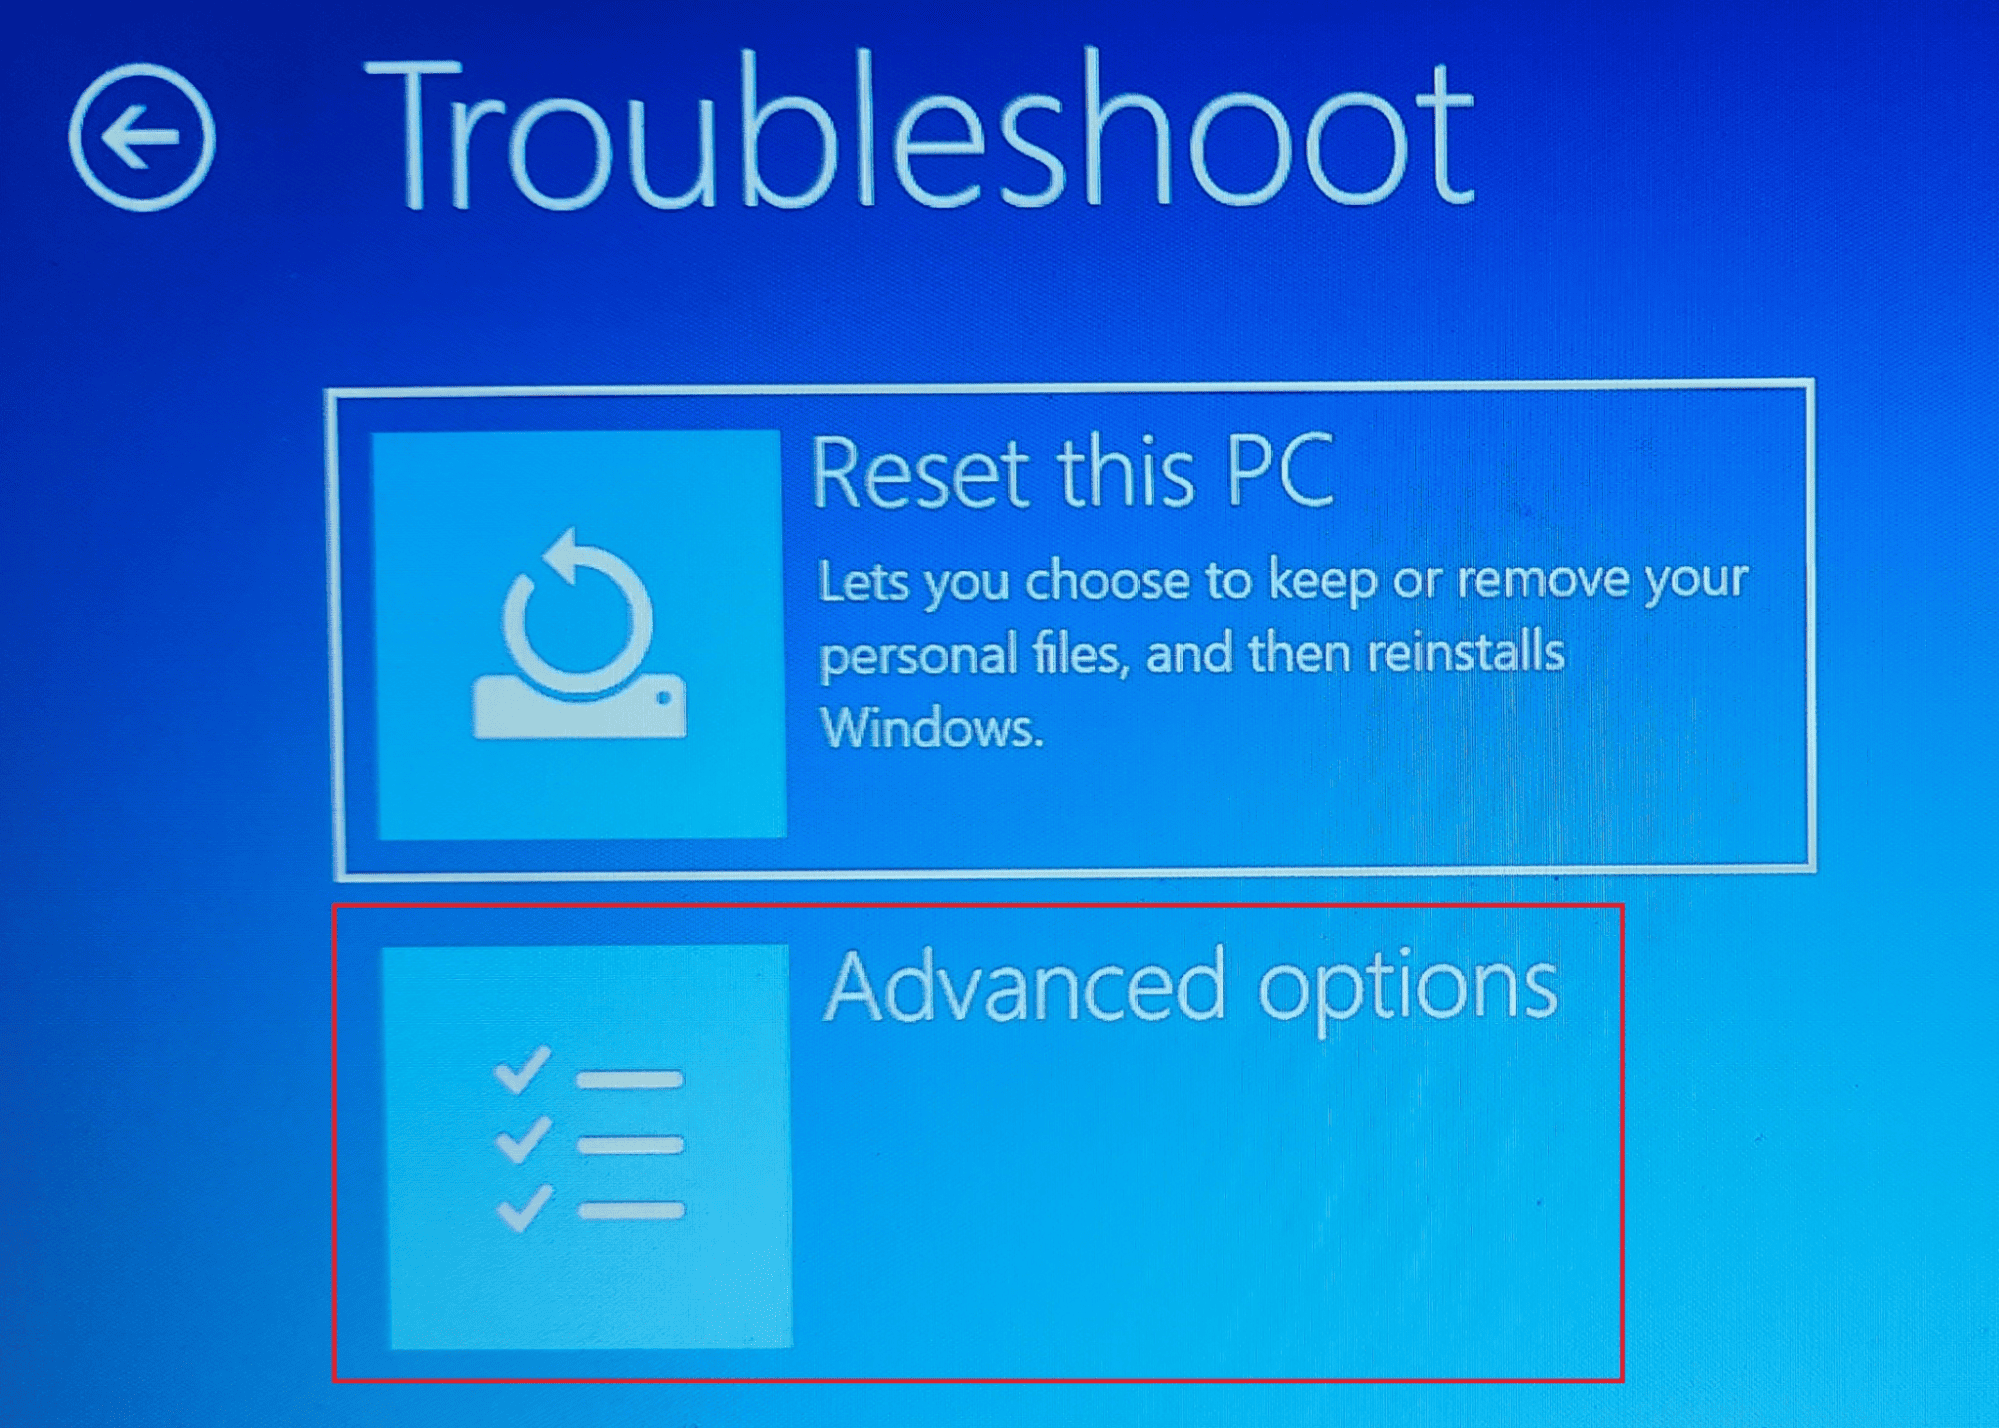
Now, select “Advanced options”.
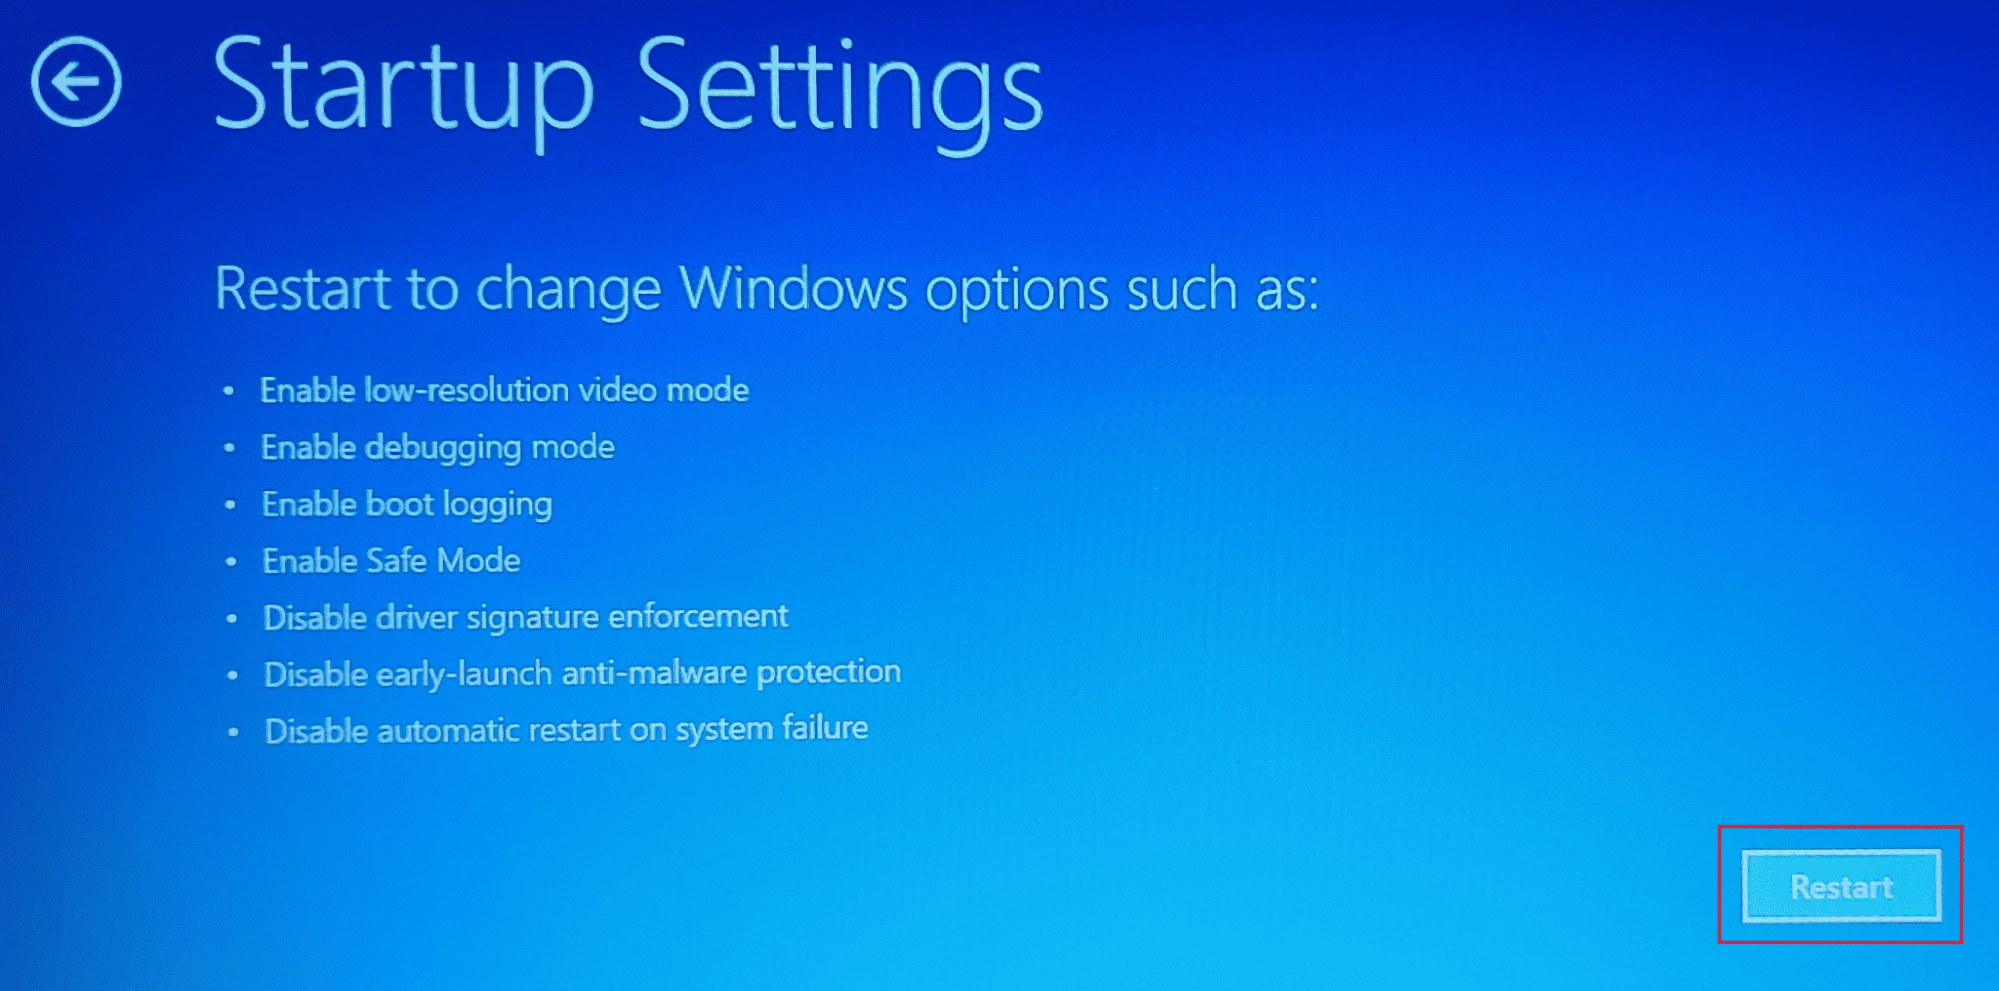
Then, select “Startup Settings”.
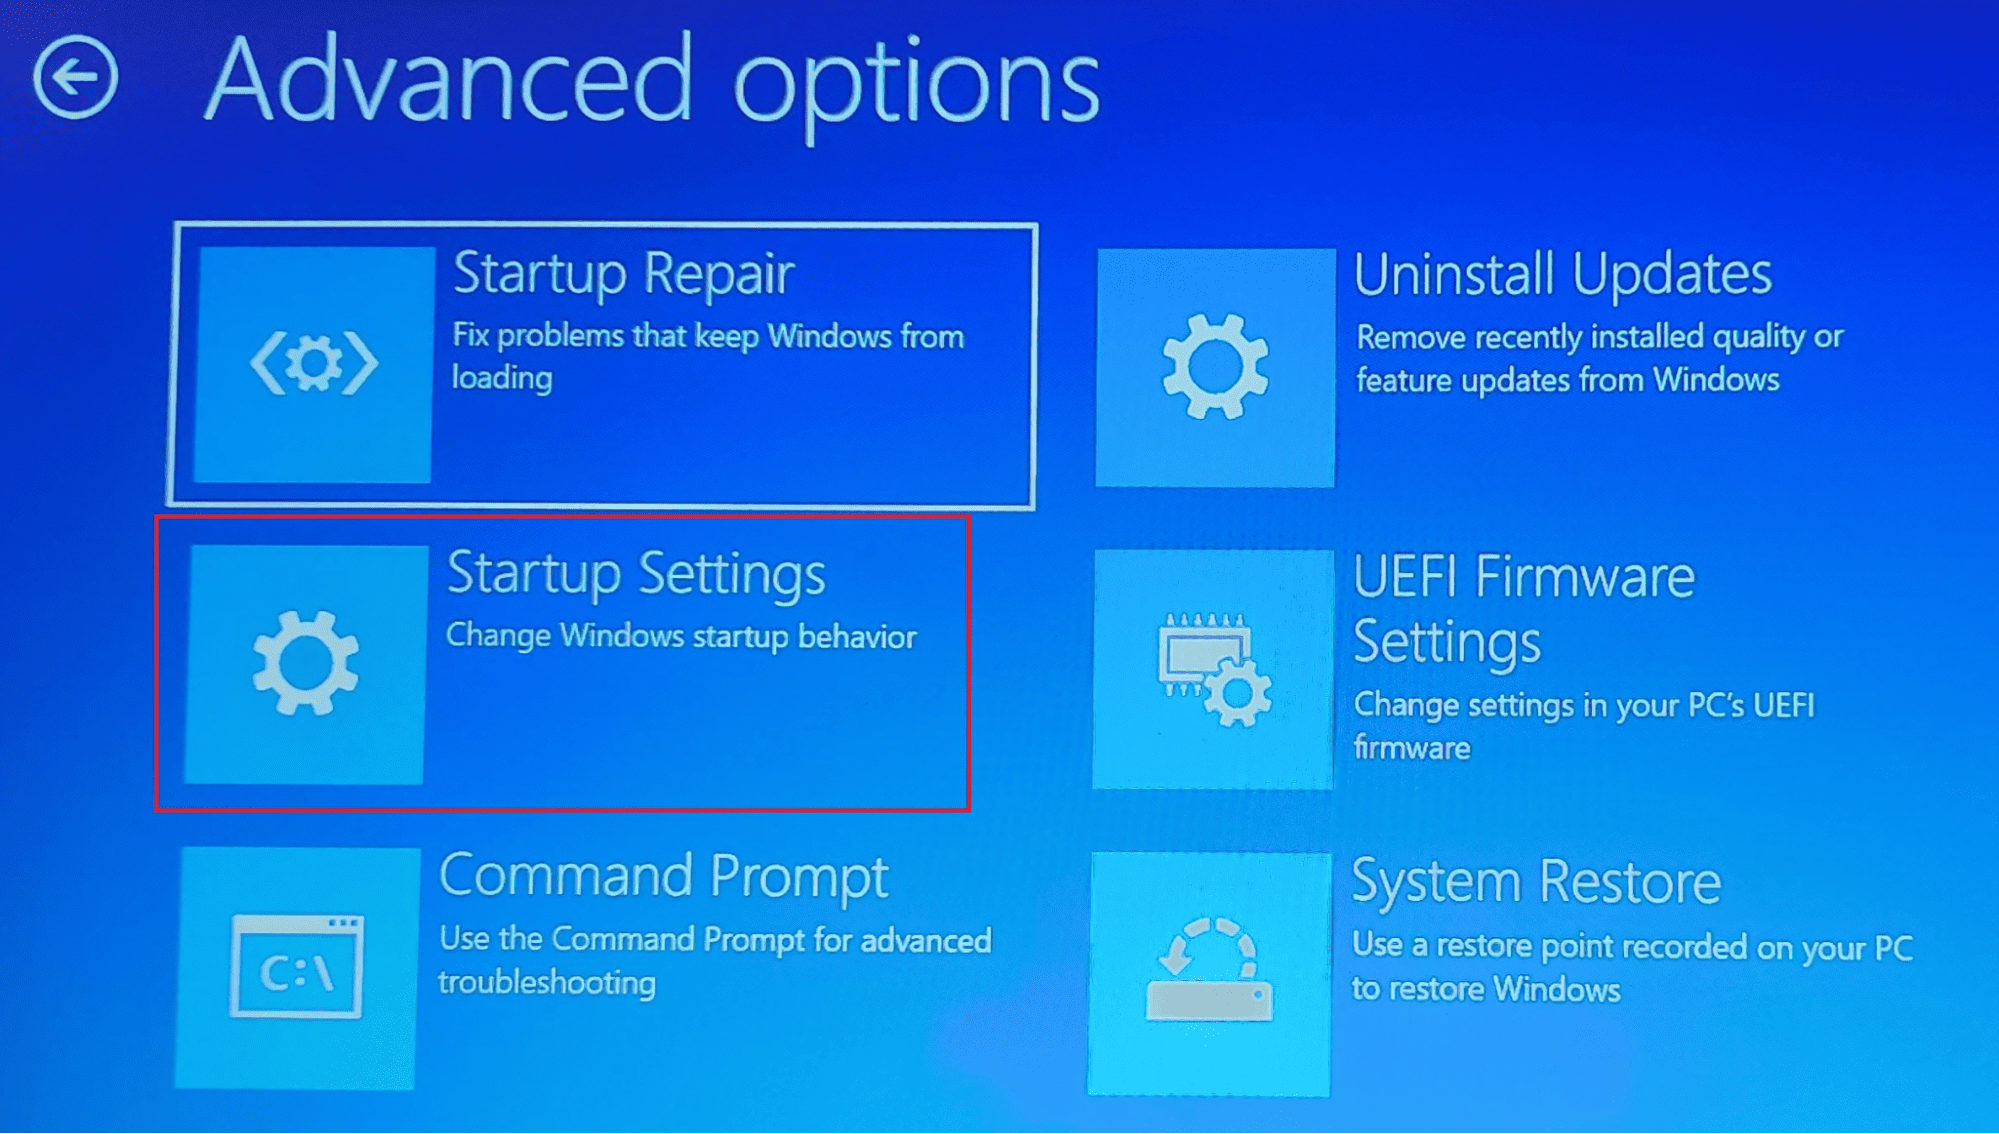
In the Startup Settings window, click the “Restart” button.
When the PC restarts, press number 7 to select “Disable driver signature enforcement”.
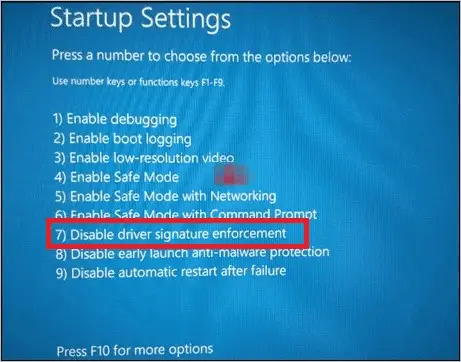
The PC will restart. After that, you can run your old software without any issues.
Use Command Prompt
Many people find using Command Prompt easier than other methods. If you are one of them, run old apps in Windows 11 compatibility mode using a single command. Let us see how.
Open File Explorer and locate the application you want to run in compatibility mode. Right-click on it and select “Copy as path” to copy the path of the file.
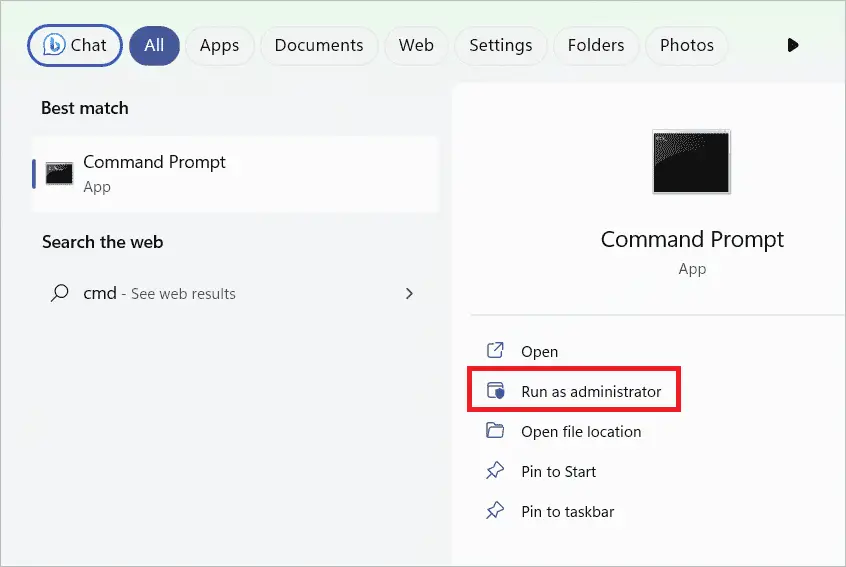
Type “cmd” in the search bar and open the Command Prompt with administrator privileges.
Type the following command and press Enter.
reg.exe Add “HKLMSoftwareMicrosoftWindows NTCurrentVersionAppCompatFlagsLayers” /v “FilePath” /d “ValueData”
Replace FilePath with the path of the file you copied initially. ValueData is the value associated with the Windows version. Choose the ValueData from below, depending on what version of Windows you want.
Windows 8: WIN8RTM
Windows 7: WIN7RTM
Windows Vista SP2: VISTASP2
Windows Vista SP1: VISTASP1
Windows Vista: VISTARTM
Windows XP SP3: WINXPSP3
Windows XP SP2: WINXPSP2
Windows 98: WIN98
Run the command by inserting appropriate values to change the compatibility settings for your program.
Use Registry Editor
The Registry Editor in Windows can be used to change Windows 11 compatibility mode. But remember to take a backup of the registry before you work on it.
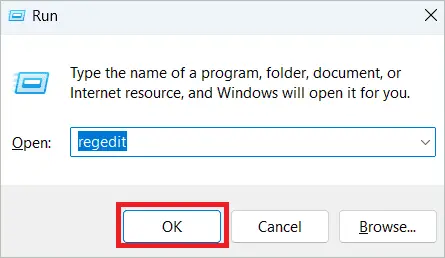
Press the Windows key + R to open the Run dialog box. Type “regedit” and click “OK”.
When the Registry Editor opens, open the following path.
HKEY_CURRENT_USERSoftwareMicrosoftWindows NTCurrentVersionAppCompatFlagsLayers
If you want to set the mode for all users, go to the following path.
HKEY_LOCAL_MACHINESOFTWAREMicrosoftWindows NTCurrentVersionAppCompatFlagsLayers
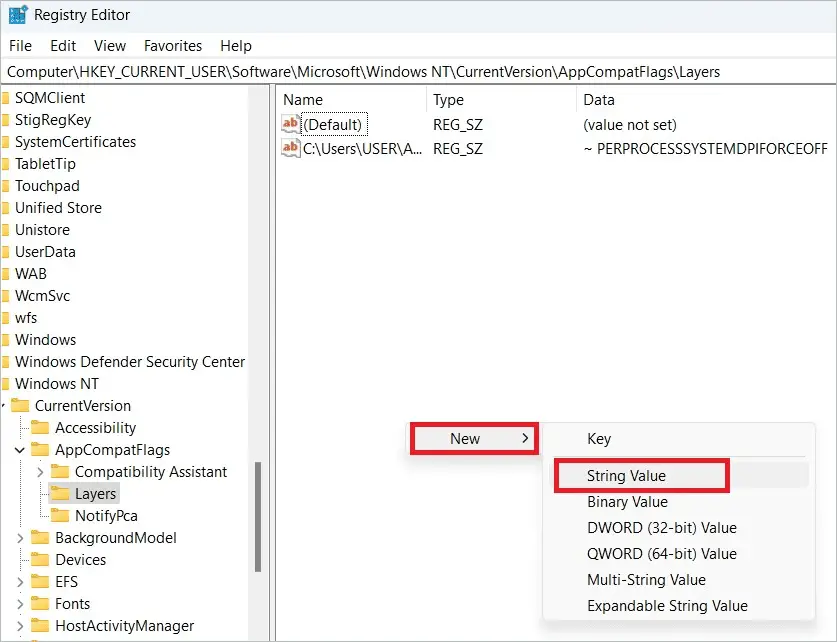
Right-click on the right pane and select New > String Value.
Type the full path of the app’s exe file and press Enter.
Double-click the new value created to make changes to its properties. Enter one or more combinations of data values depending on how you want to run the app. Refer to the table for data values.
| Settings | Data value |
| Disable fullscreen optimizations | DISABLEDXMAXIMIZEDWINDOWEDMODE |
| Run this program as an administrator | RUNASADMIN |
| Run in 640 x 480 screen resolution | 640X480 |
| Override system DPI (build 17063)Windows logonApplication start | PERPROCESSSYSTEMDPIFORCEOFFPERPROCESSSYSTEMDPIFORCEON |
| Override high DPI scaling behavior. (build 15002)Scaling performed by: ApplicationScaling performed by: SystemScaling performed by: System (Enhanced) | HIGHDPIAWAREDPIUNAWAREGDIDPISCALING DPIUNAWARE |
| Reduce color mode (8-bit 256) | 256COLOR |
| Reduce color mode (16-bit 65536) | 16BITCOLOR |
| Use legacy display ICC color management | TRANSFORMLEGACYCOLORMANAGED |
For example, if you want to run the program in Window 8 with 640 x 480 screen resolution and as an administrator, type the following.
~ RUNASADMIN 640×480 WIN8RTM
Click “OK” and close the Editor.
If you want to undo the compatibility mode settings, simply deleting the string value should be enough.
Final Thoughts
Windows 11 compatibility mode is a feature that lets you run an old program as if it runs in an older version of Windows. This setup makes the programs run correctly on Windows 11 PC. You can run any software program and games using settings from an earlier version.
The article gives you different methods to run the older programs designed for an earlier version of Windows. You may run the troubleshooter in Windows 10 or 11 to make Windows fix common compatibility issues or choose the settings manually. If you wish to run old apps frequently, you may consider installing a virtual machine with a previous OS version.


