When you start your PC, you are probably not concerned about where it boots from, as it automatically considers the hard drive the first option. But if you want to change the boot device, for example, make it a USB drive, you will need to learn how to boot from USB Windows 11. You can change it for any operating system, including Windows 10 and 11.
You may want to boot Windows 11 from a USB drive for reasons like trying a new OS version, troubleshooting the issues with booting, or any other. If you find any performance degradation, you may first learn how to factory reset Windows 11 before trying out anything else. Whatever the reason why you want to boot Windows 11 from USB, you need to create a bootable USB in the first place. As you will see going forward, the processes of making a Windows 11 bootable USB and booting your computer from it aren’t too complicated.
How To Create A Windows 11 Bootable USB Drive
The first step in learning how to boot from USB Windows 11 is to understand how to create a bootable Windows 11 USB drive. But first, you need to download the Windows 11 ISO file from Microsoft’s official page. Once done, you can select one from the below methods to make your USB bootable.
1. Using Rufus
You can use the open-source utility Rufus to create a bootable USB drive. When you use it to create a bootable drive for Windows, you can then use it to install Windows 11 on your device. But before anything, you need to download Rufus. So, let us see the steps here.
Visit Rufus and download the latest version of the utility to your system. Run the executable file to install it.
Connect your USB drive and wait till Rufus detects it. The utility will list the bootable devices in the Device drop-down box. Select your bootable USB device. Select the “Disk or ISO image” option in the Boot selection drop-down box. Now, click “Select” and select the ISO file by browsing the folder.
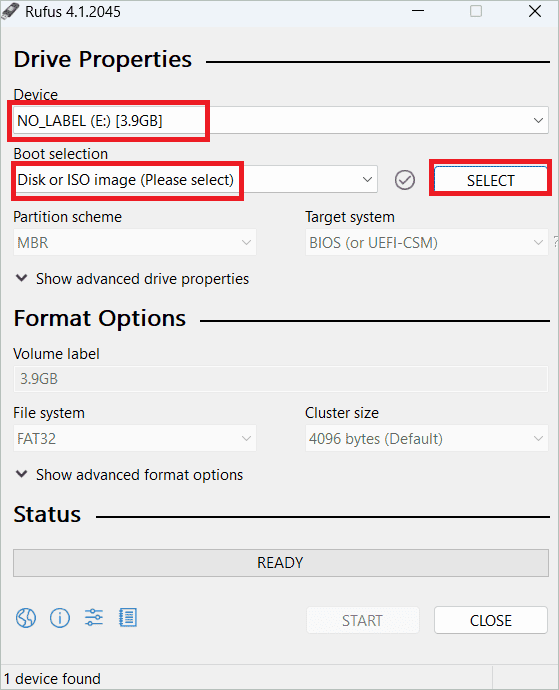
Select “Standard Windows 11 Installation (TPM 2.0 + Secure Boot)” in the Image option drop-down menu. You may select “Extended Windows 11 Installation (no TPM/no Secure Boot)” if you want to skip the system requirement during installation.
Let all the other options remain as the default. Give a name for your USB drive under the Volume label.
Finally, click “Start” to start creating a bootable drive.
2. Using Media Creation Tool
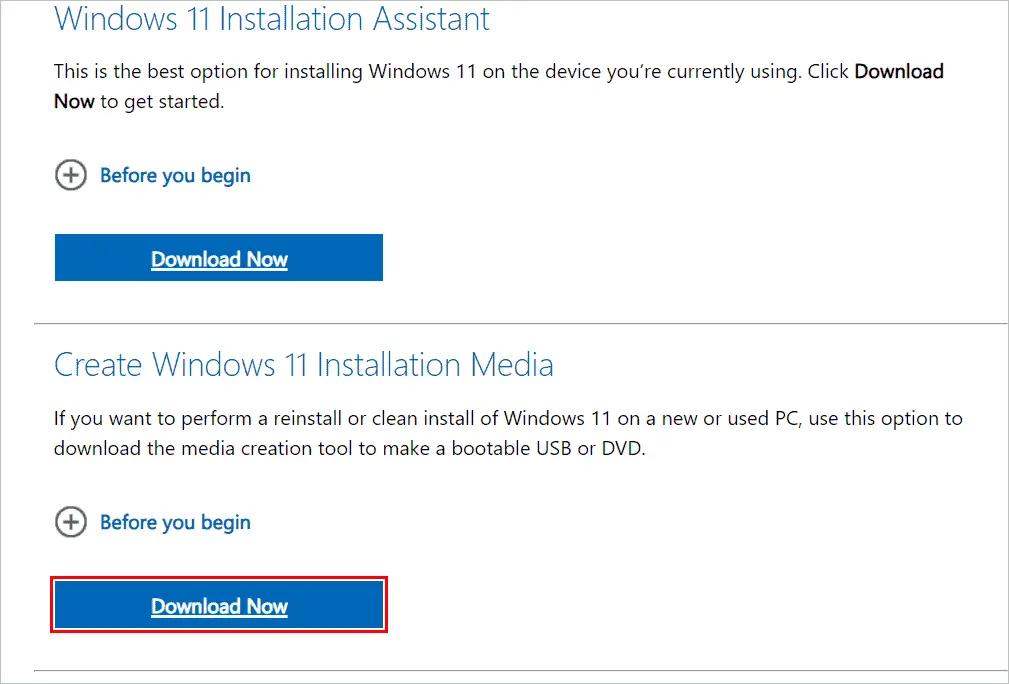
Microsoft lends support to create an installation media with the Windows 11 Media Creation tool. You will first go to the Microsoft download center to download and install the media creation tool to help make a bootable USB.
Visit the Microsoft download center and click “Download Now” under Create Windows 11 Installation Media.
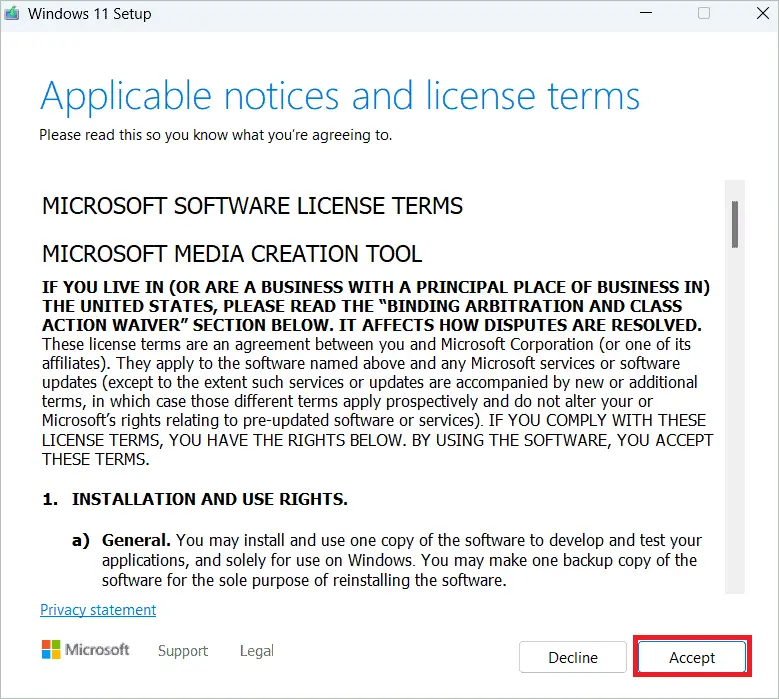
Run the executable file and wait for the Setup wizard to appear. When it appears, click the “Accept” button.
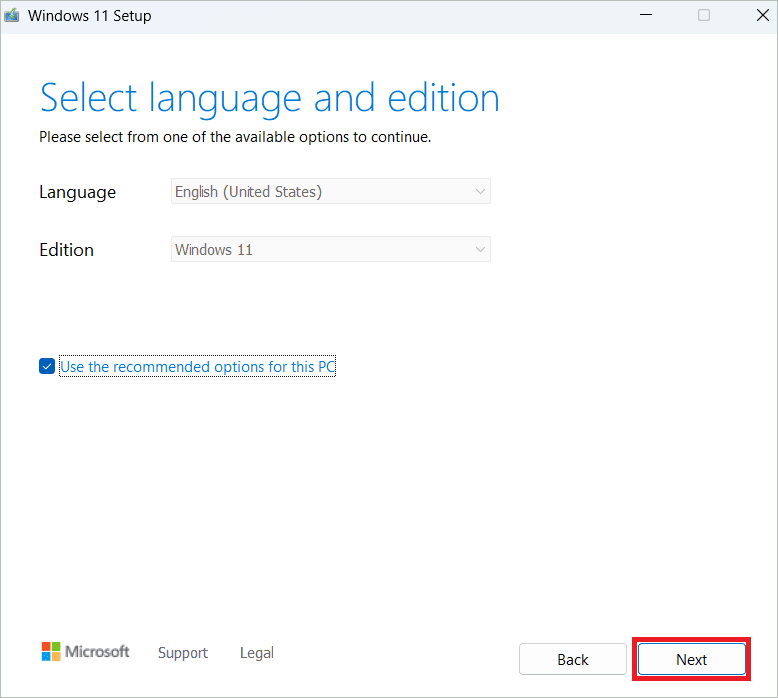
On the next page, you will see that the Language and Edition are automatically selected. Click “Next”.
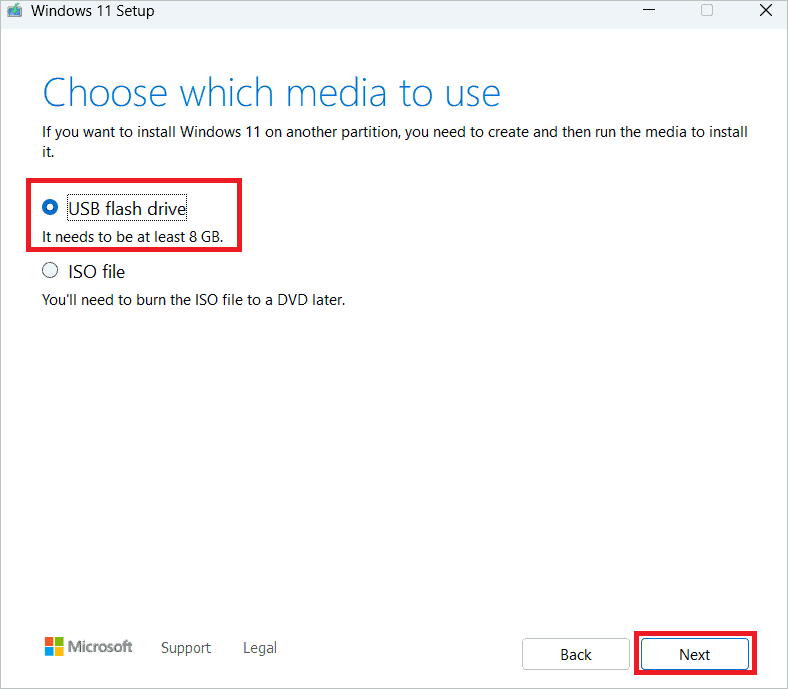
Under Choose which media to use, select “USB flash drive”, and click “Next”.
On the next page, select the USB drive from the list. Next, click the “Next” button and then “Finish”.
Once the installation media is ready, you will get the following message – “Your USB flash drive is ready”. Finally, click the “Finish” button and close the setup wizard. If you are happy with the method, you can go to the how to boot from USB Windows 11 section.
3. Using Command Prompt
If you prefer the Command Prompt over other methods, doing everything from this single interface must be easy. You will use the Diskpart utility and the Command Prompt to create a bootable USB. Follow the below instructions carefully.
Connect your USB to the device. Remember to take a backup of the USB contents before using it.
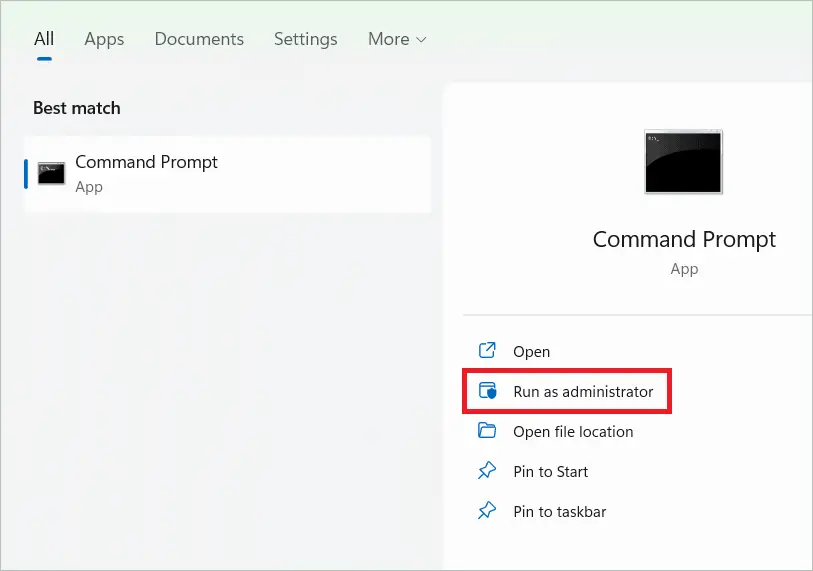
Type “cmd” in the search bar and open the Command Prompt by selecting “Run as administrator”.
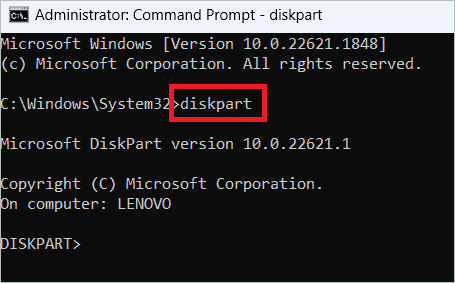
Type the following command and press Enter to launch Windows Diskpart.
Diskpart
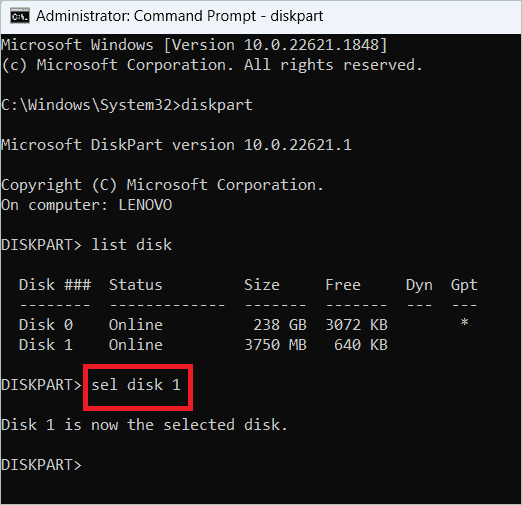
Use the List command to list the storage devices available.
List disk
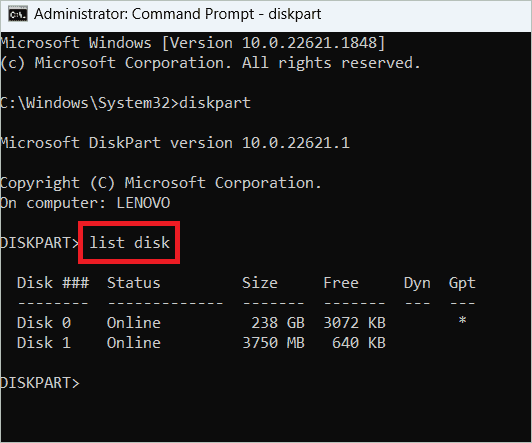
When the devices are listed, take clues from the size of the devices to find the USB drive. Here, Disk 1 is the USB drive.
Select your drive with the following command.
Sel disk 1
Type the following commands in the same order to delete the drive contents, create a primary partition, and select the main partition, respectively. Press Enter after each command.
Clean
Create Partition Primary
List Par
Now, execute the following command to activate the partition.
Active
Format the USB drive using the following command.
Format FS=NTFS Label=“BootableUSB” Quick override

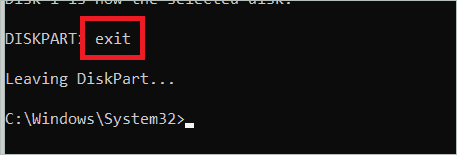
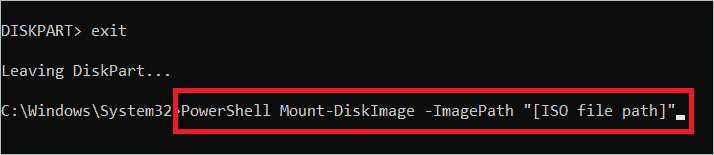
Type Exit and press Enter to exit the Diskpart utility.
Now, you must mount the Windows 11 ISO file. Type the following command and press Enter.
PowerShell Mount-DiskImage -ImagePath “[ISO file path]”
Replace the contents in the [ ] with the actual file path.
Now, launch Diskpart by executing the following command.
Diskpart
To see the available volume, run the following command.
List volume
Check the ‘Type’ column of the result. The one with DVD-ROM is the volume of the mounted ISO file. Its corresponding letter will be listed in the column ‘Ltr’. Also, note the letter of the USB drive.
Type Exit and press Enter to leave Diskpart.
If the ISO volume letter is K, type the following command and press Enter.
K:
To boot from CD, execute the following command.
cd boot
To apply the master boot code compatible with Bootmgr to the USB, run the following command.
Bootsect /nt60 L:
Replace L with the USB drive letter.
Run the following command to copy the Windows 11 system files to the USB drive.
xcopy K:*.* L: /E /F /H
Wait for some time, and you will get a message that the files are copied. Your bootable USB is ready.
How To Boot From USB Windows 11
There are two answers for how to boot from USB Windows 11. Depending on your computer’s working condition, you can select one of the two methods. If the Local Security Authority protection is off on Windows 11, turn it on before booting from the USB for improved security.
1. Using Settings
If your PC can start normally, you can go to the Settings app and begin the steps to boot Windows 11. So, learn how to boot from USB Windows 11.
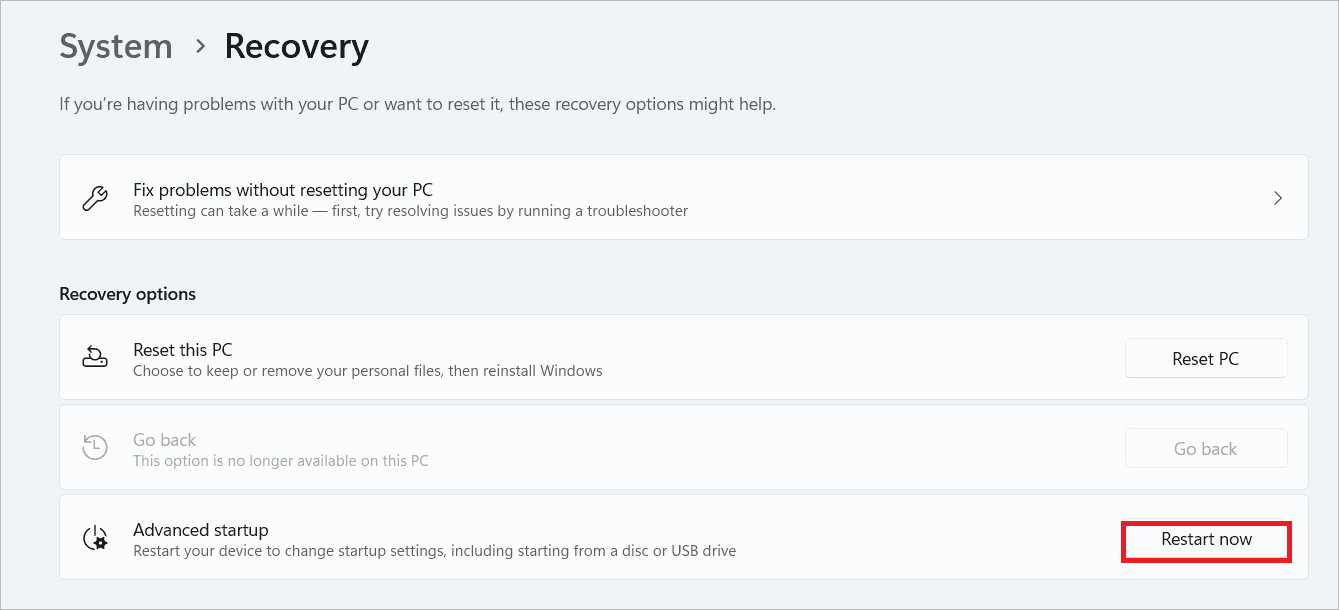
Connect your USB flash drive to your device. Open Settings by pressing the Windows key + I. In the Settings window, select System > Recovery.
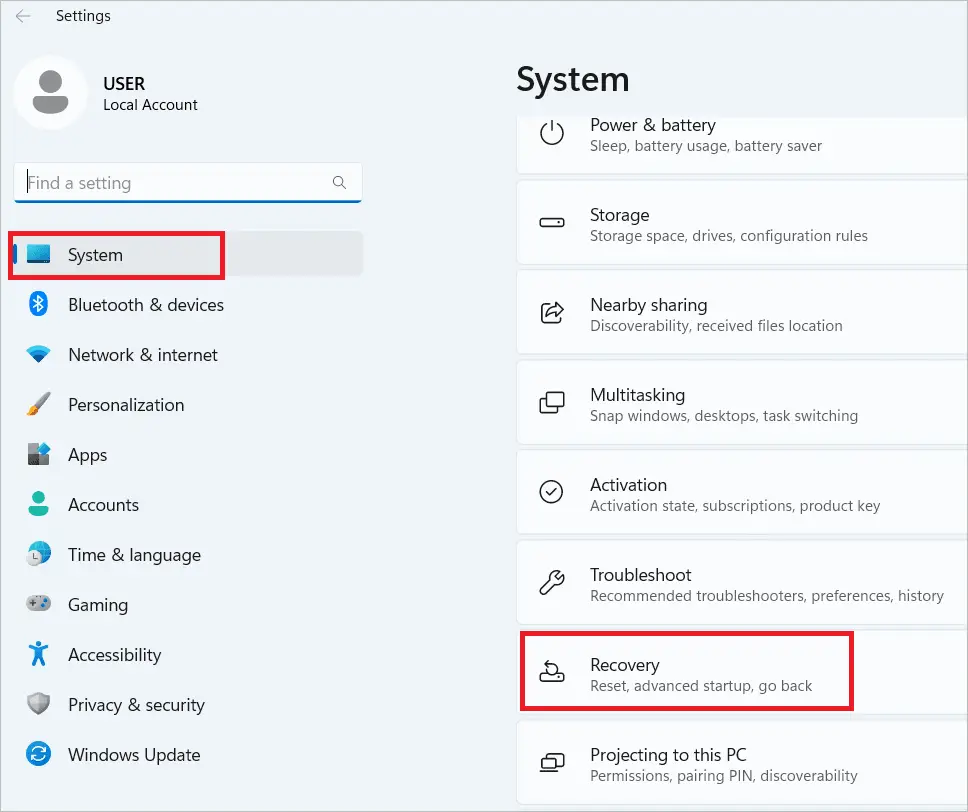
Click the “Restart now” button near Advanced startup.
Now, the computer will restart and go to the Windows recovery environment. When the Choose an option window appears, select the “Use a device” option.
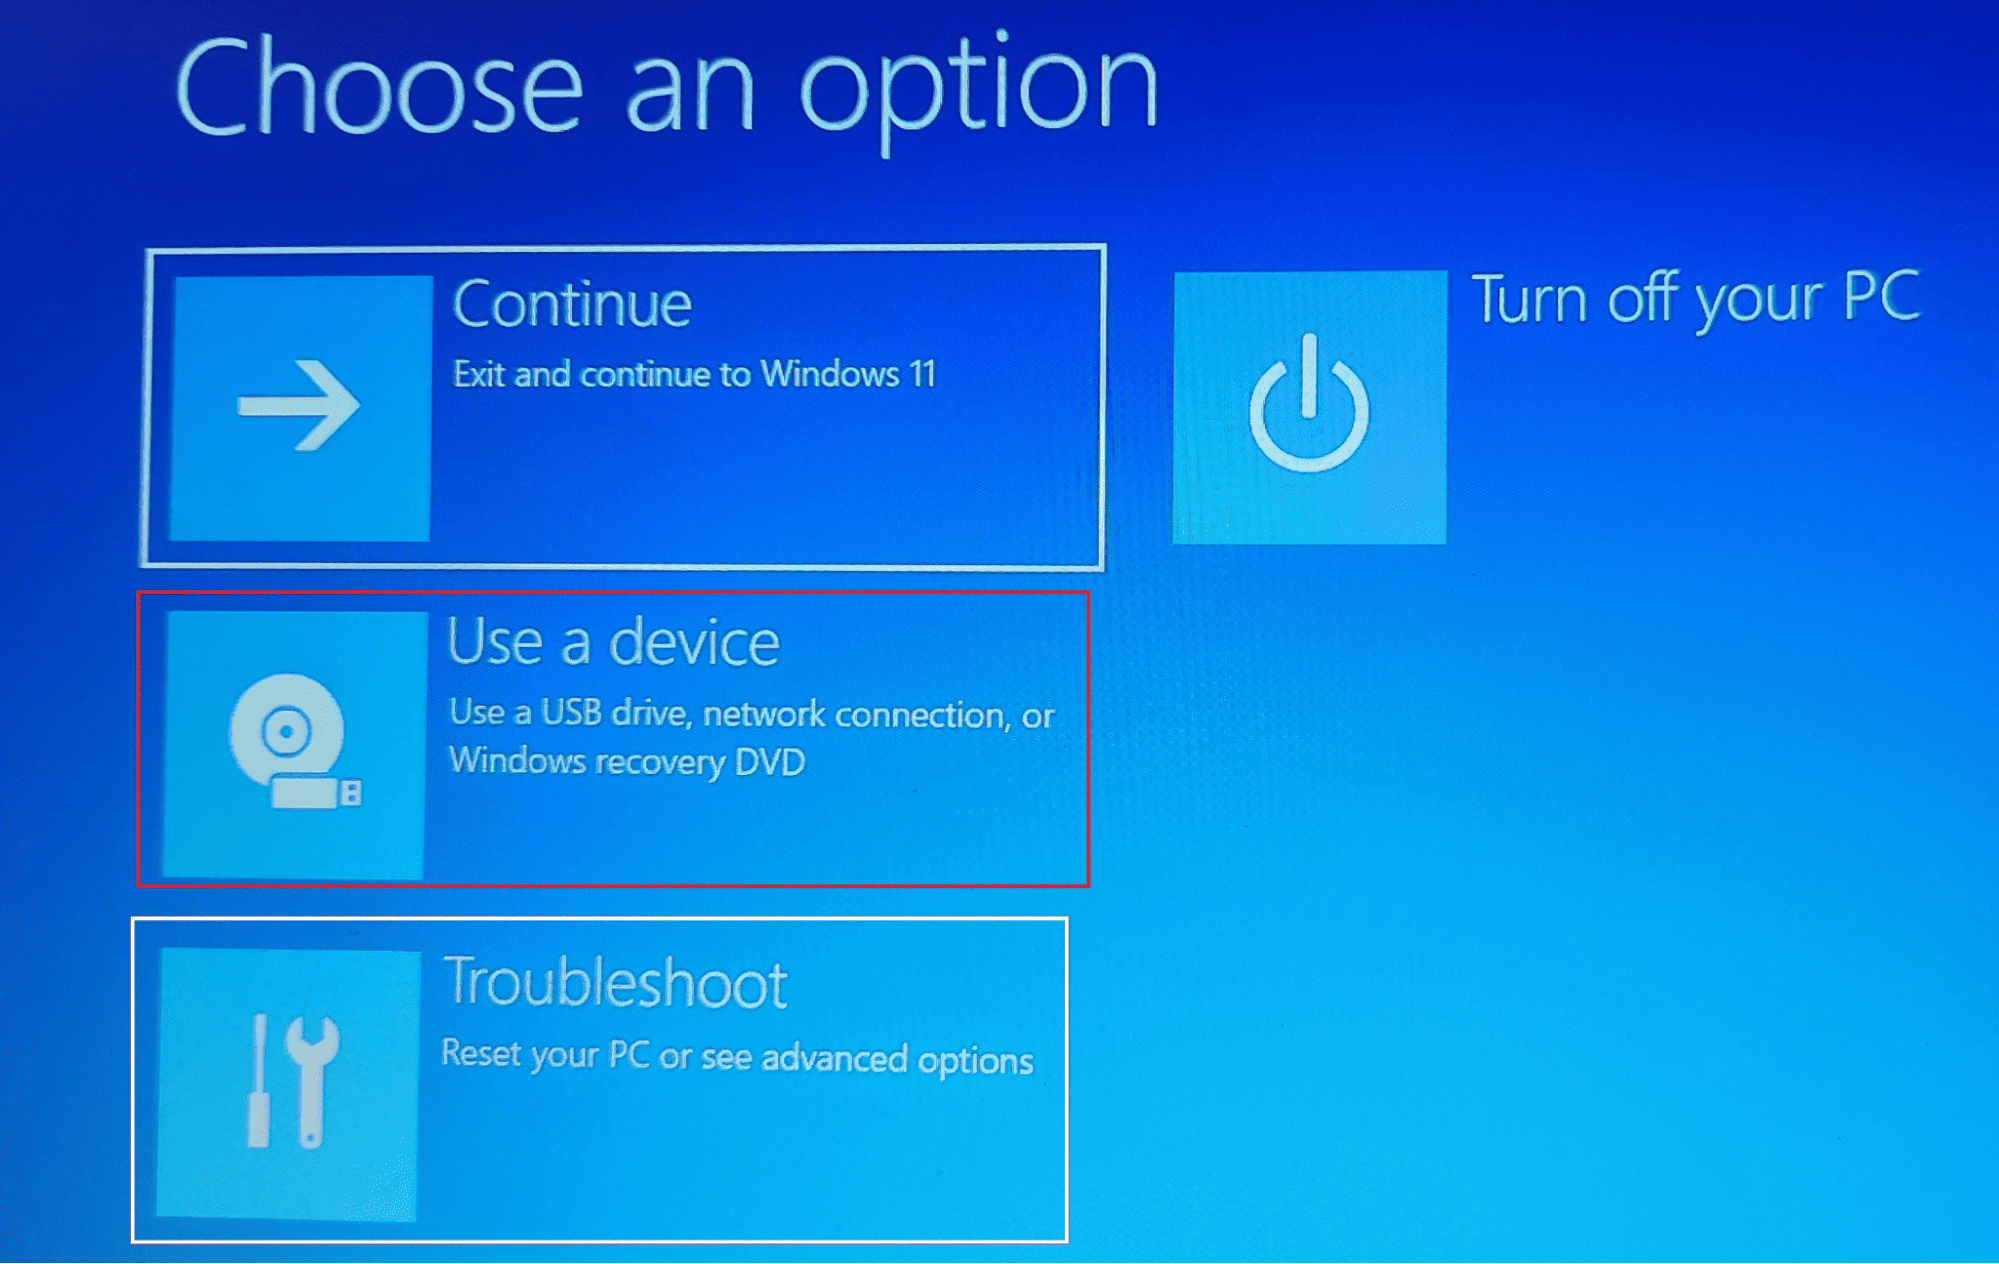
Now, the bootable devices will be listed. Choose the connected USB drive from among them.
Your PC will restart and boot from the USB selected. If you know how to password protect folder in Windows 11 and have password-protected folders, these passwords will still work once you go back to the hard drive.
2. From Boot Menu
If the Windows 11 computer cannot start normally, you can change the boot order on the boot menu. By taking the USB flash drive to the top of the menu, the PC will automatically boot from the USB. So, let us see how to boot from USB Windows 11 from the boot menu.
Connect your bootable USB flash drive to the USB port. Press the power button of your PC to start it. When it starts loading, keep tapping the appropriate boot menu option key specific to the PC that lets you enter the BIOS setup. The standard keys for the purpose are the functions keys, Esc or DEL. But you may confirm it with the manufacturer of your PC.
In the boot menu, you will see a list of options, including the USB drive. Use the arrow keys to move the drive to the first position.
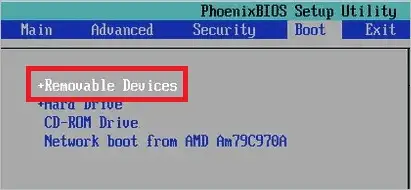
Press F10 to save and exit the BIOS. Now, your PC will restart and boot from the USB you have inserted.
Final Thoughts
You must be aware that all versions of Windows boot from the hard drive by default. But by learning how to boot from USB Windows 11, you can change the boot device and set it to a USB device you have connected.
The article explains the methods for creating bootable USBs and ways for Windows 11 boot from a USB. You may first download the Windows 11 ISO image file and then proceed to the methods in the article.


