
Those who are new to Android often wonder what is a bootloader and what difference does a locked or unlocked bootloader make. Locked bootloaders are the bane of customization on Android. They prevent you from installing a custom OS on your device. Any attempt to install a custom ROM with a locked bootloader is an easy way to get your device bricked. Why take the risk? Unlock the bootloader before getting a shiny new ROM for your device.
If you are wondering what the unlocking process actually does to your device, here it is. On unlocking, the device is reset to factory settings and any data, documents, photos and other files which are not backed up are completely erased. The data backups you have should be saved to the cloud or on your computer as the internal storage of the device is also erased. In simple terms, the device would reach the same state it was in when you first unboxed it except for the unlocked bootloader.
Carriers and OEMs go to lengths to prevent the unlocking of your device. Things have been improving lately as OEMs give in to the users’ demand and the new devices come with an unlocked or easily unlockable bootloader. As for Nexus devices, the simple fastboot unlocking method works well. Let’s see the basic setup and Android Debug Bridge (ADB) commands needed to unlock your device.
The basic setup before unlocking
Enable USB debugging
Go to “Settings > Developer options > Debugging” and enable USB debugging.
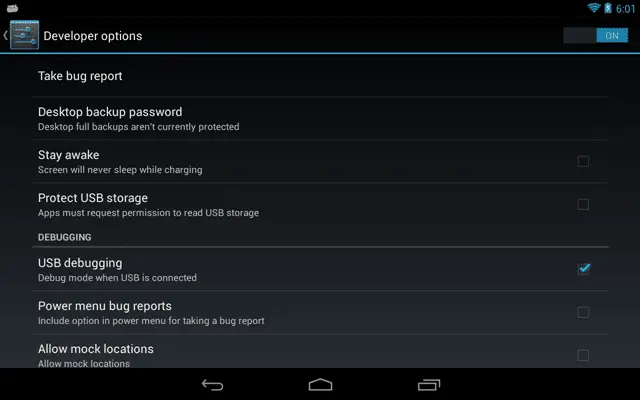
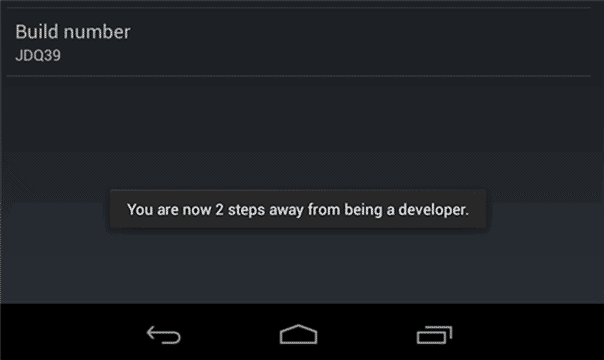
Tip: If you do not see Developer options, you would need to enable them. Go to “About tablet” and tap on “Build number seven times.” Yes, that’s the way it’s done. You need to tap seven times to enable developer options. You would get a notice that tells you that you are a certain number of taps away from becoming a developer. On the 7th tap, you will get a toast notification saying that “You are now a developer” and developer options would be available under Settings.
Set up Android SDK and ADB
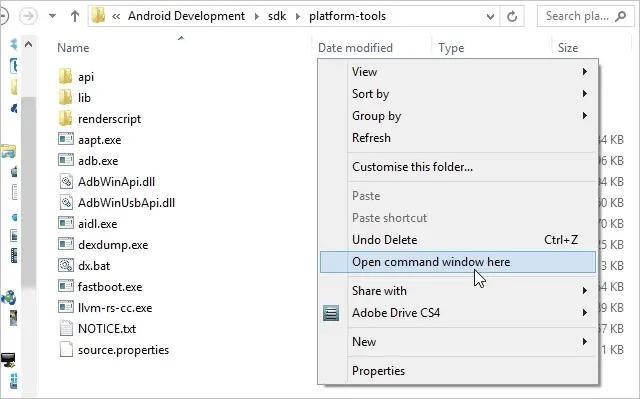
ADB allows you to send commands to your Android device from the command prompt and perform various actions. It comes as a part of Android SDK, which Google has made really easy for users to set up. Download the Android Development Tools (ADT) Bundle for Windows or for another platforms, unzip it at your desired location and navigate to the platform-tools folder. This folder would contain adb.exe as well as fastboot.exe files.
Shift and right-click the folder and choose “Open command window here.”
Nexus 7 device drivers
I often connect my Nexus 7 to PC as a portable device and transfer data without any issue. However, I got an error saying device not found while using the adb commands. To avoid this error, you need to get the Android Composite ADB Interface driver for Nexus 7, unzip and manually install it from Windows device manager.
(Note: I am using Windows 8. You may or may not need the drivers for other editions of Windows. Please check before installing)
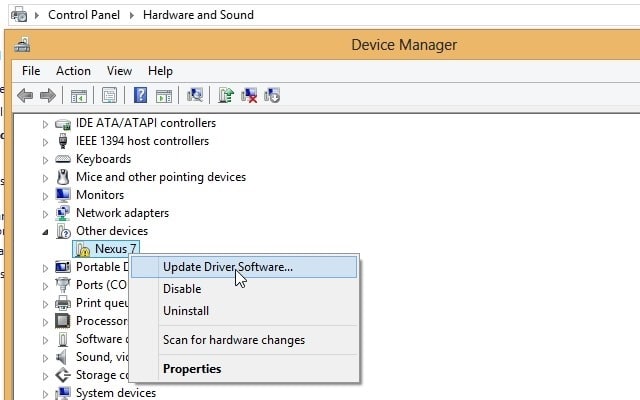
Updating the device drivers should also solve the ‘Waiting for device’ error encountered by some users.
Unlock Nexus 7 bootloader
Connect the Nexus 7 tablet to PC via USB. If you get a popup with the computer’s RSA fingerprint and asks for permission to allow USB debugging, tap “OK.”
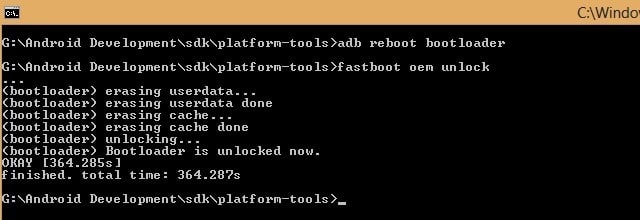
Give the below command to reboot the tablet into bootloader:
adb reboot bootloader
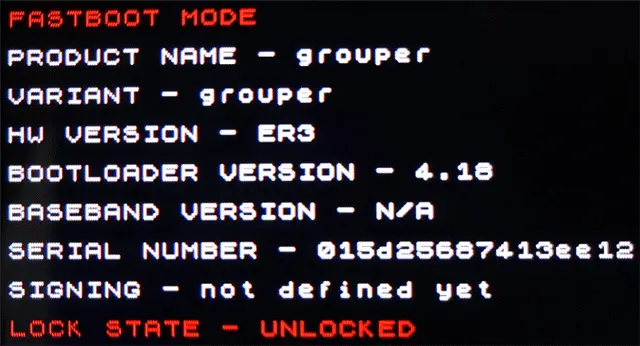
Notice that the lock state is seen to be locked.

Type the below command to start unlocking:
fastboot oem unlock
The device then asks for confirmation before unlocking. By default, Yes is selected. Confirm by pressing the “Power button.”
Warning: Unlocking a bootloader completely resets the device. All apps, data, and files in the internal storage are removed.
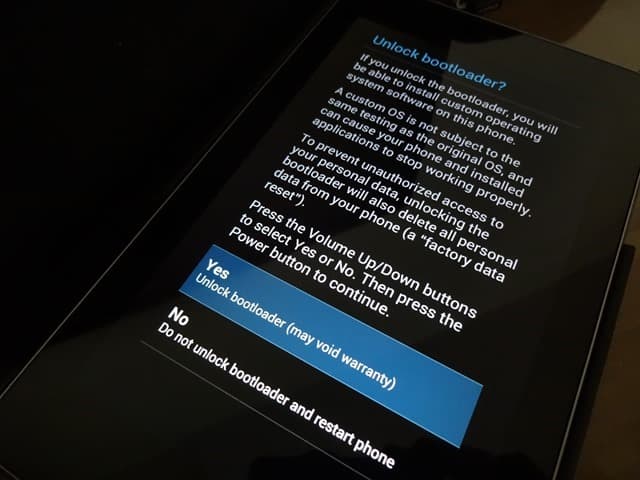
The device then takes a few moments to factory reset and unlock the bootloader. Once done, the lock state should now be unlocked.
Here’s an image of the command prompt with the ADB commands we used and unlocking stages as reported by the device.
Press the “Power button” to boot and do the initial setup of the device.
Lock the Nexus 7 bootloader
If you wish to lock the bootloader of Nexus 7 after you have unlocked it, follow the below steps.
Reboot the tablet into bootloader by typing the below command:
adb reboot bootloader
Type the below command to lock the device:
fastboot oem lock
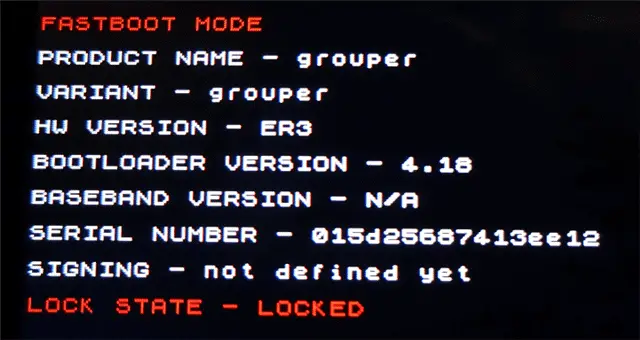
You will get a message in the command prompt confirming that the bootloader is locked now.

The lock state gets updated to locked again. In the above image, you can see it was previously unlocked.
Unlocking the bootloader: The need and the risks
Not everybody needs an unlocked bootloader. If you like to tinker with your device and customize to a large extent, unlocking the bootloader is the way to go. There is also the factor of voiding the device warranty when you unlock it and you are warned to that effect during the process. If you are too concerned about the warranty, you are probably better off with a locked bootloader.
Also, though this process is demonstrated on a Nexus 7 tablet, it should work with all Nexus devices.
Have you unlocked your tablet yet? Did you encounter any errors except those mentioned above? Share your thoughts and problems with us in the comments below.


