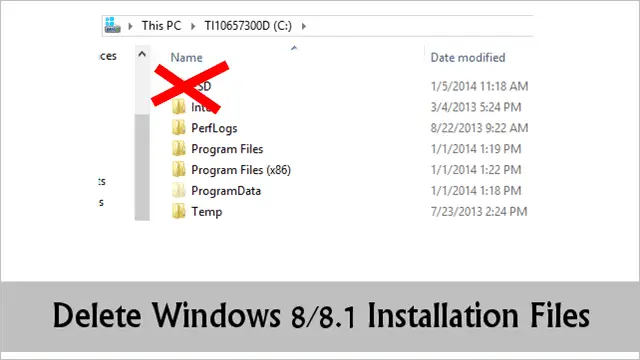
If for some reason you downloaded the Windows 8 or 8.1 installation data but never went through with the upgrade or install, you can delete the data from your PC. This data is hidden, so users have to navigate through some hidden folders to find it. Deleting this data is safe and will recover a significant amount of hard drive space while you’re at it.
The Windows 8 or 8.1 installation data is doing no harm by staying on your PC, other than taking up space. If you need that space, deleting this data will give you back a couple gigabytes instantly. Otherwise, leaving it on your PC for when you decide to upgrade is the better choice as it’ll save you from having to download the installation files all over again in the future. Whenever you pick back up on the upgrade, since the files are ready to go, the installer will start back up where you left off, letting you upgrade to Windows 8 or 8.1.
This is how to delete Windows 8 or 8.1 installation data from your computer.
Related Reading: How to Delete the Windows.old Folder to Retrive Space From Previous Windows Install
Deleting Windows 8 or 8.1 Installation Data
These steps will work in Windows 8 or Windows 8.1. We’ll be detailing them for Windows 8.1.
You will need to be logged into the administrator account in order to delete the Windows 8 or 8.1 installation data. While you can delete this folder if you tried to upgrade Windows 8 or 8.1 from any other account on the PC, you can’t upgrade to Windows 8.1 without being logged into the administrator so you wasted the time downloading the installation files, to begin with if that’s the case.
To get started, open “This PC.”
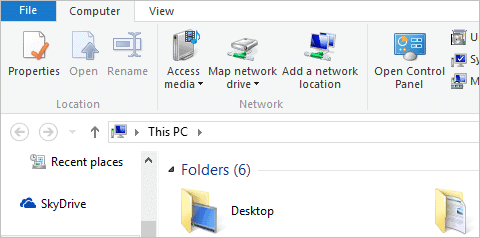
Click on “View” in the toolbar.

Check the box next to “Hidden items.”
This will reveal all hidden folders and files on the PC, which you’ll need to delete the Windows 8 or 8.1 installation data.
Now, navigate to your primary drive and right-click on it.

You’ll find a folder called ESD that was previously hidden.
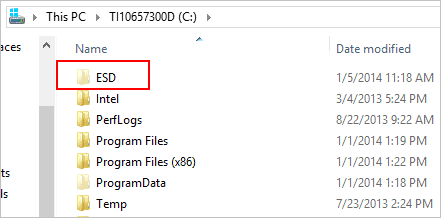
Right-click on the ESD folder and click “Delete.”
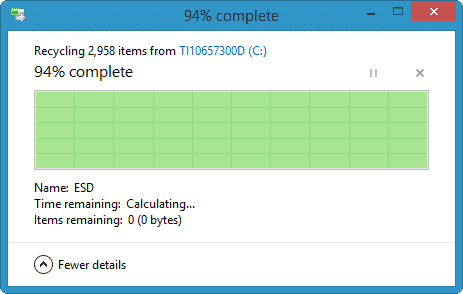
A pop-up will appear, showing you the deletion progress. You can pause this or cancel it at either time by using the controls in the right-hand corner of the pop-up.
If you’re doing anything else in the background, the deletion will take longer. Once finished, you can move on to step two.
Head back into This PC and you double-click your drive.
Locate the Users folder and double-click it.

Look for the user account that was logged in when you downloaded the Windows 8 or 8.1 installation data. This will most likely be the administrator account which you’re already logged into.
Double-click on that user folder to open it.
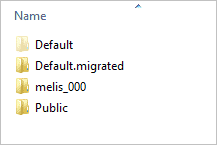
Then, double-click on the AppData folder which was hidden previously.
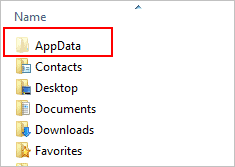
Now, double-click on “Local” to open it.
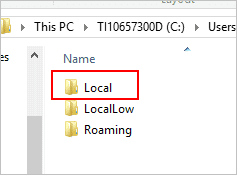
Navigate to the Microsoft folder and double-click on that.
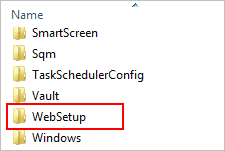
Finally, right-click on the WebSetup folder and click “Delete.”
Once again, it’ll take a few moments for the WebSetup folder to be deleted.
Head to the Recycle Bin now and empty its contents. You can change the view settings of your folders back to hide hidden items, then restart your PC. You’ve now successfully deleted the Windows 8 or 8.1 installation data from your computer.
In the future, you’ll have to re-download the Windows 8 and 8.1 installation if you want to upgrade. However, as we mentioned before, if you opt not to delete the Windows 8 or 8.1 installation files, you can start back up where you left off and quickly upgrade to either OS. If you have the space on your hard drive, we recommend leaving the Windows installation files there for future use instead of deleting them and having to start the download process all over again.
See Also: How to Create a New Hard Drive Partitions in Windows 8
Conclusion
Unfortunately, there’s no utility or quick fix for deleting the Windows 8 or 8.1 installation data available from Microsoft other than digging deep into hidden files and folders on your PC. Microsoft may be doing this for a reason: So you’ll upgrade and not backtrack. So, no matter the reason for deleting the installation data, this guide should help you do it in the quickest possible time.
If you’re not interested in installing Windows 8 or 8.1, getting rid of the files is the next step to avoid taking up hard drive space when you need it the most. This is a personal preference, so the choice is yours.


