With the Windows 10 Anniversary Update, you can no longer disable the lock screen like you used to be able to in Home and Pro versions of the OS. For some users, this is an annoyance they’d like to avoid. If you have Windows 10 Enterprise or Education editions, you’ll still be able to disable the lock screen.
Why Microsoft keeps taking away these little features from users is a mystery to us all. In the meantime, users keep finding ways to bring these features back with a little ingenuity and poking around the Windows operating system.
Let’s look at the steps for disabling the Windows 10 lock screen so you can get right to it when you come out of sleep, hibernation or step away for a bit.
Disabling the Windows 10 Lock Screen
Previously, you were able to disable the Windows 10 lock screen via the Group Policy Editor which underwent some changes with the Anniversary Update. Now, you’ll no longer find this ability to toggle on and off there.
It’s an easy fix as long as you’re ready to tinker around with the Task Scheduler.
Open your Control Panel either by using Cortana to search for it or using the Win+X Menu. Alternatively, you can search for “Task Scheduler.”
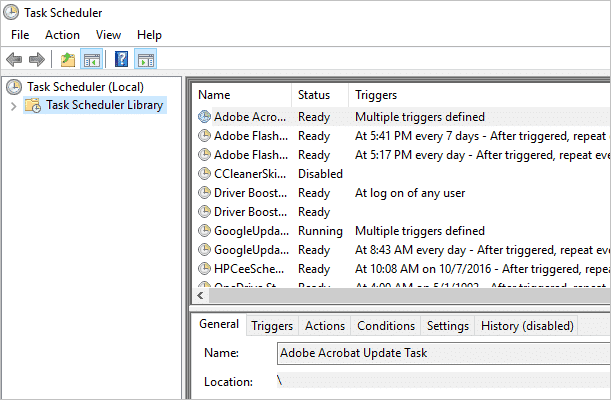
Once open, click on “Task Scheduler Library” in the left side of the window.
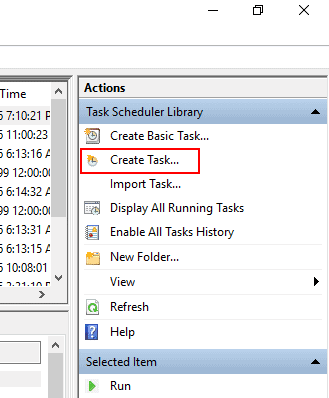
Then, in the right side of the window, click on “Create Task.”
From here, you’ll want to name the task something that describes it, such as “Disable Lock Screen.” You can also add a description if you want.
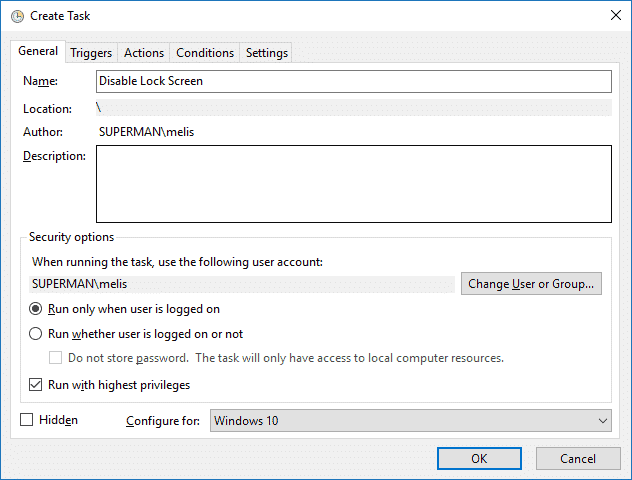
Now, check the box next to “Run with highest privileges.”
At the bottom of the window, you’ll see a box that says Configure for. In this box, select “Windows 10.”
Now, switch to the “Triggers” tab of the Create New Task window.
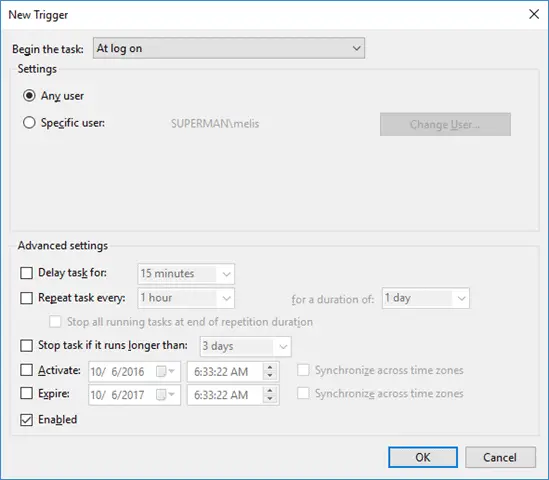
Add the following triggers by clicking “New” button:
- At log on
- On workstation unlock of any user
All you have to do on the new triggers window is select the trigger and click “OK” at the bottom. There’s no need to tinker with any of the other settings.
Once finished, move to the “Actions” tab.
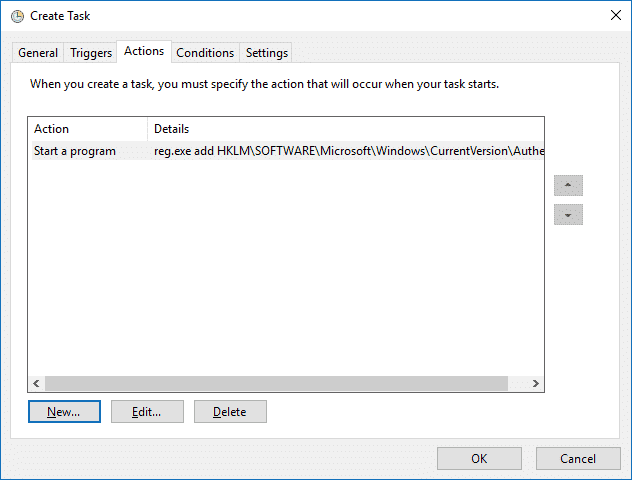
Click the “New” button and enter the following in the Program/script box:
reg.exe
Then, in the “Add arguments (optional)” box, add the following:
add HKLM\SOFTWARE\Microsoft\Windows\CurrentVersion\Authentication\LogonUI\SessionData /t REG_DWORD /v AllowLockScreen /d 0 /f
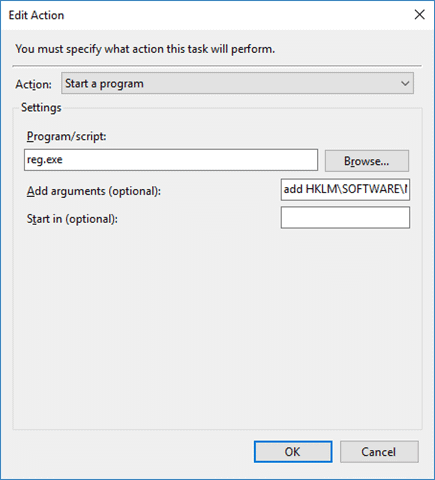
Now, click “OK.”
The above registry addition and tweak will change the DWORD value of the AllowLockScreen entry in your Windows registry. When set this way, it disables the lock screen.
However, every time you restart your computer, the value will be reset which is why scheduling this task will change it and disable your lock screen without having to go through the above steps each time you get on the computer for the day.
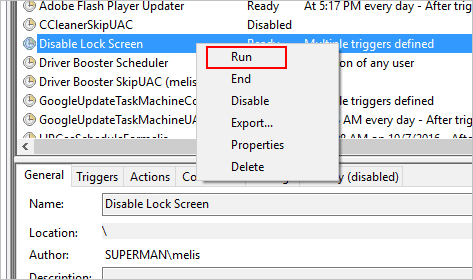
Finally, run the task to get it started. After that, it’ll start on its own every time you boot up your PC.
Now, to test that everything is working properly, using the Windows Key + L shortcut to trigger the lock screen in Windows 10. If you can just jump to sign in, it worked; if not, double-check the steps above to make sure everything is in order.
Conclusion
For now, the above steps seem to be the best option for disabling the lock screen long-term. Unless Microsoft finds a work around for the tweak or reintroduces being able to disable the lock screen, this is your best bet to skip the lock screen and jump right to the desktop next time you step away from your computer.
Special thanks to WinAero for discovering this Task Scheduler trick to disable the Windows 10 lock screen after the Anniversary Update.


