The WiFi connection cannot beat the internet speed given by Ethernet cable. And therefore, many of us still rely on an Ethernet connection. At times you may be able to browse websites and work online efficiently when connected to WiFi. Still, the issue may arise when you try connecting to the internet with an Ethernet connection. The Ethernet not working in Windows 10 is quite common, especially if you recently upgraded Windows 10.
When your Ethernet is not working, but WiFi is, the troubleshooting process becomes a bit difficult. However, there is no reason to get panicked as we have got you covered with a list of solutions to fix your Ethernet. Some other reasons for Ethernet not working can be issues with network drivers, Windows update, antivirus or VPN software, and hardware malfunction.
Solutions To Fix Ethernet Not Working in Windows 10
As mentioned above, there is no one cause for Ethernet connectivity issues. And because of it, there is no one specific solution that can fit all. A solution that may work for you may not work for your friend or colleague who has the same issue.
Therefore, we recommend you to go through the solutions mentioned below one by one till you get the issue fixed.
Initial Checks For Ethernet Not Working Issue in Windows 10
Before moving on to the list of solutions, make sure your internet is working on other devices. If the internet is not working, the solutions can’t be of any help. Also, turn off the WiFi before connecting the Ethernet cable.
Although WiFi is turned off automatically by Windows whenever the Ethernet cable is plugged in, it is better to avoid any complication and turn it off manually.
To turn off WiFi, launch the Settings app from the Start menu and go to Network & Internet. Next, navigate to WiFi from the left frame and toggle the switch below the WiFi to turn it off.

Once you are done with initial checks, move on to the set of solutions to fix the Ethernet on your Windows 10 system.
1. Check Ethernet Cable
If your WiFi is working fine and the issue is only with an Ethernet connection, the first thing you should check is if Ethernet cable is intact or not. You can also check if the Ethernet cable is plugged in properly to the router and the computer, and there is no loose connection. Well, if you see any sign of damage, we recommend changing the cable with another one.
After replacing the Ethernet cable, you can check connecting to the internet to see if it works. However, if you don’t find any damage or lose connections, and can still not access the internet, move on to the next set of solutions.
2. Run the Windows Troubleshooter
You can run the Windows troubleshooter to diagnose the problem and also fix it. You can run the Internet Connections troubleshooter along with the Network Adapter troubleshooter.
To run these troubleshooters, launch the Settings app by pressing Windows key + I, and go to Update & Security. In Update & Security settings, click on Troubleshoot from the left panel and then click on Additional troubleshooters seen in the window’s right frame.
Now, click on Internet Connections and then on Run the troubleshooter below it.
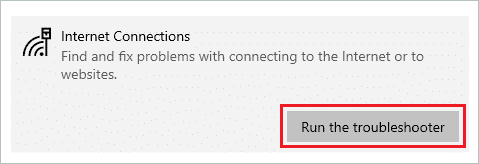
Let the troubleshooter run and fix the problem for you. After troubleshooting internet connections, if the Ethernet starts working, there is no need to run Network Adapters troubleshooter. However, if the Internet Connections troubleshooters didn’t fix the Ethernet not working in Windows 10, move on to the next steps mentioned below.
To run the next troubleshooter, which is network troubleshooter, search for Network Adapter under ‘Find and fix other problems’ and click on it when found. You can then click on Run the troubleshooter button below the Network Adapter.
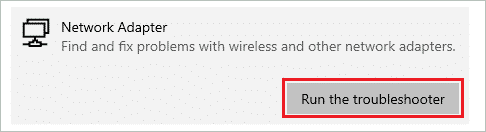
The instruction wizard on-screen will help you fix the issue. Even after running both the troubleshooter, the issue isn’t fixed; check out some other solutions from the list.
3. Try Another Port on the Router
You can try connecting the Ethernet cable to another port of the router. At times, the router port can malfunction and cause issues in Ethernet cable connectivity. The router has many other ports; you can switch the cable to another port and check if you are able to connect to the internet.
If the internet starts working with an Ethernet cable, the issue lies with the port. You can keep the router as it is until you need to use all the ports on the router. If the router is still in warranty/guarantee period, try talking to the manufacturer and fixing your issue.
However, even after changing the port, if Ethernet is not working in Windows 10, there might be some other issue with the computer settings or driver.
4. Disable Antivirus and VPN Software Temporarily
You can temporarily disable antivirus software along with a VPN to fix the Ethernet not working issue in Windows 10. Some antivirus software may cause the connection to network a bit difficult.
You can check the manual to know how to disable the antivirus software you are currently using. After disabling the antivirus, check if Ethernet starts working again. If it does, you don’t need to disable VPN. And in case you paid the antivirus software, you can speak to the support and get the issue resolved.
You can also opt for other malware removal software to safeguard your computer from vulnerabilities. And if disabling antivirus software doesn’t work to fix the issue, try disabling the VPN software.
However, if the Ethernet is still not working after disabling both antivirus and VPN software, you can enable them and move on to the next set of solutions.
5. Enable Ethernet Connection
If the Ethernet is disabled, you may not be able to access the internet with an Ethernet connection. This can happen because of a temporary glitch in the Windows system or some unwanted change in the settings done accidentally. You can easily enable the Ethernet connection by going through the instructions given below.
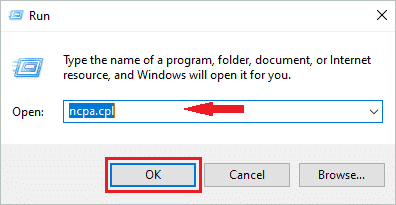
Open Run by pressing Windows key + R and type in ncpa.cpl in the box next to Open. Click on OK or press Enter to open the network connections.
Now, right-click on the Ethernet connection that is disabled and select Enable from the context menu.
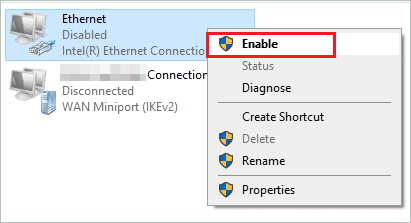
Enter the administrator credentials when prompted to do so. After enabling the Ethernet connection, check if the Ethernet not working in Windows 10 is fixed or not. However, if your Ethernet connection doesn’t show Disabled, you can perform the next solution.
6. Renew IP address, Flush DNS, and Reset TCP/IP
The issues network address can cause connectivity issues in Windows 10. You can run a set of commands to release and renew the IP address, flush DNS, and reset TCP/IP. These commands can fix your network and which can, in turn, can fix Ethernet not working in Windows 10 issue.
In the start menu, type cmd and right-click on the Command Prompt from the search result. Click on Run as an administrator to launch the command prompt with administrator rights.
In the command prompt, type the following commands one by one and hit Enter after execution of each command.
ipconfig /release
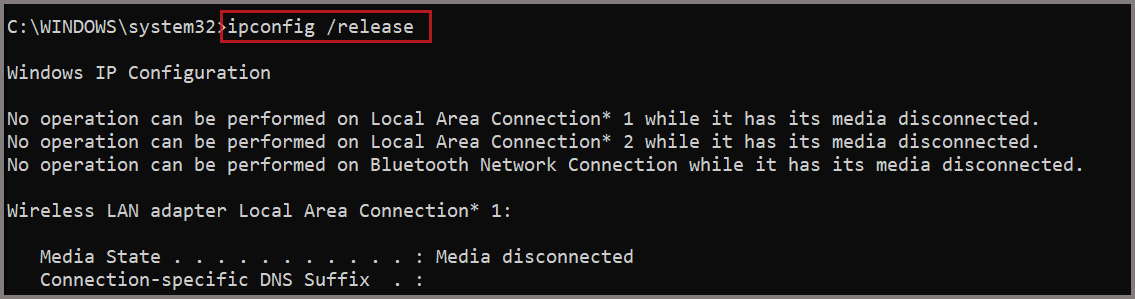
ipconfig /renew
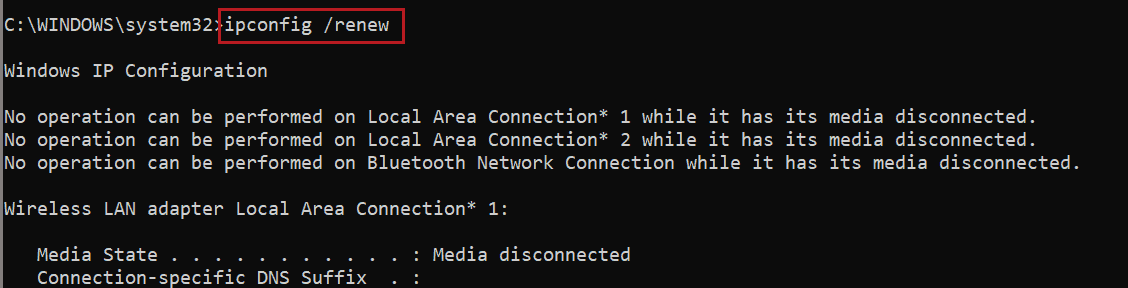
The above command will renew and release the IP address for you. You can now run ipconfig /flushdns command in the command prompt.

After executing the above set of commands, check if the Ethernet starts working. If there is still an issue, you can execute the commands to reset TCP/IP.
Open the command prompt again with admin privileges, if you closed it before, and execute the below-mentioned commands there.
netsh winsock reset
netsh int ip reset
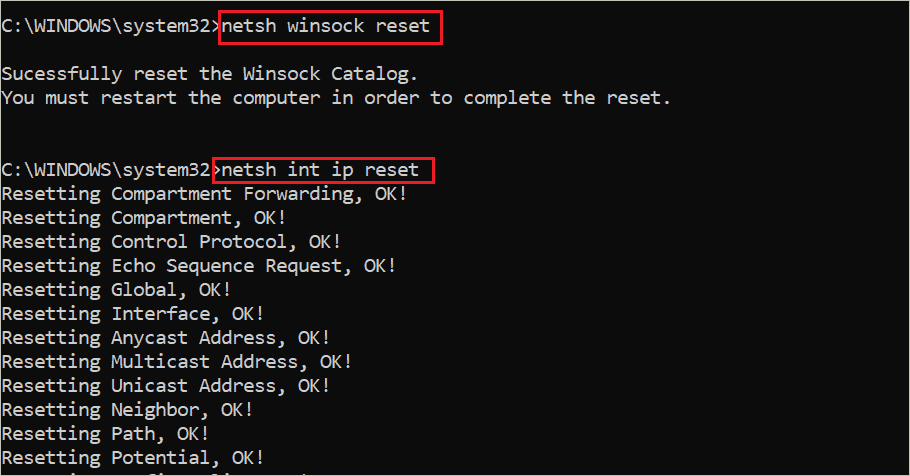
You can now check if these commands make the internet connection with Ethernet possible again. If not, you can try doing a network reset.
7. Reset Network
You can reset the network with a click in Windows 10 to fix the Ethernet not working issue. When you do a network reset, the network drivers are reinstalled, the settings are changed to default, and networking software like VPN and virtual switches are removed.
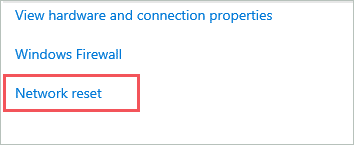
It is easy to reset the network in Windows. Launch the Settings app and open Network & Internet settings. Now, go to the bottom of the Network & Internet settings and click on Network reset option.
On the Network reset window, click on the Reset now button.
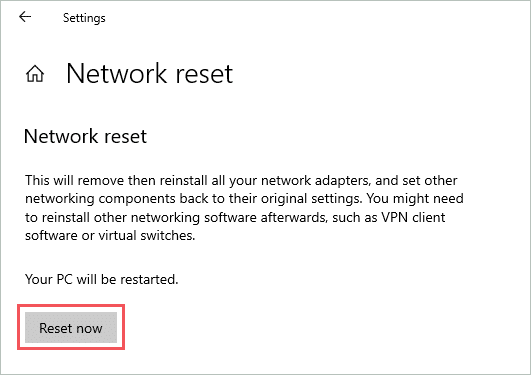
If asked for confirmation, click on Yes to confirm the network reset. Make sure you save all the work before you click on the reset now button, as your PC will restart after clicking on it.
After your PC restarts, check if the Ethernet not working in Windows 10 is fixed. If you are still experiencing internet connection problems via Ethernet, try modifying the network adapter’s power management options.
8. Modify Power Management Option of Network Adapter
You can modify the Ethernet adapter’s power-saving feature to fix the issue you are facing on your Windows 10 system. If Windows 10 is turning off the network driver for Ethernet to save Power, this solution can fix it.
Press Windows key + R to open Run, type ncpa.cpl there and click on OK to open Network Connection.
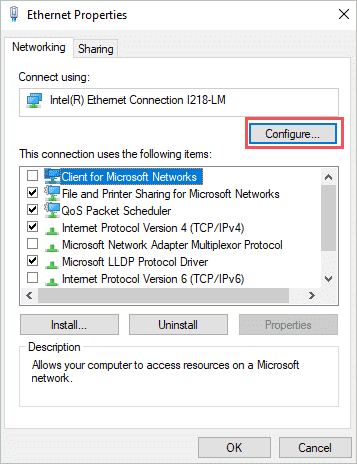
Once the Network Connection opens, right-click on the Ethernet connection and click on Properties. Click on the Configure button seen on the Ethernet Properties window.
Next, go to the Power Management tab and uncheck ‘Allow the computer to turn off this device to save power.’ Click on OK to save the change in the power management options.

Restart the system so that the changes can take effect and then check if you got rid of Ethernet related issues.
9. Update Ethernet Drivers
You can update the Ethernet network driver to fix Ethernet not working in Windows 10. Many users have third-party software installed on their system to help them manage device drivers. If you don’t have any software to update the ethernet driver, you can manually update them in Device Manager.
To do so manually, open Device Manager by searching for it in the start menu. Next, expand the Network adapters. Right-click on the Ethernet driver and click on Update driver.

You can also refer to the complete guide on device drivers in Windows 10 if you get stuck in between the update process. Post the update process; close the Device Manager, and check if you can browse the internet using the Ethernet connection.
10. Roll Back Ethernet Drivers
If you started experiencing Ethernet connectivity issues after updating the driver, the chances are you updated driver software with an unstable release. In such cases, you can roll back the driver version.
To roll back the driver, go to the Device Manager, expand the Network adapter. Right-click on the Ethernet driver, as shown in the above solution. Select Properties from the context menu.
When the Properties dialog box opens, go to the Driver tab and click on Roll Back Driver. Follow the wizard to complete the process.
If the rollback button is greyed out, you don’t have an option to roll back your Ethernet driver to the previous version. You can move on to the final resort in such cases.
11. Manually Configure DNS Address
You can manually configure the DNS address and use Google DNS to fix the Ethernet related problem in Windows 10. You can follow the below steps to add a DNS address manually.
Step 1: Open the Settings app and go to Network & Internet.
Step 2: Click on the Change adapter option seen under Advanced network settings.
Step 3: Right-click on the Ethernet connection and select Properties.
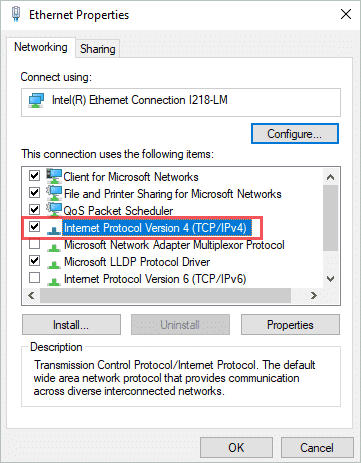
Step 4: When the Ethernet connection Properties open, search for Internet Protocol Version 4 (TCP/IPv4) and double-click on it.
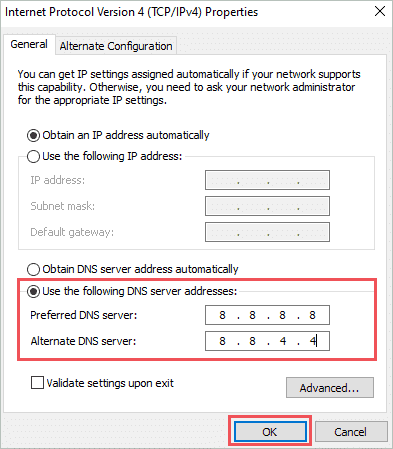
Step 5: On the next window, select ‘Use the following DNS server addresses’ and then put in the following addresses below it.
Preferred DNS Server: 8.8.8.8
Alternate DNS Server: 8.8.4.4
Click on OK to save the changes.
Once done, check if this fixes Ethernet not working in Windows 10 issue.
Conclusion
Wired connections are much more reliable when it comes to the internet connection, and therefore many users prefer it over a wireless connection. The Ethernet not working in Windows 10 can stop you from using the wired connection to browse on the internet. The above list of fixes can help you conveniently fix the Ethernet issue.
You may need to try different workarounds to fix the issue as there is no particular reason to experience Ethernet connectivity. However, if the issue is not that severe, you can easily fix it by running the troubleshooter or using another router port. The solution that will work for you depends on the severity and the cause of the issue.


