Windows 10 OS offers many trivial yet essential functions and features to its users. One such feature is the drag and drop operation that allows the users to move files between different locations. But, if a user can’t drag and drop in Windows 10, it’s rather difficult to operate, isn’t it?
What To Do When You Can’t Drag And Drop In Windows 10
The drag and drop feature is a faster and comparatively more convenient way to transfer files and content in Windows 10. However, it seems way more convenient if you have the current and the destination location windows open on the screen. Plus, it also provides a visual indication of the movement of the files. This function can act as a useful backup feature if the copy-paste is not working correctly.
Similarly, if the Windows 10 right-click not working, it could also slow down the user’s working speed. So, it’s always better to know alternative methods and keyboard shortcuts.
The solutions below give details on what to do when you can’t drag and drop in Windows 10.
1. Press the Esc Key
Most of the time, the last drag and drop action gets stuck in the Windows 10 memory due to a program or server. Hence, users cannot initiate new visual drag and drop events. So, select the content you want to transfer and press the Esc key on the keyboard to cancel out that interface. The Escape key solution doesn’t guarantee success every time, but it’s worth trying out.
2. Update Windows 10
Outdated versions of Windows 10 might also be the reason why you can’t drag and drop in Windows 10. Make sure you have the latest Windows update installed to avoid the drag and drop issue.
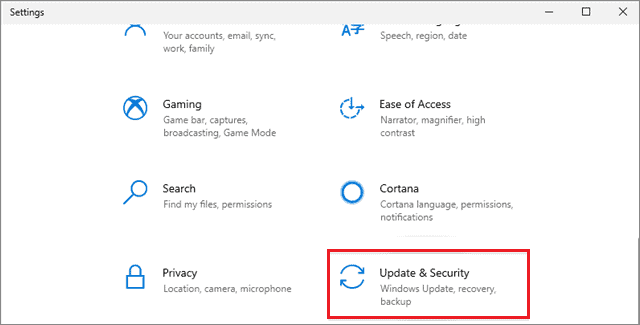
Go to the Settings window and click on Update & Security.
In the Updates tab on the left pane, click on the Check for updates option.
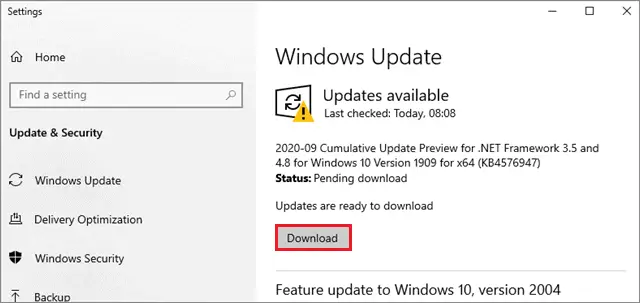
Windows will scan for new updates and let you know if they are to be installed. The system will download and install the new changes automatically. After these steps are executed, you can identify whether the drag and drop action is working if you don’t see the visual indication while performing the action.
3. Run Hardware & Devices Troubleshooter
You can run the Hardware and Devices Troubleshooter if you can’t drag and drop in Windows 10. However, the troubleshooter isn’t available for Windows 10, starting from version 1809. So, you can skip this solution if the Hardware Troubleshooter isn’t available.
To begin with, open the Control Panel from the search box on the taskbar. Then, open the Troubleshooting option.
Now, select Hardware & Sound. Choose Configure a Device. Click on Next to run the troubleshooter.
4. Uninstall and Reinstall Mouse Drivers
Your mouse could be having issues with smooth functioning if you can’t drag and drop in Windows 10. In such cases, consider removing and reinstalling your mouse drivers to see if it works.
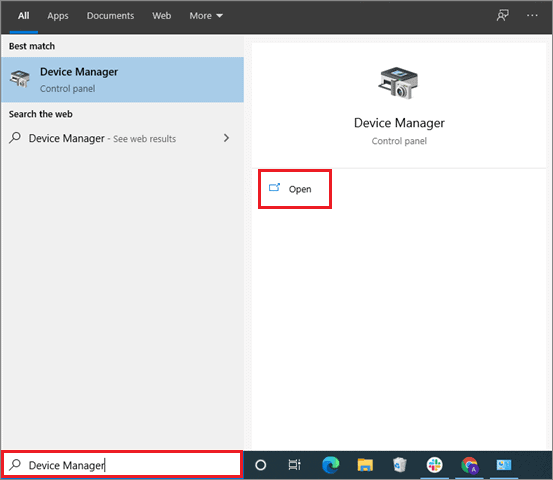
The first instruction is to open the Device Manager from the Start menu search box on the taskbar. You can also press Windows key + R, open the Run dialog box, enter ‘devmgmt.msc’, and click on Run to open the Device Manager.
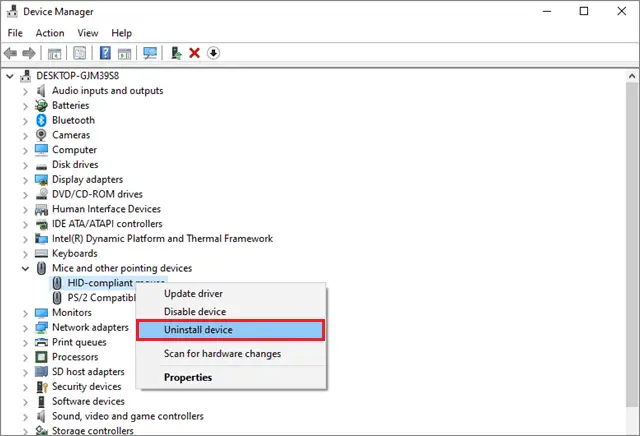
Then, click on Mice and other pointing devices.
Now, right-click on the mouse device you wish to eject and select Uninstall.
After uninstalling the driver, restart your Windows computer. The drivers will be reinstalled post the restart.
5. Restart File Explorer
Restarting Windows Explorer is one of the most common solutions to execute if you can’t drag and drop in Windows 10. Your screen might disappear for a few moments after disabling Windows Explorer, but no need to panic about that. It will be recovered automatically.
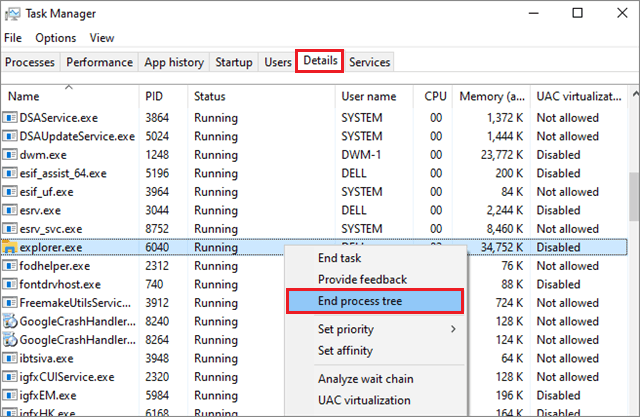
Press Ctrl+Alt+Del to open the Windows Task Manager. Then, go to the Details tab on the status bar and locate the explorer.exe process.
Press the right mouse button on the process and select End process tree to stop the Explorer.
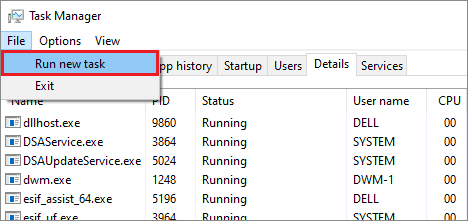
To restart the Windows Explorer process, click on the File option in the menu bar and select Run new task.
Type explorer in the space and click OK.
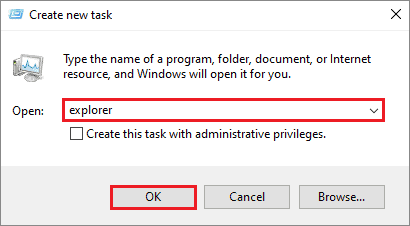
The explorer.exe process will restart and bring the PC back to the previous state. Check if the drag and drop not working problem still exists on your Windows PC.
6. Disable UAC
Changing the registry key entries might be a dangerous task to undertake, given that it can affect the system. However, you can check and tweak a value to see if it works for you.
First, press Windows key + R to open the Run command. Enter ‘Regedit’ in the blank field and hit Enter. Following this instruction will open the registry; you can also open it by typing Registry editor in the search box on the taskbar.
Now, navigate to the following path:
HKEY_LOCAL_MACHINE\SOFTWARE\Microsoft\Windows\CurrentVersion\Policies\System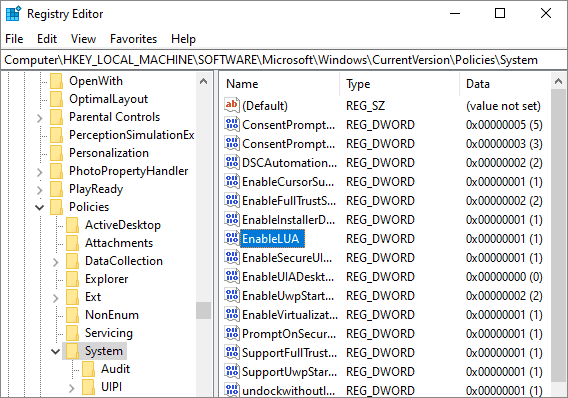
Locate and select EnableLUA and double-click it. Change the value to 0.
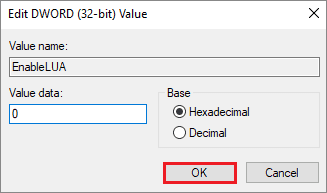
Once you have made the required changes, boot the Windows computer and check if you can drag and drop files and folders or any other content.
7. Change Drag Height and Width
The Drag height and width in the Windows PC can be changed as per the preferences of the users. If you can’t drag and drop in Windows 10, this is one of the most basic solutions to try out.
Open the registry using either the Start menu search bar or the Run window. Then, navigate to the following location on the left pane.
HKEY_CURRENT_USER\Control Panel\Desktop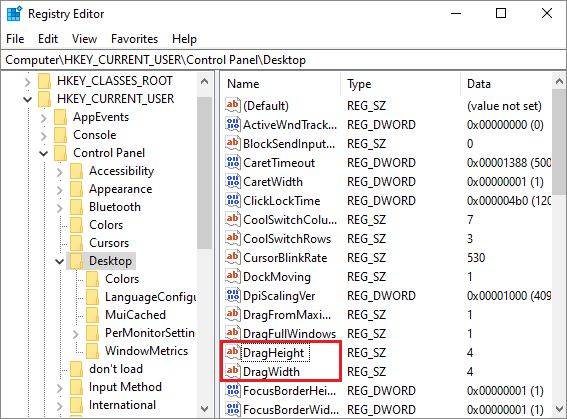
Then, double-click on DataHeight and DataWidth options in the right pane and change their numbers. Make sure you set a high value for both entities.
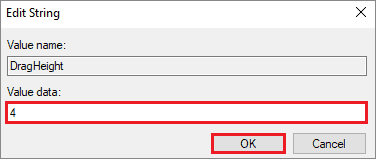
Check if these steps help solve the can’t drag and drop in Windows 10 issue.
8. Perform the SFC and DISM Scans
The System File Checker scans the system for corrupted files and replaces them with new ones. You can refer to the quick guide to know how to perform an SFC scan using the Command Prompt window to solve the drag and drop problem.
To perform the DISM scan, open the Command Prompt window in the administrator mode and run the following commands.
Dism/Online/Cleanup-Image0/ScanHealthDism/Online/Cleanup-Image/RestoreHealth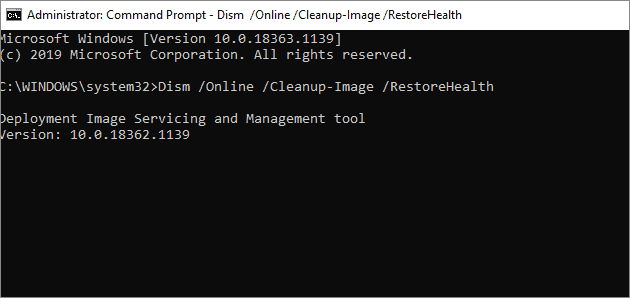
After successfully running the two processes, check if you can drag and drop content.
9. Uninstall And Reinstall Fences
Fences is a Windows utility that helps people in cleaning and organizing their files and folders on a desktop. It places shortcuts and icons of all the applications automatically in shaded areas called fences. If you have this utility, consider uninstalling and reinstalling it again.
After you uninstall Fences, make sure to remove all Stardocks files and content in the Program and Program Data folder.
Reinstall the Fences utility and go to View. Uncheck the Auto Arrange Icons and Align icons to grid options. Check if the drag and drop not working in Windows 10 still exists after using these steps.
10. Perform a Clean Boot
If you have installed any new programs lately, you can perform a clean boot to identify whether that program is causing a problem in the application of the drag and drop operation. A clean boot helps users start a Windows 10 PC with the minimum set of drivers to gauge the program causing the problem.
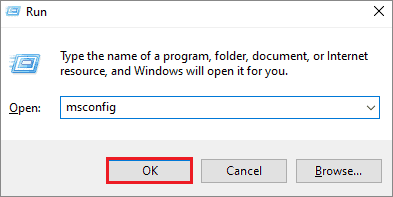
To begin with, the clean boot, open the Run window using the Windows key + R dialog box. Type msconfig in the Run window and click OK to continue.
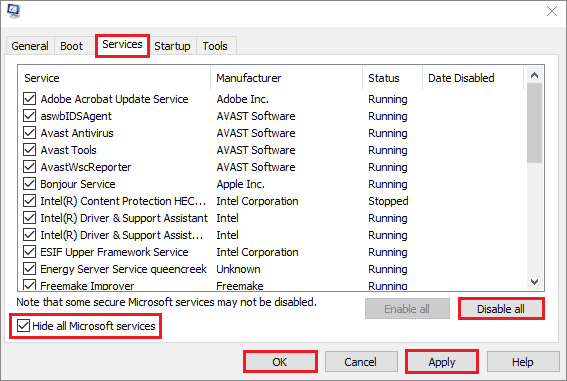
Now, select the Service tab in the System Configuration window. At the bottom, check the box next to ‘Hide all Microsoft services’ and select Disable all.
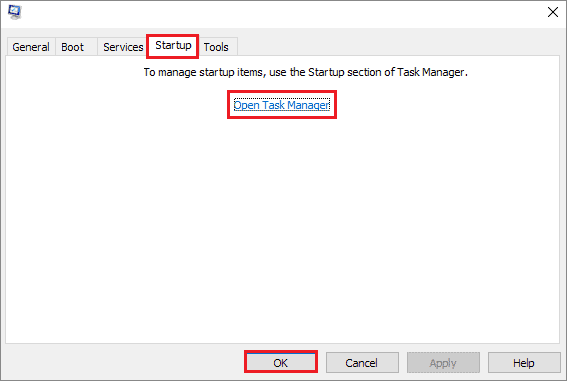
Now, go to the Startup tab and click on the Open Task Manager option.
Go to the Startup tab, press the right mouse button on a program, and select Disable. Close the window afterward.
Now, return to the System Configuration window and select Apply and Ok. Reboot the Windows 10 computer and check if you still can’t drag and drop in Windows 10. If the clean boot process doesn’t solve the drag and drop not working problem, move on to the next solution.
11. Perform Startup Repair
Performing Startup Repair is an advanced process; make sure you don’t jump directly to this solution before executing the simple methods. To begin with, insert the Windows installation disk or USB drive and restart your Windows computer. You need to press any key of your choice to boot from the DVD.
Once the Install Windows page is displayed, click on Repair your Windows 10 computer to start the Windows Recovery Environment (WinRE). Now, click Choose an option and select your choice of language, time, and other parameters, and click Next. Then, select Repair your computer. Choose your operating system and click on Next.
Now, select Troubleshoot and click on Advanced Options. Choose Startup Repair in the Systems Recovery Options box. Check whether the drag and drop not working problem exists. If it does not, install the latest Windows updates and restart your Windows 10 computer.
12. Edit Registry Entries
If you can’t drag and drop in Windows 10, you can try editing certain registry values to check if that resolves the drag and drop not working issue. This solution will only work if the registry of your PC has been corrupted.
First, open the registry editor by typing ‘regedit’ in the Run window.
Navigate to the following path:
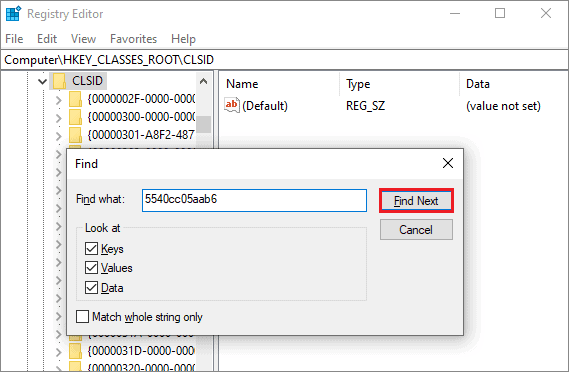
Computer\HKEY_CLASSES_ROOT\CLSID\Now, locate {679f85cb-0220-4080-b29b-5540cc05aab6} file in the left pane.
If you don’t find it, press Ctrl + F to open the search box, enter 5540cc05aab6 and press the Enter key. This will help you locate the file easily.
Once you have located the correct file, double-click on the Attributes value in the right pane, and then set the value to a0100000.
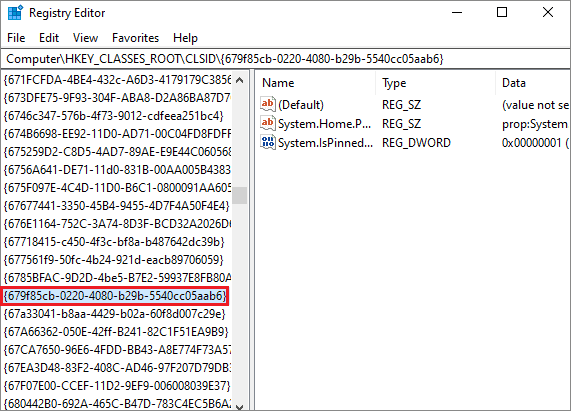
If the Attributes value isn’t available in the right pane, it means that the drag and drop not working issue isn’t related to the corrupted files and folders in the registry.
13. Reset Your Windows10 PC
Some people have reported that resetting the Windows 10 PC has helped them solve the drag and drop issue. However, resetting the Windows 10 computer means losing any important application, files, or folders in many cases; make sure you have a backup of all the essential files and folders before performing a reset.
To begin with the reset, open the Settings application and click on Update & Security.
Now, select Recovery on the left pane. Select Get Started under Reset this PC.
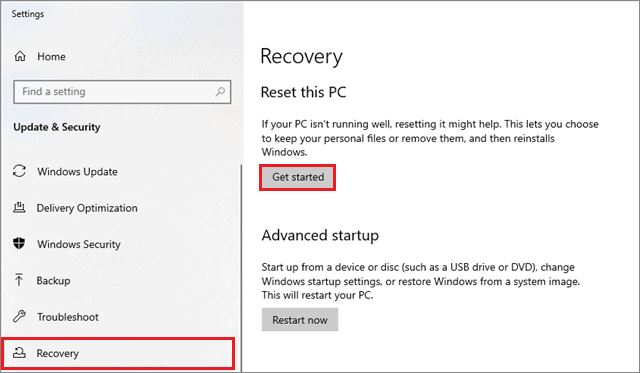
When the blue screen appears, you can select the Keep my files option to perform a reset without harming your personal files. All the apps installed will be removed, and the settings will be reset. Check for the visual indication during the drag and drop operation; it will help you know if the feature is properly working or not.
How To Enable Drag and Drop Operation in Google Chrome?
If you are using the Google Chrome browser, you may need to drag and drop files for various reasons, like adding attachments to emails, uploading files and folders on Google Drive, and much more. If the drag and drop not working issue occurs in such cases, you can follow the given steps to solve the problem.
Enter the chrome:/flags in the address bar and click Enter. Then, type Enable touch initiated the drag and drop in the search bar on the page.
Once you find the option, switch it to the Enable mode. Now, relaunch the Chrome browser to see if the drag and drop function has started working.
Conclusion
The drag and drop operation allows the users to be a useful backup feature for moving files from one place to another. It can be used primarily if your copy-paste feature has ceased to work. Secondly, using the visual drag and drop feature also increases the speed and efficiency of transferring files and folders from one place to another.
The solutions mentioned in this article should ideally be followed in the order as displayed, given that they are arranged in ascending order as per their difficulty of execution. If you can’t drag and drop in Windows 10 properly, make sure the drag and drop not working issue is resolved quickly. The absence of this operation also risks the possibility of not being able to drag and drop files in case the copy-paste feature stops working.
(Article Updated on 25th February 2021)


