The right-click function is one of the essential provisions offered by the Windows 10 computers. You can create new files and folders, create shortcuts, refresh the PC, and do many more things. The right-click function also allows users to do many such things in web browsers. Hence, it is unimaginable to know how to work on a computer if the Windows 10 right click is not working.
If the right mouse button is not working as expected, it could also slow down any user’s working speed who is not accustomed to using keyboard shortcuts. Secondly, right clicks are handier than using a combination of keywords to execute a specific function.
How To Fix Windows 10 Right Click Is Not Working Issue
There are several reasons why right-click might not be working. There may be some conflicting programs obstructing the smooth functioning of the right-click, or there must be issues with the hardware. Let’s have a look at the possible solutions to fix this issue.
1. Turn Off the Tablet Mode
The tablet mode introduction in Windows 10 PCs means the users can operate their PCs like a tablet. However, the right-click stops working after the tablet mode is switched on.
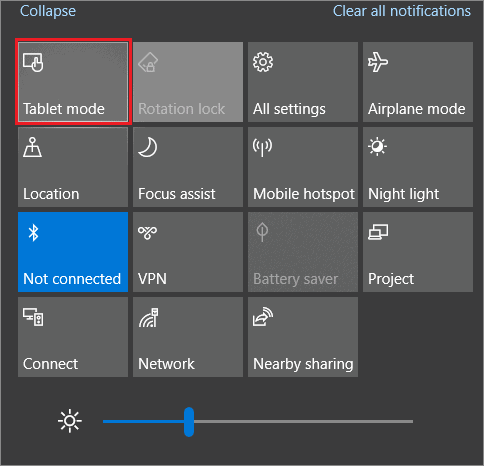
To switch off the tablet mode, press the Windows key + A keyboard combination.
Alternatively, you can also go to the Action Center and click to switch Tablet Mode off.
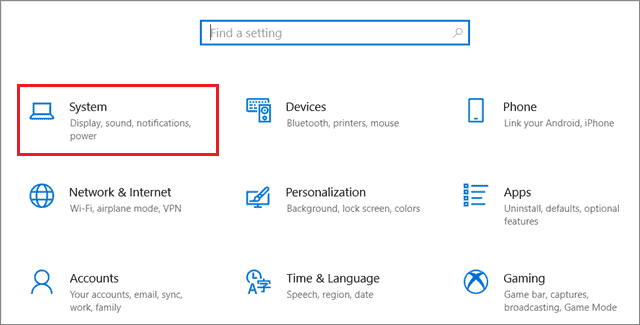
You can also disable the tablet mode using the Settings app. Press the Win key + I shortcut to open the Settings app and select System from the available options.
Then, select Tablet mode in the left pane. Turn off the button below, ‘Make Windows more touch-friendly when using your device as a tablet.’
You can follow the same steps and turn the tablet mode On as well. Check if the right mouse button works after you have switched off the tablet mode.
2. Restart the PC
Restarting the computer is an essential solution to execute if your Windows 10 right-click is not working properly. If you face this issue, make sure you restart your computer before applying the advanced solutions.
3. Check the Mouse and USB Port
If there’s a hardware issue with your mouse, you can try connecting it to a different computer to see if it works well. If it does, that means the USB port in your computer might have an issue. So, connect the mouse to another USB port. If it doesn’t work on any of the given ports, it’s safe to say your laptop has hardware issues.
4. Use Right-Click Keyboard Key
Many keyboards have a unique key for accessing the secondary options offered by the right-click menu. If your keyboard doesn’t have that key, consider using the Shift + F10 universal shortcut for accessing the right-click menu in Windows 10.
5. Use Mouse Keys
Mouse keys is a special feature offered by the Windows 10 OS that enables the users to use the keyboard for functions that are generally executed with a mouse. If your Windows 10 right-click is not working, you can enable this feature as a secondary option to execute the context menu functions.
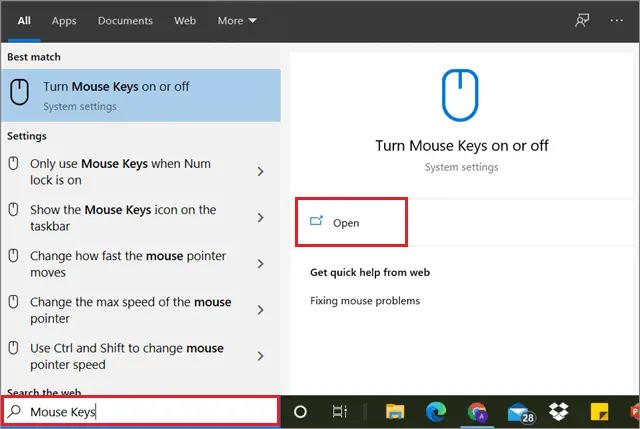
Type Mouse Keys in the Cortana search box, and you will see an option that says ‘Turn mouse keys on or off.’ Select Open to open the mouse settings.
Now, turn on the Mouse Keys feature and see if it works properly.
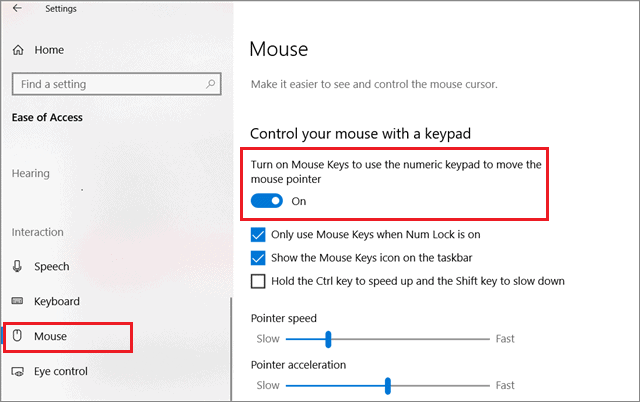
Users can navigate the mouse cursor by using the numerical keypad. Buttons like “/”, “*”, and “-” are used for keyboard navigation. “-” acts as the right-click on the keypad so that you can use that to access the context menu.
6. Enable the Touchpad
If you are using a Windows 10 laptop, the touchpad can act as your secondary source for navigation if your mouse isn’t working as expected. If you have disabled the touchpad, here’s how to enable it.
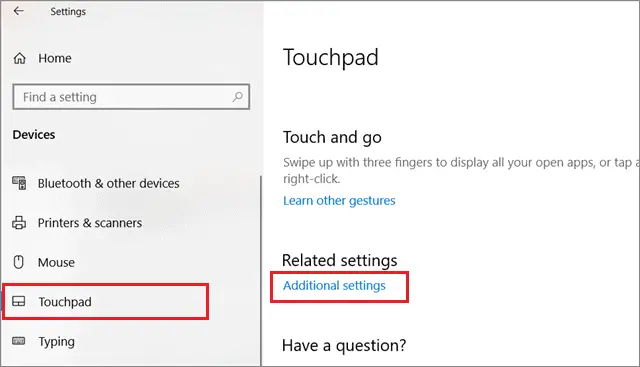
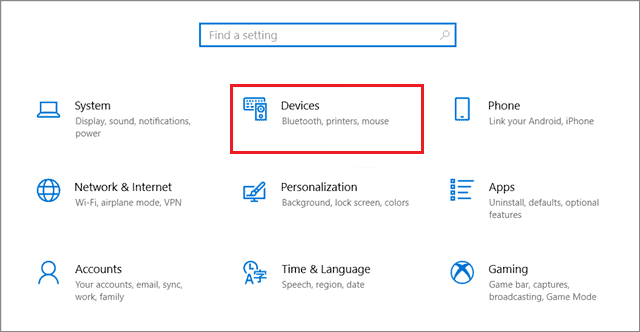
Press the Win key + I to open the Settings window. Choose the Devices tab from the available list of options.
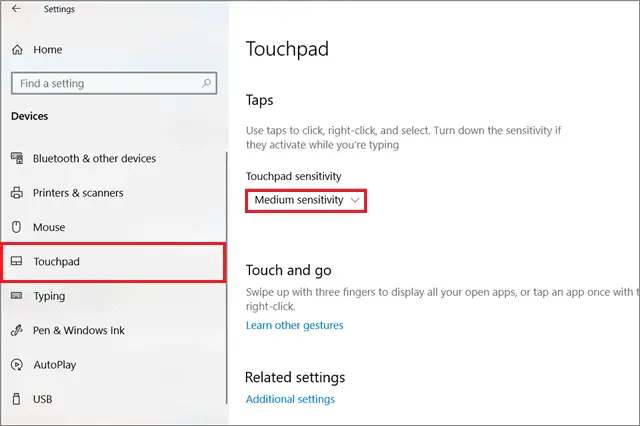
Then, select the Touchpad tab in the left window pane and select Additional settings.
Select the ClickPad Settings tab in the Mouse Properties dialog box. Here, you can view the name of the manufacturer of your laptop touchpad. Select it and click on Enable; click Apply and OK to save the settings.

Once you have enabled the touchpad, restart the PC to save the changes and then check if the right-click is working on Windows 10 touchpad.
7. Make Sure the Touchpad is Working
Sometimes, the touchpad gets disabled automatically due to various reasons; it doesn’t work even though it is enabled from Windows settings. In such cases, you need to try out a few basic solutions.
If you have a Lenovo laptop, press the Fn + F8 key to unlock the laptop touchpad. For Dell laptops, the unlock combination is Fn + F3.
If this shortcut doesn’t work, make sure you check the BIOS settings of your PC. Boot your computer and press the F2 key or F8 key for Dell when the boot screen opens. Select the Main tab and switch the Touchpad to Enabled.
8. Conduct A Full System Scan
If there are viruses in your system, they can affect the right-click context menu function. You can run a full system scan to eradicate these viruses or use third-party antivirus and malware removal tools.
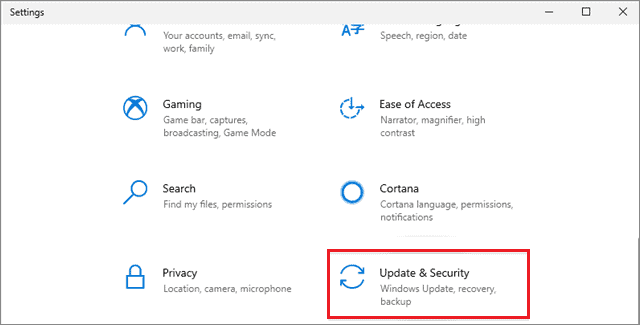
To begin with, the built-in Windows Security scan, open the Settings app using the Win key + I keyboard shortcut, and select Update & Security.

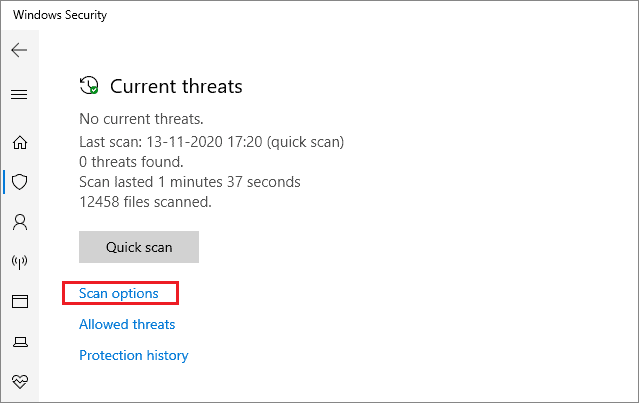
Then, click on Windows Security and select Virus & threat protection.

Next, select Scan options.
Choose Full scan from the given options.
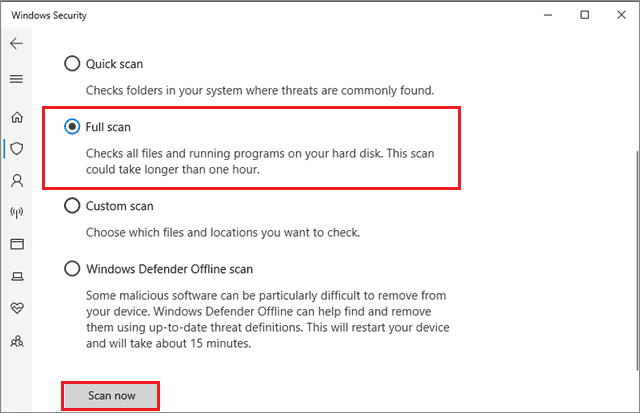
After the process is completed, check if the right-click has started working in Windows 10.
9. Update Windows 10
If you have a Windows 10 system it can cause several types of issues. Hence, it is necessary to install the latest update on your PC. If your Windows 10 right-click is not working.
Use the Win key + I shortcut to open the Settings window. Then, click on Update & Security from the list of options.
Select Check for updates.
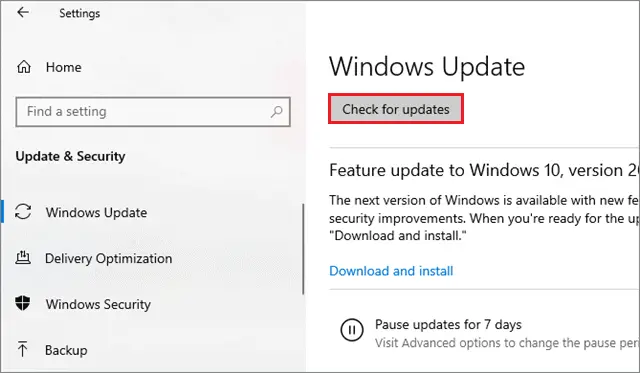
The Windows updates will be installed automatically as soon as you restart the PC.
10. Adjust Touchpad Delay Time
If your Windows 10 right-click is not working, you can try changing the touchpad delay time settings and see if that works.
To begin with, open the Settings window using the Win key + I keyboard shortcut. Click on Devices from the available list of options.
Next, select Touchpad in the left pane and change the sensitivity under the touchpad sensitivity section.
In some cases, using both mouse and touchpad could be the reason why the context menu stops working in Windows 10. So, it’s better to choose and enable only the object that you want to use for navigation.
You can easily disable the touchpad if you choose the mouse as your primary device for navigation. If you are facing any issues with the laptop touchpad, refer to this brief guide on how to fix the problems.
11. Remove Recently Installed Applications
If you have installed any new applications, consider uninstalling them; certain third-party applications often cause problems with the smooth functioning of the Windows operating system. After uninstalling these applications, restart the computer to see if the Windows 10 right-click is working properly.
12. Uninstall Conflicting Applications
Many applications may affect the stability of your computer system. The malfunctioning of these applications can cause issues with right-click. Applications like Symantec System Recovery, WinZip, 7Zip, etc., can be either disabled or uninstalled to check if they are causing the right-click issue.
These apps tend to control your HID sometimes, thus leading to a loss in functionality. You can also start the PC in safe mode to diagnose any such third-party applications that are responsible for the cause.
13. Restart Windows Explorer
If your Windows 10 right-click menu is not working specifically in the File Explorer window, consider restarting the process.
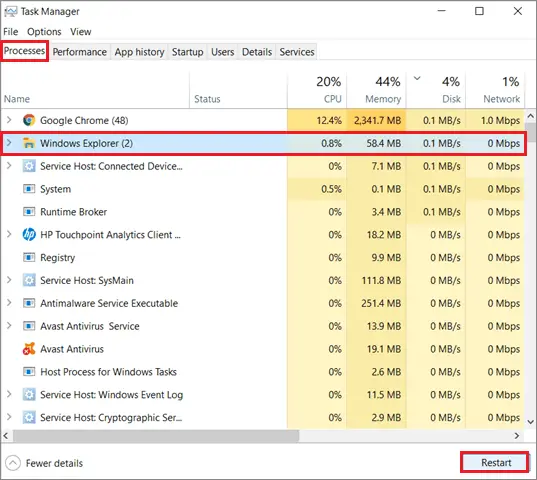
To begin with, open the Task Manager using the Ctrl+Alt+Del keyboard shortcut.
In the Task Manager window, click on the Processes tab and locate the Windows Explorer process. Select it and then press the Restart button.
Check if the right button on your mouse has started working after executing this method.
14. Run the Hardware & Devices Troubleshooter
The Hardware and Devices troubleshooter is often used to identify the reason for the occurrence of any hardware issues. If your mouse is not working correctly, you can run this troubleshooter to gauge the root cause of the problem.
Note: The Hardware and Devices Troubleshooter is not available for Windows 10 v.1809 and above.
To start with, open the Control Panel and click on Troubleshooting from the available options.
Then, select View all in the left pane.
Select Run the Troubleshooter option under the Hardware & Devices section.
Make sure the Apply repairs automatically option is checked in the Advanced section. Follow all on-screen prompts to complete the troubleshooting process;
If the troubleshooter reports any detected hardware device, click on Apply this fix and restart the computer to see if the right-click function has started working.
15. Remove Shell Extensions
Shell extensions are COM objects that increase the abilities of the Windows operating systems. Many shell extensions are installed by default, but many third-party applications also install additional shell extensions, which can cause a problem to the context menu(right-click menu) in a computer.
Hence, these shell extensions need to be removed using a cleaning tool. You can use CCleaner or any other alternative software to remove the third-party shell extensions and ensure that the context menu is working properly.
16. Update Drivers
If your PC has outdated drivers, it might cause the right mouse button to malfunction. Hence, make sure your drivers are updated regularly. In case of the right-click not working issue, it is vital to update the keyboard driver and the mouse driver to resolve the issue. Users can also check the guide on how to update all kinds of drivers in Windows 10.
17. Run the SFC Scan
An SFC scan, also known as System File Checker scan, is used to identify and rectify the corrupted system files in a computer. This process deletes the corrupted file and replaces it with a new file. If your Windows 10 right click is not working, you can follow this quick guide on how to perform the SFC scan in the Command Prompt window.
18. Execute the DISM Scan
The DISM(Deployment Image & Service Management) helps users fix the errors and issues caused due to corruption and misconfiguration of files.
To run the DISM scan, open the Command Prompt window with admin rights. Then, enter the following commands and press the Enter key.
DISM.exe /Online /Cleanup-image /RestoreHealth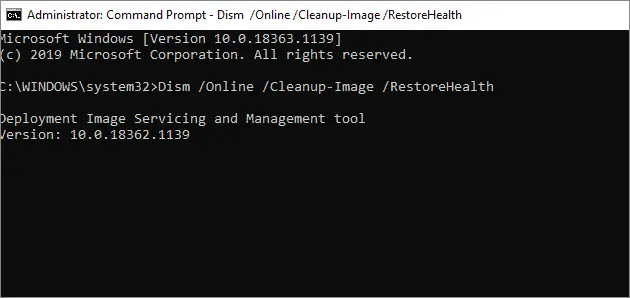
After the process is completed, restart your computer and check if the right-click issue has been resolved.
19. Change Power Management Settings for USB Root Hub
If your Windows 10 right-click is not working as expected, you can tweak the USB Root Hub properties to see if that resolves the problem.
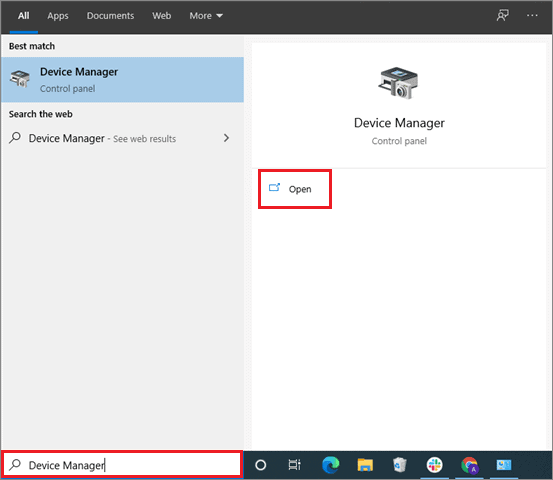
To begin with, press the Windows key + R shortcut and open the Run command. Then, enter devmgmt.msc in the search box and click OK. As an alternative, you can open the Device Manager from the Cortana search box.
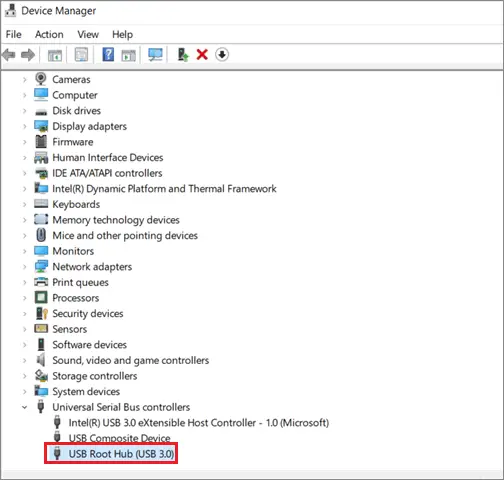
After the Device Manager window opens, locate and expand Universal Serial Bus controllers. Then, select USB Root Hub.
Now, choose the Power Management tab and check the box that says Allow the computer to turn off this device to save power. Click on OK to save the settings.
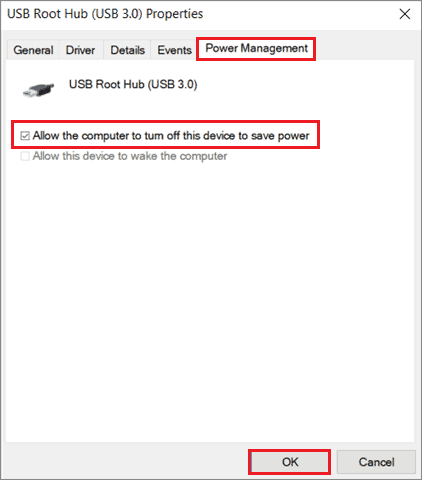
Go back to the previous menu and follow these steps for all the USB Root Hubs. The right-click button issue should ideally be resolved after this step.
20. Remove Registry Entries
If your right-click is not working correctly, you need to remove selected entries in the registry.
Make sure you backup your registry settings before executing this method so that you can restore them if any tweak goes wrong.
To start with, press the Win key + R and open the Run window, enter regedit in the address bar, and click on OK.
Once the registry opens, locate the following path in the right pane.
HKEY_CLASSES_ROOT\Directory\Background\shellex\ContextMenuHandlersWhen you locate the ContextMenuHandlers folder, delete every file in it except New and WorkFolders.
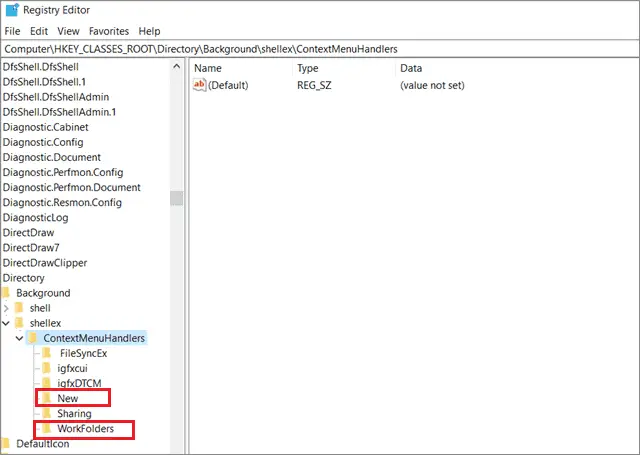
Then, close the registry editor and restart the PC to see if this solution has resolved the right-clicking issue.
21. Fix the Context Menu using the Registry Editor
In the previous solution, we discussed deleting selected entries in the registry. Now, we have to create a new value to fix the context menu issue.
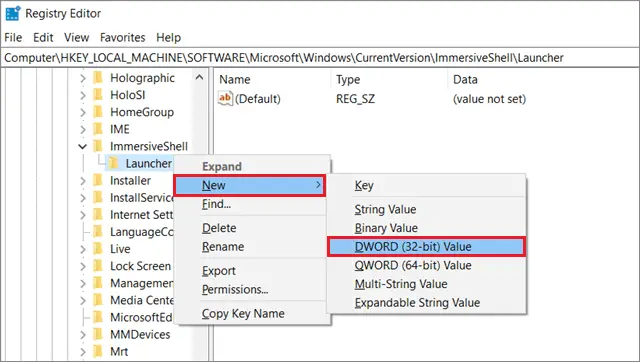
Open the registry editor using the Cortana search box or the Run command window. Then, navigate to the following path.
HKEY_LOCAL_MACHINE\Software\Microsoft\Windows\CurrentVersion\ImmersiveShell\LauncherNow, press the right-click button on the keyboard or the Shift+F10 shortcut to produce the context menu. Go to New and select DWORD(32-Bit) Value.
Name the new DWORD as UseExperience, double-click on it, and set the Value data to 0.
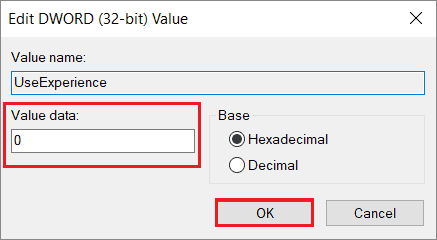
After you have followed all the steps mentioned above, the right mouse button issue should ideally be resolved.
22. Check Group Policy Editor Settings
If the context menu doesn’t appear on the screen when you press the right click button, you can disable the default context menu in the local group policy editor. For background information, know that the Windows 10 Home edition does not have a Group Policy editor.
To start with, press Windows key + R and open the Run window. Enter ‘gpedit’ in the address bar and select OK.
Once the Group Policy Editor opens, navigate to the given path.
User Configuration > Administrative Templates > Windows Components > File ExplorerNow, in the right pane, double-click on Remove Windows Explorer’s default context menu.
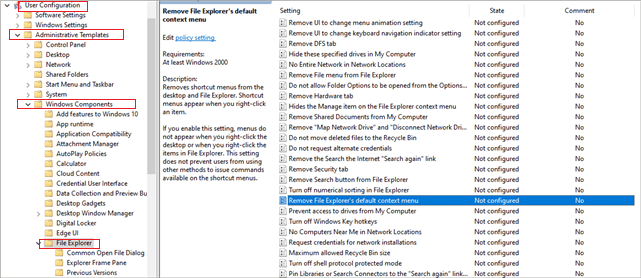
Select the Disabled option and click on Apply and Ok to save the changes.

Ideally, the right mouse button should start working after you execute the steps given in this method.
23. Use Powershell
Powershell is a command line interface used to regulate and configure settings on a local computer. If your Windows 10 right-click is not working, you can install a package and fix the issue.
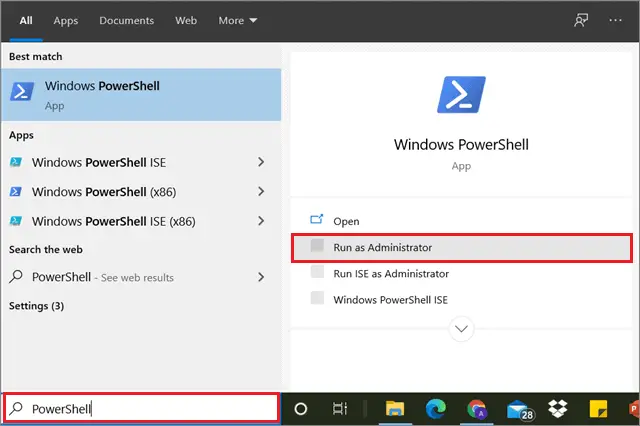
First, type PowerShell in the Cortana search box and Run it in the administrator mode.
Now, enter the following command and press Enter key.
Get-AppXPackage -AllUsers | Foreach {Add-AppxPackage -DisableDevelopmentMode -Register “$($_.InstallLocation)AppXManifest.xml”}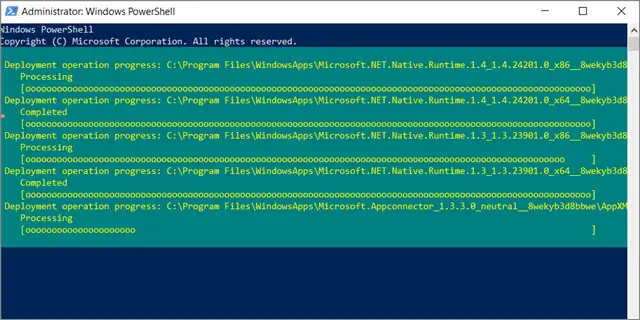
A cluster of packages will be installed following the execution of this command. Reboot the PC and check if the right mouse button has started working.
24. Replace the WinX folder
The WinX menu, also known as the Power User menu, is a menu consisting of shortcuts to various locations. You can access this menu by right-clicking on the Start menu button. If the WinX folder gets corrupted, it can affect the right-click function; we can replace the folder to resolve the right-click issue.
To open the WinX folder, follow the given path.
%USERPROFILE%\AppData\Local\Microsoft\Windows\WinXNow, you will notice the folders named Group1, Group2, Group3, and many more. You have to overwrite these folders with similar folders found in other user profiles.
You can also copy these folders from a different PC and paste it into your laptop. Once you have done that, the right-click method should ideally be resolved.
25. Perform A Clean Boot
The clean boot process is used to identify problems caused by non-Microsoft products; this process helps in starting the computer by loading only essential files and programs. These applications and services give rise to issues due to which the right-click is not working in Windows 10. You can perform a clean boot and close these processes.
Note: You need to operate your computer in the administrator mode to perform a clean boot process.
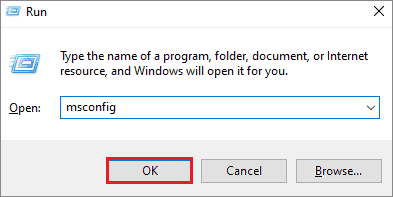
Once you have opened your computer, open the Run window and enter msconfig. Click Ok to confirm the entry.
In the System Configuration window, navigate to the Services tab and choose the Hide all Microsoft devices box. Then, choose Disable all.

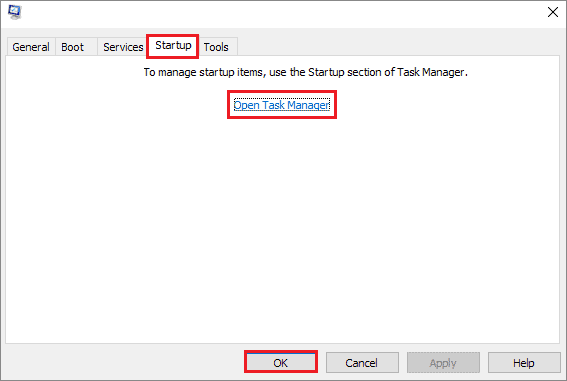
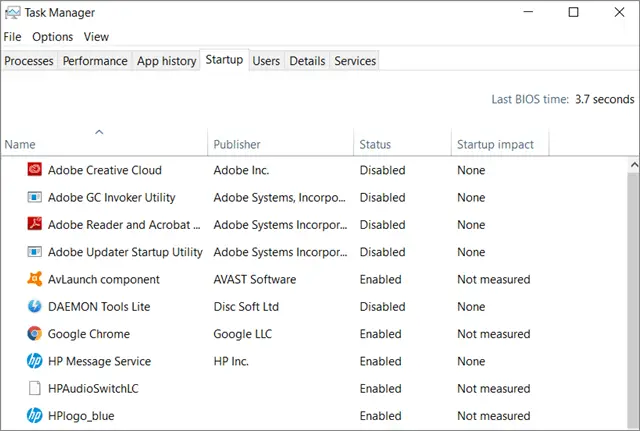
Now, open the Startup tab and choose Open Task Manager.
Now, right-click on all the tasks that have a high impact and disable them.
Then, click on Ok to close the System Configuration window and reboot your computer. Once the high-impact tasks are taken care of, you can check if the right-click function works properly.
26. Perform System Restore
The system restore process enables users to retreat to a previous point with original settings. If you have made any changes to your system and then the right-click function starts malfunctioning, you can restore your PC to the previous state using this method. The system restore process will also help you gauge if any newly installed program or software has caused the problem. Check the detailed know-how on performing the system restore process successfully.
Conclusion
Not having the right-click function working properly can turn out to be a headache for users. Imagine not being able to create a new folder or refresh the PC the usual way. Hence, we need to know the right things to do when the Windows 10 right click is not working.
These solutions will help you fix the right-click context menu. No single solution will work for every user, given that the reason for the issues is different for all users. Hence, you need to execute these solutions on a trial-and-error basis, ideally following the order of the solutions mentioned above. Doing so will ensure you don’t directly carry out complex methods.


