Long-term projects can be antagonizing if you have to keep multiple events, dates, and milestones in mind. Unless you properly organize these events, it might be difficult for you and your team to be on the same page and work seamlessly. Hence, you need to have a timeline template in Google Docs to ensure a smooth workflow.
A creative timeline template in Docs or MS Word allows you to have a clear visualization of the tasks you are working on in a particular project. Timelines are very important for project managers because they give a clear idea of various aspects like the amount of time required to complete a certain task, the person responsible for this task, and much more.
Timeline Template In Google Docs: How To Create Them For Different Projects
Creating a timeline in Google Docs, Sheets, or Google Slide can be done via add-ons in simple steps. You can use various ready-made templates that fit the bill of your requirements. Let’s take a look at how to create a timeline in documents.
How To Create Google Docs Timeline Template in 3 Steps
1. Open the Google Docs Drawing tool.
2. Create a template using shapes and lines.
3. View the template in the Google Doc.
How To Create A Timeline Template In Google Docs Using the Drawing Tool
If you do not wish to install an add-on for the purpose of creating a timeline template in Google Docs, the Drawing tool can come to your aid in this case.
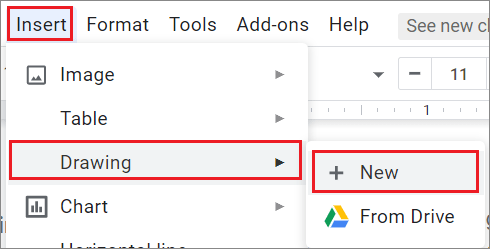
1. Open The Drawing Tool
To open the Google Drawing tool, click on the Insert tab, select Drawing from the drop-down menu, and choose New.
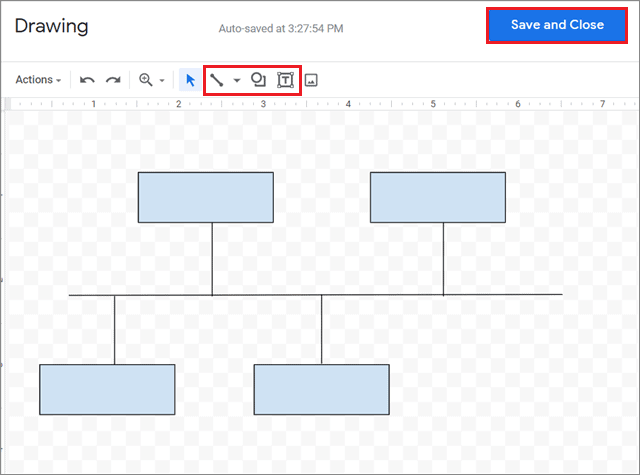
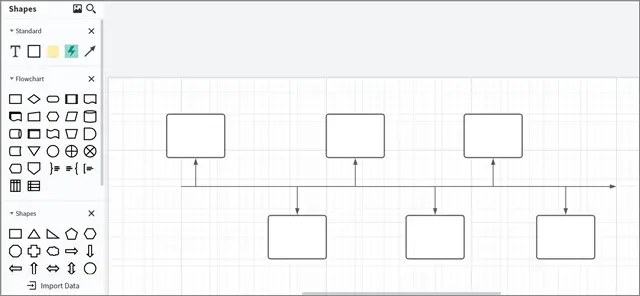
2. Add The Shapes And Lines To Create The Template
Now, add the shapes and the lines to make a timeline graphic on the canvas. You can add the shapes and lines to create the template. Use the Text icon with the ‘T’ to create text in the shapes.
After creating the template, make sure you click on Save and Close to insert the timeline in the document.
3. View The Template In The Document
This is how the timeline will look like in the Google Doc.
How To Make A Timeline In Google Docs Using Lucidchart
You need to install the Lucidchart add-on for creating a linear timeline template in Google Docs. This tool can also be used for creating mindmaps.
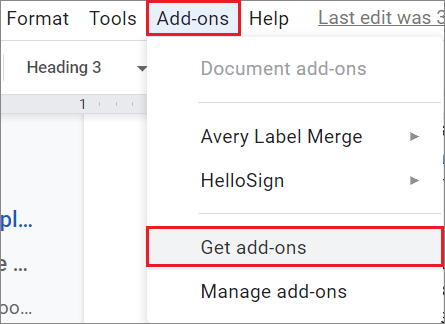
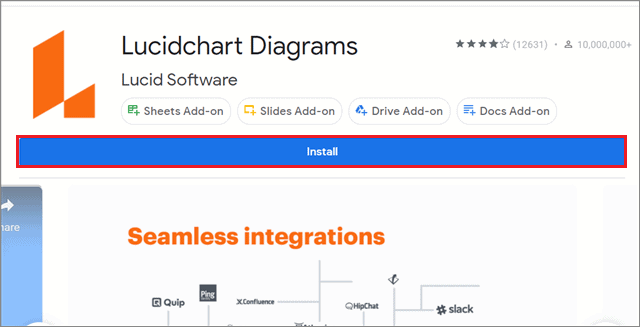
1. Install Lucidchart Add-On
Once you open a new Google Doc, select the Add-ons tab and click on Get add-ons.
Search Lucidchart Diagrams in the Google Docs tool.
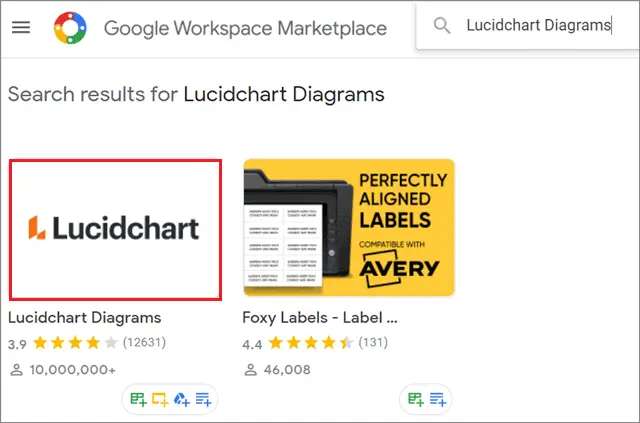
Click on the Install option to install Lucidchart Diagrams and create a timeline template in Google Docs.
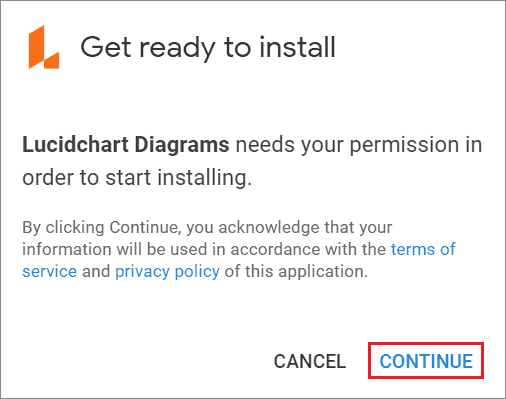
Give Lucidchart the required permission to access Google Docs.
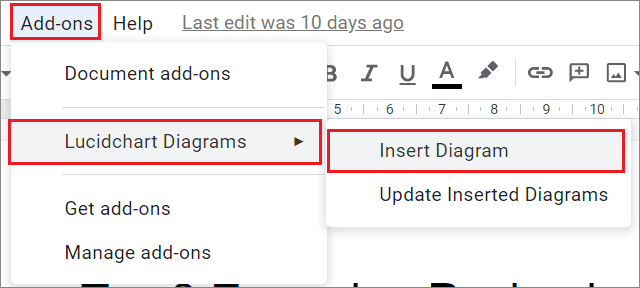
Now, click on Add-ons, select Lucidchart Diagrams, and click on Insert Diagram.
2. Create The Template
You will see that a sidebar appears on the right side. Select your preferred free template from the template gallery and click on the ‘+’ sign.
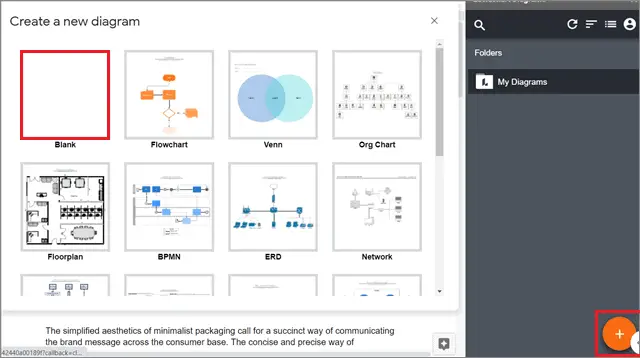
Since we have to create a project timeline template in Google Docs, you need to open a blank document in the Lucidchart tool and create the timeline templates manually using lines and shapes.
You can use the text box tool to insert the text box in the shapes.
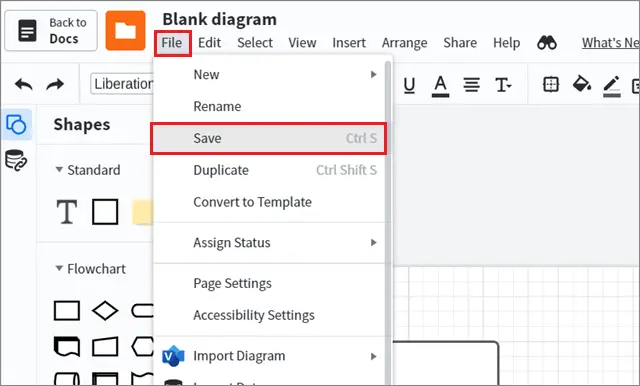
Once you have created the timeline templates in a Google Doc, click on File and Save option on the toolbar to save and close the template.
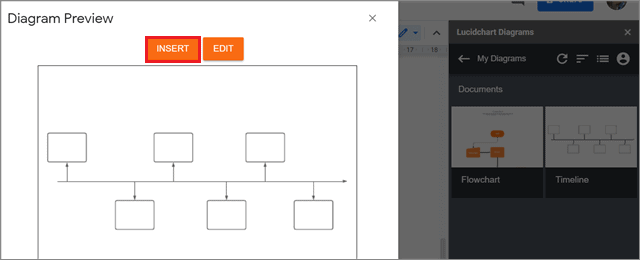
Once you have clicked the ‘+’ button and chosen your timeline, click on Insert.
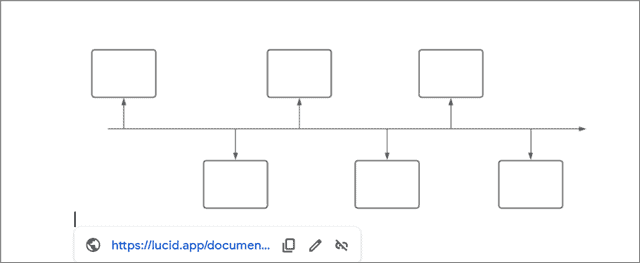
3. Check the timeline
Now, it’s time to view the timeline template in Google Docs.
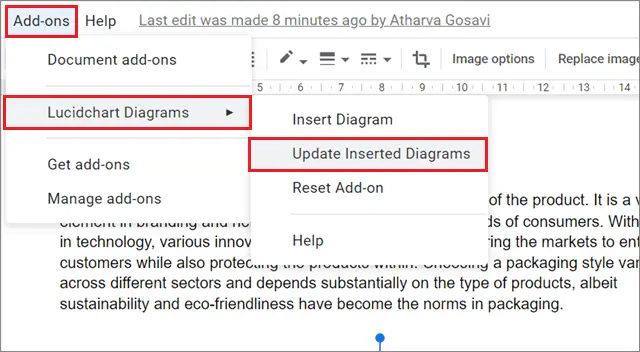
If you wish to make any changes in the timeline, go to Add-ons > Lucidchart Diagrams > Update Inserted Diagrams.
If you create a timeline and feel like reverting to a previous setting, you can track the changes in Google Docs at any moment in time.
How To Make A Timeline In Google Sheets
If you want to create a project timeline in a Google spreadsheet, it’s easier to do so as compared to Google Docs. Here, you have a ready-made template to use which saves a lot of time in contrast to what we did previously in Docs.
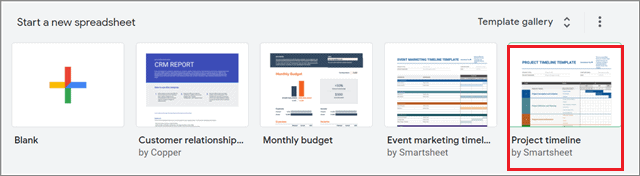
1. Open Google Sheets And Click On Project Timeline Template
To begin with, open Google Sheets and click the Project timeline template.
2. Edit The Text In Template Template
Once the template opens up, you can edit the ready made template according to your liking. You can decide the project phases, enter the task details, and assign a tentative time span for the completion of each task and phase.
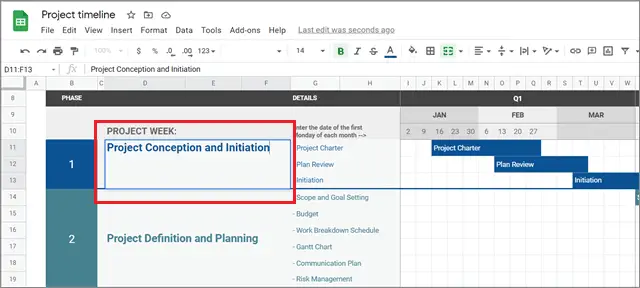
The duration bars are the specialty of this timeline template, which also make it a Gantt chart that is easier to read and comprehend. You can create a duration bar by merging the cells between start date and the end date.
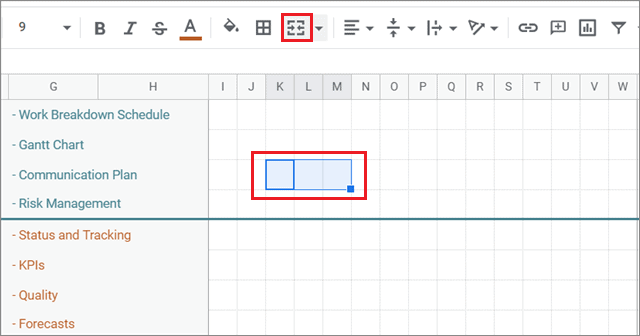
Select the number of cells to merge and click on the Merge button in the Google Sheet toolbar.
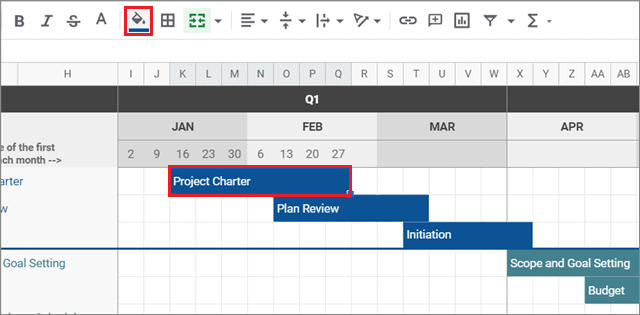
3. Edit The Color Of The Duration Bar
After creating a duration bar, you can change its color as per your requirement using the built-in color palette.
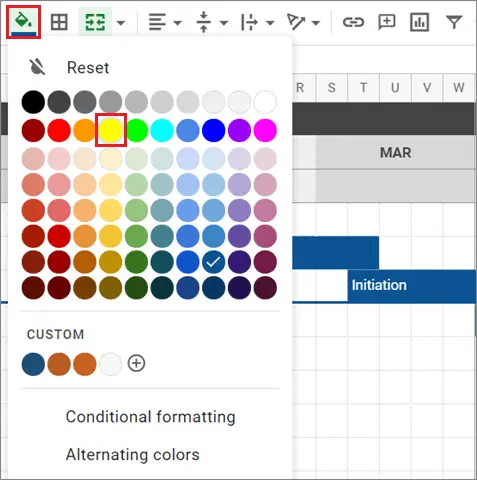
First, select a bar and click on the Fill color in the toolbar at the top.
Now, select the color from the palette.
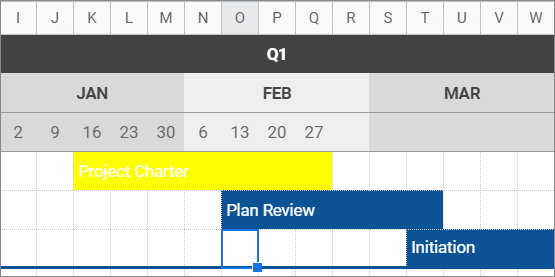
This is how the duration bar will look once you tweak the color settings.
That’s pretty much everything about creating a timeline chart in Google Docs and Sheets. You can also use ready-made budget templates to cover the financial planning of your projects if you are using Microsoft Excel.
Conclusion
As they say, failing to plan is planning to fail. If you are a project manager, you need to plan every aspect of your project meticulously and with precision. Having a project plan template that takes care of every aspect of a project schedule will help you complete each task successfully and accurately. Hence, you need to understand the process of making a timeline template in Google Docs.
Users can choose any Google Docs template as per their requirements and get started with planning all the facets of their respective projects with ease. If you don’t prefer using Docs, you create timelines using Google Slides, or a free Microsoft Powerpoint template. Google Slides also facilitates the creation of stunning timeline slides and timeline infographics for this purpose.


